Amon Millner
|
|
|||
| Weekly Assignments | |||
| 3D scanning | |||
| Inspiration |
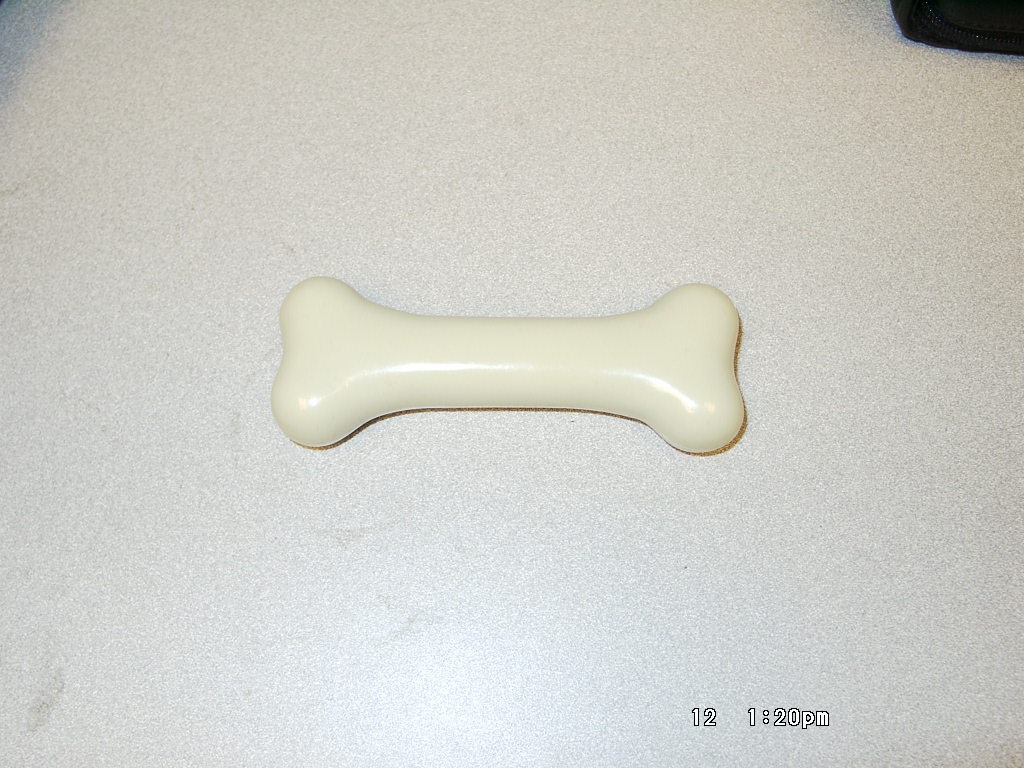
I heard an inspiring talk about how 3D scanning tools are
changing the way archeologists work. I decided to preserve this toy
bone that a prehistoric stuffed dog buried in our lab ages ago
|
||
| Project files | file dump | ||
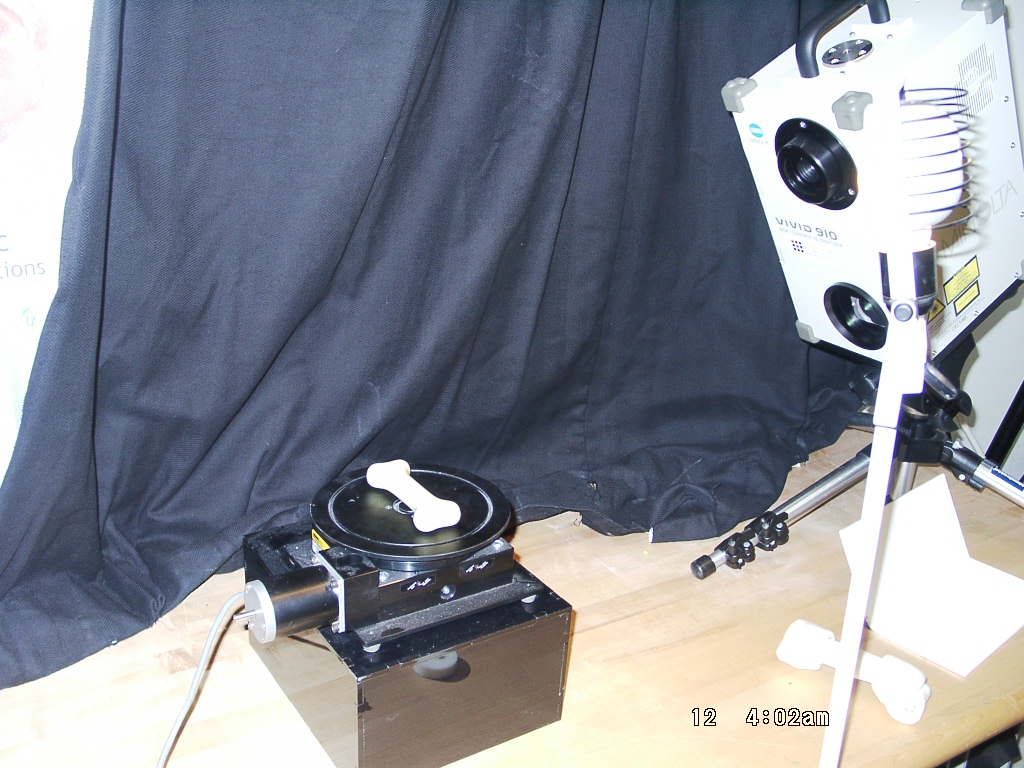
Who says computers are bad DJs? The GeoMagic software controlled this turntable to scan different sides of the bone |
|||
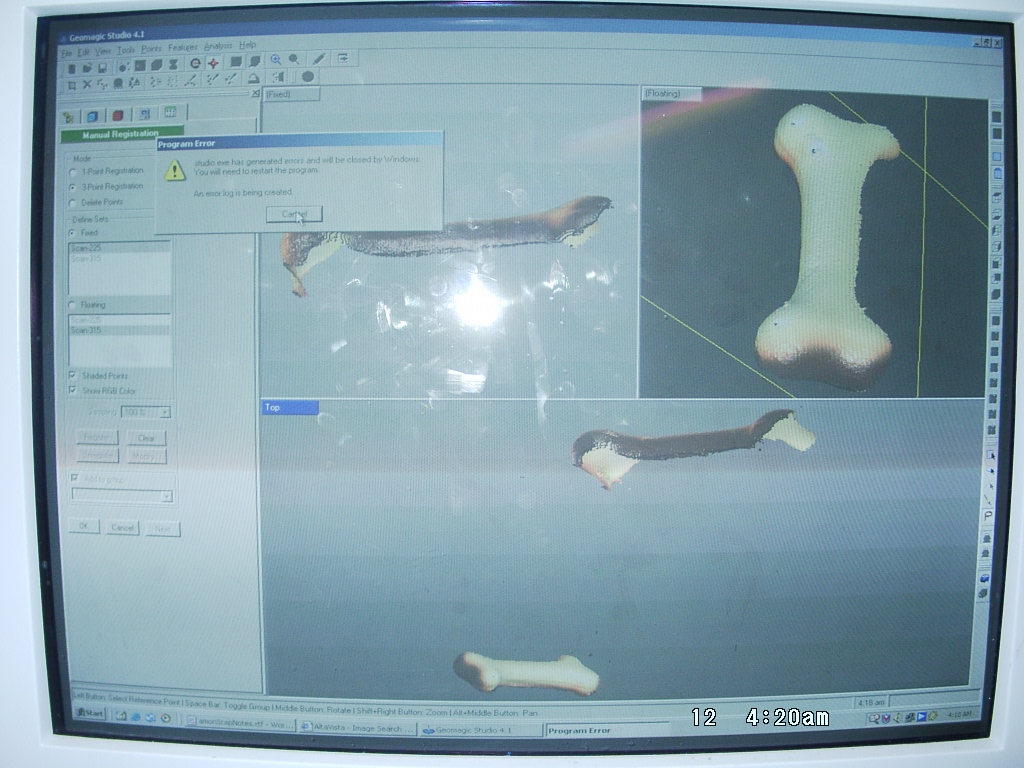
This ERROR screen caused me to lose my work and start over again. If you look at the screen, you can see inside of a partially closed bone. Using a process called "manual registration," I was lining up the 8 scans I took of the bone at different orientations and combining the images to make the object look like one closed bone. Once the scans were oriented in the right direction, I created a "shell" around them to give the image of a bone shown in other screen shots. |
|||
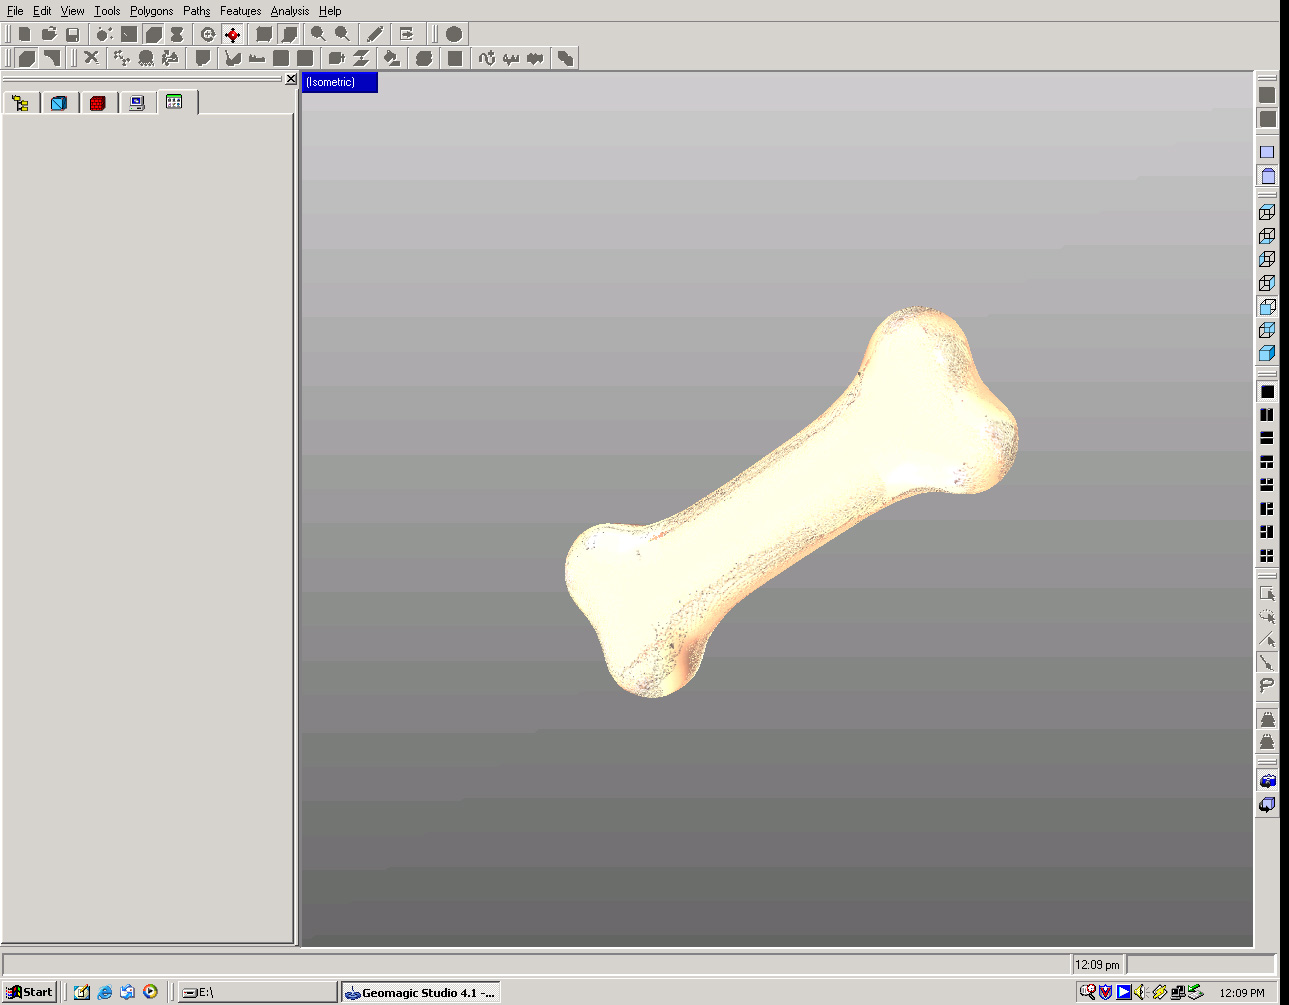
In an ideal world, the bone would be a light tan color all around it, however, here you can still see some of the dark pixels I had to remove (that were remnants of the parts of the turntable that were scanned with each bone scan) |
|||
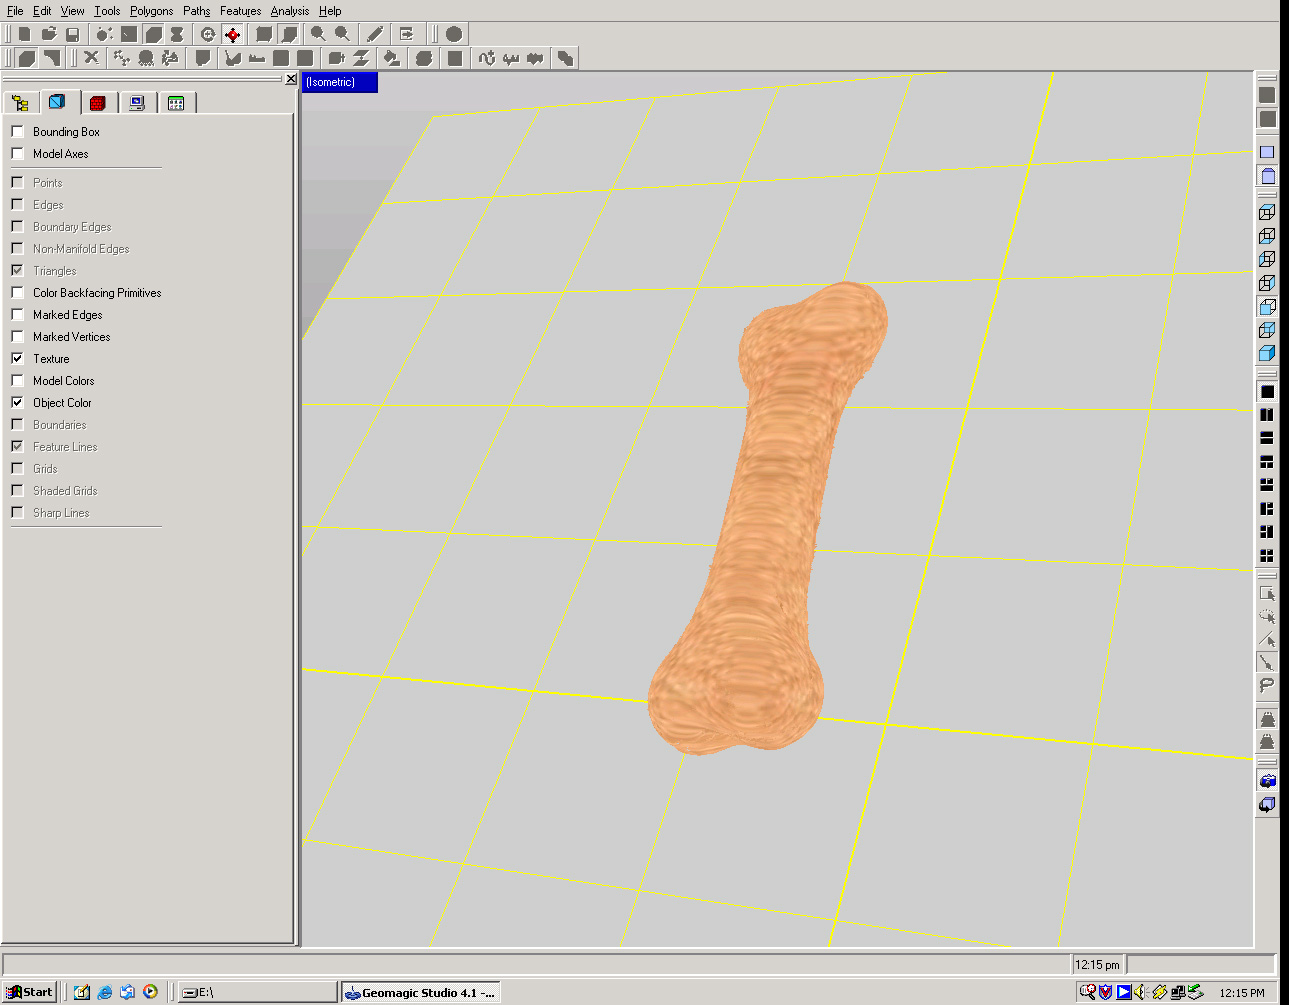
Once you have a 3D model of your object, you can tweak it in many different ways. I played with the bone's length, width, and color. This image shows how I gave the virtual bone the texture of a milkbone doggie snack. I chose not to print this version to decrease the chances that a Media Lab dog would attempt to swallow my project. "Neil - where's your project Amon?? Me - a dog ate it!" *no animals were harmed while making this project (unless you count graduate students) |
|||
| Process notes/tips |
-I recommend starting with a very symmetrical object (that's not full
of holes or fur)
-8 scans (4 of the top, 4 of the bottom) of an object is more than enough to piece together a 3D image (in my opinion) |
||
|
|
|||