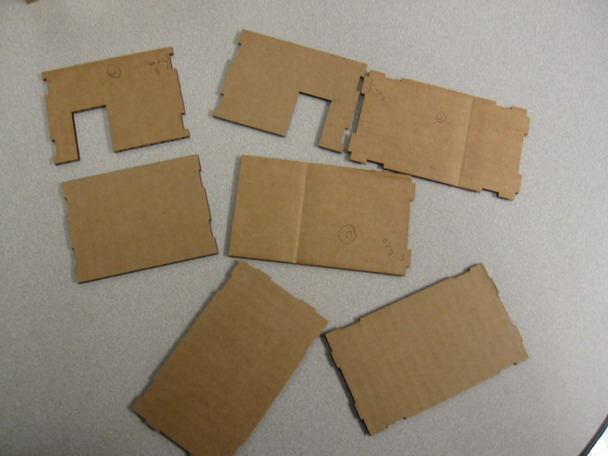
figure 1. house building. first (unsuccessful) use of the laser cutter.
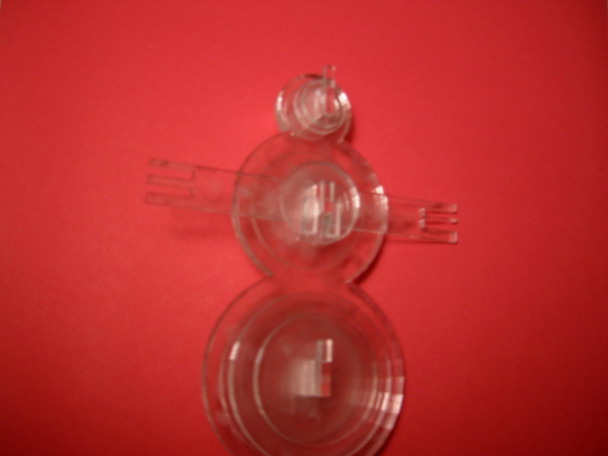
figure 2. front view of snowman kit.
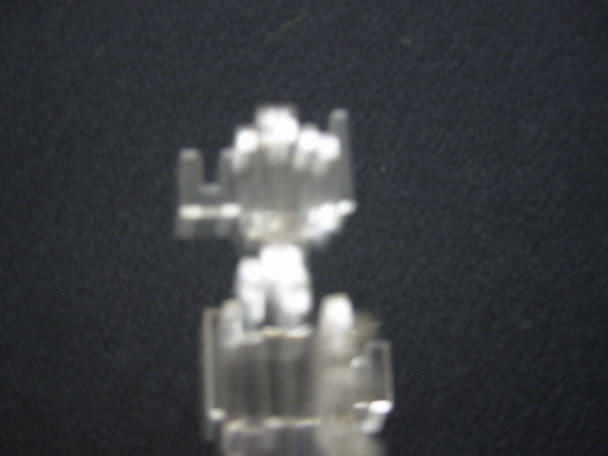
figure 3. side view of snowman kit
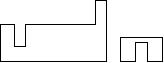
figure 4. locking mechanism for snowman kit
WEEK 2
This week, we were charged with creating a cardboard construction kit. I decided that it would be really fun to try and build a doll house... I was wrong :). Actually it was a lot of fun considering my geometry teacher told me that was why geometry was important. My first difficulty was getting the tabs to work so that the house could be press fit. I tried about three times before I finally got something that would work. I finally made the female part .5" and the male part .522". This was enough to make things stick well with the cardboard.
The next small challenge I had was the roof. My first plan left gaps, which probably isn't the best thing to have in a roof top. Dealing with the the angles proved challenging in Open Office since there's no great way to rotate rectangles without warping them too much. The solution for that was to create rectangles as lines (width 0.01) and then manipulate them as a line before I used them. Once I figured all of this out, all of the cardboard ran out. This meant reconfiguring all the tabs-- again. So here's what should have been the finished product (figure 1.) if I would have stayed with the house.
My next venture was a different sort of press fit objects. For this, 2D objects are stacked into 3D and then be joined by a press fit joint. Since I'm not much of an artist (and since it's freezing in the lab), I went with a snowman, which proved wise. The "snowman kit" comes with different sized circles and a base so it can be assembled in different ways. It also has different appendages that can be interchanged.
I first tried to do this project in cardboard. The problem I came across was that the cardboard joint that I tried to use at first would usually give when the objects were being placed on it and no longer be press fit . To solve this, I switched to acrylic which was stronger.
Once I switched to acrylic, another problem encountered with the snowman kit is that my original joint that connected all the objects would not always keep the objects together. I think this is, in part, because the holes on the circles got wider as I pressed the joint through. To fix this, I made a mechanism to lock everything into place. It's shown in figure 4. Basically, the pieces (circles and appendages) are slid onto the mechanism on the left. Then the mechanism on the right fits in the notch to make them tight.
Many hours later, this is my first experience with a laser cutter. If you use your imagination, there could be much more elaborate structures (animals, cars, etc.) that could be built wiht lots of interchangeable parts using the technique. If you are interested, here is the .svg file I used to generate the parts.