10/20: 3d scanning and printing:
scan, modify, and print an object
PROJECT 0
I had never heard of 3D scanning, and was really impressed by its capabilities. I searched for an object with interesting shapes and textures to scan...


...I quickly learned that this was not a good first project.
PROJECT 1
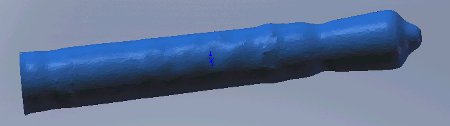
I chose an object with fewer geometric complexities for my first project: the white board marker.

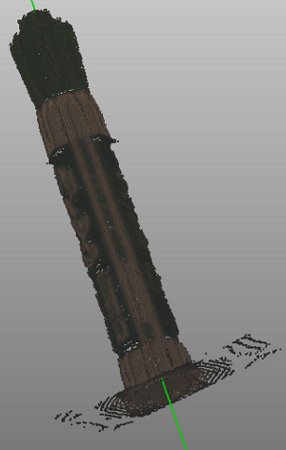
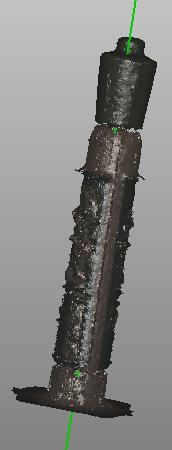
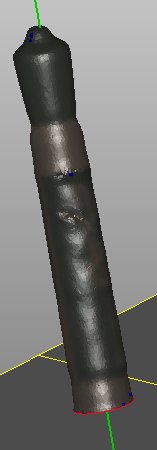
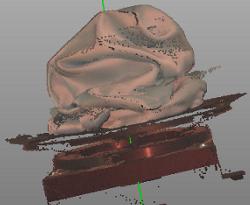
The three figures below provide a snap shot of my work process.
The image on the left shows the collection of data points obtained by the scanner. Although I anticipated the scanner to have no problem with such a symmetrical object, the reflective nature of the marker's materials proved to be a problem. The figure shows that the scanner had a difficult time capturing the color transitions on the reflective surface, so that the white letters appear sunken in against the green background. Rescanning the marker did not remedy the problem. It's possible that playing with the lighting would reduce this artifact, but I was unable to tackle this issue.
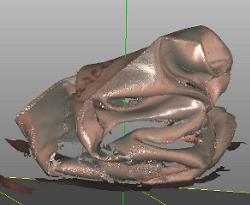
The middle figure shows the points of the leftmost image merged. There image has many spikes due to the sunken white letters. Holes between the cap and body and between the "green" body and while lower band are pronounced. However, the cap itself is rendered beautifully.
The last figure shows the marker after I filled the holes, removed spikes, and flattened the bottom. Unfortunately, the smoothing removed the word details. I experimented with different ways to smooth the figure, but was unable to retain legible writing. In the future, I would determine whether Geomagic would let me build a cylinder around the object body to manually remove the spikes.I suspect that removing the spikes and doing a linear hole filling procedure may allow me to keep such detail.
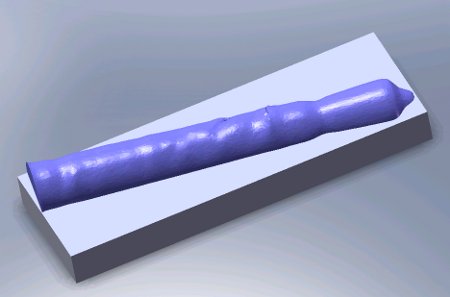
To modify my scan, I saved it as an stl file and imported into Solidworks. It looked like my student version of Solidworks did not recognize the imported stl as a mutable object - the most I was able to convince it to do was to allow me to select a different color for the object and intersect the object with geometric shapes. As such, I colored the marker blue and intersected it with a rectangle. It represents how I am feeling - having ideas but being trapped by inexperience to bring them to fruition.
What I thought was an stl file turnout out to be too small to be a full stl file. It turns out that Solidworks treated the marker and the extruded rectangle differently. In order to turn the marker into a Solidworks part, I followed Courtney's instructions:
1. Use an add-in called ScanTo3d that lets you convert a mesh file (STL or WRL) to a part. To use it, enable the feature in Tools -> Add-Ins. This adds two new file types in the Open File dialog.
2. Open your file and select the file type for mesh files.
3. If your mesh imports with errors, right click it and run the Mesh Prep Wizard. After that, run the Surface Wizard, which should turn your mesh into a Solidworks part.
Following this procedure helped to clean up many of the bumps in my figure. However, Solidworks was still unable to turn my mesh into a solidworks part. My last iteration of this file is displayed below:
PROJECT 2
After completing the marker scans, I tackled something more challenging. I was inspired to mix textures, and wanted to scan something very soft and fluid and subsequently print it into a rigid object. I went back to the shoe idea, but rather than scanning the shoes, decided to use the shoe bag which exhibited their criteria.
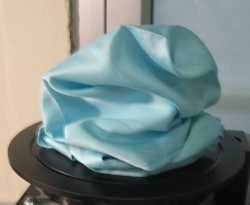
The left most scan shows is the collection of data points and looks quite good for such a complicated structure.
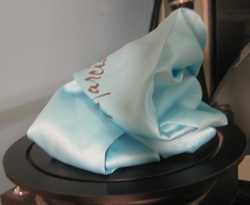
Unfortunately, the merged points (middle figure) had on the order of 160 gaping holes. I started to patch the holes individually. The program patched the small holes with no problem, but could do only flat surfaces on the large holes. Filling large holes with flat planes did not impact the overall aesthetic of the flowy material. The program crashed on me several times while I was filling holes which forced me to start over (see tips about saving below). Finally, I chose the "fill all holes" option. Despite the multiple warnings against filling all holes at once, most of my holes were filled via this procedure.
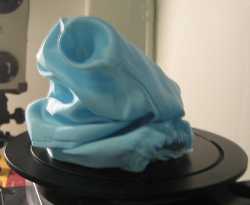
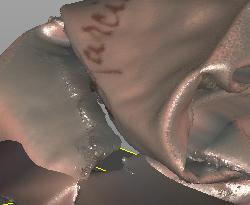
The pre-final figure I achieved is depicted in the right image. This image is pre-final because I could not close the bottom.

Upon more careful inspection, I found that the object had hole in the side. I spent many unsuccessful hours trying to figure out how to close the hole. At this time the hole remains open, and I am unable to print this file :(
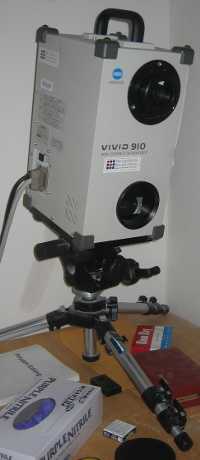
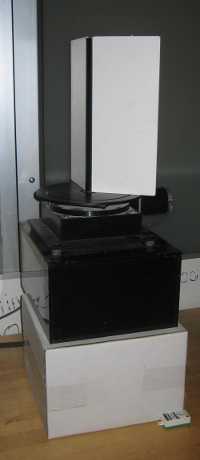
EQUIPMENT: MINOLTA SCANNER AND TURNTABLE
This is the Minolta scanner with its accompanying turntable. The turntable is pictured with the calibration tool.
USING GEOMAGIC WITH THE MINOLTA SCANNER
Open Geomagic. Open the Minolta application (Click on the Minota icon).
Tools --> Options --> Minolta Scanner
If required, choose the following settings:
turntable model: ZETA6104 (high)
Vivid Model; 900; COM1
When prompted, accept calibrating the turntable
place the calibrating tool on the turntable
take the tool off when finished calibrating
OTHER TIPS
For the most part, I found that we were told or could easily figure out much of what we need to know for this assignment. However, the note below proved to be useful:
- If you are working with a large file, it is especially inconvenient to to keep all of the scanned points and merged views in the file. Right click on the "merged" item and save just the merged item in a separate file. This makes the computer much faster.
- The Geomagic will not allow you so save your file while the hole patching dialog is open. Close this dialog in the middle of patching holes to save your file. It could save you lots of time down the road.
- Nadav (Fall 2006 class) posted great advice regarding scanning and cleaning up the scan here (unfortunately, I was finished with the assignment before I found it).