10/27: inpute devices:
measure and display something
I made two sensors this week: capacitative touch sensor using the step response PCB board and a ligth sensor using the light PCB board.
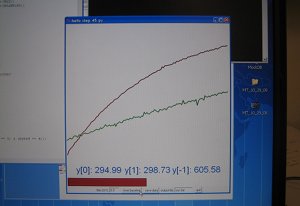
Here is the step response PCB board and the python output:
Some ideas I would like to implement with capacitative sensors in the future:
- multitouch screen/ surface
- exam stress sensor (something you place under paper, detect force of pen on paper and correlates to stress level/ subject performance
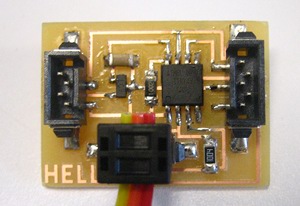
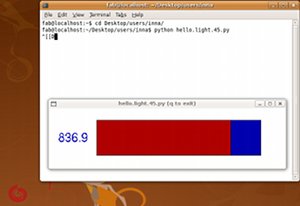
Here is the light PCB board and the python output:
For the display portion of the assignment, I decided to play with the light sensor. I considered many ways in which I could use the light sensor. Here are several examples:
- measure light
- tilt sensor (see a proof of concept movie here)
- proximity sensor (very short range)
- slider
- button press
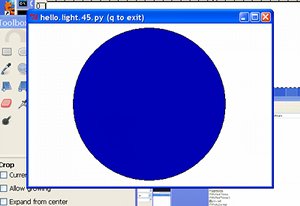
My goal was to use the light sensor to zoom into photos with TKinter. Little light should result in a large photo while a lot of light should result in a small photo. I began by displaying a circle which is small when there is a lot of light and becomes large when there is little light. A short video of the movie is here and the commented code is here (you will need to give it a python extension to use it). One screenshot of the circle is here:
Note about running these python scripts - when using IDLE, I had to remove and reinsert the usb into my computer each time I tested my code until I discovered it is better simply to click on the file as if opening an application. Maybe this will save someone some time...
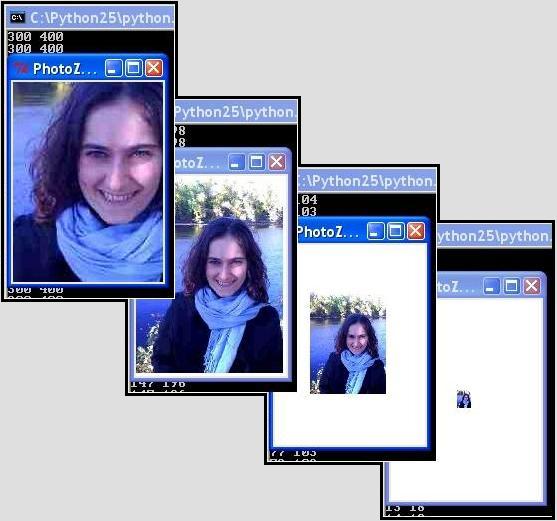
With this complete, I turned my attention to displaying a photo on the canvas and zooming the photo by reducing light on the sensor. I downloaded Python's Imaging Library (PIL) which allows you to use photos with TKinter. The code is here (you will need to give it a python extension and input your own photo directors/photo to use it). A short movie demonstrating my working prototype is here.
I thought this would be an easy modification, but ImageTk and canvas.create_image are very different from the other canvas items - I had to run the canvas.create_image in the idle loop to get it to work. Additionally, the program cannot update large photos quickly, and there is a large delay because python updates much slower than the photo sensor information coming from the serial connection. Therefore, I modified the photo image so that it was 8.95 KB, 300 x 400 px (originally, 177 KB, 600 x 800 px).
This is the modified photo I used in the python code:
Here are some of the screenshots of my working program: