How to make (Almost) Anything

Week 9: Output Devices
Monday, November 16, 2009
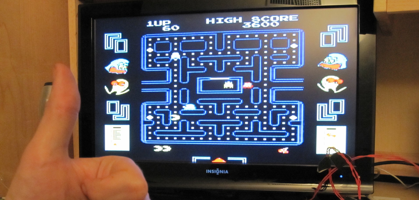
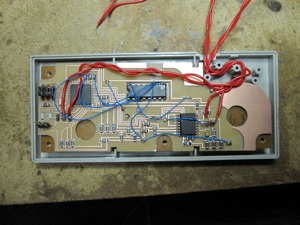
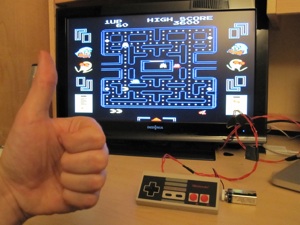
This week, I built a variation of the Uzebox open-source game console inside of a classic NES controller.
From the Uzebox website:
“The Uzebox is a retro-minimalist homebrew game console. It is based on an AVR 8-bit general purpose microcontroller made by Atmel. The particularity of the system is that it's based on an interrupt driven kernel and has no frame buffer. Functions such as video sync generation, tile rendering and music mixing is done realtime by a background task so games can easily be developed in C.”
There are several implementations of the Uzebox hardware floating around the web, and I researched these thoroughly so that I could pick and choose design features that I liked into my own version. Yay for open source hardware, and big ups to Uze, Clay Cowgill, ladyada, and Steve Chamberlin!
Never having done anything with digital-to-analog converter, I first built a minimal version of the hardware that would allow me to understand the basics of DAC design as well as displaying greyscale video to a screen. This design consisted solely of the ATmega644 as well as a resistor ladder which mixes the 8 color channels with the horizontal sync signal. Once I got this working, I moved onto the color version. But first.....
****NOTES ON DAC DESIGN****
I had somewhat of a hard time finding a brass tacks summary of how to design an appropriate DAC for the Uzebox. Here’s a summary of what to do in order to design a simple resistor ladder DAC.
A (“binary weighted”) DAC can be implemented using a resistor ladder whose output overall output voltage is controlled by which resistors have current flowing through them. These resistors are chosen such that each is twice the value of the previous one, giving a summed output voltage that is proportional to the binary value of the inputs.
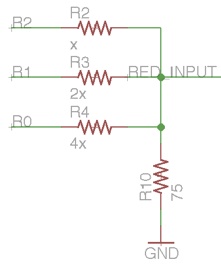
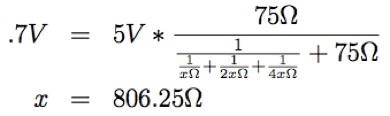
So, the optimal resistor values are about 806, 1.6k, and 3.2k.
Unfortunately, since these exact values were not available, I chose the closest available values from the Digi-Key catalog.
Next, I laser cut a hole in the back of the controller to allow access to the power and programming pins.
In the next version, I’d like to do a dual-layer board to save routing space so that there would be enough room to keep the batteries inside of the controller. Also, since the SNES controller is the “official” one used by the Uzebox, version 2 will live inside of an SNES controller.
Resources:
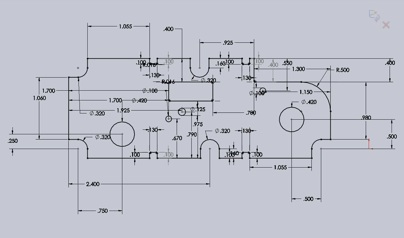
My schematic and board layout.
A great forum thread discussing DAC design.
A free utility for converting DXF files to Eagle scripts.
Finally! A project finished and working on time!

