Do Not Duplicate
26 Oct, 2009
Project 6: 3D Scanning & Printing
Replicating a Primus:
Not too long ago I read about a German lock-pick who managed to get a photo of the Dutch hand-cuff key. He then managed to 3-D print a copy of the key. Upon getting himself successfully handcuffed by the Dutch police, he successfully tested his key. I remembered this story while trying to think up something that wasn't just “stuff”. Why not duplicate a key? And not just any key, a Media Lab key. The Lab no longer hands out building keys to students. The keys are Primus keys which are known for their difficulty picking and are not duplicatable. No legal locksmith in the area will copy them. The key says, “Do not Duplicate.” I happen to have one from when they did hand them out but I am not a locksmith. If I can succeed in scanning and printing a working Media Lab key, I can make plenty of them and barter with other students. It will bring me instant popularity!
SCANNING:
I scanned the key using the Minolta Vivid 910 3D scanner. I started out using the regular lens following the basic setup, calibrating and then turning 45 degrees each shot with manual control. I mounted the key upright using playdoh to anchor it and carefully centered the key. The immediate issue was that the scanner focused on the background. I had to perform manual focus through the color and range function. I generally targeted to have key show up yellow to green. The automatic settings had also put the power setting very low so I had to increase this to get images. I generally went with a power setting in the range of 10-20.
The results of this initial scan were less than stellar. This image is largely unmodified. I did a bit of noise clean-up and merged it, but it is otherwise it is as scanned. You can recognize the key but it will hardly work. At which point I learned about the macro lens.
I started again with the Macro lens. Swapping the lens in the camera is fairly simple.
Rotate out the cover plate.
Unscrew the present lens
Insert the replacement lens and take off any lens caps. There are two pins should line up so that the lens locks in before you screw it back in.
Hit a key on the back of the camera and it is ready.
An optional step is to navigate through the camera settings in order to verify that it has detected the right lens.
Place Geomagic on video-streaming while manually adjusting the camera viewing target, re-calibrate the Z-axis and go.
Using the Macro lens was much more successful. This time using auto focus and auto-power worked great. For one shot. For whatever reason, as soon as I rotated the key, it lost target focus. For the rest of the shots I again manually adjusted both focus and power.
This worked out much better. The notches in the key were clearly visible.
CLEANING USING GEOMAGIC:
Some programs are intuitive. Geomagic is not. Or not to me. I spent quite some time trying to figure out how to do much of anything. I did look at the tutorial manual that is supplied with the computer however it appears to be from an older version. However, it provided insight into the present program. For me, I found that most of the smoothing tools were a little too heavy handed and that to really clear the noise, also cleared my details. This led me to a lot of manual editing. The following is what I found useful and not so useful in Geomagic.
Geomagic operation mode starts out in Point mode. There aren't too many helpful tools here. When you merge the scans and register them to move to Polygon mode, registration will align your scans. I did not realize this and was trying to align my scans before registration to no avail. In my case, it turned out that the scans were aligned well enough that the auto registration did the trick. But try merging first to see if auto works, and then switch to manual registration if it doesn't.
The one thing I found useful in Point mode was deleting points. Geomagic lists all the different scans. If you find that the automatic noise cleaning, spike removal, and other smoothing tools are too harsh, or a scan has noise that is confusing the program confusing, you can delete the offending points in advance. A good method I found for initial clean-up was to hide all the other scans by right clicking and selecting hide. I'd then view each scan on its own and could see where noise or distortions had entered in. Using the selection tools, I would select clearly wrong data points and delete them. I found this method of clean-up much better than trying to figure out what was noise after a merge.
I then did merge with auto-registration to get the solid polygon model. In this mode I ran some basic noise reduction. Other options were spike removal, and sandpaper. Sandpaper was interesting as it smoothed things out as if you the cursor was a large block. It was confusing though because sometimes it took out things I would have thought interior and it failed to always remove spikes. I particularly found that the more you used it the less effective it became. In the end, it was nice for spot smoothing but I didn't find it that useful.
I generally found that the automatic tools smoothed things too much. My first run getting rid of noise was very effective except that I ended up with a smooth key with little to no teeth. I wanted to keep my angles. So I did a lot with manual deletion, selecting blocks that looked out of place and inconsistent with the surface and deleting them. This created a lot of holes though and led me to my favorite Geomagic tool, Fill Holes (Polygon Menu).
Fill Holes had a number of settings. I had trouble using all but the first one. But that was really all I needed. Just click on a hole and it is gone! Sometimes it will ask if you want curved or flat surface, select accordingly. It is that simple. And it highlights the holes so they are easy to find. The open bottom of my model even identified as a fillable hole and was easily patched for a solid surface.
A tool I thought would be useful I didn't understand was the boundary tool. It wouldn't let me pick interesting points.
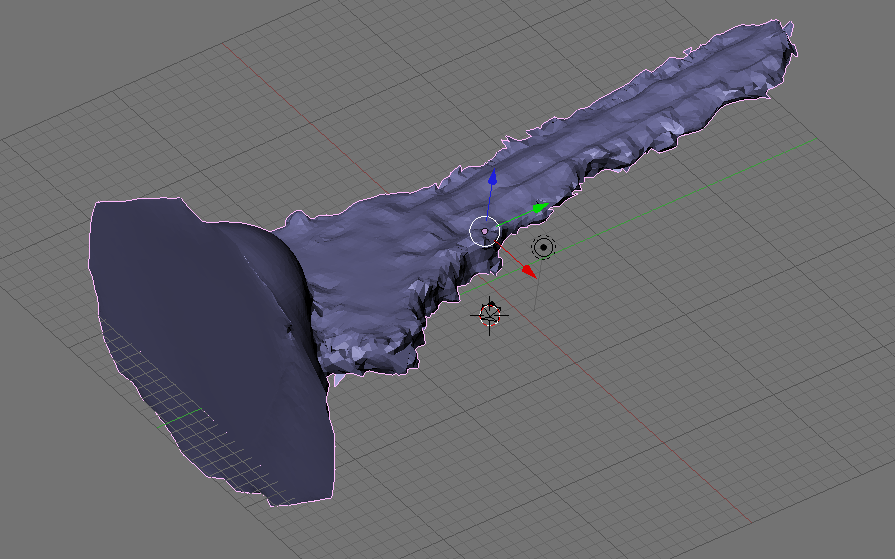
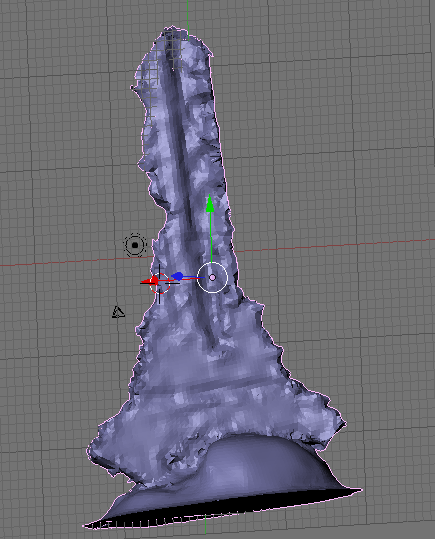
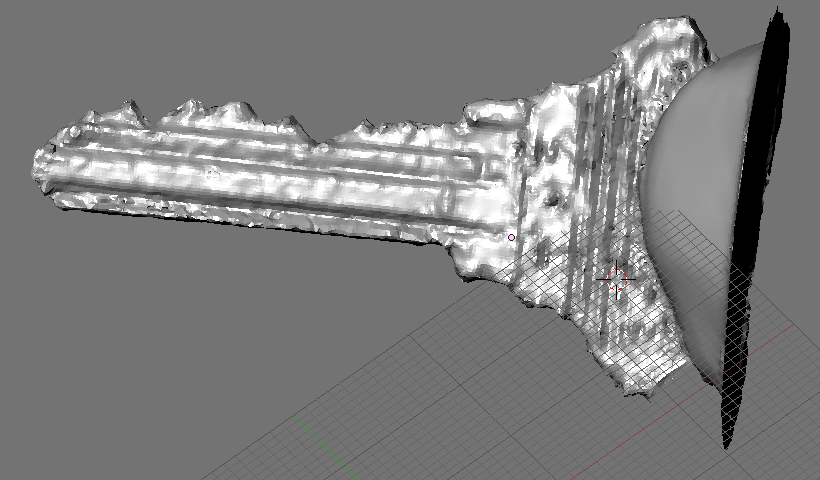
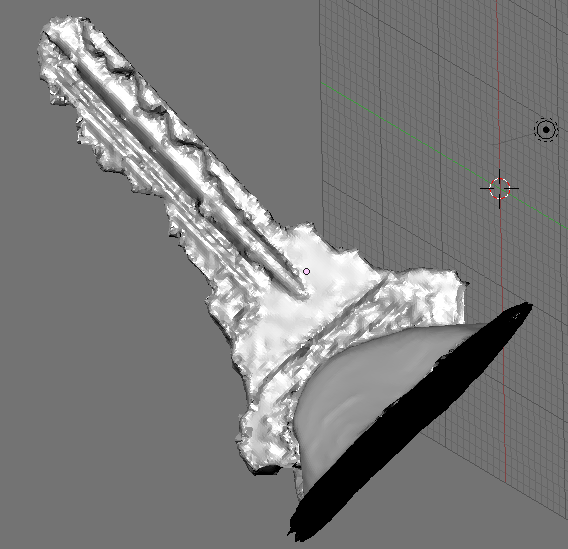
I still found Geomagic a little clumsy and more importantly difficult to visually interpret. I switched to doing a lot of my editing in Blender. Visually it was easier plus the point manipulation was much improved. I used vrml1 to go between the two. Stl didn't seem to work and dxfs took too a long time to process on both ends. In Blender I continued to delete inconsistent verticies and was also easily able to insert new verticies fix clumsy areas particularly where I had made a number of deletions. Filling holes in Blender however is labor intensive and it can be hard to identify holes. Because of this, I returned to Geomagic for final hole filling.
EFFECTIVE SCANNING:
 Something
that became apparent to me as I cleaned up the scan is that it is
better to scan on lower powers. This may result in possible holes
but trying to clean up noise can get exceedingly messy. Overlapping
scans will probably catch holes and if they don't, fixing them is
reasonably easy. Everything I scanned was reflective and noise
inducing. The very first auto scan ran at 7 power and gave me a
great scan. In an attempt to clearly get a full image and because it
flattens the color/range spectrum, I often scanned subsequent angles
at higher power (max 16). I would have saved myself much time by not
doing this. It looked better while scanning but not in the noise
removal process.
Something
that became apparent to me as I cleaned up the scan is that it is
better to scan on lower powers. This may result in possible holes
but trying to clean up noise can get exceedingly messy. Overlapping
scans will probably catch holes and if they don't, fixing them is
reasonably easy. Everything I scanned was reflective and noise
inducing. The very first auto scan ran at 7 power and gave me a
great scan. In an attempt to clearly get a full image and because it
flattens the color/range spectrum, I often scanned subsequent angles
at higher power (max 16). I would have saved myself much time by not
doing this. It looked better while scanning but not in the noise
removal process.
OTHER SCANS:
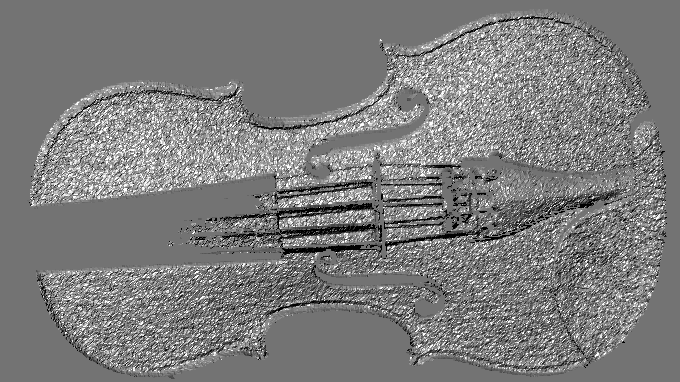
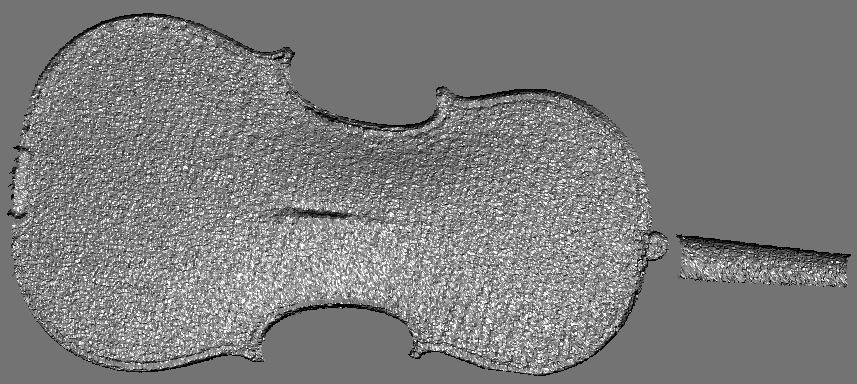
I also tried out the Wide Angle lens to get a scan of my violin. There was not space nor a good mount for my violin so I just got a front and a back view of it. In this case, the regular lens didn't fit much of the instrument so I switched to wide. The varnish on the violin is also glossy so that the angle of the image had to be chosen to avoid this being problematic in the scan.
THE MICROSCRIBE:
I gave the Mircroscribe a whirl, in part because I was frustrated with Geomagic and dubious I'd get a decent result. If Geomagic was frustratingly unintuitive, the Microscribe made me laugh. Boris and I were trying to figure it out and it was this odd combination of wonderfully simple, completely confusing, and mildy physically awkward. It took us a bit to properly set our axis. Once that was done, we tried to see how we could model things. Not so well. We doodled with a couple objects. The detail was nowhere near what I needed to print my key. We tried a couple other objects not really grasping how to make a good useful model of the object with the Microscribe. Here is my hand. I taped my hand to the desk so I wouldn't inadvertently pick it up to pick my nose or something and I used my other hand to outline the hand and then added the outline of the top of my hand. Here are the results. I couldn't figure out how I would actually convert this into anything remotely useful. Too much learning curve. I went back to the Minolta.
3D PRINTING:
 Printing
largely consisted of sending Tom an STL file and asking him to print
it. Yet I still managed to mess this up. Always check that your
export exported correctly. I forgot this at first. While working on
cleaning up the key, I designed a mallet to go with the glass gong
from an earlier project. I was having trouble subtracting in Blender
so opted to print the whole mallet. Except that I just exported the
rod. Now I have a very expensive 9” acrylic rod. I also grabbed a
planetary gear card from the website:
Printing
largely consisted of sending Tom an STL file and asking him to print
it. Yet I still managed to mess this up. Always check that your
export exported correctly. I forgot this at first. While working on
cleaning up the key, I designed a mallet to go with the glass gong
from an earlier project. I was having trouble subtracting in Blender
so opted to print the whole mallet. Except that I just exported the
rod. Now I have a very expensive 9” acrylic rod. I also grabbed a
planetary gear card from the website:
http://www.thingiverse.com/thing:505
I added my name on it in Blender. Except that I forgot to check the Stl export so I just printed the card.
As of now, I haven't actually gotten anything back. So can't say much more on printing. Does the key work? Have to wait and see.