
Charred Pieces of Wood
or
Press Fit Kit using the Laser Cutter
28 Sept 2009
Project Two- Build a Press Fit Kit using the Laser Cutter
My goal was to build a press fit table from wood cut using the laser cutter. For some odd reason, some of my favorite chairs are small foldable stools (actually sold for putting plants on. But who says I can't use them as chairs?) The problem is they are very low and when I want to work on my computer sitting on these stools, I usually put it on a chair. My idea was to build a low table that would support both my laptop, and a separate audio I/O box.
However, considering the time frames involved and particularly that cutting had to be largely done by Friday, I was dubious that I'd have time to figure out the details for proper join fit, followed by the drawing, and cutting by the end of Friday. There was also the high likelyhood of getting things wrong the first build and having to fix things, so I decided to start with something less ambitious that I knew I could achieve, a press fit cardboard kit.
The Press Fit Cardboard Sheet:
I picked shapes that I figured would go together and could be used to build a variety of objects. I selected a long rectangle, a square, circle, triangle, and hexagon. After trying a test run with a gap width of .157” (including offset) I ended up using a width of .155” for the cardboard slot with a .002” XXXX on most of the slots to hold a little tighter. It made for a fairly tight fit but worked well. The only end problem is that I made the triangles too small so that you can only fit one object in a slot. Using two slots, the cardboard pieces collide.
As for other technical details, I found CorelDraw annoying to use and didn't want the pixelation that happens using cad.py. Drawings were rendered using Adobe Illustrator 3, exported as an R14 dxf file and then imported into Corel for printing. This was a smooth easy import. Corel asked me to confirm I wanted inches and there was no other scaling needed. I did include a reference box drawn around my sheet but it wasn't necessary in the end. Offsets where accounted for in my head and informed the initial sizing in Adobe. The recommended cardboard settings for the laser cutter worked splendidly.
I threw the kit on my dinning room table at home and told my housemates to build. They said it was great! Here are the results:
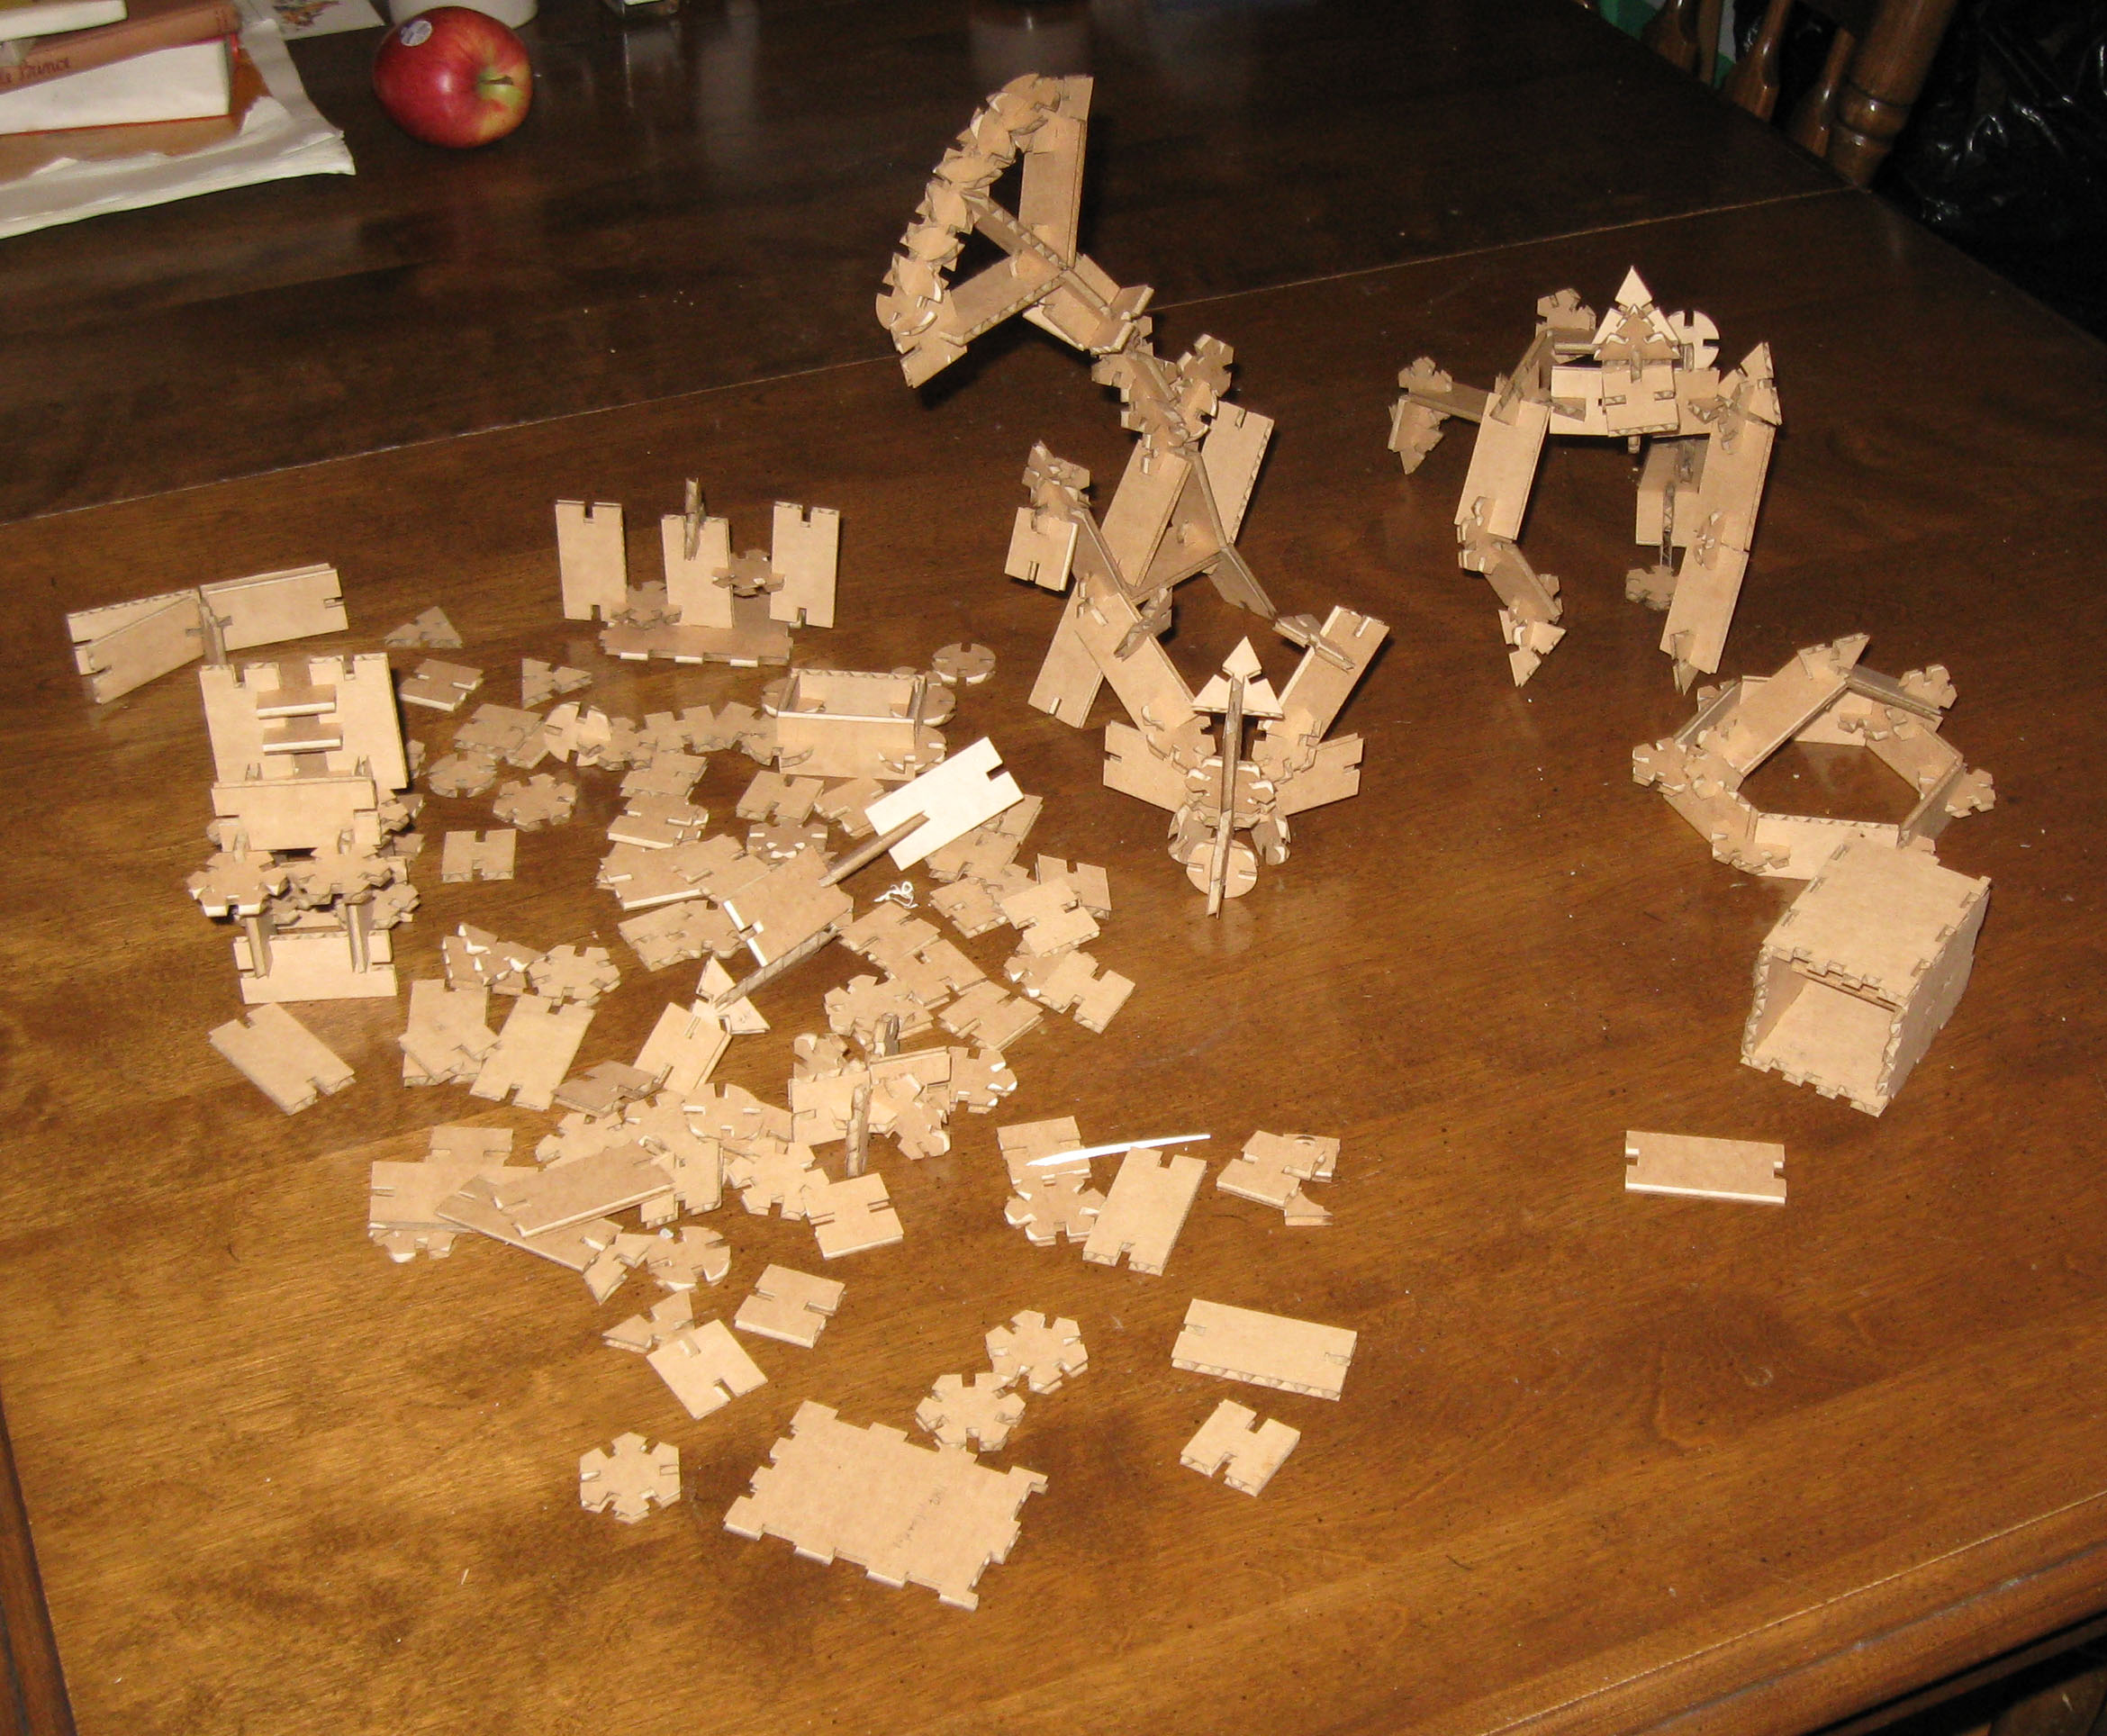
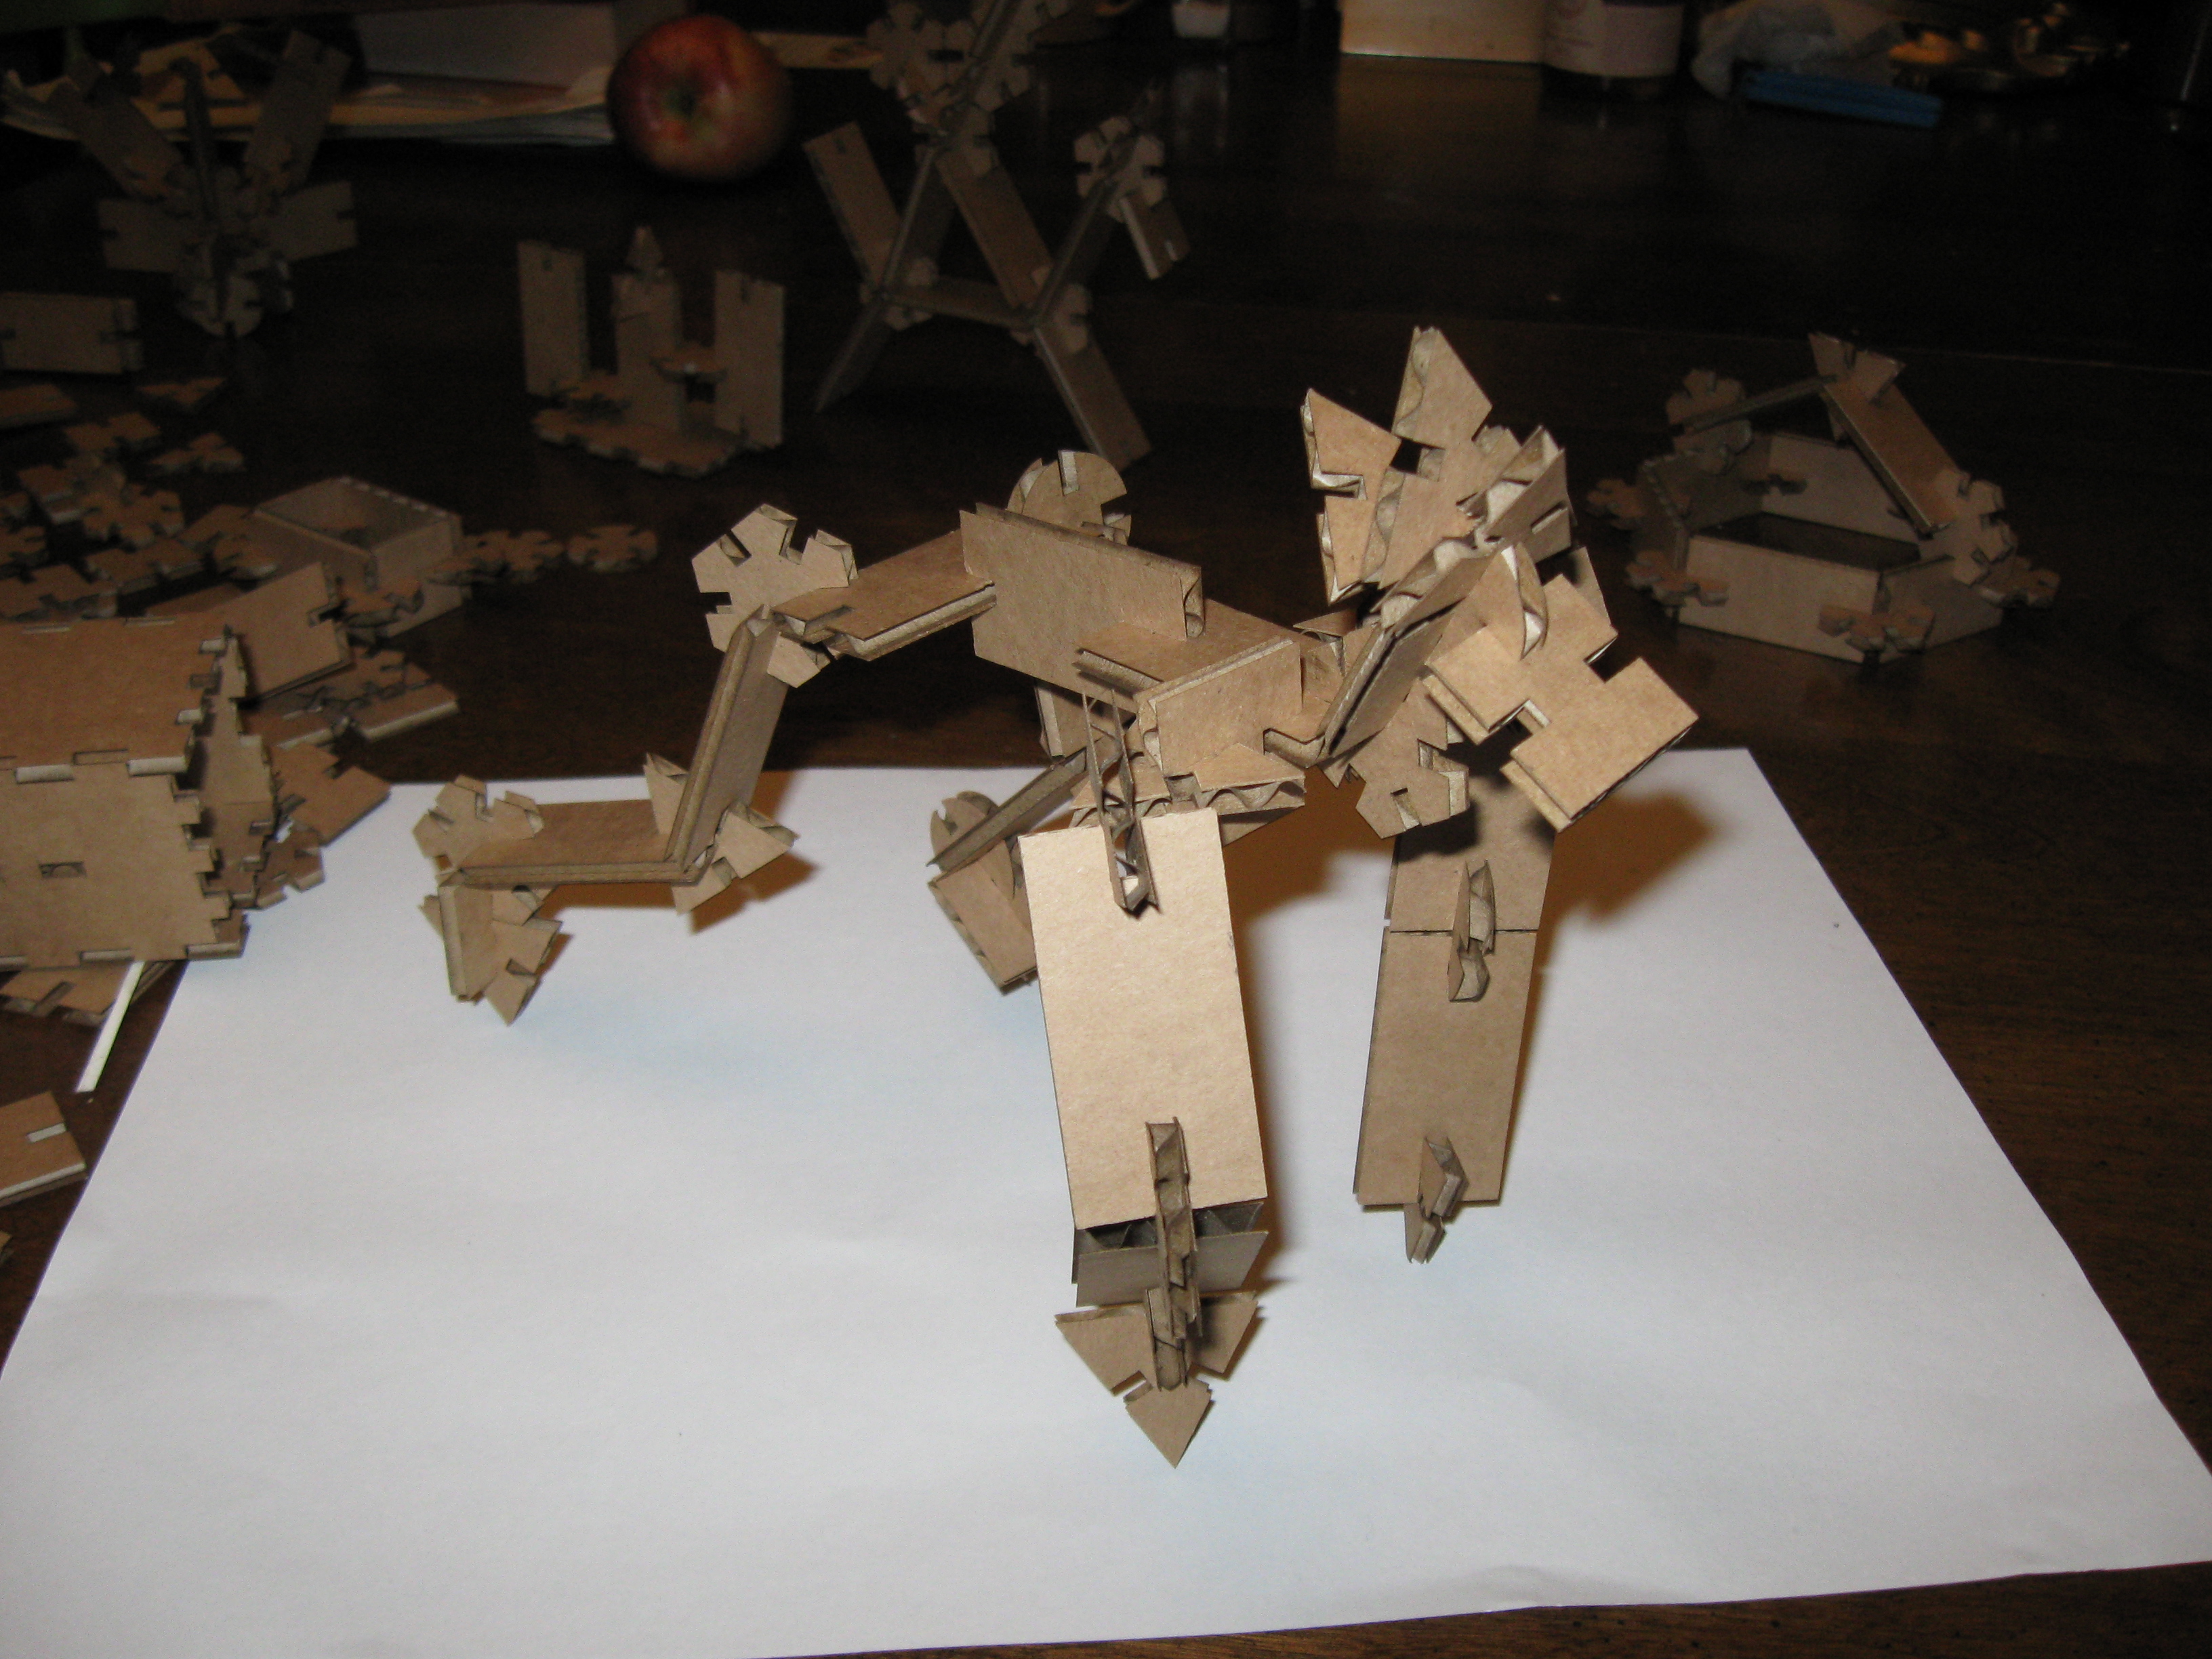
This is a gorilla that I made:
Charred Wood:
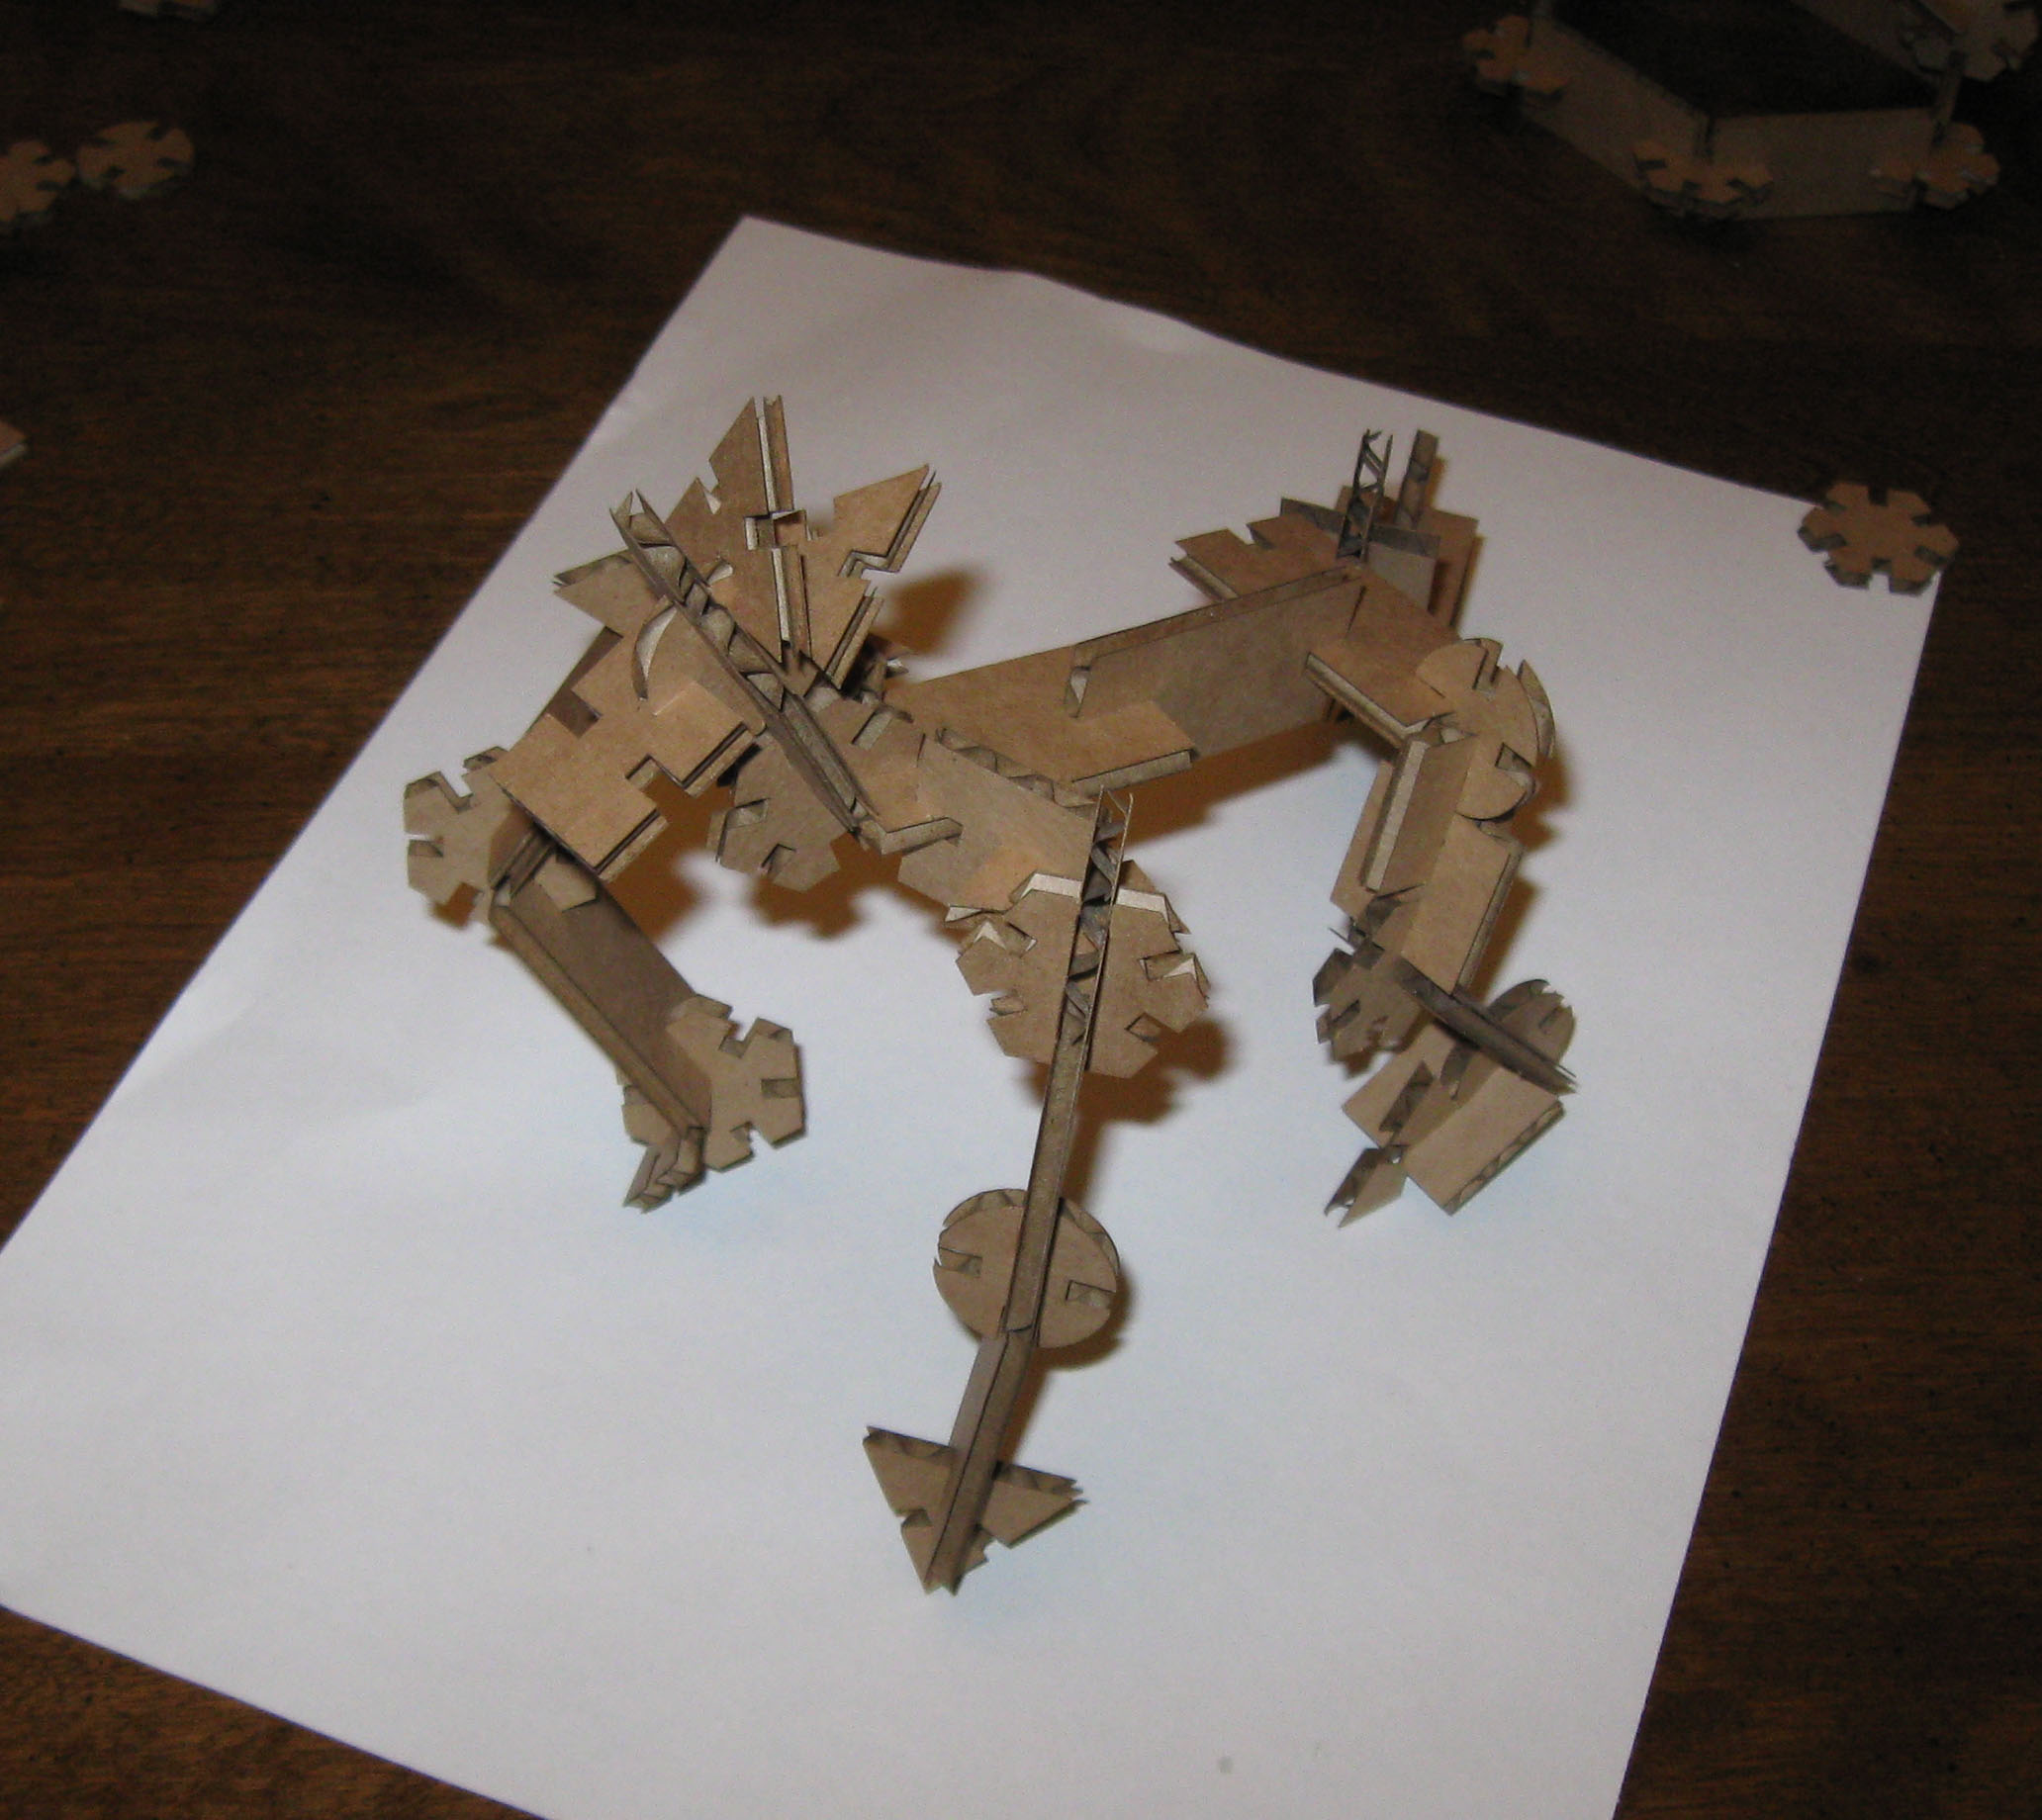
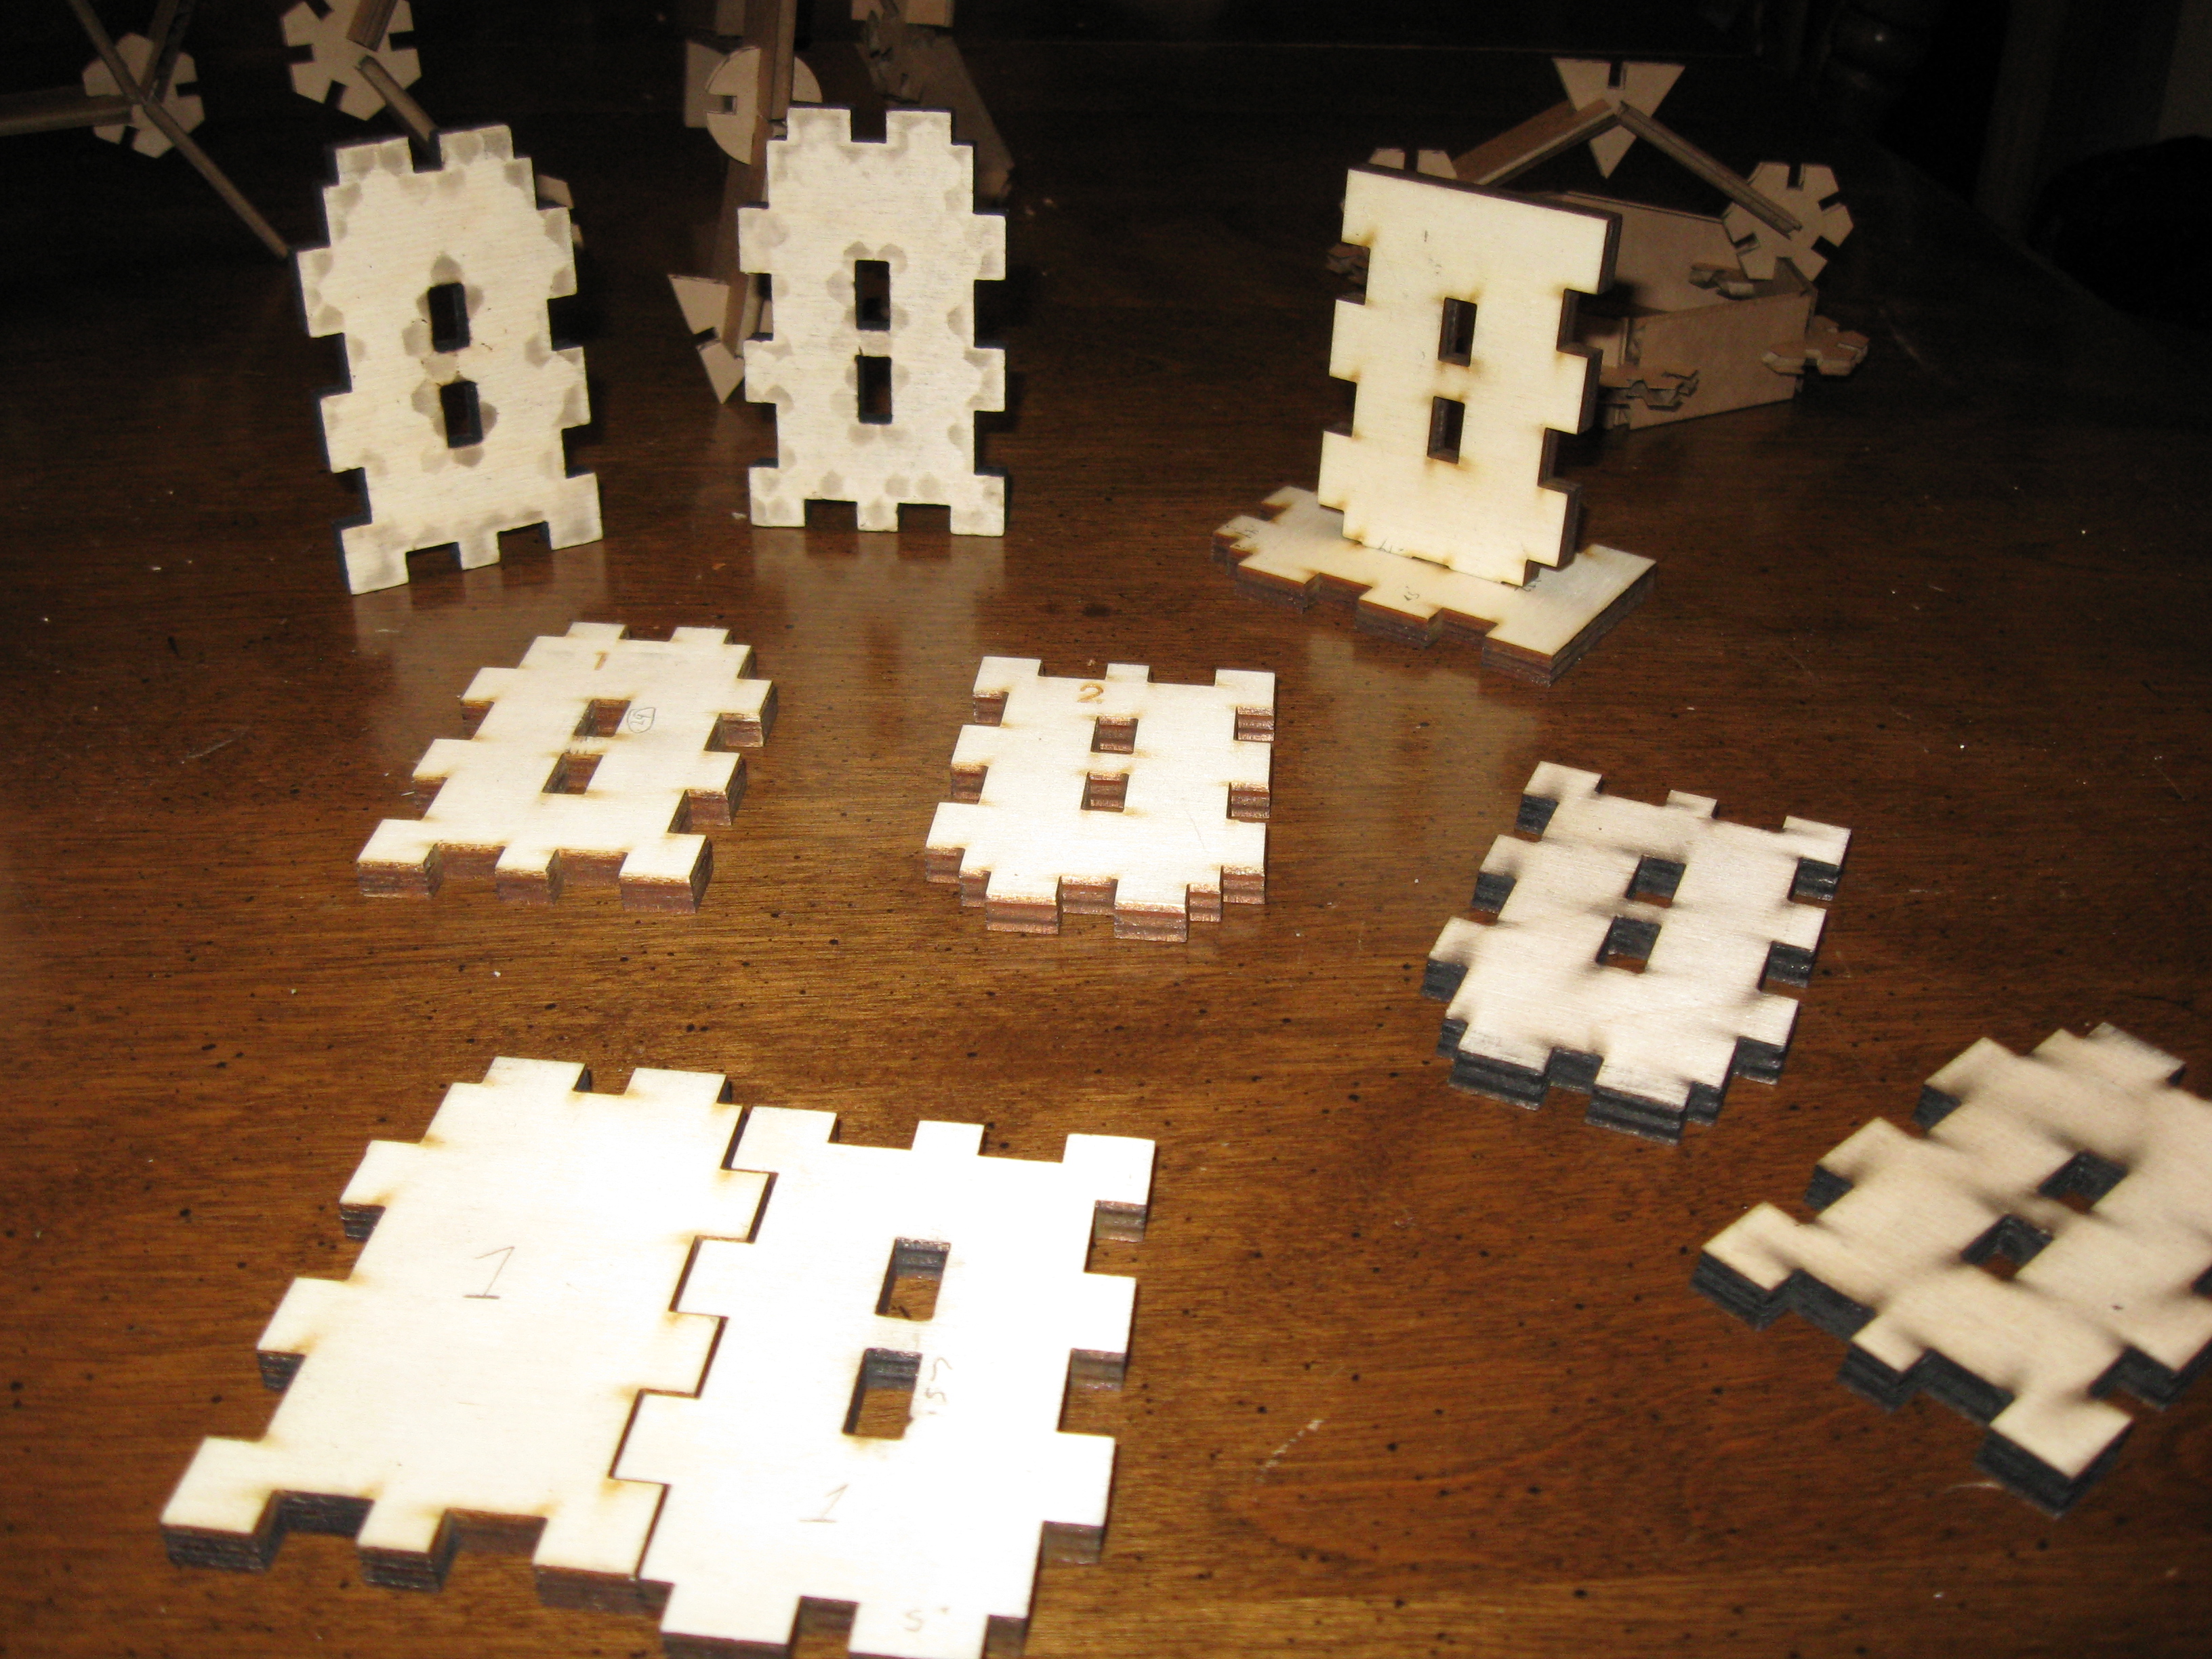
Having completed the press fit kit requirements, it was on to the target construction of the table. The first item of business; testing the leg interleave. Here I have a cardboard version of a successful side join. This was a cardboard prototype for the table legs. Unfortunately, it was also at this point that things stopped going smoothly.
 I
built some test pieces to replicate what I had done in cardboard and
test corner fit and insert fit. I started out with ¼ birch
plywood. As there were no settings listed for the laser cutter using
¼” birch plywood I tried starting with setting for cedar and
went to harder wood from there. Settings that didn't
cut through:
I
built some test pieces to replicate what I had done in cardboard and
test corner fit and insert fit. I started out with ¼ birch
plywood. As there were no settings listed for the laser cutter using
¼” birch plywood I tried starting with setting for cedar and
went to harder wood from there. Settings that didn't
cut through:
|
Power |
SPI |
Speed |
|
30% (cedar) |
1000 |
2.6% |
|
60% |
1000 |
2.6% |
|
80% (mahogany) |
1000 |
2.6% |
|
95% |
1000 |
2.6% |
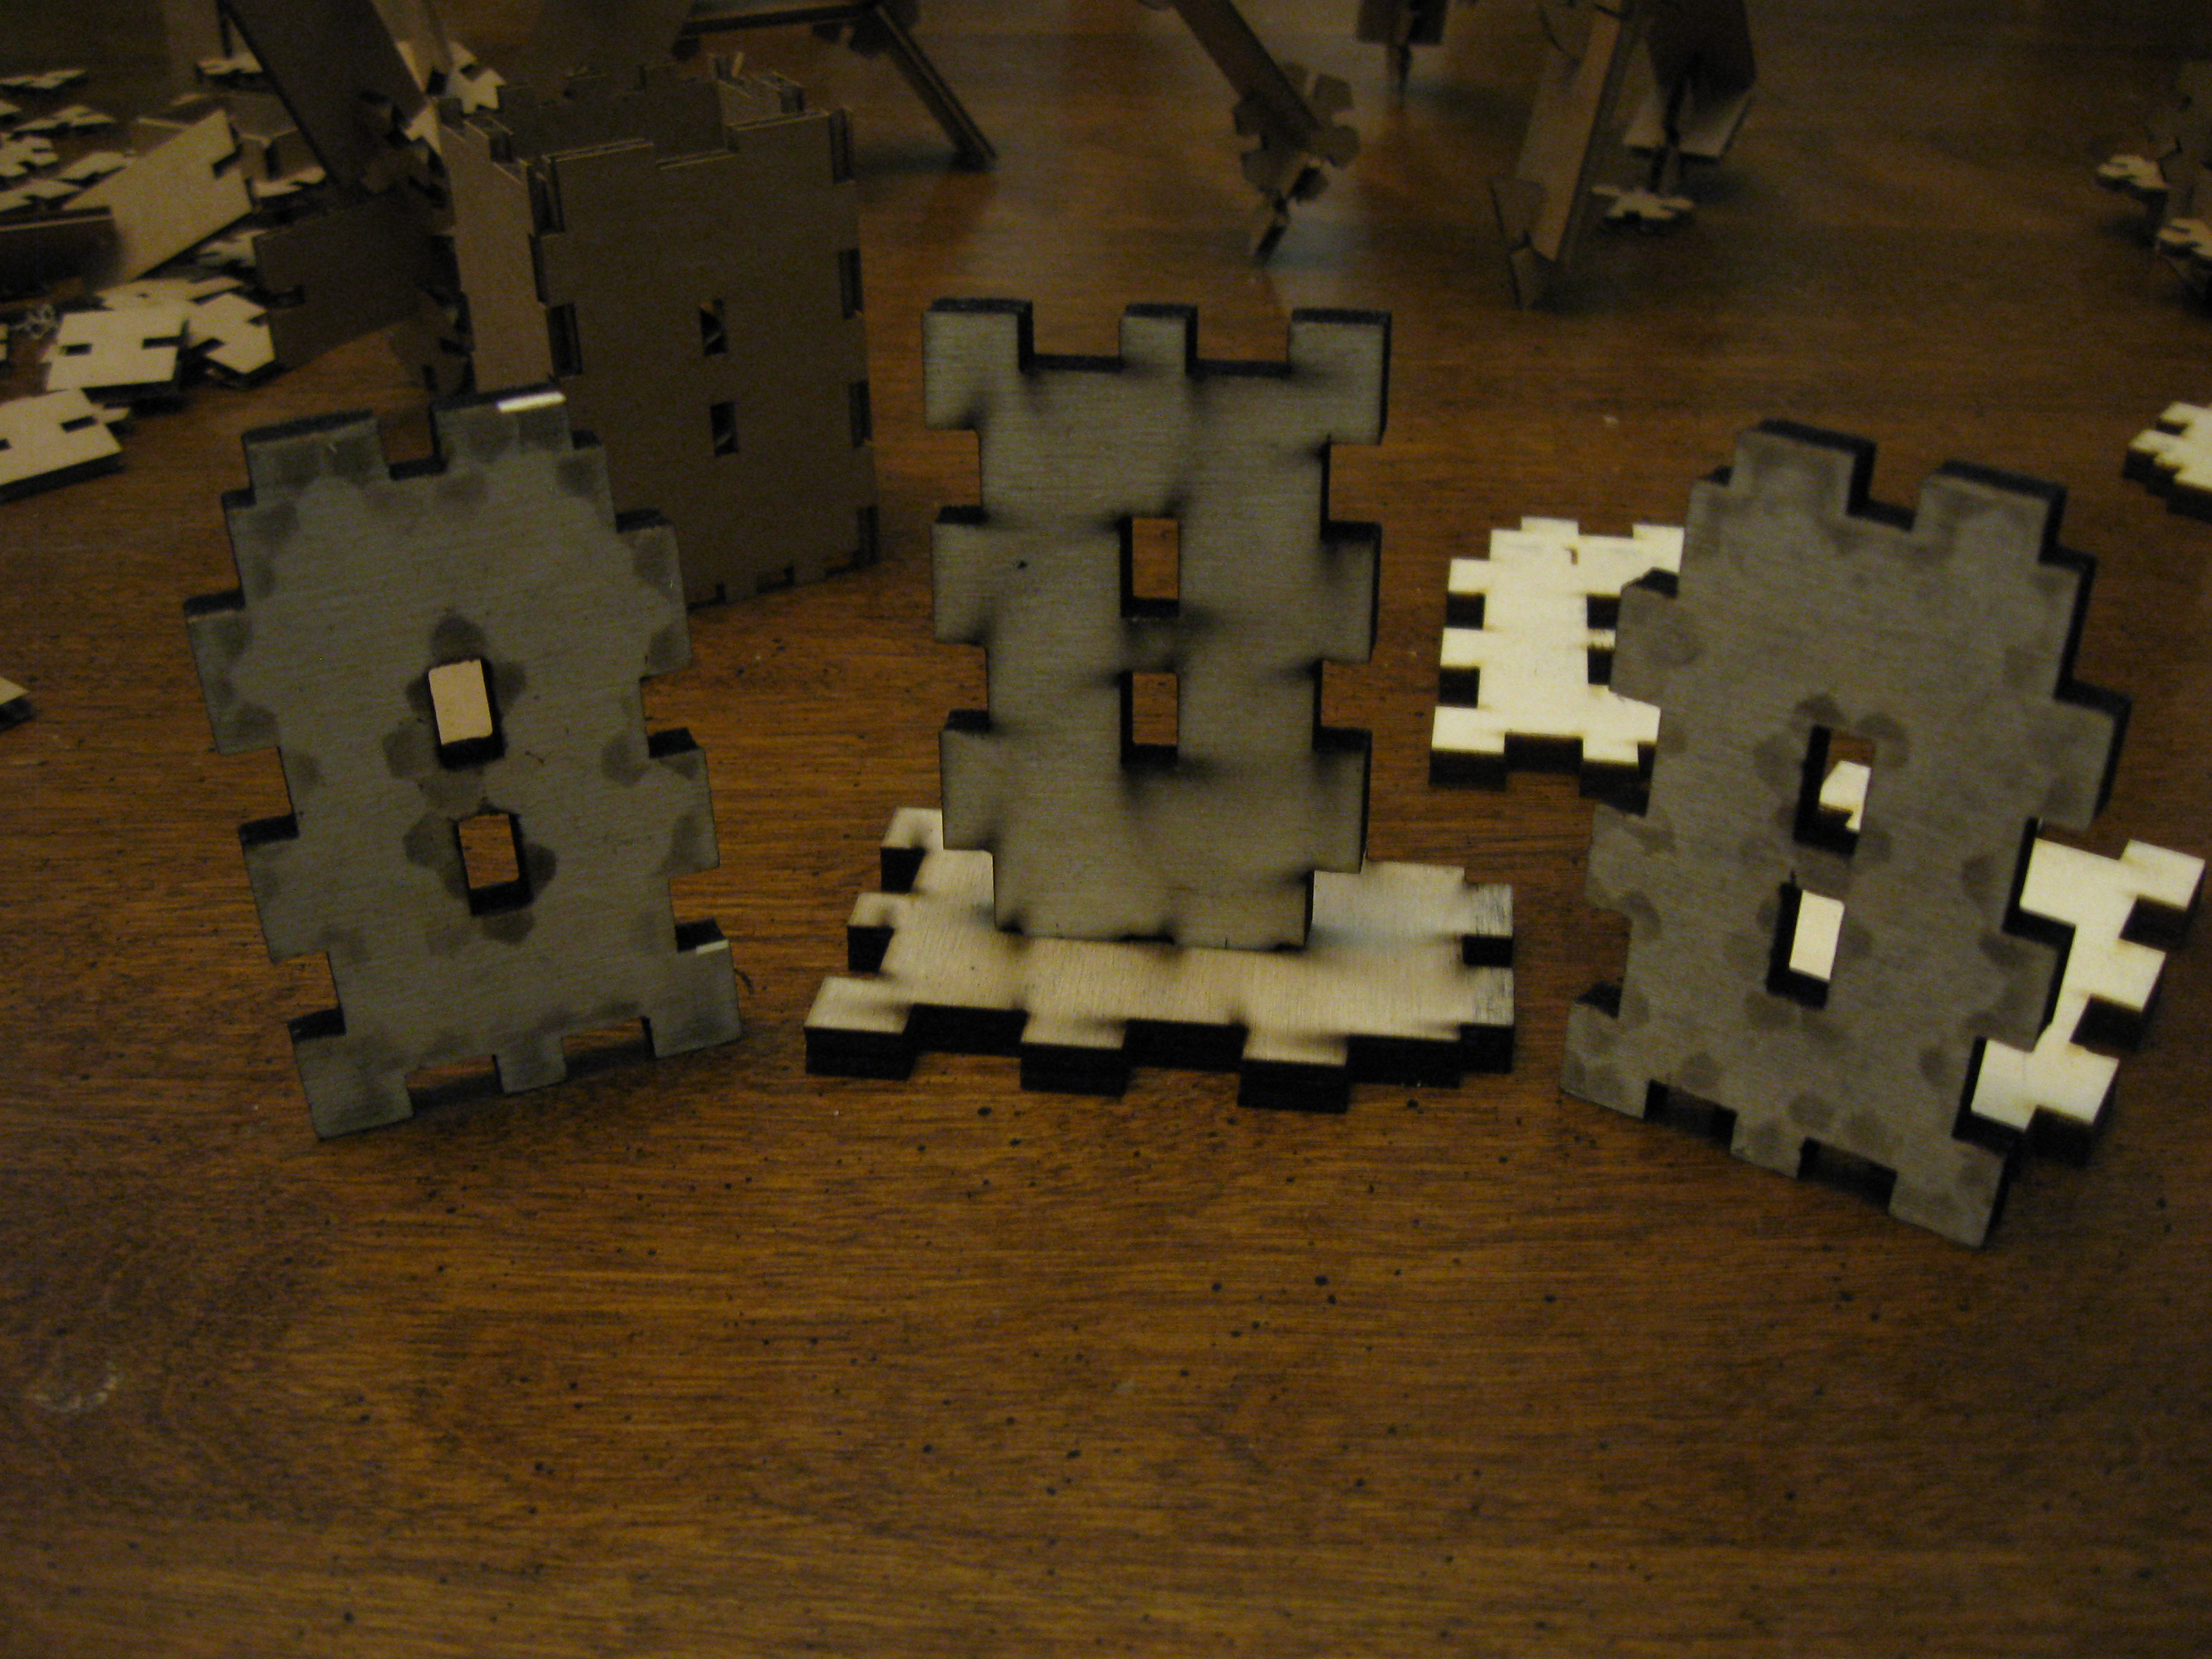
Maybe if I did the cut twice it would work? Repeating the cut I discovered that the laser cutter starts from a slightly different x-origin if you hit “go” again. This was not helpful. At this point I found that there was also 1/4” micro-lite board. Whatever micro-lite is, it must be softer than birch. Settings for micro-lite that didn't work:
|
Power |
SPI |
Speed |
|
30% |
1000 |
2.6% |
|
60% |
1000 |
2.6% |
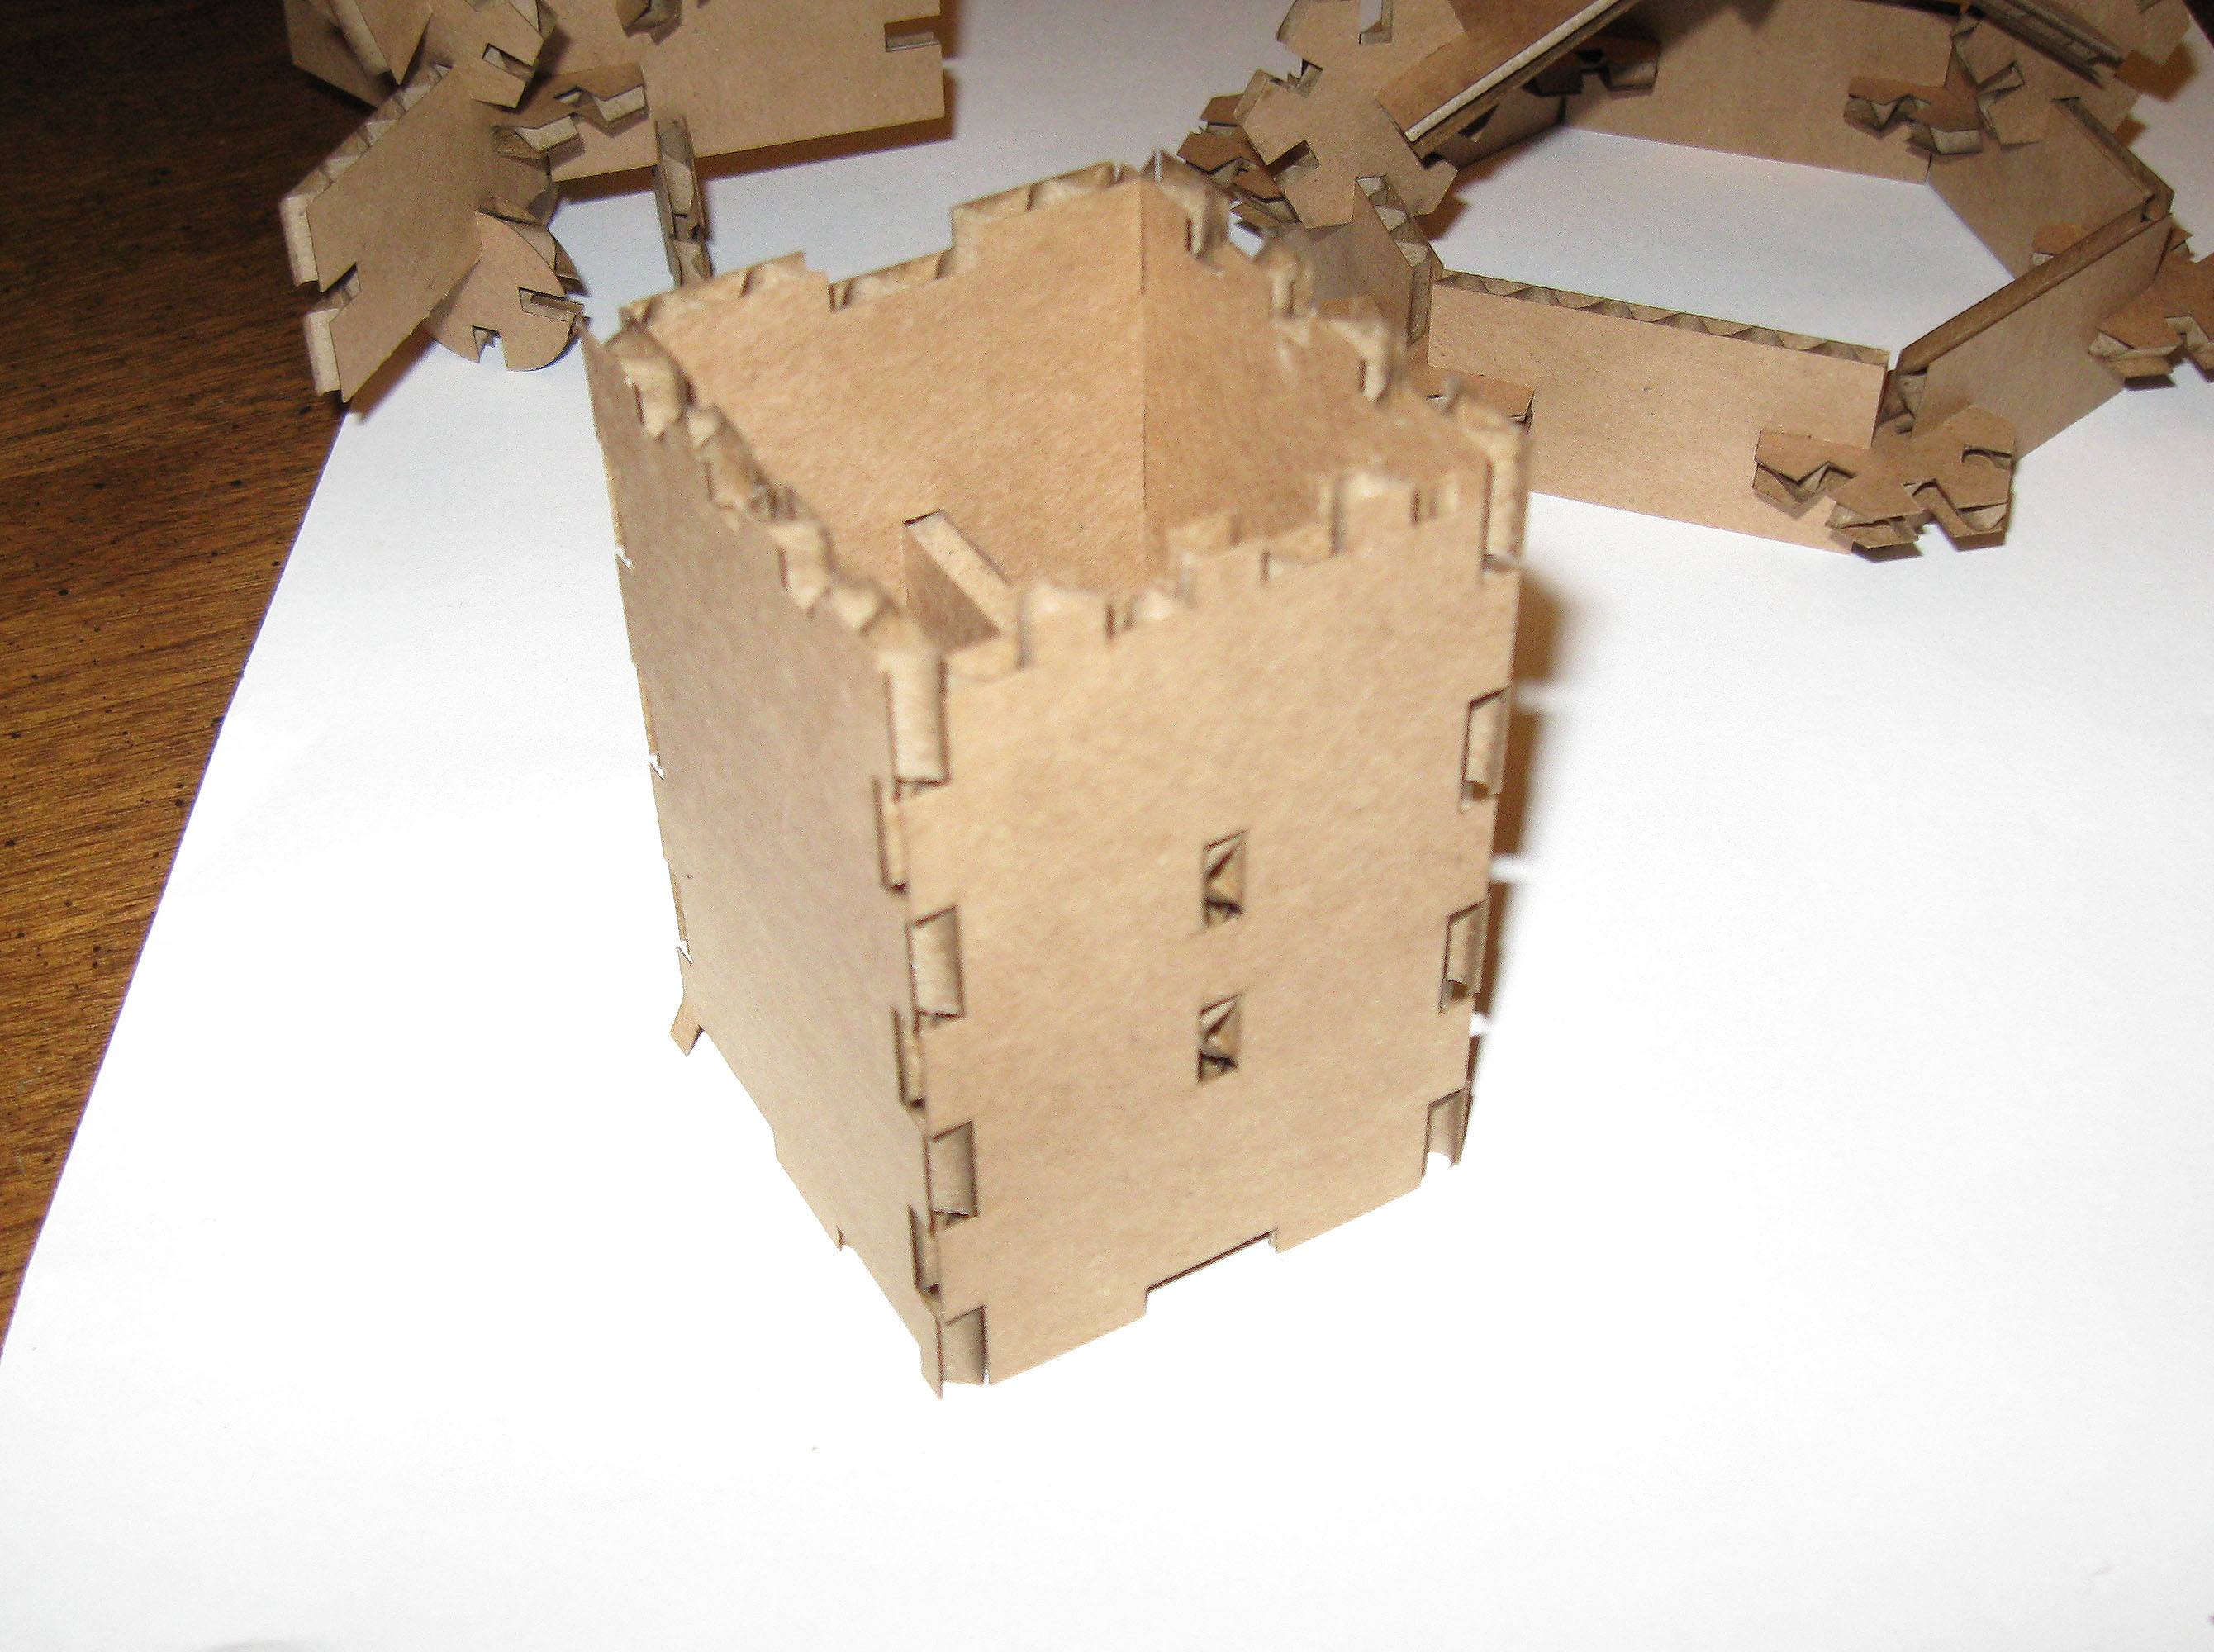
As the picture to the left attests, I did finally cut through wood successfully. With the micro-lite, still not cutting through with suggested settings, I tried slowing the laser speed to see if that had better results. Presto! Success! To get through the birch, I succeeded by doubling the figure in my Corel version. This traversed the same vectors twice without incurring a horizontal offset and successfully cut through the birch. It also nicely charred the wood significantly. With the birch, I only had one successful run with almost certainly non-ideal settings. Enough excess char occurred during the second cut that I ended up with a pleasant lattice work from the grill visible on my wood pieces. Successful cutting settings for wood:
|
Wood |
Power |
SPI |
Speed |
|
Birch (cut twice) |
90% |
1000 |
2.6% |
|
Micro-lite |
30% |
1000 |
2.2% |
Unfortunately, as predicted, time ran out just as I was perfecting the fit for interleaving the legs. Using micro-lite I obtained a good insert fit using a width of .24” (excluding offset) but I haven't quite figured out the desired offset for cornering. It differs from the cardboard. And that's all the fun for this project so far!