Smashing Glass...
....without Shattering
5 Oct, 2009
Project 4: Something Large- Water Jet, Shopbot, lathe and mills
smashing glass!
Project:
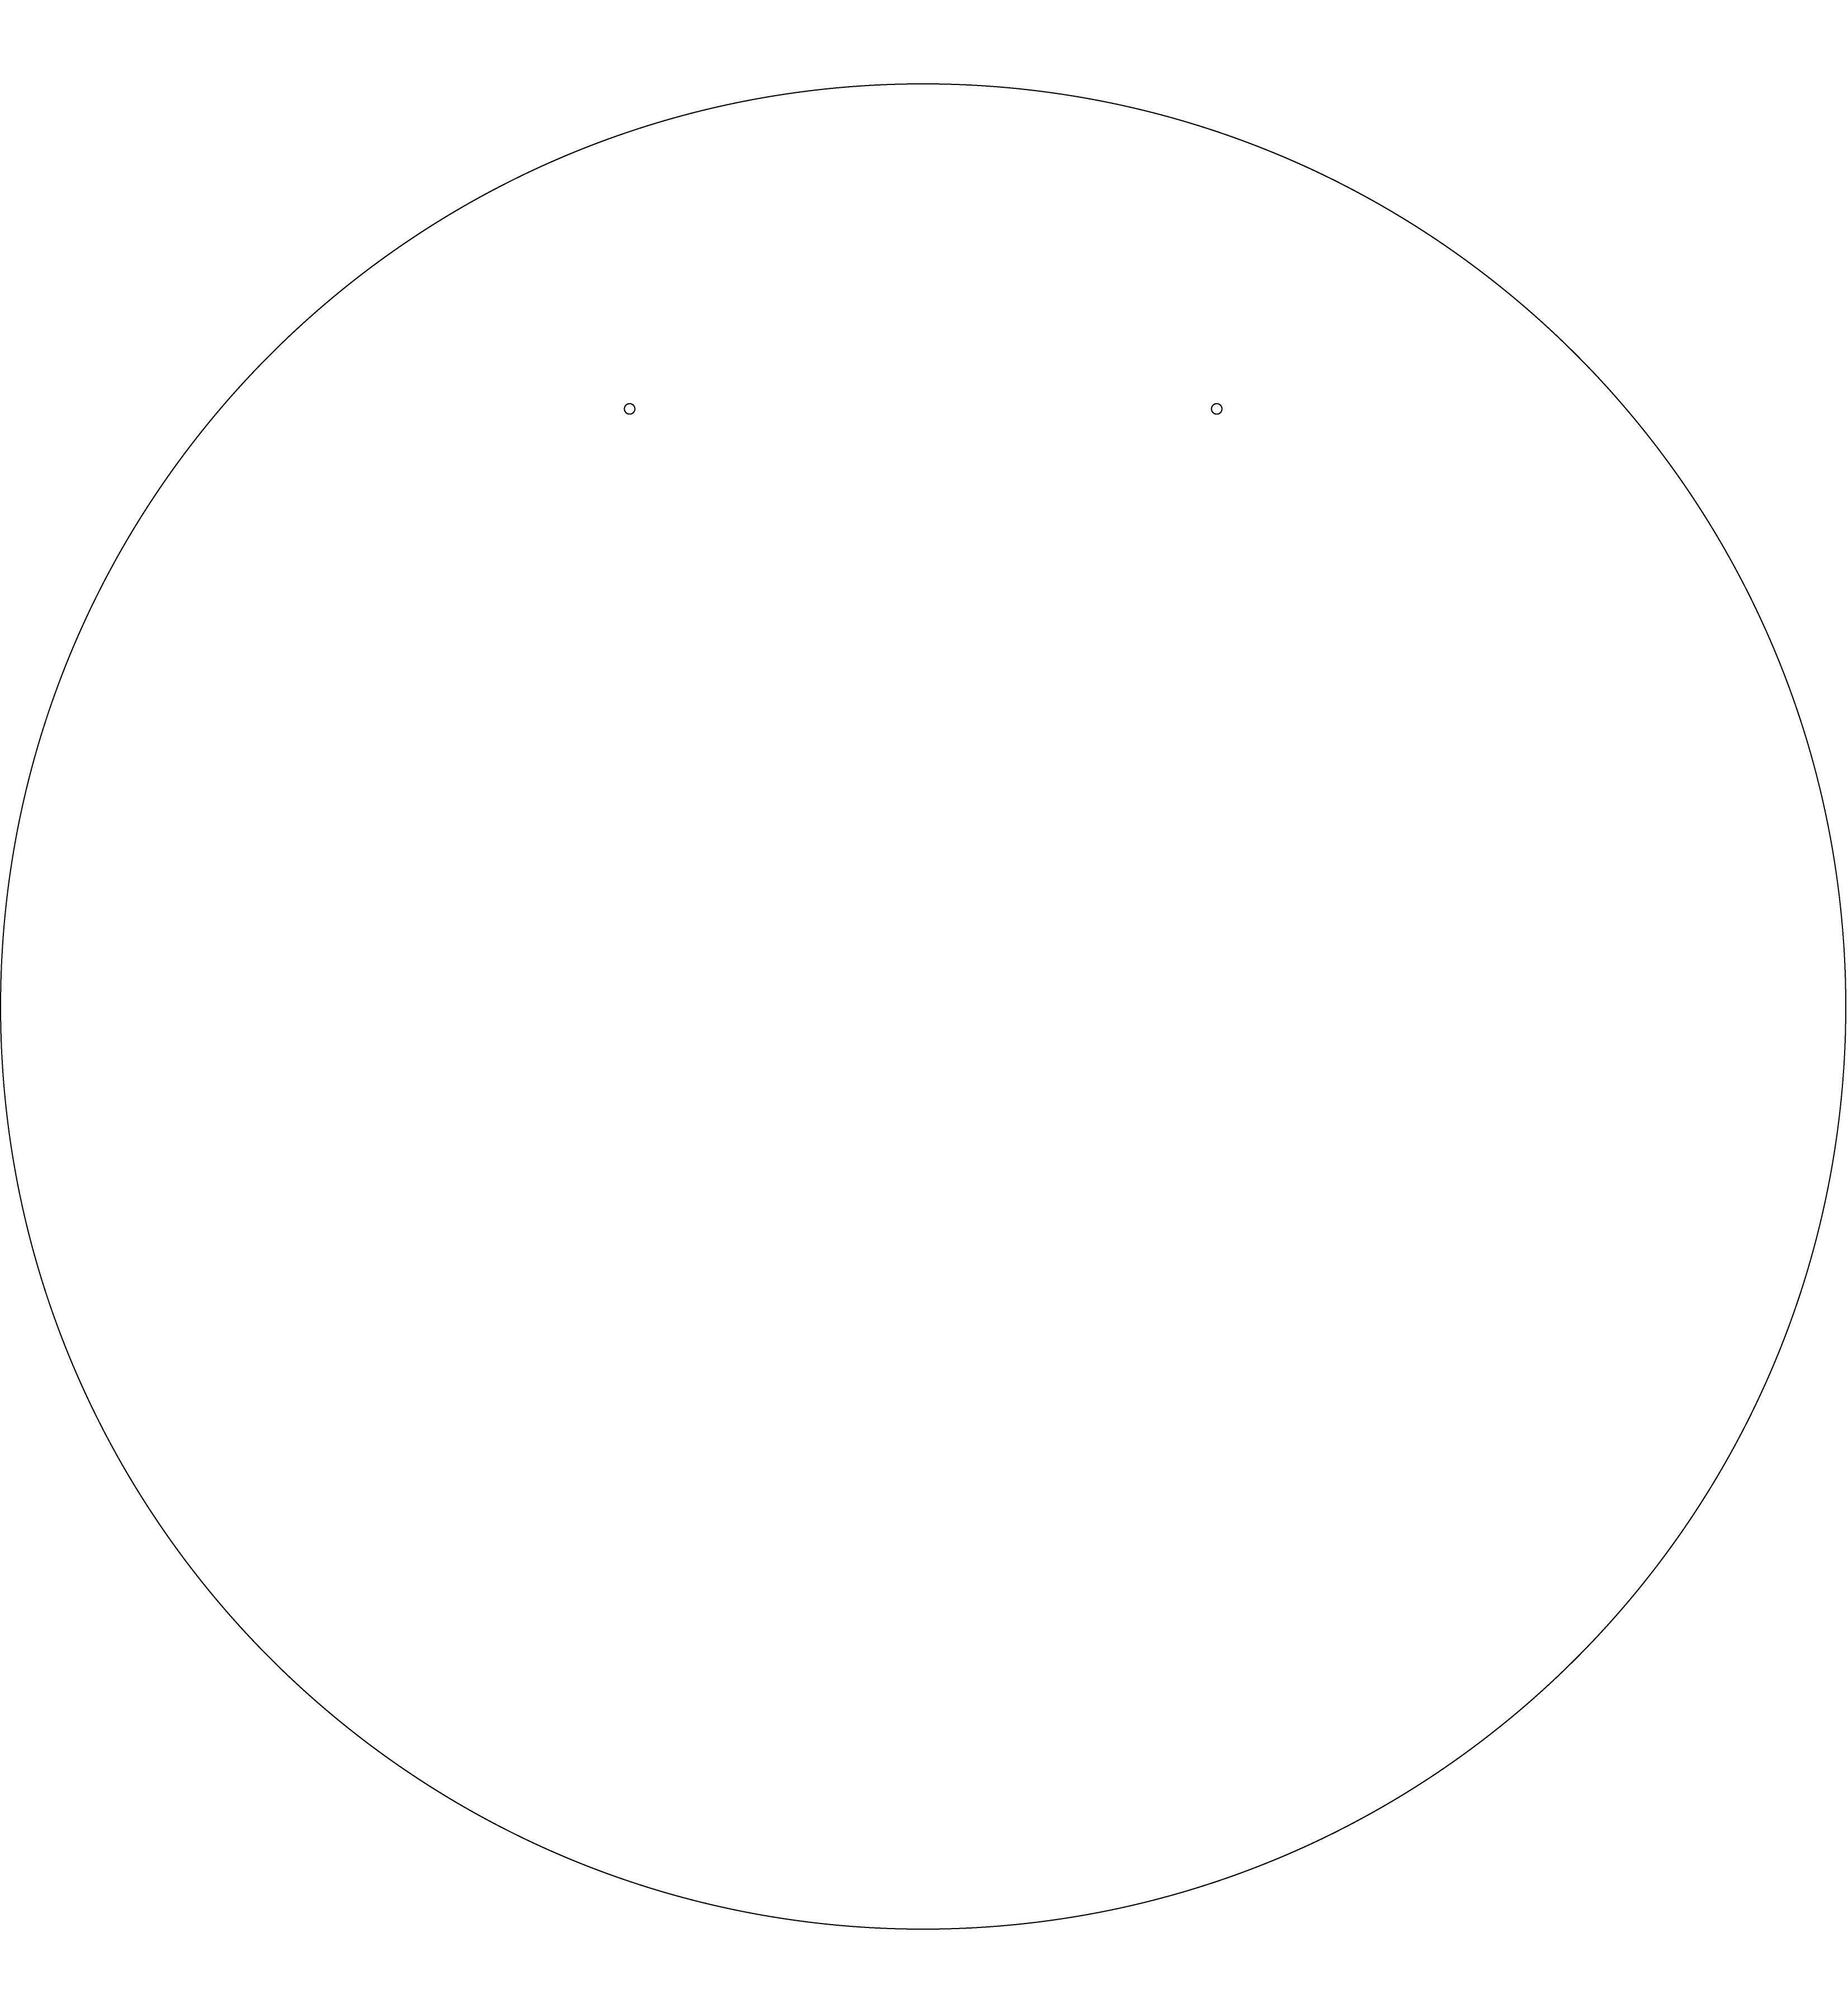
After much deliberation, I decided to build things that when you hit, make sound; a glass gong and some sample keys for an aluminum and glass xylophone. The glass gong is a flat 22” diameter glass disk 11/32” thick. Hitting it with a mallet of twined string produces a very nice mellow tone although there are some harsher overtones and any thing in contact with it degrades the initial transients.
The Gong:
The Gong is a simple disk. It has two support holes. The files for the cut can be found by clicking on the gong sketch. I went on a shopping expedition to Home Depot with Gershon and picked up some basic framing glass. It was 24” x 32” for around $15, 11/32” thick. Totally reasonable. Since it was 24” wide, I opted for a 22” gong and used the rest of the sheet to cut out some test xylophone keys. The support holes are large enough to cut and fit some light nylon cable through. I opted for what “looked reasonable” when deciding placement. I think I could have done better. As I will discuss in the Xylophone bit, the placement of the holes does have an effect on the resonance. Hitting the gong between the two support holes and outside them produces a distinctively different sound, namely it is pitch shifted up by a tone. Still, the design was exceedingly simple.
Cutting the glass on the Water Jet was a little more worrisome. I had three test keys and the disk to cut. It cut exactly that, shattering the remaining glass. I did this with John's help since there were concerns this is exactly what would happen. We clamped the glass to a piece of plywood and cut it out as such. It is recommended to do a full plywood glass sandwich. I'll have to try that at some point but the open-faced sandwich gave me my gong.
Oh, and be careful with the water jet table. I put my computer on the vibrating table and it vibrated off. Now I have no laptop screen. Sad Laurel.
A gong is useless without hanging.
The gong stand was cut using the Shopbot. Everything went largely as planned. Well not really. I used the vast majority of the sheet. I tried to leave effective margin but ended up almost cutting over a screw. I stopped the shopbot to remove the screw which led to adventure! Thanks to Natan for helping me out with this one. Unfortunately I stopped to Shopbot to the degree that it had no desire to restart (I had to move the head to get at the screw). I also did not note the execution line it stopped on. Natan and I had to go into the g-code, interpret the instruction set, remove the code we figured had been completed, and run from where we thought was correct retaining the integrity of the overall instruction set (with which we were not particularly familiar. Win! It took an hour longer for the cut than it should have but success. Files for the gong stand can be found along with the gong. The base is four pieces of plywood stacked and glued together. I used MDF.
A Xylophone:
 A
xylophone is going to consist of three main parts: the tuned keys,
optional resonators, and the support structure. I purchased PVC to
make resonators, but only got as far as cutting test keys. That is
the trickiest part so here is what I learned if you want to make your
own xylophone.
A
xylophone is going to consist of three main parts: the tuned keys,
optional resonators, and the support structure. I purchased PVC to
make resonators, but only got as far as cutting test keys. That is
the trickiest part so here is what I learned if you want to make your
own xylophone.
In the case of glass, the pitches of the xylophone keys are entirely determined by the bar length. Here is an awesome site for determining key ratios:
If you look at the site you will see the need for a known reference pitch. You can ignore this if you don't care about the instrument's core pitch. I play a lot of instruments so I would strongly prefer to have a xylophone pitched around the standard 440 Hz of an A.
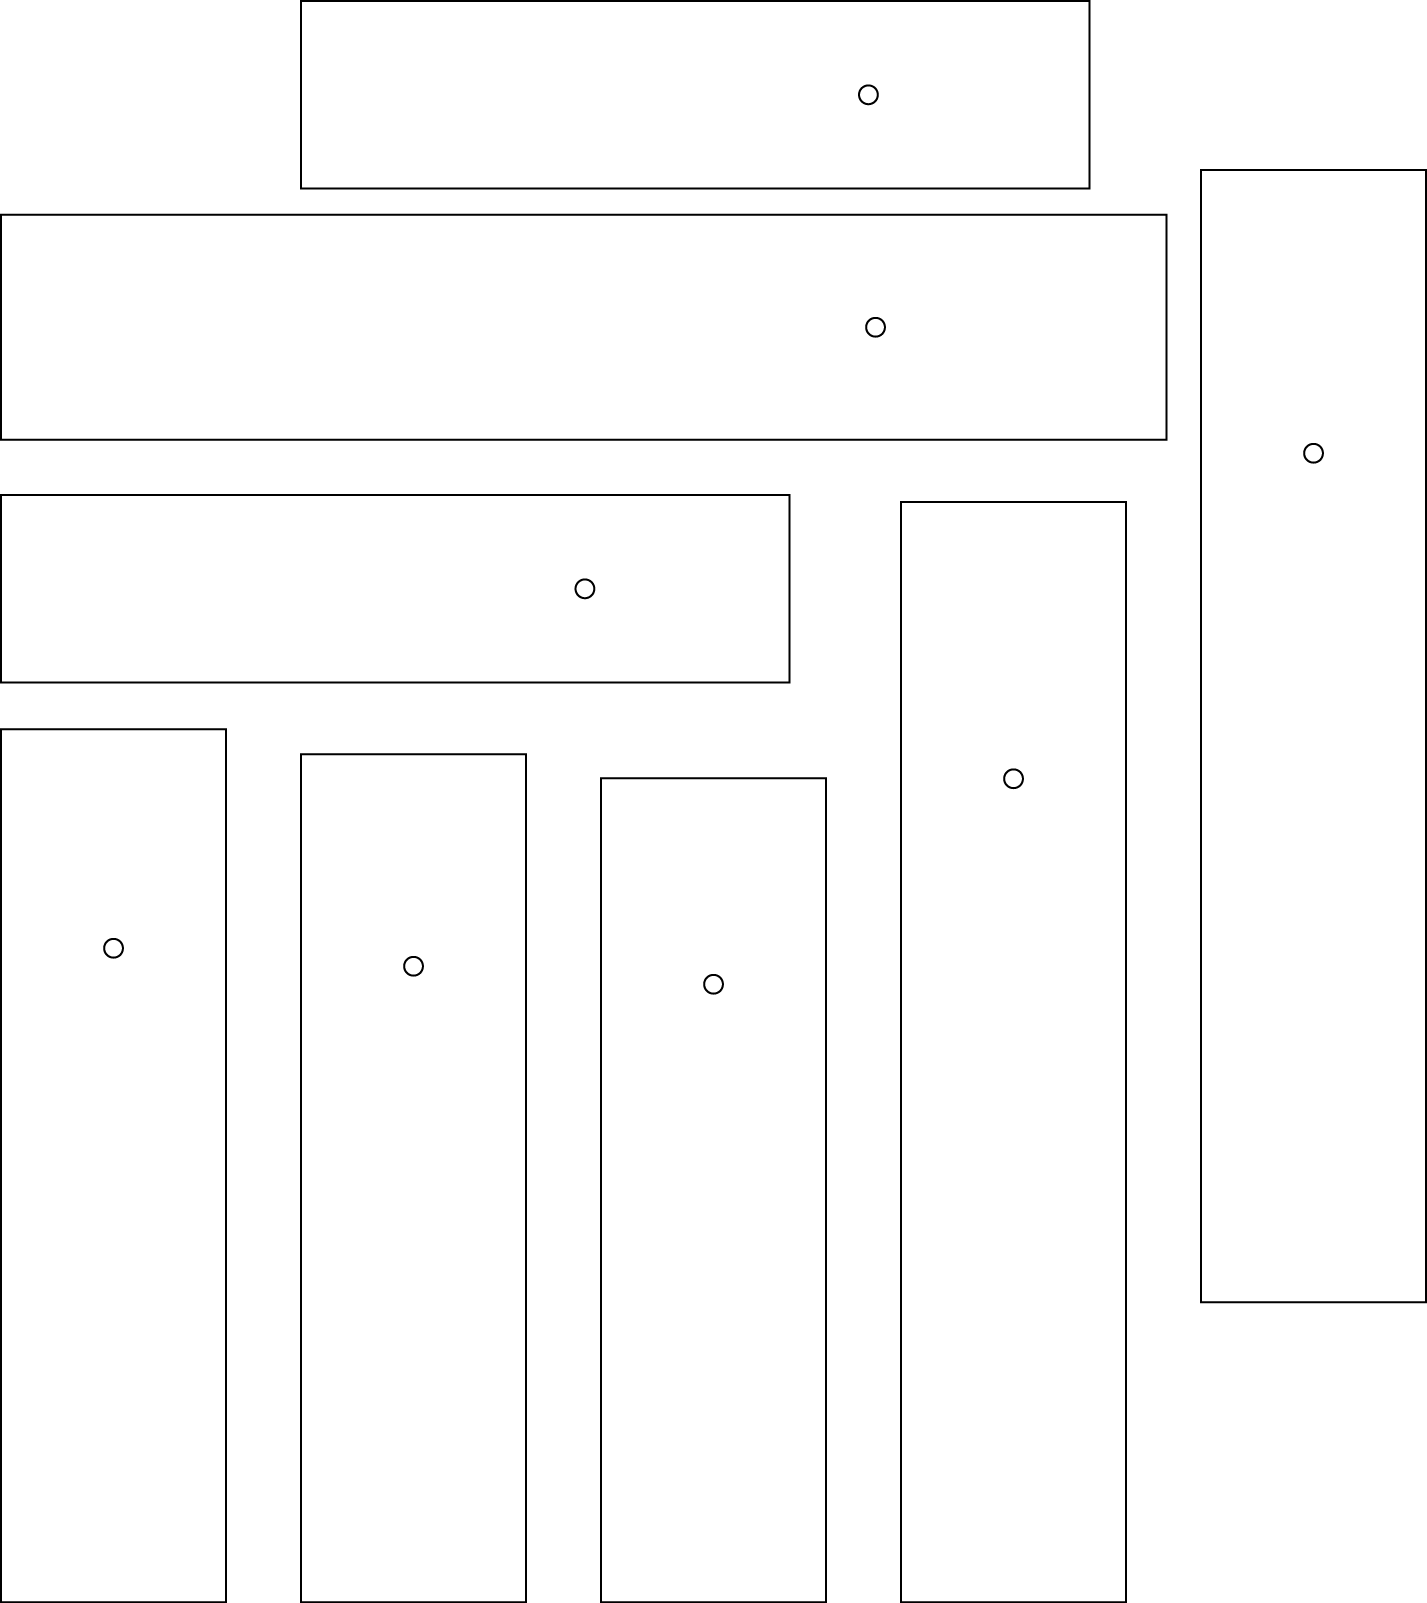
I started with the three glass keys which I cut to see what would happen, where they would pitch, and how the length to width to thickness ratio would resonate. Seeing the trickiness of cutting glass, I opted to switch to the class stock of 1/4” sheet aluminum with the intention of getting a pitched aluminum key set and then translating what I learned to glass. The additional benefit of aluminum is that it can be ground so that I can adjust the pitch after it is cut on the Water Jet.
I tried 1”, 1.5” and 2” widths. Compared to the bar thickness and simple size ease, I preferred the 1.5” width (in glass and aluminum). With the aluminum, I cut a couple lengths and then took them to the grinder and sanded them until they arrived at (or near) a pure pitch. Something somewhat obvious ((though I didn't think of it at first) is that grinding makes the aluminum hot so it expands. This means that testing the key just after grinding it, it will ring flatter than once it cools down and the cooler temperature is what it will normally be played at.
A length of 5.8” resulted in an F. Not quite right, but close. The big finding is that a change in length of 15mil roughly translates to a change of 10 cents. To make a key sharper, make it shorter. I applied this to cutting the set of keys above and found it worked fairly well. These keys are all about 15-20 cents flat since I knew I could tune up, but not down. Lastly, the sheet above is bad. Why? 1.5” is conveniently close to the size of the slits in the water jet bed. Of the 8 keys, all 5 of the “vertical” ones fell into the Water Jet before retrieval so I only ended up with 3 keys. It's the simple things that get you.
Lastly, I initially did not care about where I put the support anchor hole. However I found that there was a significantly improved sweet resonance when the key was supported at spots roughly ¼ and ¾ in from the end. Further support holes were placed using this ratio. I suspect the gong could have benefited from similar. Next time...
I haven't yet figured out how the glass and aluminum pitches relate, but once I have, I should be able to apply that to cut out a pre-pitched set of keys and put everything together. I look forward to doing that. This week was a lot of work and I still have much to do, but the results are great and I'm excited about new instruments.d