 Signature Stamp
Our assignment was to machine a mold and cast parts into it.
Idea
I had a hard time deciding what I wanted to do for this week. Eventually, I decided on making a signature stamp. Not that I actually need a signature stamp, but I thought it would be a neat application of the process.
Generating the tool path
First, I had to practice to make sure my stamp would be exactly like I wanted…

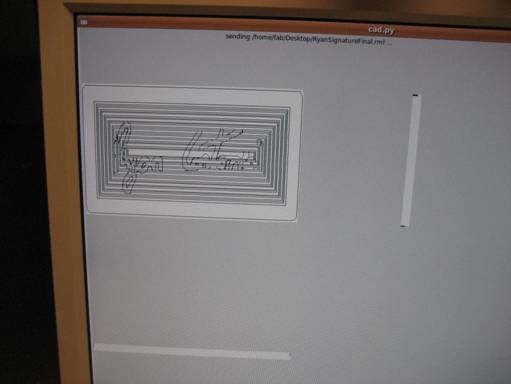
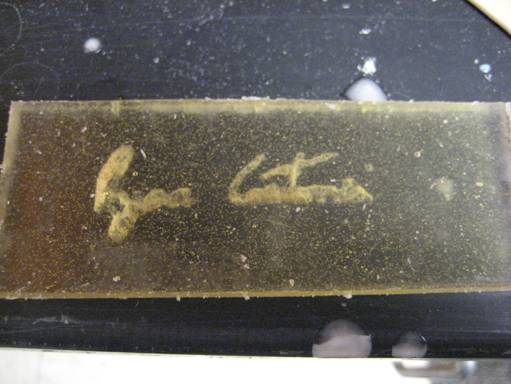
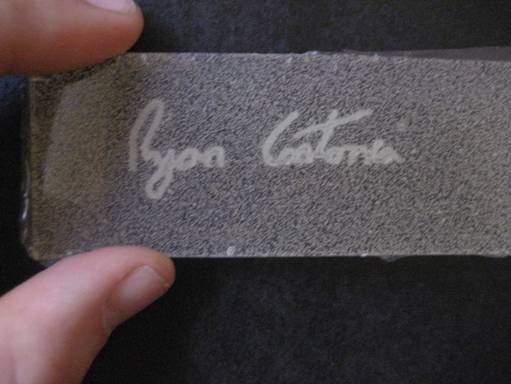
Then, I scanned my signature and touched it up in paint. Since I was planning on importing the file into cad.py as a .png I added the gray box in order to make sure I would have a depression to cast in to.

I then used cad.py to generate the tool path for the Modela.
Mold making
I cut off my piece of machinable wax on the band saw, secured it on the Modela with some double stick tape, and sent the .rml file.
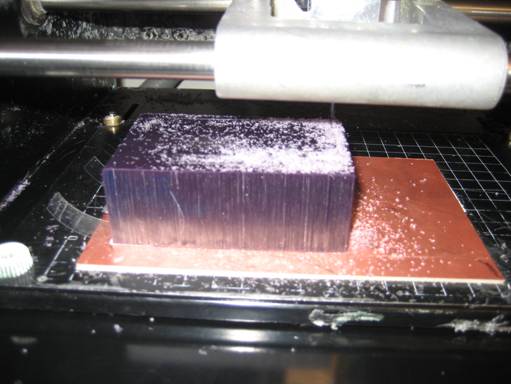
I used the 1/32” flat end mill with the hope that it would be small enough to leave the material in the middle of the enclosed letters (y, a, a, s, s, a). It wasn’t. I could have tried again with the 1/64” and it almost definitely would have worked but I had been using the Modela for over an hour at that point and there was a significant line behind me. I decided I would wait.
Once I heard that the next job after me was going to take 2 hours I decided that I would have to find another way to make a mold. The laser cutter was right behind me with scrap acrylic just waiting for a chance.
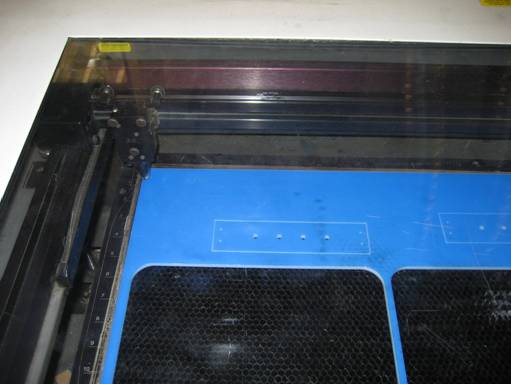
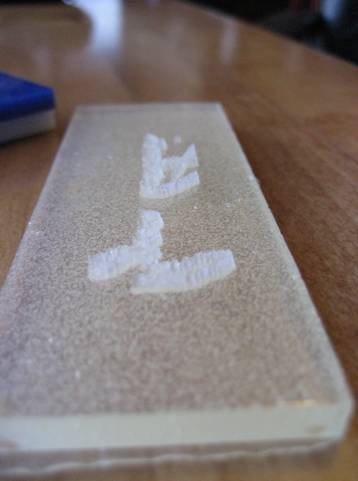
I loaded the .png file (with the gray box removed) into Corel Draw and went to work rastering my signature.

After I was satisfied with the depth of the raster (I kept the power pretty low and went over it a couple times) I cut another piece of scrap acrylic on the band saw to use as a the outer walls of the mold.
Casting
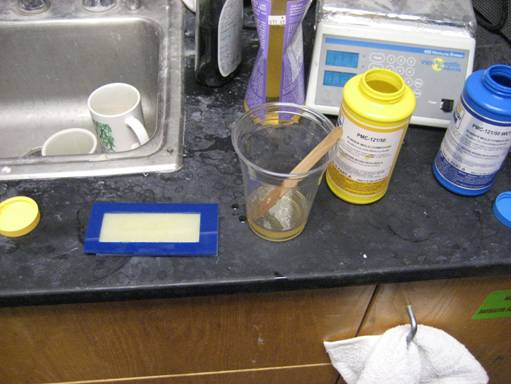
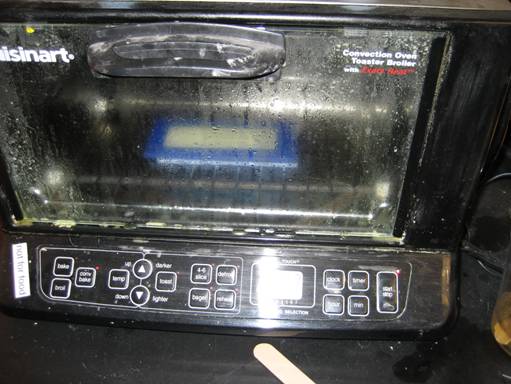
I used the PMC-121/50 rubber, poured it into the mold and put it in the toaster oven to convection bake at 150F for an hour.
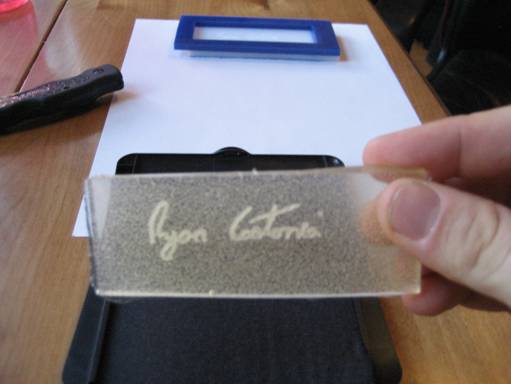
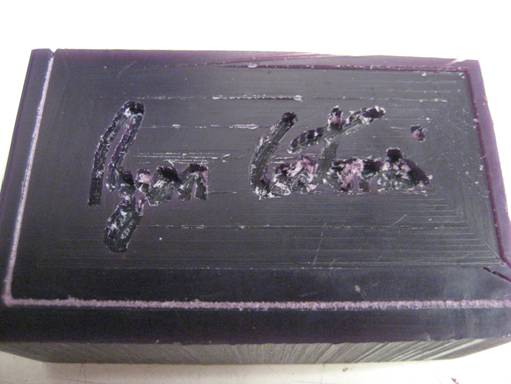
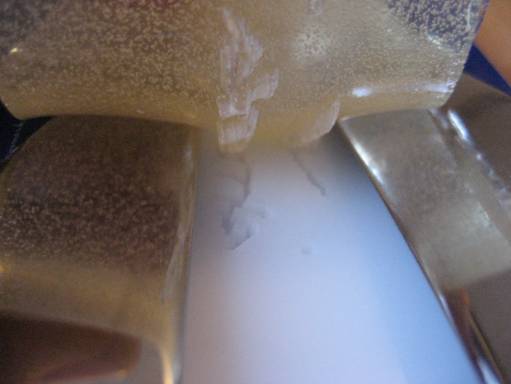
Unfortunately, the signature ripped off and stayed in the mold when I tried to separate it. It looks pretty cool though because you can see the signature through the rubber, even though it ripped off.
Since my first try was after letting the rubber cure for an hour at 150F, I decided that I would give it another try after ensuring the rubber was fully cured. I mixed up some more rubber, put it in the toaster oven at 150F for 1.5 hours and then let it cure for an additional 24 hours after that. I then began the very slow process of removing the rubber from the mold. This time the rubber was much firmer and much more difficult to remove.
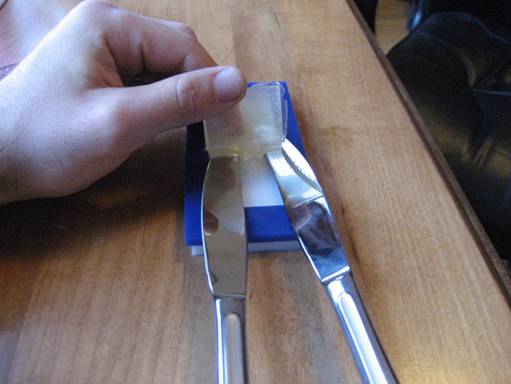
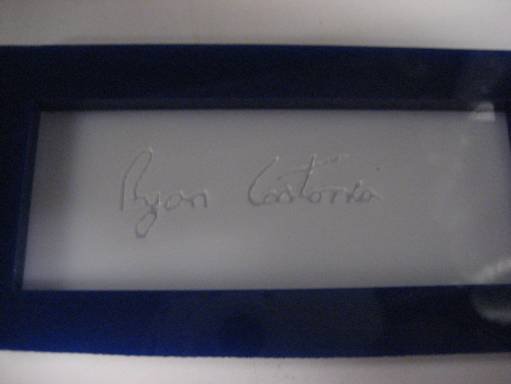
I was very excited to see that the signature was not ripping off this time! I had hope that it might actually work!
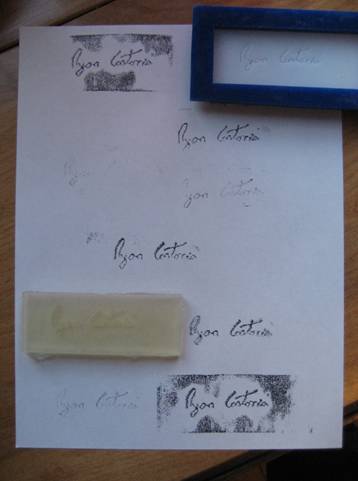
After 15 grueling minutes of trying to apply even vertical pressure, the stamp was a success.
While it definitely isn’t perfect, it does seem to do a decent job. I must admit, I’m a little surprised this ended up working.