SITEMODEL!
Sarah Hirschman
M.Arch. 2011

some infographics are no laughing matter...
After having made the desk organizer, I thought that maybe using the scoring that I'd explored earlier in a site model might be interesting. This proved to be a MAJOR challenge....
This is an image of an earlier chipboard/museum board 1:4000 site model I had made of my thesis project site - Liberty State Park in northern New Jersey.
I wanted to make a bigger site model that exploited the colness and cleanness of the aluminum material, since my thesis is to design a biobank with a very sterile, clean, antiseptic quality.
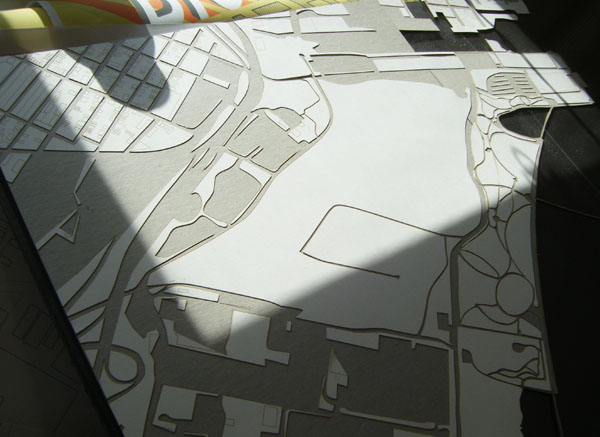
So, using the original file, sized so that it would fit on two 24"x48" sheets of aluminum that I purchased from the MIT Central Machine Shop, I brought two layers into OMAX - the exterior land-line cut shapes, and then the outlines of the street blocks. I can't share this file, as it's developed from proprietary GIS information, but it's not terribly complicated to create a file like this yourself by tracing in Illustrator, etc.
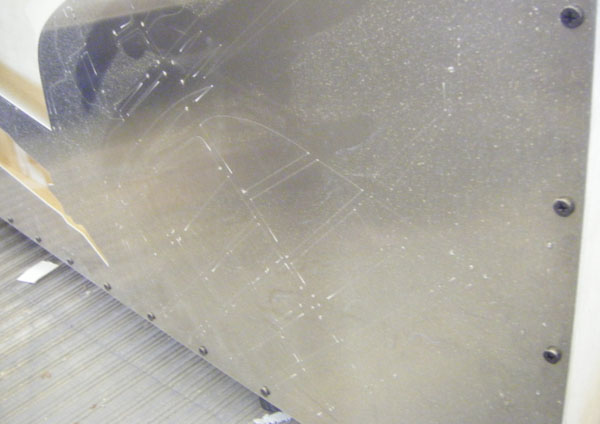
Here's where it got complicated, though - after MANY trials, we (James Coleman, the TA on duty) determined that however I tweaked the settings in OMAX Make, I couldn't get the machine to just gently score lines onto the aluminum. Turns out, doing the tweaking in Make is NOT the best way to create score lines. The best way is to set the quality of your lines in Layout to SCRIBE. This setting cuts lines WITHOUT garnet - with water alone, at low pressure.

Next, it was important to check that the thickness of my material was what I thought it was. The calipers showed that it was .0625" - about 1/16", as I'd assumed.

Once I finally figured out how to set the lines for quality Scribe, I had to set the speed of the scribing - this was done in the first setup window when opening Make. The default setting was 2.

Here's the outcome of those first few Scribe lines, done with a speed of two. The aluminum wasn't cut through, but the material was flayed and inconsistently moved away from the surface. Yuck!

After many more trials, I increased the speed of the scribing to 55, and got some clear lines. The remaining problem was that even with low-pressure, the starts of each line still pierce the material - and this is without garnet!!

Also, because the jet of water wasn't piercing the material, there was a lot of splashing and spraying in the water bed. Without going through, all that water has to go somewhere. With the water level sufficiently raised, this was not a major issue, but something to be aware of.

The box stand for the model is still in progress, but here you can see how the holes I cut in the outline of the landform cut out were used as screw holes to secure the metal to the plywood box I made using the table saw, band saw, and sander.
With another aluminum piece, and flexible polyurethane foam dyed blood-red, this site model will hopefully express the kind of bloody, messy, but scientific and hospital-like feeling that I'm going for in my thesis.

to be a bit continued as the thesis develops and fills in the model!