Lobstah Liberty
or 3D Scanning / Printing Week!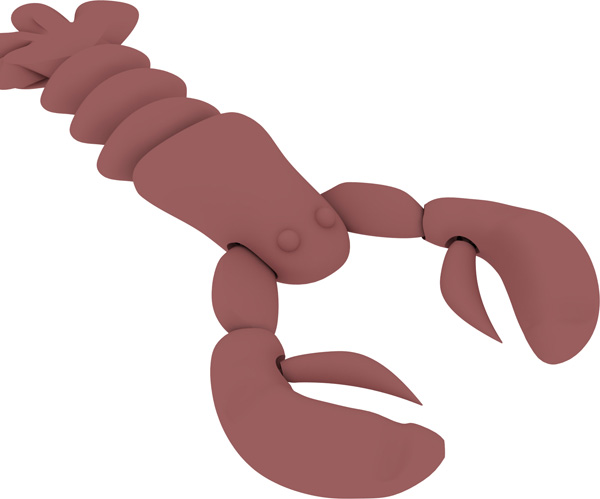

Sarah Hirschman
M.Arch. 2011
Many exciting adventures this week, though scanning wasn't exactly a huge success, fidelity-wise.
I started out with a few figurines that I thought might be nice to test the resolution and detail of the scanner...
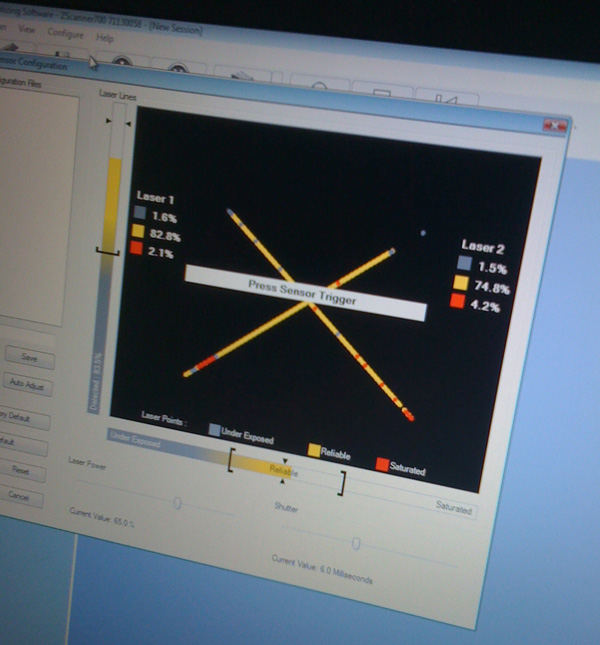
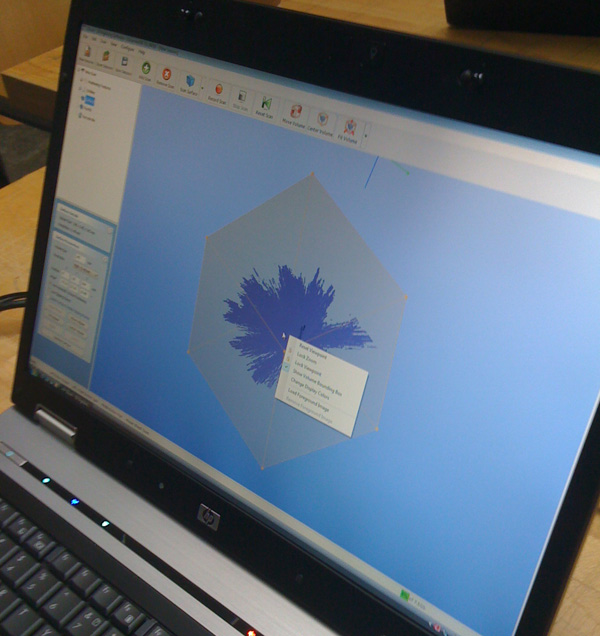
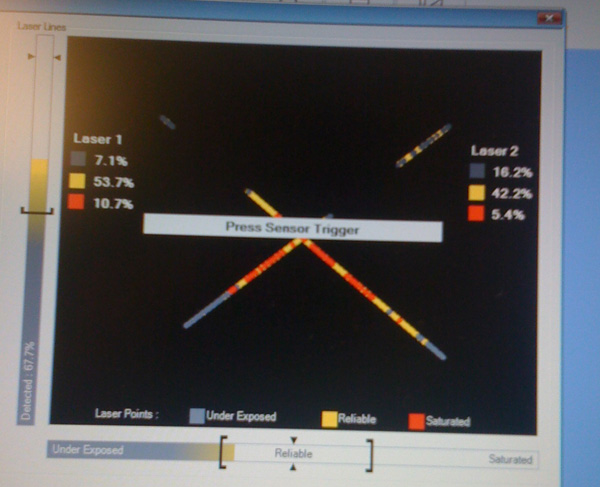
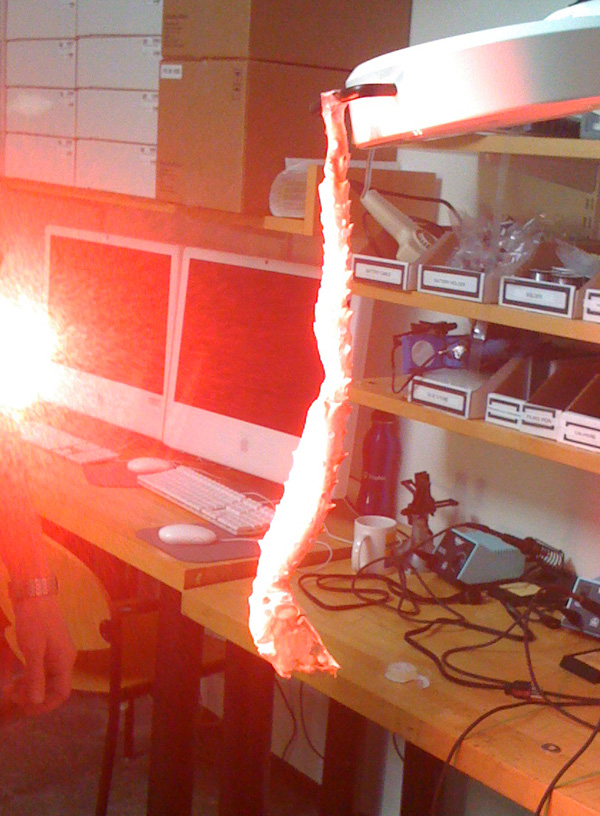
Here you can see the configuration of the laser - I had an 82% yellow setting, suggesting that I had a pretty good potential for capturing my object...
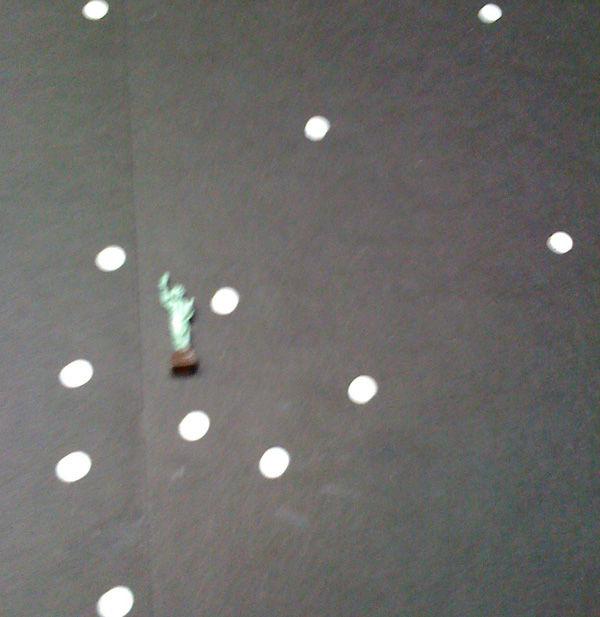
I laid my Statue of Liberty figurine down on the stage provided with the laser scanning set, and added a few more dots to make sure that it caught the subtlety of the area around the small figurine.
After a first round of finding the points, then scanning the object, James helped me to reduce the size of the bounding box down to the limits of the object and to increase the resolution of the scan. Looks like we're off to a good start, no?
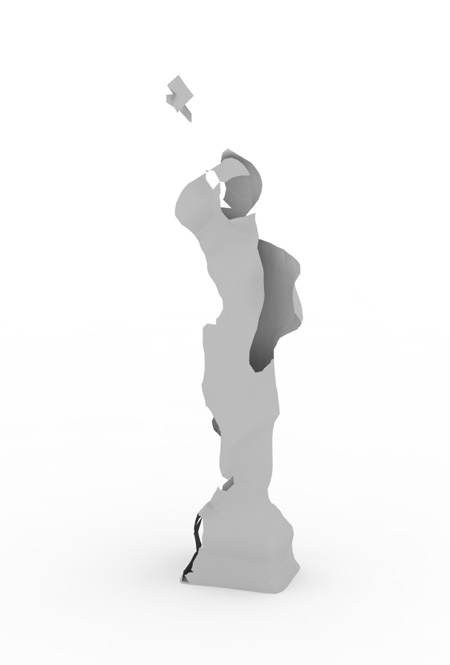
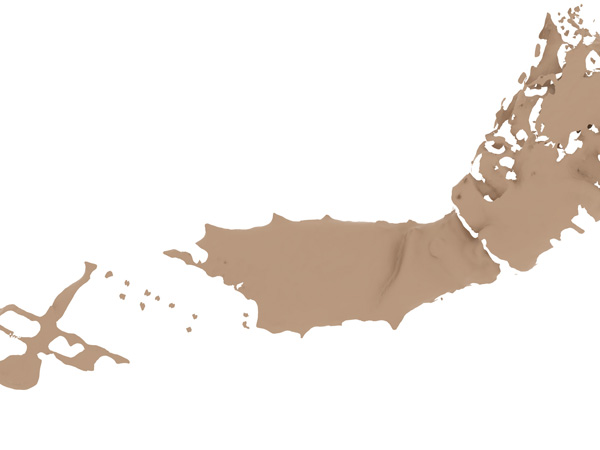
No matter how I scanned her, she always was missing a lot of detail on the actual object. You can see that in this early image of the facets scanned, the basic shape of the figurine is apparent.
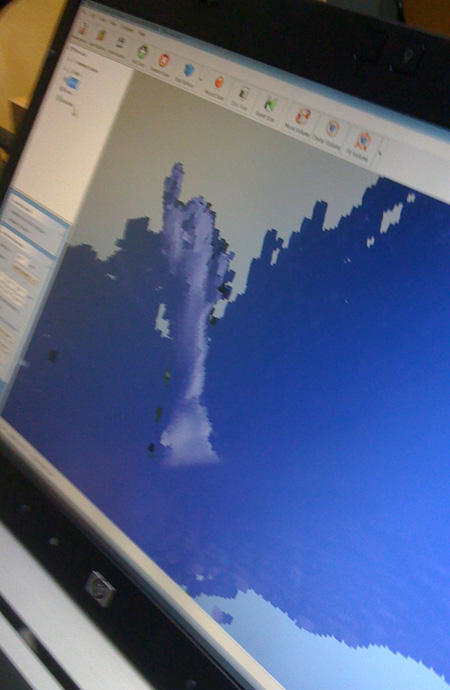
In the surfaces viewer, it looks like there's even less detail because it's smoothed out.

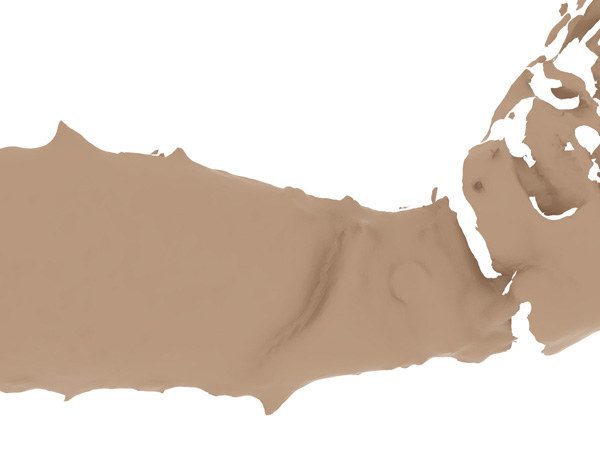
I imported the .stl mesh into Rhino and started cleaning it up and filling in some holes here and there, but ultimately, there just wasn't very much detail to work with.
Sorry, Lady Liberty!
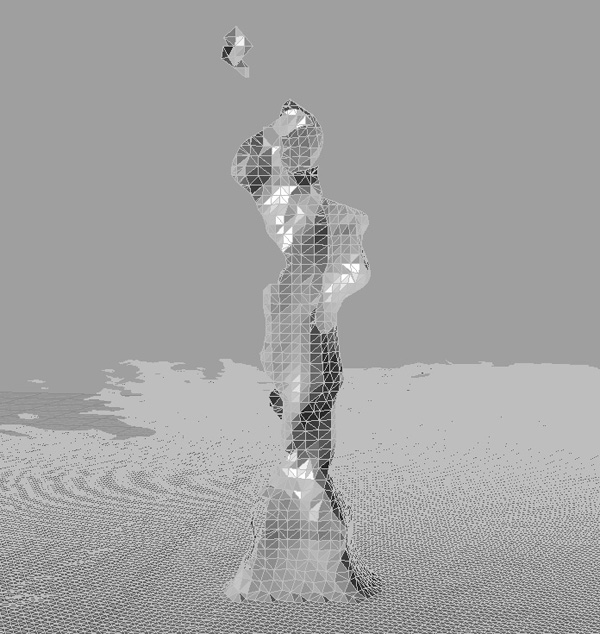
I wouldn't think that this emblem of American hope and freedom would mind too much being rendered in this more... expressionistic manner, but she's not really all that recognizable. And I don't know what France would have to say about this!
Second, I thought I might try to scan a crab leg, because crustaceans
a) are cool
b) are really complicated surface-wise
c) have a lot of variety in their surfaces
and because the guy at the grocery store wouldn't (apparently it's illegal) kill a lobster on the spot for me, and I didn't have time to go home and boil it to death... we can have our scanning subjects moving all around!
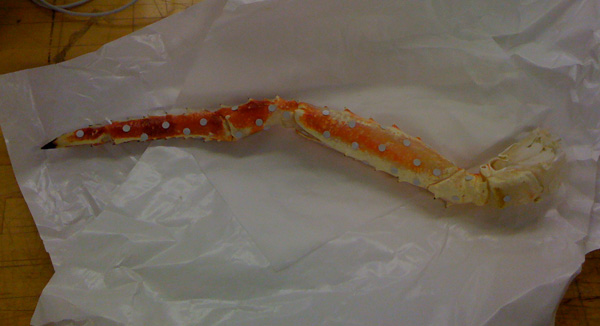
Because the joints in the crab leg work, and actually bend quite a bit even when you don't notice it, we ended up hanging the crab leg from a scaffold so that I could get all the way around it without having to accidentally change it's relationships.
Please note: seafood smells awful after a couple of days! My apologies to anyone who was in the lab on Saturday who got a whiff of this guy, because after a night in the studio, he sure wasn't getting any fresher.
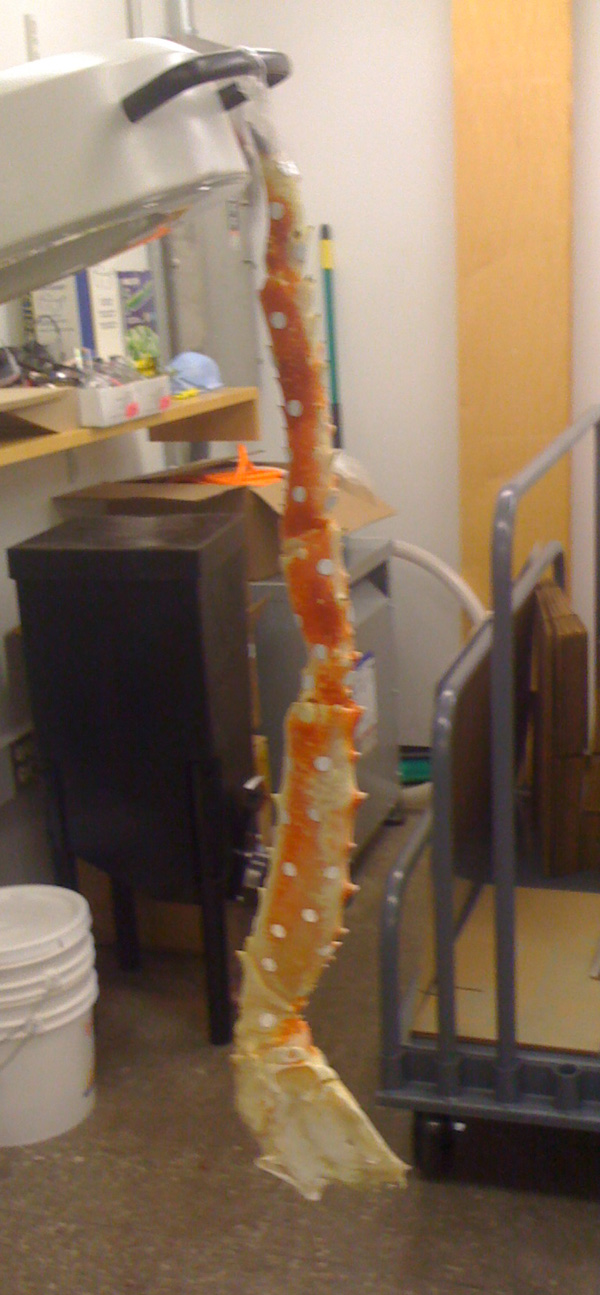
Much trouble ensued when trying to get a configuration for the laser on this one, perhaps because his shell was so smooth and constantly curved? I got the best readings by focusing on the meaty end by his shoulder, but that wasn't consistent for the majority of the leg... From this point on, the scan was not ideal!
It took a very long time to capture all the dots for this scan... Even though I tried very hard to get multiple dots in areas of high curvature, it turned out that the quickness with which the shapes took on hard edges made it almost impossible to capture the dots in their proper geometric relationships.
The most successful dot-capturing region was of course the flattest side of the crab leg - I was already eating into someone else's (Masoud's) scanning time at this point, so I decided to just scan one side of the crab leg and see how that came out.

Survey says... not bad! Of course, there is a lot of detail missing, but after a couple of tries of really not being able to capture much at all, this side of the crab's elbow actually came out rather well.
A detail rendering from the mesh imported into Rhino...
the little spikes on the edge aren't great, but they are indicating that the scan was starting to pick up some of that ridgier detail, which I hadn't expected.
All in all, this scan actually turned out pretty well, and indicates that if I'd spent maybe another five hours carefully going over every point and placing each dot again, it might have worked out really well.
Thankfully, the assignment was not to print out the thing we scanned, because my scans did not turn out as really interesting things that you might print.
I do like crustaceans, as I've mentioned above, though, so I thought I might try to print a lobster who has joints that move and wiggle.
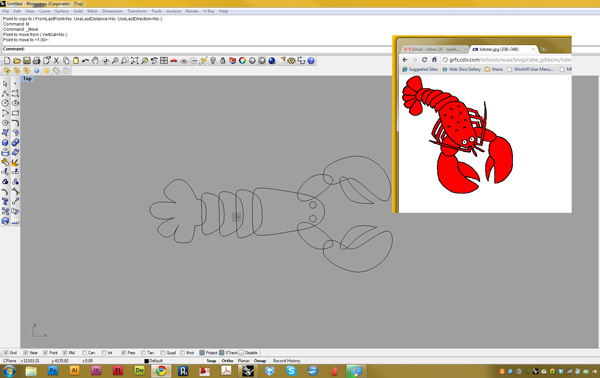
I started by drawing a cartoon of a lobster following an image I found on the internet. I simplified it even more, getting rid of the little tentacle leggies because the 3d print was going to be very small.
I then modeled each part of the lobster so that it might fit into the larger one holding it in a manner sort of like pop-beads, except that they wouldn't (hopefully) pop out... A ball joint, is I think the proper term.
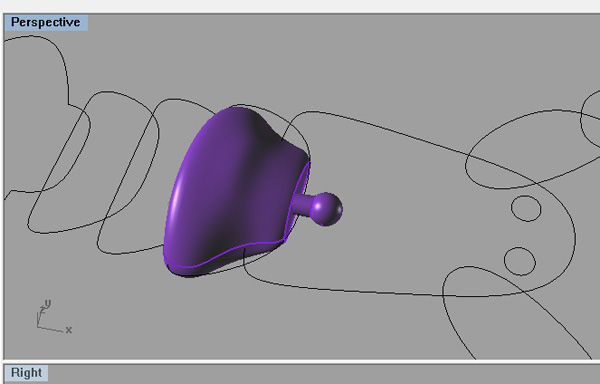
All of the joints used the same size ball and socket - sized so that I'd have about an eigth of an inch room between them for the scaffolding to fill in and later be dissolved out.
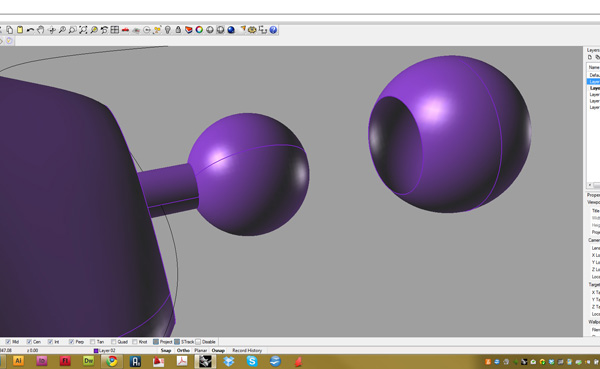
Fixing the joints in each case was not as easy as I'd planned, mainly because of the size.
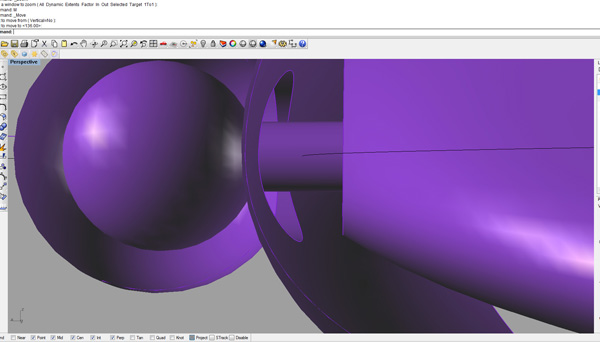
Here you can see how all the pieces fit together into one another.

If the pieces were to be 3d printed separately, this is how they might look... but of course I'll never see this in real life! It will always hold together perfectly!
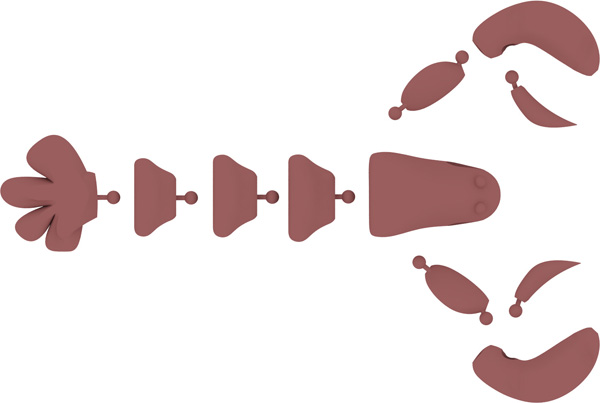
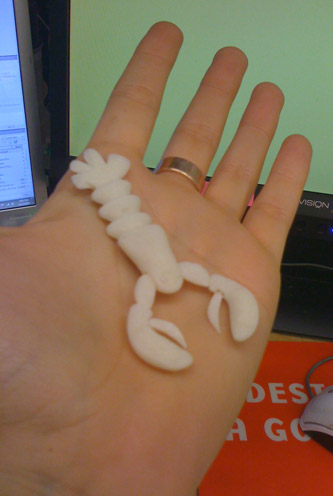
Here's how this little guy will look when he comes out, minus the color.
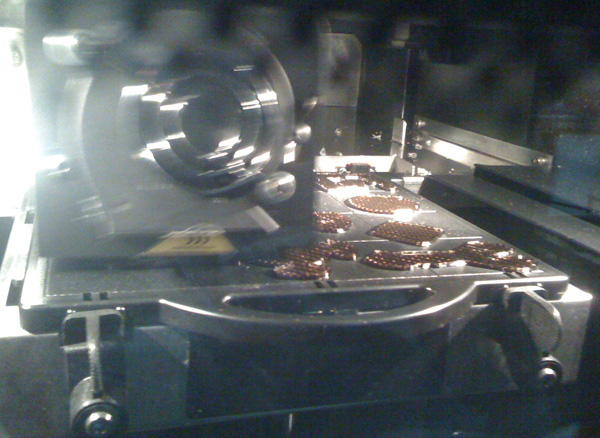
Here's a picture of the 3D printer starting to do its thing with a batch of our prints... mine is in the front right corner... When Masoud saw this, he was a little bit horrified, as the shape doesn't neccessarily scream 'lobster' off the bat... oops!