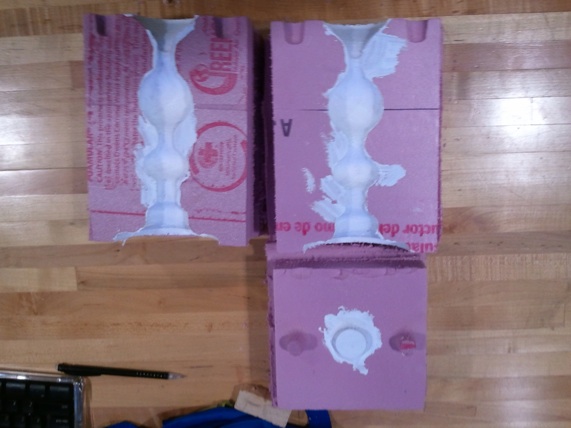
Moulding and Casting

What Should I Make ?.......

Deciding what to make was half of the work. My Initial Thought was to make a rubber latex case for my cell phone.  But I quickly abandoned that idea due to the multiple moulds I  would need to implement in order to create the control holes. These were to be very very exact for the case to function correctly (microphone, speaker, camera, usb, etc).

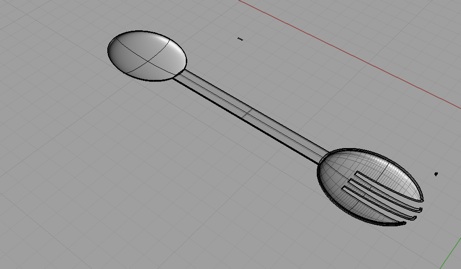
My second concept was to design a Spork - which is a Spoon and Fork in one. I spent several hours designing this - (result can be seen on the right). Alas, I found out that I could not use any wax to mold my design due to multiple culprits stealing the supply (you know who you are !).

Because I wanted my Spork to very smooth, I could not use the foam which was full of holes and had a rugged surface.

My Spork joined the rubber latex phone case in the graveyard of unimplemented “cool” projects.


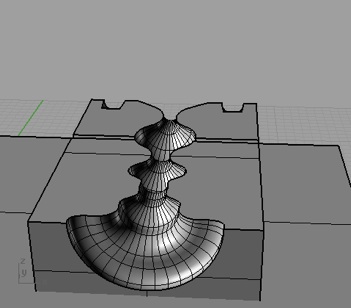
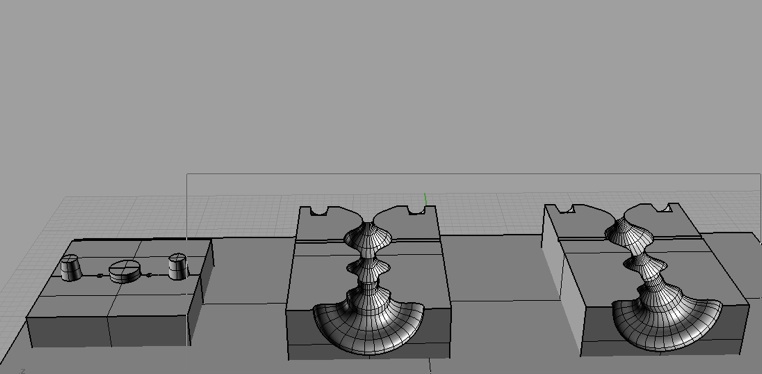
2nd Try - The “Ghostly” Candlestick

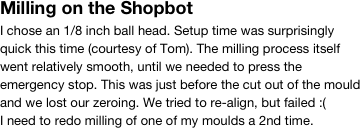
After abandoning my initial concept, I decided to design a candlestick. and implemented my design in Rhino. The candle stick required a 3 piece mould. The bottom mould would be used to create an imprint for the candle to rest in.


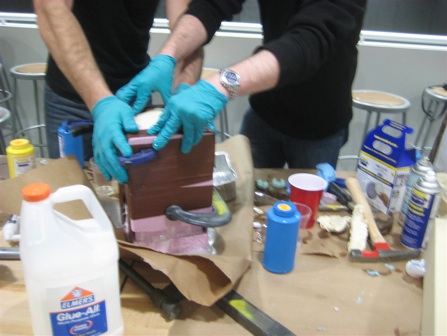
Foam not thick enough - Enter Gorilla Glue

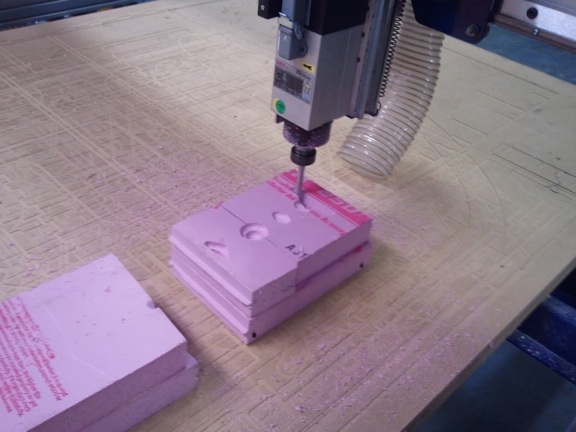
The foam in the shop was not thik enough for my candlestick so I had to glue 2 pieces together. I used Gorilla Glue and a large amount of weights to pressure it while it was drying. I hope It would dry within a few hours.


After 3 hours I saw that the glue was still damp, so I added screws in order to keep the foam pieces from detaching during the milling process.


Milling on the Shopbot
I chose an 1/8 inch ball head. Setup time was surprisingly quick this time (courtesy of Tom). The milling process itself went relatively smooth, until we needed to press the emergency stop. This was just before the cut out of the mould and we lost our zeroing. We tried to re-align, but failed :(
I need to redo milling of one of my moulds a 2nd time.
Pink Foam + Plastic = Evil
I wanted to use Hydro-stone, and in order to achieve a smooth finish I painted my foam with primer paint. Instead of using the Hydro-stone,  
but Constanza suggested I use Smooth-Cast 305 I sprayed.I cut a square on a piece of foam by using an exacto knife and poured in some smooth-cast. It seemed that the foam was hardly deformed, so I decided to go for broke and pore smooth-cast into my mould.
I used duct tape and clamps to connect my moulds together, mixed the smooth cast and poured it into my mould. Alas, I did not seal the seams between the 2 moulds and the bottom mould, which caused some of the material to leak.
After 10 minutes I saw that the smooth-cast was generating vast amount of heat (a lot more than my test cut). I touched the plastic and it seemed that it was pretty hardened. So I detached the moulds. During the detaching process, the candlestick broke in 2 places - the ones which were the thinest. I do no know if this was because of the reaction with the foam or other reasons.
Behold - The Ghostly Candlestick 
After all of the abuse, you can see what came out of my poor candlestick. It has pieces of primer and foam stuck to it, and the plastic is not clear and has a rugged finish. I tested both Epoxy glue and super glue. The Epoxy did not work well, but the super glue did a wonderful job. In the future, I plan to sand the candlestick in order to give it a finer finish.