SensorChips: An Automated Microblogging Platform
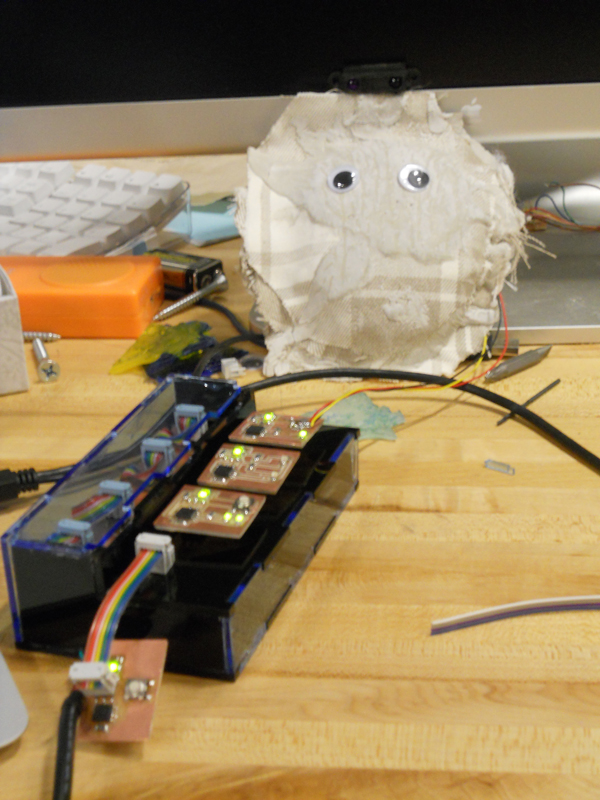
Meet @sensorchips. Doesn't he look human? No? Well he isn't! Sensorchips is the public face of the automated microblogging platform I created as my final project for this course. It turned out well!
The system has three node types:
- Message Nodes - static slots that can forward the data in value nodes to the trigger node whenever a tweet has been requested.
- Trigger Nodes - static slots which collect the components of the tweet, compile the final string, and send it to the computer.
- Value Nodes - modular nodes which contribute to the tweet and send off the "tweet triggers" to the message and trigger nodes. A Value node can have the ability to generate a message, trigger a message, or both.
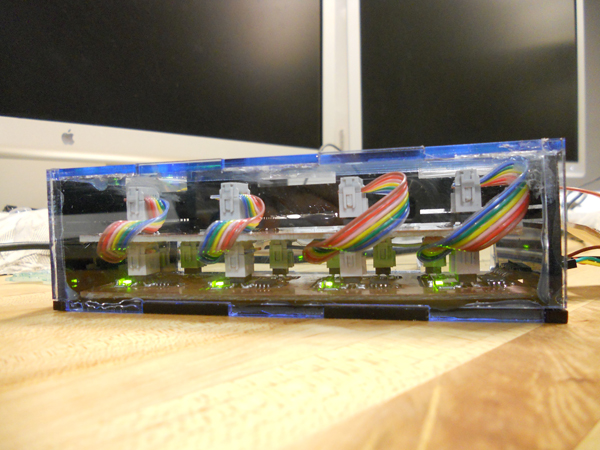
The message and trigger nodes are both considered "reciever" nodes because they recieve various types of inputs from value nodes. The value nodes can take on many forms, so long as they know how to speak to message and trigger nodes. For this iteration I created a reciever base with one trigger node and three message nodes, and four value nodes (light, proximity, 4-state button, and a simple "trigger" button)
Constructing the Chips
It turns out that milling a lot of little boards takes just as long as milling one large board. I used the mill a lot, but luckily I did so early in the week so I didn't get in anybody's way.
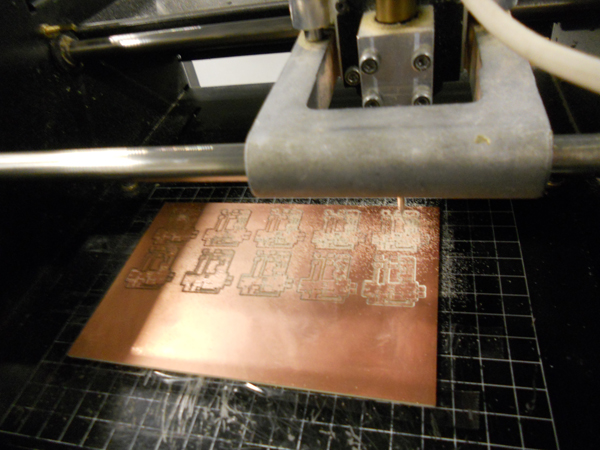
Milling went pretty directly. I noticed that the left hand side of both Modellas consistantly produce shallower cuts than the right hand side, which implies that the beds must not be level.
Since the value nodes would be "set" onto the message and trigger nodes I had to do a through-hole female header. This woul dbe the first I had done through-holes, and since I was doing multiple copies of the same chip I decided to use the drill press rather than try to align all the images. When using the drill press be sure to make a small dent where you want the hole using a nail (or the tool whose name I'm blanking on). This will guide the bit to exactly where you want it, rather than letting fate decide.
The reciever board:
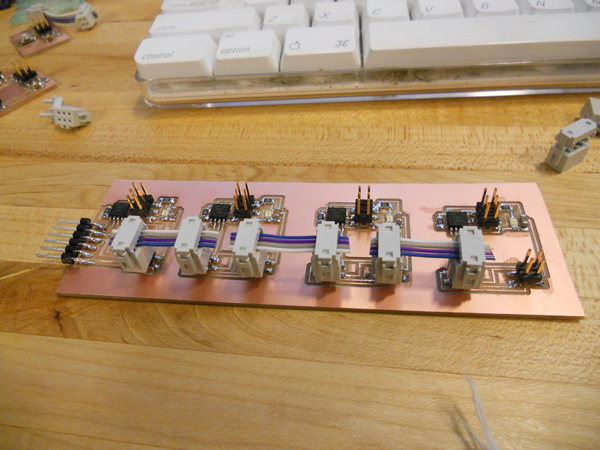
Since I needed to have space to "place" the value nodes onto the reciever board, I had to make an extension board which didn't have annoying circuits in the way:
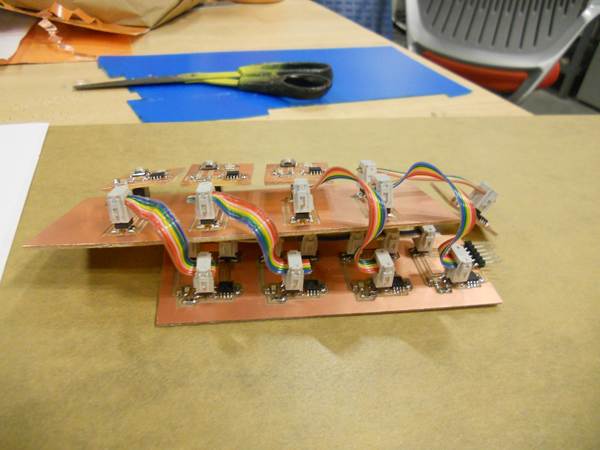
These extensions just forwarded the connection lines to more flexible locations.
The Software
My system had a few tricky aspects. The reciever nodes all had to communicate to one another, in addition to communicating with the computer. I used a single bus line for both TX and RX between the nodes to achieve this. The controller node was the only one to initiate communication; the message nodes only talked when spoken to.
Each message node also had to be able to communicate with a value node which may or may not be there. The value nodes also had to be able to communicate both values and triggers. This meant that I had three lines of communication between reciever nodes and value nodes: trigger, value in, value out. When a message node was asked for its payload by a trigger node it would check to see if there was a value node, request that value if applicable, and forward it's information back to the trigger.
Timing ended up being only a minor issue in all this, despite the relatively rule-less network communication. This was a nice surprise.
Communication with twitter had to be done through a physical serial connection, although the next step is to add all sorts of wireless functionality to this system. Python picks up any tweets sent to it and uses Twitter's API to update the status (I have a 20 second rate limit).
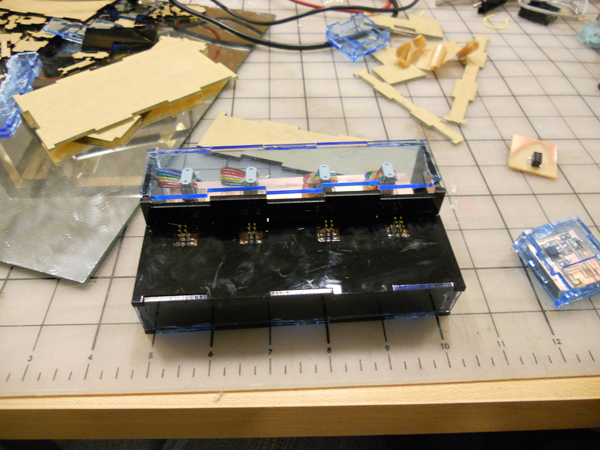
Making the Case
Constructing the case brought several first time experiences. For one, it was the first time I had attempted to make a case. For another it was the first time using anything but cardboard and pumpkins in the laser cutter. It turned out as well as I had hoped, although wasn't perfect. I learned that DXF is the best way to maintain proportion from Adobe Illustrator (which is apparently why my tie fighter failed way back in the first week). Before I realized this, though I had already printed out a mini version of the case, so I put it together to see how it would work.
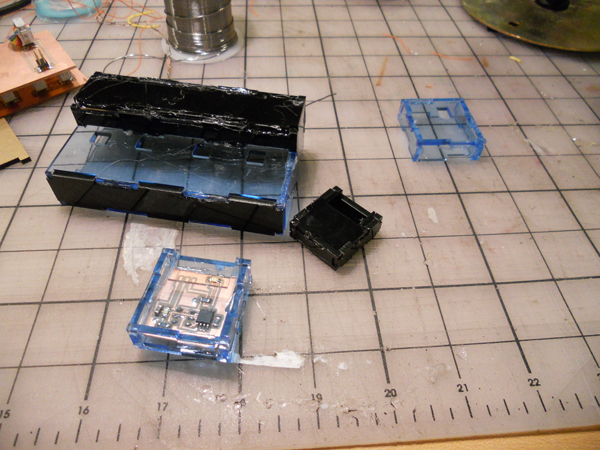
After I corrected the mistake, I printed and constructed the full size version. Of course there were a few errors in the design and I had to take the bandsaw to some of the sides to trim them down. I also found out that when I milled the connector board (the one that forwarded the ports) I still put them too close together, so I wouldn't be able to use the case around the value nodes like I had hoped.
The final project works like a charm though! And I even included some clear sides that the blinkey LEDs can shine through!