| 04 // Make something big! - 3D Marble Maze |
|
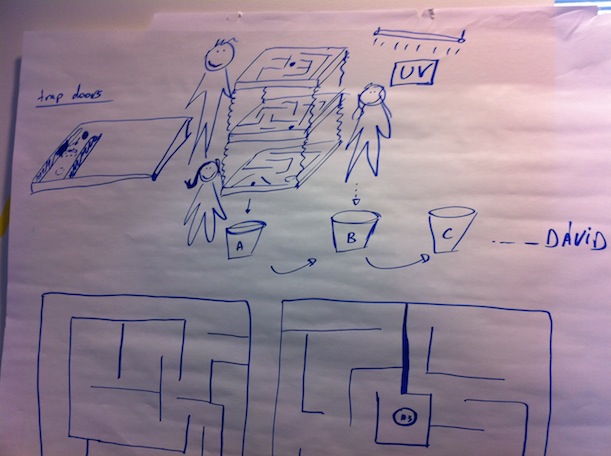
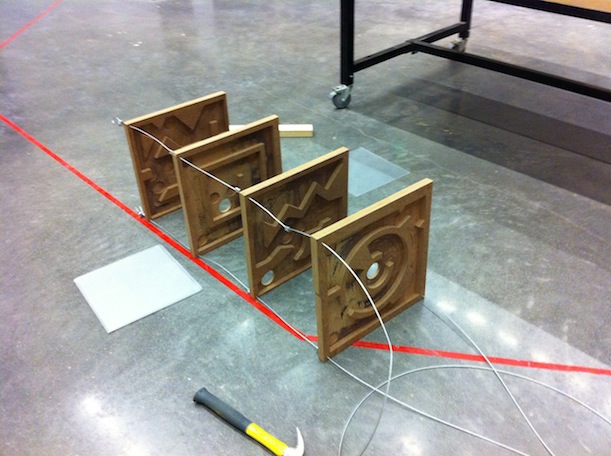
This week due to the large pressure felt by the upcoming sponsor week I decided to do a project that would make people laugh to release some stress. 3D Marble Maze! The game is the same as the old Marble Maze that you have to tilt to get the marble from start to finish. Of course looking out for the traps! The 3D version of the game consists of 4 levels, which are controlled individually by a different person. All the levels are supported by 4 wires running through all of them, thus mechanically connecting them. This connection forces the players to collaborate ... otherwise ...
Without further overdue here Make something big version D'vid ++ MUSIC!! |
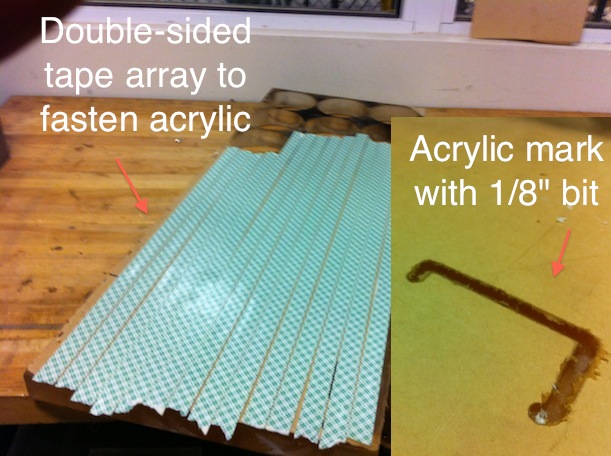
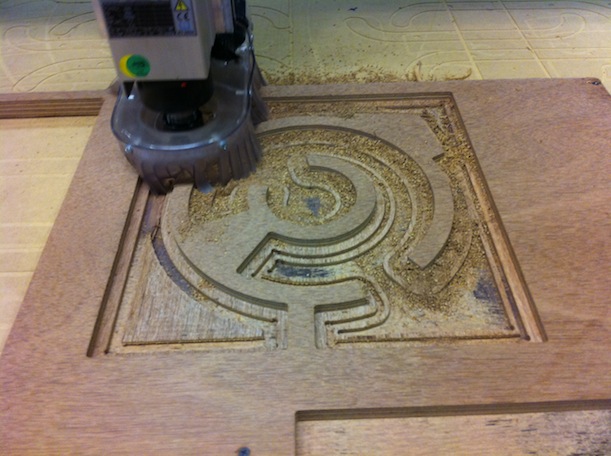
My initial sketches inspired the final design, during the design process I have not changed direction, which I consider a major improvement compared to the previous weeks. However the material did: my original idea was to make to whole project from transparent acrylic and at the put LEDs into the edges of the acrylic so the game could be played in the dark. Unfortunately the ShopBot is not a perfect candidate for the job. For acrylic you have to go REALLY slow (2000 rpm, 8 inch/min) and to prevent the material from melting you have to spray it constantly with water. Before starting the project the software estimated 17hrs for my design, so I decided to go with wood...sad sad sad. Check out the pictures from shopbottin' acrylic, it works, just very slowly. After recovering from lethargy I moved onto wood and I found the most beautiful wood lying in the basement of the Media Lab: Mahagoni. Mahagoni is great for the ShopBot: you can go up as high as 18000 rpm which cuts sharp edges fast. Sometimes (not that often) bigger junks of splinter would start to peel off but it does not hurt the aesthetics. |
|
|
|
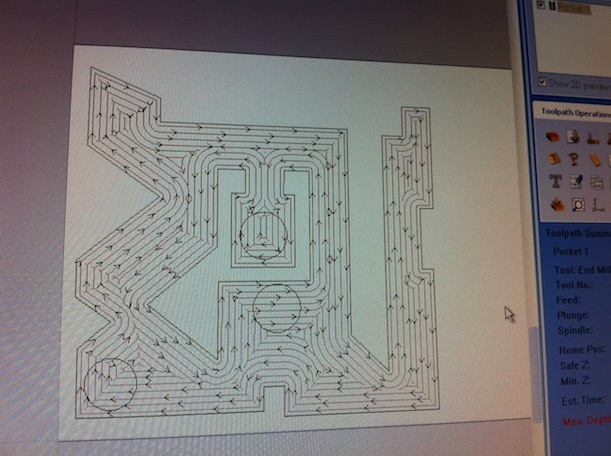
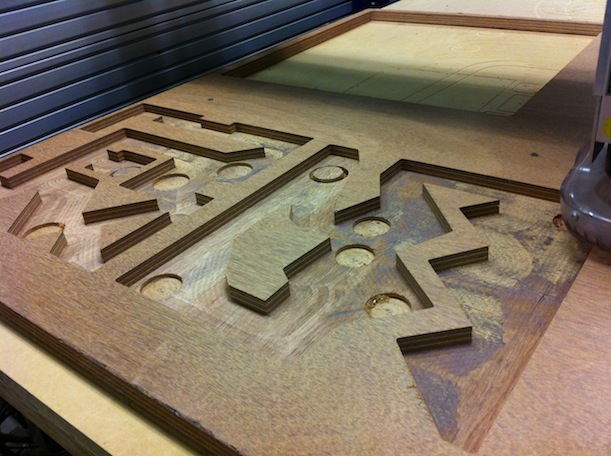
I designed all levels and the clamp in Rhino 4. CLICK to download design files! On Amazon I ordered 1" marble balls to have some fun for 10 USD with shipping for 30 of them. Since I knew the ball dimensions beforehand it was easy to design a maze that was hard enough to navigate around the traps but still manageable for everyone. My pockets are 0.7" deep and my traps are 0.85" deep. The Mahagoni itself is 1" thick. This way the grooves are deep enough so the balls cannot get out unintentionally. Some important "bit math": if you have a 1/4" bit than your pass depth (the amount of depth carved in every pass) should not exceed 0.25", the size of the bit itself. Therefore my grooves need 3 passes every time. For the 4 levels it took 90 minutes to ShopBot. Some important points:
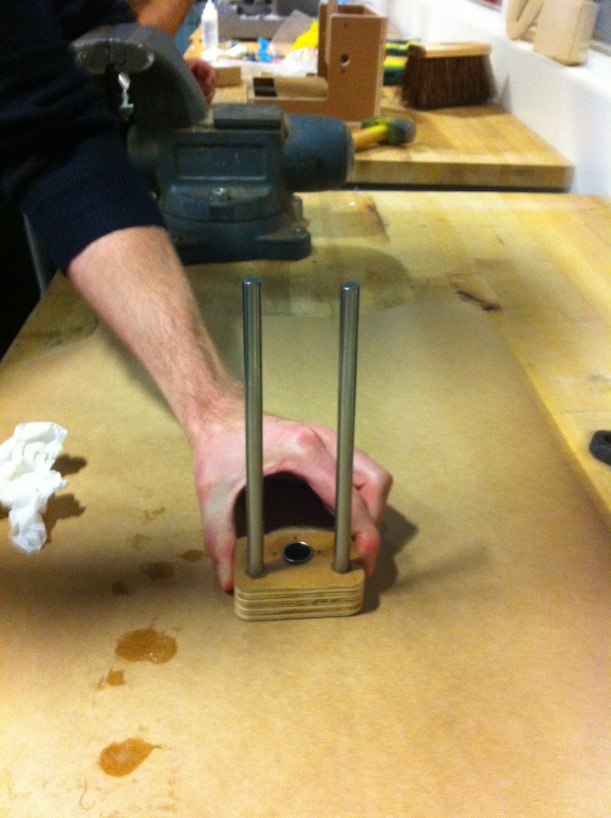
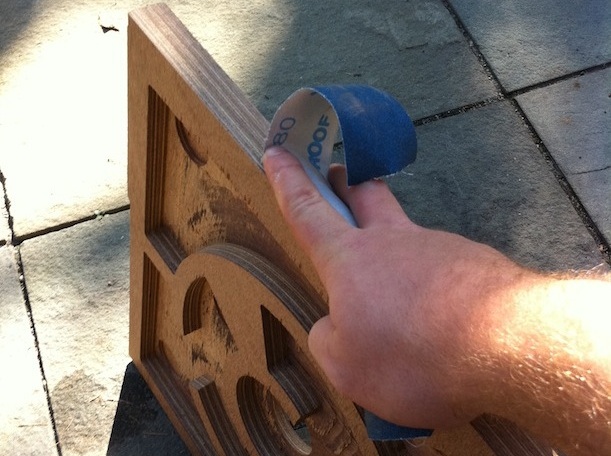
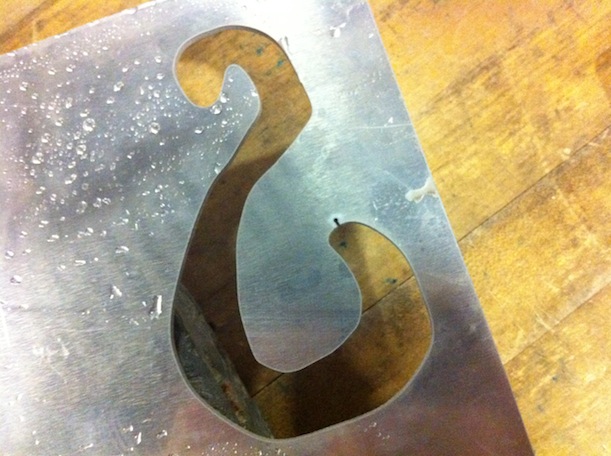
After the surprise that actually everything turned out good I sandpapered the whole surface to get the splinters off the material. After some cleaning up I drilled holes into every corner of every level and led a 1/8" wire through them, which I fastened with a wire grip under every level. At the top I needed a clamp to join all 4 wires together. So I returned to the mines and fabbed a hook with the help of Matt Blackshaw from Aluminium. After I got my piece I sandblasted the part so it doesn't look shiny. |
|
|
|
|
|
|
|
|
|
On Thursday evening I helped build the Z-Axis of the Mantis Machine, based on the tutorials David Carr provided for everyone. It's worth mentioning that the epoxy glue hardens in 30 mins, which can be only 20mins, so you have to watch out before the texture gets gel-like. The tutorial can be found here! |
www.flickr.com
|