Week 4: make something big
PART 1: novel architecture
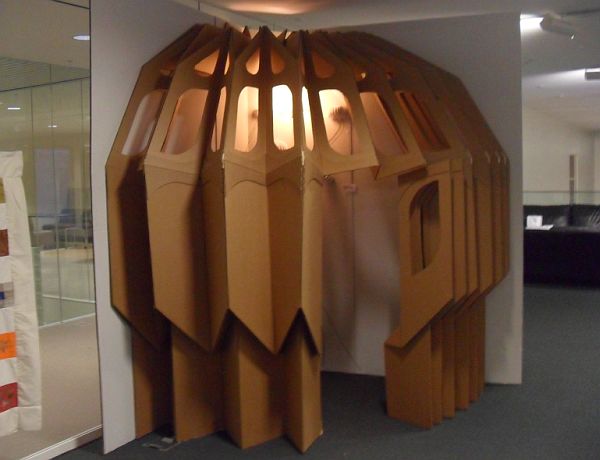

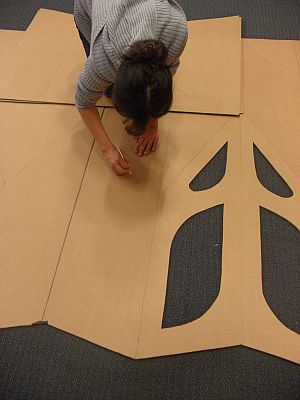
Before the assignment began, I was in progress on a giant pop-up book out of corrugated cardboard. The idea was to experiment with scale by making something normally small (a book) into something very large (a room). I used 4ft x 8ft sheets of cardboard, which were too large for the BEAM laser cutter so I ended up cutting all the pieces by hand using an X-acto knife. This process took about 8 hours to cut 12 pieces, the majority of the time being spent simply measuring and marking where to cut.

PART 2: cutting cardboard on the shopbot
After being introduced to the shopbot, I wanted to see if all the cutting could be done with the milling machine.
I started with a 1/4" end mill with 2 flutes, 11,000 rpm rotating speed, 140 mm/s feed rate and 60 mm/s plunge rate. The result was this extremely frayed cutting edge:

Though the cardboard is 0.125" and I set the cut to 0.13", the cardboard was also not cut all the way through. Then I set the cutting depth to be 0.19" and found a new end mill that was also 1/4" but was much more sharp. Keeping the tool settings exactly the same, this new end mill made a much smoother cut edge on the upper surface but still failed to cut all the way through. My guess is that the cardboard is either bending out of the way of the end mill, or that the cardboard thickness is thinner on the edges, where I measured, than in the middle.

Then I used a cut depth of 0.22" which is almost double the thickness of the cardboard and the mill cut completely through. While there was a clean cut on the top surface, the cardboard was still extremely frayed on the bottom surface.
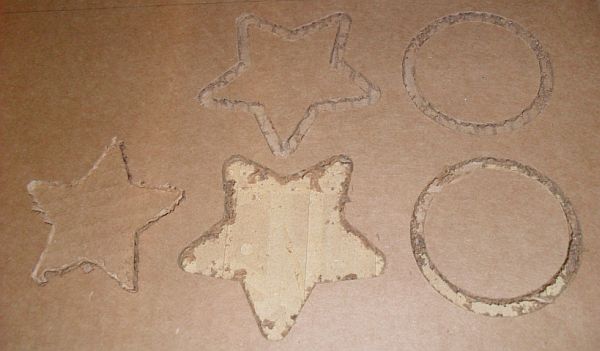
I experimented with decreasing the rotation rate and increasing the feed rate, so that the end mill spends less time cutting in the same location, but the results were actually more frayed on both the top and bottom sorfaces. I then tried stacking a sacrificial layer of cardboard below the top sheet, which actually reduced the fraying on the bottom surface of the cardboard but still not completely. Finally I tried using a smaller 1/8" end mill for more precise cuts. The smaller mill actually resulted in even worse quality since I had to do multiple passes. With ever pass the cardboard became more and more frayed.
Lessons Learned:
- Use a sharp, new end mill. The sharper the cut tool, the less fraying you get in the cut. If you want to cut cardboard, get a new bit and use it only for cutting cardboard so that it does not dull.
- Cut as few passes as possible. The cutting edge becomes more frayed with every pass so it's best to use a larger end mill that requires only one pass.
- The top cut edge is always smoother than bottom cut edge. Plan your cut accordingly so that, if possible, only the top cutting edge is exposed.
- Use a sacrificial layer of cardboard for a smoother bottom cut edge. Stacking a second layer below the main piece of cardboard helps prevent fraying of the bottom cut edge.
- For super smooth cut edges, use an X-acto knife!
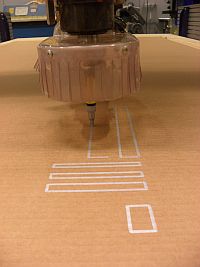
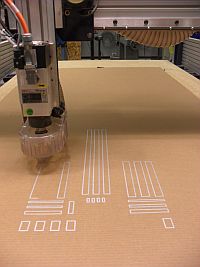
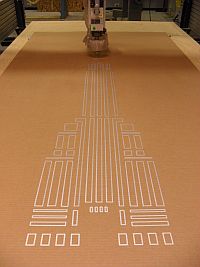
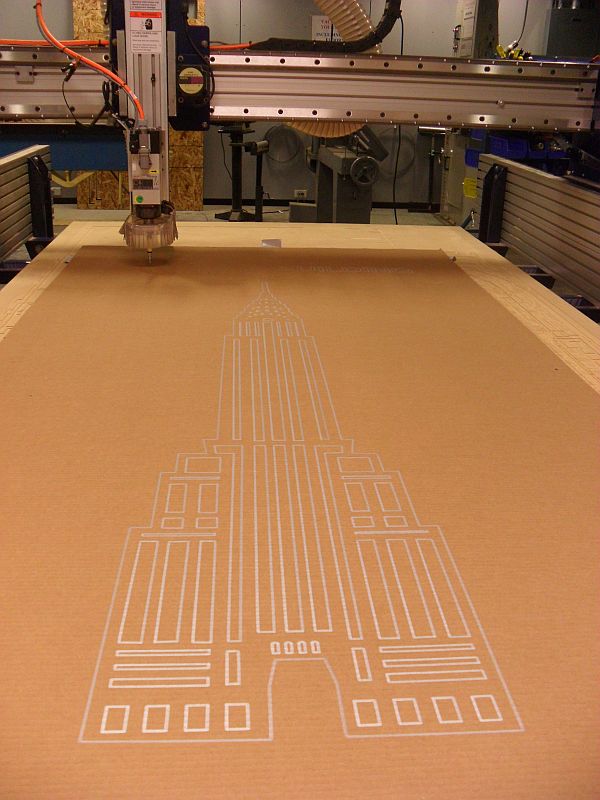
PART 3: How to draw with the shopbot
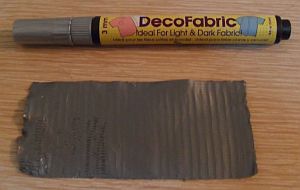
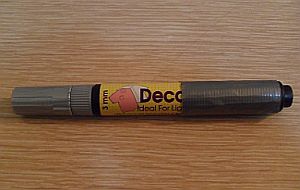
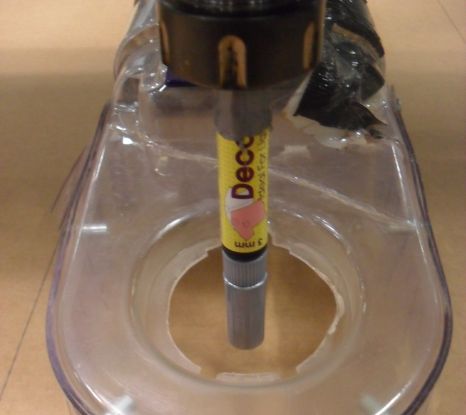
Materials: DecoFabric marker*, duct tape, 5/8" chuck
*I chose to use the decofabric marker because it has a "springy" tip, so that if you press down on the marker, the tip retracts instead of snapping. It also happens to be just smaller than 5/8" in diameter, which made it perfect for placing in the 5/8" chuck with the help of some duct tape.
1. Secure your material to the shop bot so that it is evenly flat. If your material is bowed, it make break your marker or make unintended lines.
2. When preparing your path file in ShopBot Partworks use the following settings:
Cutting Depths:
Start depth = 0.0 in
Cut depth = 0.05 in
Tool:
Spindle rate = 1 rpm (Partworks wont allow 0 rpm)
Feed Rate = 60 mm/sec
Plunge rate = 20 mm/sec
Machine Vectors:
On
3. Wrap the marker with duct tape twice, so that it fits snugly into the chuck.
4. Place the marker, chuck and holder into the shop bot as you would with a regular milling tool. Do not tighten too much so that you don't break the marker! Also, since you will not be rotating the spindle, do not engage spindle rotation (don't put the key back in the machine)
5. To set the Z axis, take the cap off of the marker and place a piece of paper under the pen tip (so that when the marker touches the drawing surface, it wont mark your final piece).
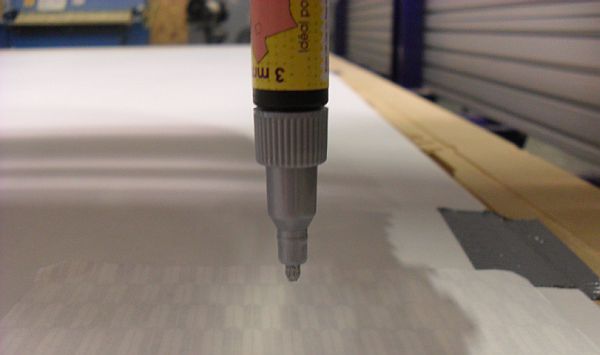
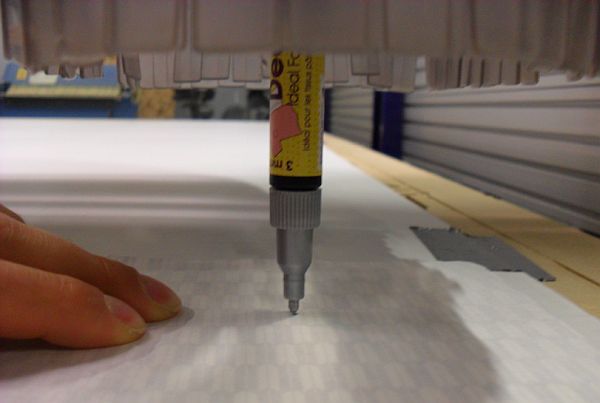
6. Load your file and begin the print job. When the program asks you to begin spinning the spingle, DO NOT press the button to let the spindle run, so that the marker does not spin during drawing(even at 1 rpm).
7. Watch the Shopbot draw!
Back to index