Laser Cutter
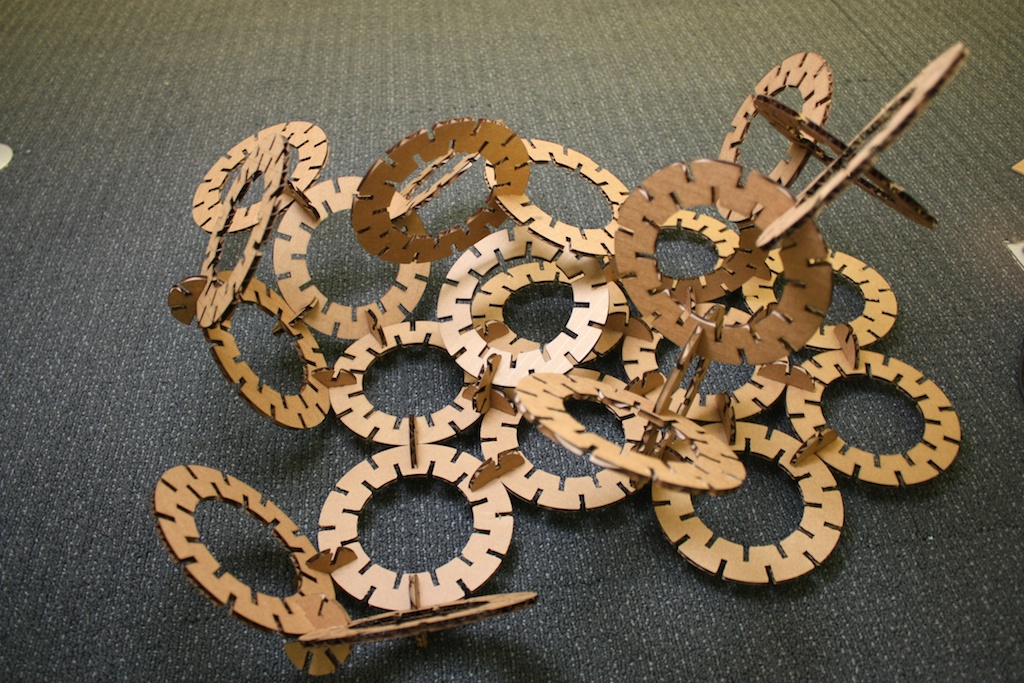
Complete assembly
This week our assignment was to create a snap-together kit from laser cut (or otherwise) materials.
Inventor
I've been doing this fairly regularly now, but I haven't quite settled on the best method. This is my current procedure...
- If it's a simple part or a small assembly of parts, you can create a drawing (IDW)
- Which can be exported as a PDF or as a DWG
- Which can be fed directly into Corel Draw and cut out
I've had bad luck with the exported PDFs + Corel Draw, but good luck with exported DWGs. Once in Corel Draw, you can arrange the different parts to make the best use of the stock.
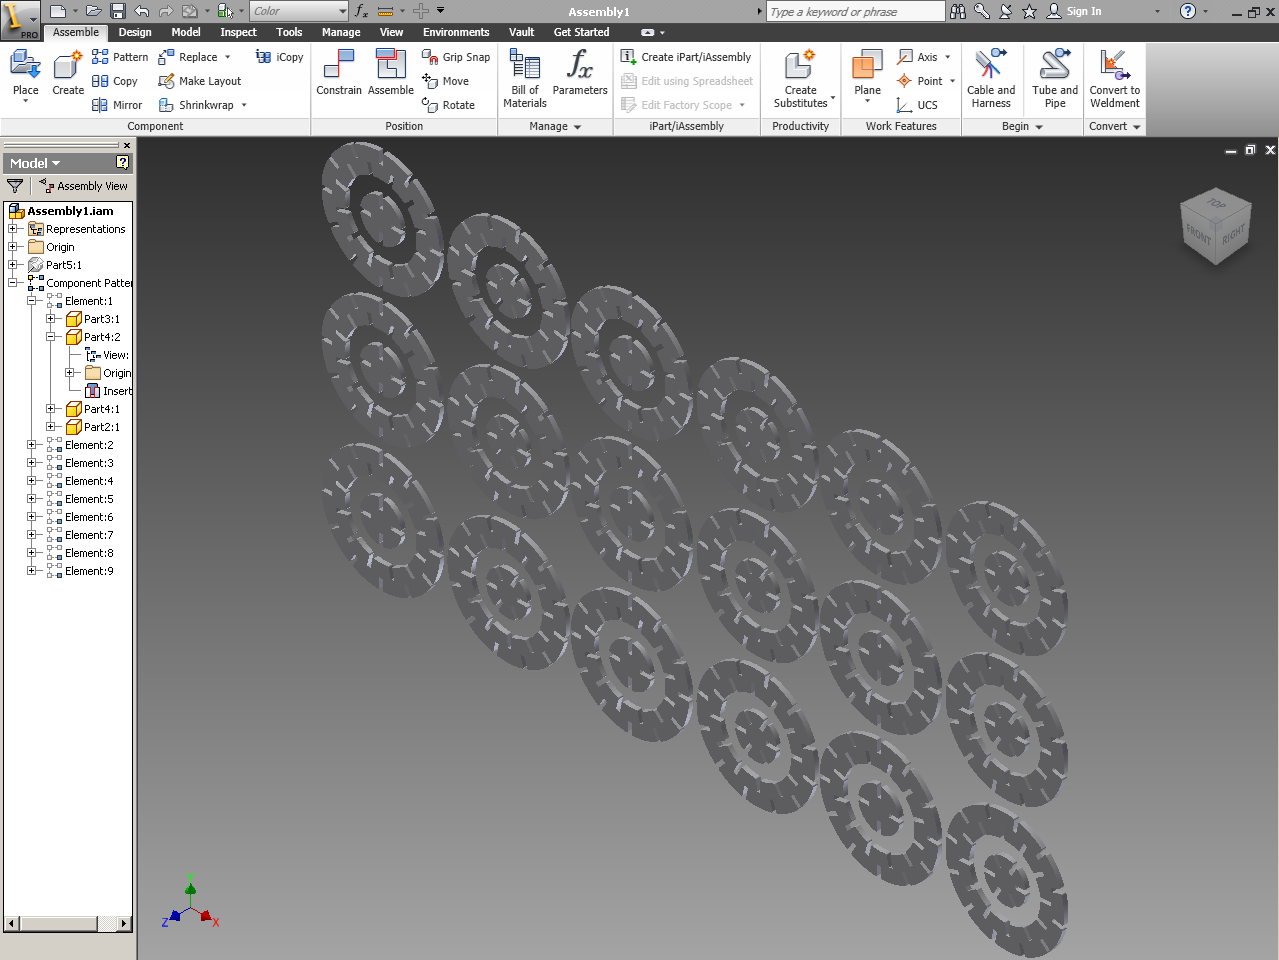
- If it's a more complex assembly - many many parts
- I create another assembly with a dummy "stock" part which is the dimensions of the stock I'm cutting the assembly out of
- I constrain all the parts to the stock as I want them cut out
- I make a drawing (IDW) of the new assembly
- As previously, I export a DWG
- And cut out with Corel Draw
Now... I'm not satisfied with this method, because the machine has a kerf, and in my models, I don't account for kerf. Jonathan Ward suggested that for each part, I make a dependent part, where all cut dimensions are adjusted to account for kerf. Then I would repeat the procedures as described above. This is a lot of work - haven't tried it yet though...
As a contrast, Jonathan Ward exports each part as a DXF and imports into Rhino where he arranges parts on virtual stock and cuts directly from Rhino.
For this project, I created a few simple parts in Inventor, then patterned used the second method (I made a "stock" part and arranged them in an assembly).
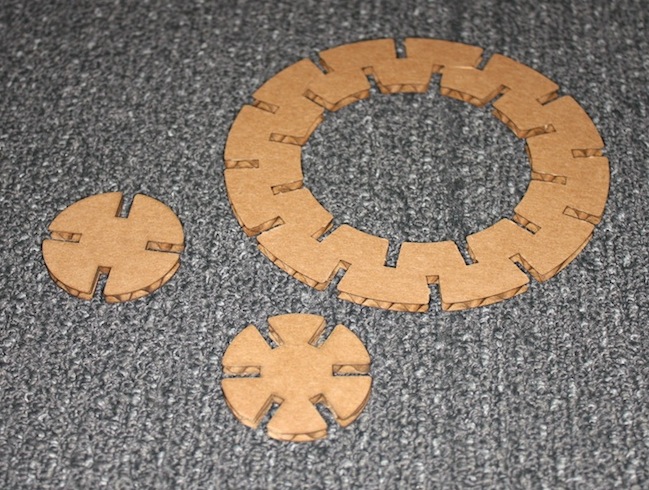
Snap-Together Construction Kit
 |
 |
 |
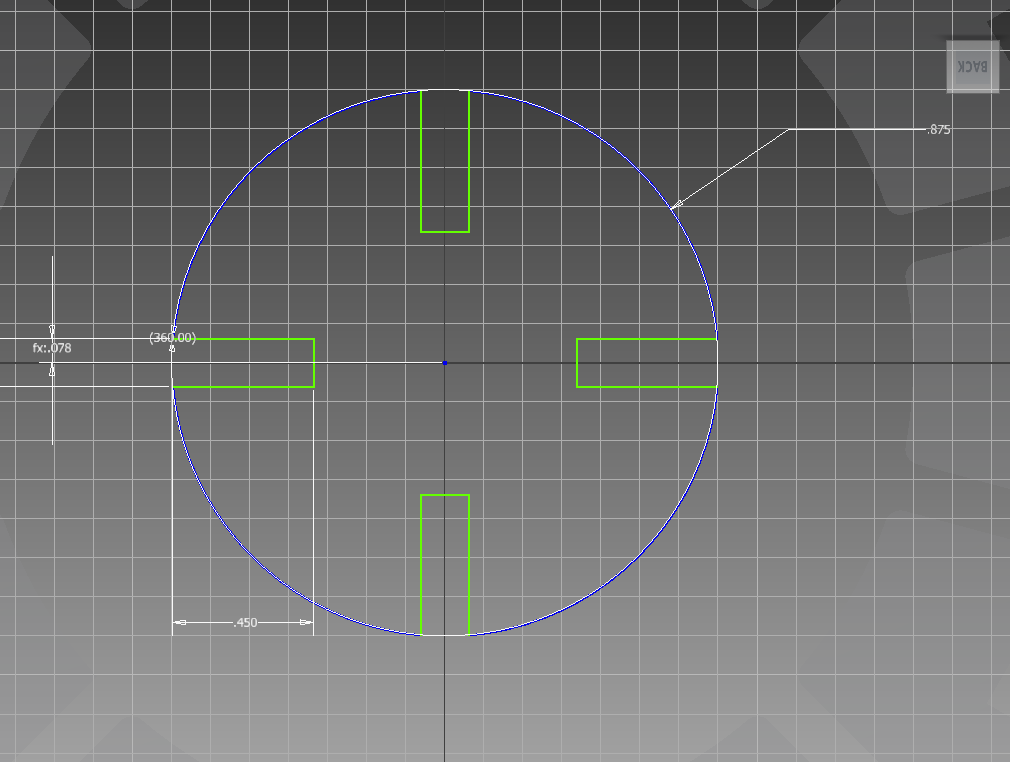
Since I was careful to keep crucial dimensions parametric during the design of each of the construction elements, I was able to iterate a few times varying the tolarance and sizing of the parts very easily.
Complete assembly
The parts were cut out from Corel Draw at 100% power 20% speed. Some of the parts were not cut entirely through. They were all on the lower right of the workpiece. My hypothesis is that the telescope is defocused a little at that distance and does not have enough power to cut through.