Using the Vinyl Cutter to Make PCB Circuits
So for several weeks now I have been meaning to try using the vinyl cutter to cut copper sheets and make PCB circuits that can be stuck onto anything. I love the concept - it seems so flexible and has so much creative potential, but so far I have had absolutely no luck in applying the technique! Although the workflow seems straightforward, I've found that in practice, making PCB circuits this way is anything but. Here's the ideal workflow as I understand it:
In reality, I found it very difficult to get this workflow to work. In cutting the traces, I found that either I didn't have enough force to cut all the way through, or I had applied too much force and was destroying the circuit I was trying to cut. With the few good boards that I managed to cut out, I found that using duct tape to transfer them didn't work because the traces wouldn't lift out of the copper because they hadn't been completely cut through. Instead, I cut around the entire circuit, applied it like a sticker to my final surface, and then tried to weed out the unwanted copper from the circuit. That didn't end up working either because the copper would rip in the wrong places, destroying my traces.
I think there is a lot of room for improving my technique here - any suggestions? Help!
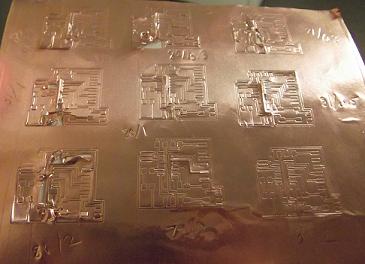
This is the sheet of copper where I tried to find the optimum vinyl settings, varying both the force and the speed. I found that the slower I went, the greater the force I could apply (thank goodness my circuit was small!) but it was still a struggle to find a setting that completely cut through the copper without mangling it.
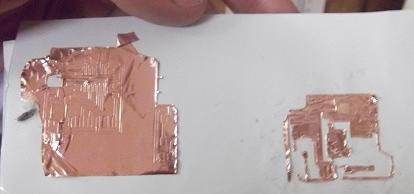
This is the final surface I tried to transfer the copper to. I think my patience ran out before I managed to finish the job. More to come on this project!