Week 1: An Introduction to Vinyl and Laser Cutters
This week we were introduced to vinyl and laser cutters, and our assignment was to use the laser cutter to make a press fit kit, and to play around with the vinyl cutter. The results were awesome - I love being told to play at MIT!
Stick With the Vinyl Cutter
The vinyl cutter is easy to use with the Fab Modules that convert image files to paths for the Roland Laser Cutter to use (file extension .camm). The vinyl comes in a variety of colors and, once cut, can be stuck onto any surface, like a sticker. It's basically the ULTIMATE STICKER MAKING MACHINE.
No, seriously, I mean it. Or, almost - my first attempt was to cut a Celtic triangle pattern that I found on the Internet, but as it turns out, that was too complicated (see Things I've Learned for more details about that mistake!). Like all Celtic patterns, everything is intertwined, which doesn't come out so well in sticker form. But I'm pretty sure that's just because I haven't figured it out yet - there has to be a way! More to come on that front.
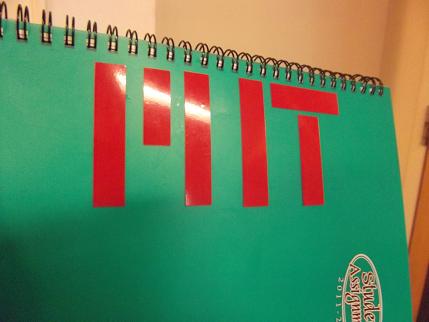
But in the interest of time, I tried to make something simpler with the vinyl cutter. And what could be simpler than the MIT logo? (After all, you can depend on an engineering school to design something very mathematical and regular!) There's a picture of the sticker on my agenda below - in the end I took some artistic liberties with the logo, but you can still tell what it spells.
It's worth explaining that to transfer the cut vinyl from the backing to the final surface, you need to use masking/duct tape. Apply the tape to the vinyl colored surface and peel away to remove the sticker. Then apply the vinyl and the tape to the destination surface, press firmly, and then very carefully pull the duct tape away, leaving the vinyl behind. Depending on how intricate your design is, you may have to do some weeding to get the sticker out of the vinyl (weeding just refers to the process of removing the vinyl you want from the vinyl you don't want).
Lessons from a Laser
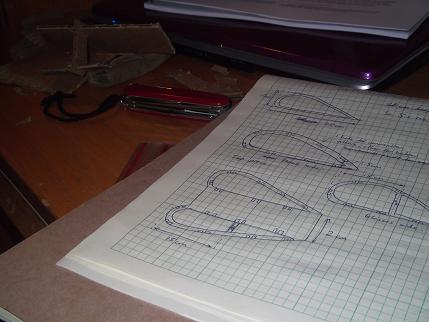
My experience with the laser was a lot more challenging than the vinyl cutter, but definitely rewarding! My design progressed through a couple of stages; first I wanted to make a hanging basket to put on the side of my bunk bed so that I could keep my books and glasses case within reach. My design was too complicated, though (sound familiar?), so I came up with an alternative - dodecahedrons! More specifically, I made hexagons and octagons with tabs and corresponding holes on every side so that I could fit them together to form dodecahedrons. (There are some pictures below to better illustrate what I'm talking about.)
The trouble came with the software.
...[Pause for dramatic effect. Lightning. Thunder.]...
Okay, so it wasn't actually that bad. I used Autodesk Inventor to design my pieces (I drew them and saved them as .dwg files) and then opened the drawings in AutoCAD in order to print them with the laser cutter. I chose to use Inventor because I find that it has a much better user interface and it is easier to make parameters (so that if I change the dimensions of one tab, all the tabs change).
When the drawings were opened in AutoCAD, however, they are treated as blocks, and so are printed on the laser cutter as Raster images. There are two drawbacks to this - I can't apply layer settings to blocks in AutoCAD, and the laser cutter prints Raster images slower than a Friday afternoon calculus lecture. I was extremely lucky to get help from a grad student named Toshi (if you're reading this, thank you again!) who helped me figure out what the problem was and to change my procedure so that I could successfully cut my pieces as vector images (which is faster because instead of printing individual points as a Raster image, the laser cutter follows the lines of a vector image).
Here's my procedure:
- Open the .dwg file in AutoCAD - the image will be a "block".
- Type "Explode" and select the image; when a collection of blue squares marking the points appear, type "Join".
- Copy the image into Model space (it's the first tab on the bottom left hand corner of the screen).
- Create a new layer called "Cut". Change the color of the layer (choose one of the primary colors) and set the line width to 0.
- Set the image that you've copied over as a part of the "Cut" layer.
- Create a 36" x 24" square and place the image inside that square.
- Use page setup to configure the color mapping settings to the power, speed and frequency that you want. Doing this through page setup before you open up the print window will save your settings so if you want to print the image multiple times (i.e. if you're tweaking dimensions or making multiple pieces) the settings will be saved for the entire session.
Pictures! (If you were scrolling through the text, STOP HERE!)
|
|
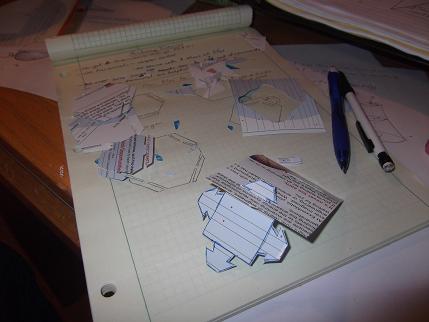
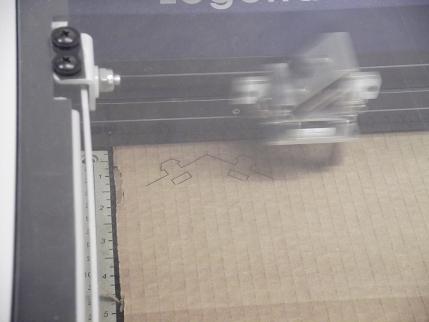
Debris from my first night of brainstorming - I cut out some cardboard to get an idea of how the slots would work, and you can see some of my early sketches from my hanging basket idea. |
Now my brainstorming has morphed into something with tabs more closely resembling the final product. |
|
|
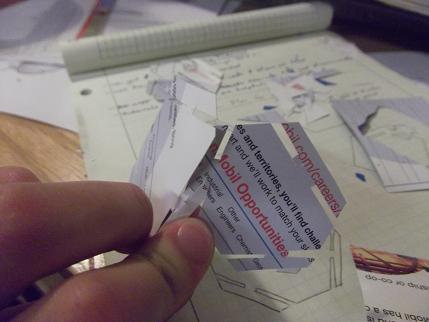
The Career Fair was a godsend - how else would I have gotten my hands on high-quality cardstock? Thank you Exxon-Mobil; I bet the recruiters had no idea this would happen to their handouts. |
My MIT sticker! |
|
|
If you see the laser cutter doing this, you are cutting a Raster image and you will be waiting FOR ALL ETERNITY. |
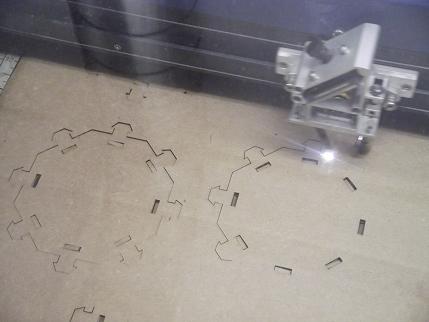
On the other hand, if the laser cutter is doing this, awesome things are happening. |

|
|
The actual production of my pieces was kind of an 11th-hour event - 15 minutes before my shift was up, this pile of parts starting building up on the desk! Hooray! |
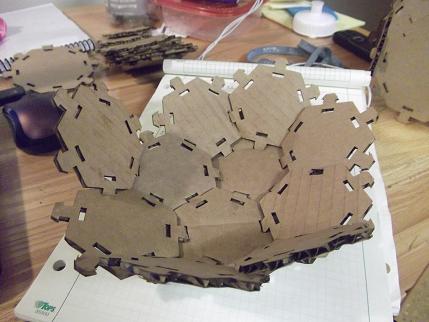
In the end, I didn't have enough hexagons to complete the shape I wanted, but this is just to give you an idea of what I was going for. Maybe it's an artistic bowl? |