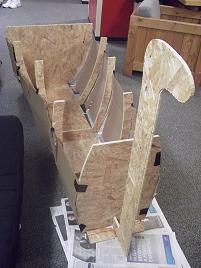
The completed frame, fully assembled
(but before the prow and front end are glued on.
The frame, after gluing and siding are attached.
Week 3: Make Something BIG!
This is a week of sheer epicness as we learn to use a ShopBot CNC mill and a waterjet to create something BIG. Both the ShopBot and the waterjet are pretty heavy-duty machines (the Shopbot can cut very thick plywood, and the waterjet can cut through metals and glass), so there were some safety issues to consider this week, but it also meant that we weren't restricted to cardboard and acrylic as building materials!
I chose to make a (smallish) rowboat. I don't really remember why that was the idea I chose, but it made more sense than a full-on frigate and yet could still be pretty fun to play with. I have pictures below; essentially what I did was cut out the frame of the boat, and then, due to a lack of sea-worthy materials, resorted to cardboard to cover up the sides. (Aviva suggested I try heat-shrinking a drop-cloth to it; I may do that in time for the Head of the Charles regatta next weekend!)
|
|
The completed frame, fully assembled |
The frame, after gluing and siding are attached. |
Designing the Boat
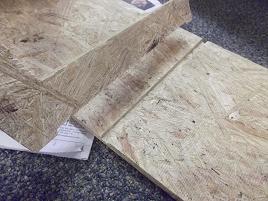
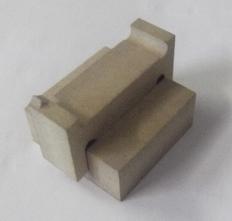
Like the press-fit kit in Week 1, this week's project had to press-fit together, and everything had to fit onto a 4 ft x 8 ft piece of plywood when cutting on the Shopbot. To fit to these parameters, I cut a base board that had grooves in it, which I would then fit my ribs and end/head boards into; the ribs and front and back boards all had notches in the bottom, too, to make a tighter fit. (There's an image below.) These notches worked pretty well (I wouldn't sail in my boat, but it stands by itself!), although I think that had I chosen to use the .75" OSB instead, the grooves would have been a much better fit. I did make a test piece using the OSB, however - there's a picture of that below, too - it needed some adjustments but promised a very solid fit.
I used Solidworks to draw out my pieces and then exported it as a .dwg and a .dxf to be modified in Partworks. I found this to work very well, because I like the GUI in Solidworks, and it transferred over to Partworks very easily. I think it's also worth noting that although I did add T-bones to the Partworks toolpath to accomodate my inside corners, they were usually somewhat larger than a right angle and so the Shopbot seemed to have no problem cutting them out; the T-bones are conspicuous in their absence.
The only truly artistic piece of this project was the prow of the boat, which is abstractly curved as though it could be some kind of animal. I was planning on cutting out a piece of metal or acrylic with a design on it on the waterjet to glue onto this figurehead. Unfortunately, I was not able to sign into the computer to get the waterjet to work, but I did make a file with the design in both Solidworks and then OMAX Layout. The link takes you to the files.
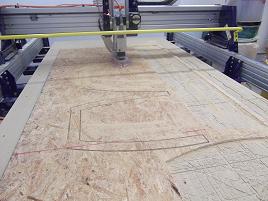
Milling with the Shopbot
The Shopbot is a very dangerous piece of equipment, so it deserves a lot of respect when you use it - don't be afraid, because it's very versatile and very useful, but just move deliberately and carefully when you use it. Here are the settings that we used when we cut out our pieces:
In working on cutting out our pieces (I was working with Aviva), we encountered a couple of challenges that we found various solutions for which may be useful:
|
|
An image of the Shopbot in progress (it's surprising how quickly it moves). |
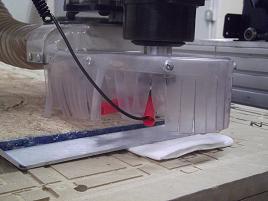
Here is our unorthodox solution to zeroing the z-axis of the Shopbot for a second round of passes. |
|
|
This image just shows the groove in the base board, with the matching notch in my rib pieces. Most of the pieces fit fairly tightly together, for being such thin plywood. |
My test part cut on .75" plywood - its the same notch and groove design, but my dimensions were too small and the parts don't fit easily within one another - they need a hammer! |