Week 6: 3-D Scanning and Printing
This week was focused on 3-D scanning and printing techniques, and while it wasn't really heavy on the hands-on, "make something" side, it was still a very interesting introduction to a current technological development. 3-D scanning techniques are being constantly updated at the moment, and 3-D printing is rapidly becoming faster and cheaper as more machines are put on the market. Because of the dual focus this week, we had two assignments:
- Scan an object to form a 3-D computer model of it.
- Use a 3-D printer to print a small object.
3-D Scanning
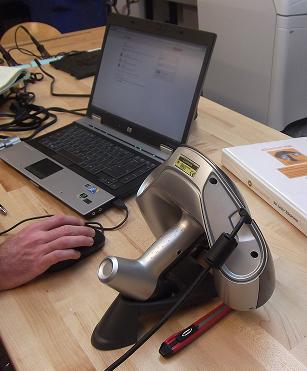
To carry out this part of the assignment, I used a handheld scanning laser manufactured by ZCorporation. It actually works a lot like a barcode scanner at the grocery store - you can move the scanner and scan all the surfaces of your object to create a 3-D mesh in the computer. You need to use registration marks (white sticker dots) to create reference points for the scanner to base itself on, and there are two main ways to do this:
- Putting registration marks directly on your object allows you to completely scan it by rotating it in your hand.
- Placing the object on a flat plate with registration marks on it; this sometimes will work better than scanning the object direcly, but unfortunately you can't scan the bottom surface of the object because its resting on the table top.
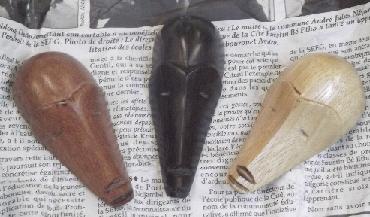
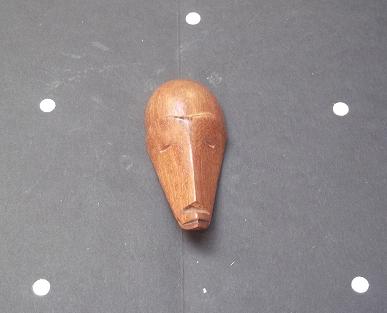
I tried scanning several times because I found that just choosing a suitable object was tricky. I started by trying to scan a small African mask carving I owned, but I found that it was too small for the scanner, and it couldn't register all the finer features on the object. Also, the object was essentially two-sided, and the scanner had trouble reconciling the way the two sides fit together. I tried scanning the mask using both techniques.
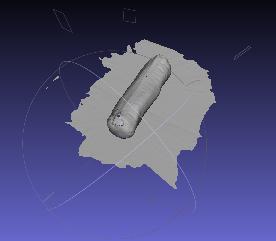
Then I tried scanning a water bottle instead, but I found that even opaque platic was too reflective, and so I switched to my cloth pencil case. This came out very well - the scanner could pick up on the wrinkles in the case and the zipper was pretty well defined as well.
Unfortunately, cleaning up the model in MeshLab was very difficult - the program kept crashing every time I tried to select vertices that I wanted to delete. I'm not sure how to proceed in using MeshLab.
|
|
The carved African masks I was trying to scan in my first attempt. |
The setup for 3-D scanning using the Z-Corporation hand scanner. |

|
|
This is the first method of scanning in an object, where registration marks are applied directly to the surface of the object; this did not work very well. |
This is the second method, where the object is placed upon a surface that has registration marks fixed on it. |
|
|
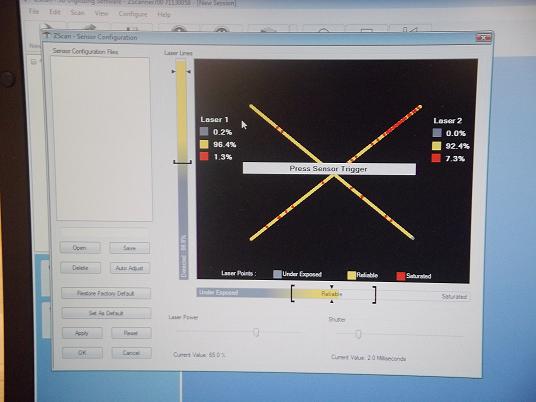
This is an image of the ideal sensor configuration pattern that you want to obtain if you configure manually. Notice how the gray-yellow spectrum is aligned with the "Reliable" bracket. |
This is a screenshot of the final model in MeshLab after scanning in my pencil case. |
3-D Printing
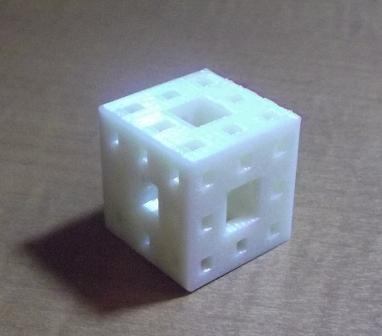
This process was not very labor-intensive because all I had to do was create a 3-D model of an object I wanted to print and export it as an STL file. I decided to make a 1-inch square Sierpinski square in 3 dimensions (so its actually a cube). A Sierpinski square is a classic fractal pattern, and translates very easily into a 3-D cube (Pascal's Triangle is a little harder to transfer to a 3-D model you can actually print!) The model came out quite well, and the resolution of the printer was adequate for the smallest hole size I wanted to get. A picture of the completed piece is shown below.