__       __             __ __    ______              ____     __                __      __    

/'__`\   /'__`\          /\ \\ \  /\  ___\            /'___\  /'__`\            /'_ `\  /'__`\  

/\_\L\ \ /\ \/\ \         \ \ \\ \ \ \ \__/           /\ \__/ /\ \/\ \          /\ \L\ \/\ \/\ \ 

\/_/_\_<_\ \ \ \ \  _______\ \ \\ \_\ \___``\  _______\ \  _``\ \ \ \ \  _______\ \___, \ \ \ \ \

  /\ \L\ \\ \ \_\ \/\______\\ \__ ,__\/\ \L\ \/\______\\ \ \L\ \ \ \_\ \/\______\\/__,/\ \ \ \_\ \

  \ \____/ \ \____/\/______/ \/_/\_\_/\ \____/\/______/ \ \____/\ \____/\/______/     \ \_\ \____/

   \/___/   \/___/              \/_/   \/___/            \/___/  \/___/                \/_/\/___/


____                                  __  __      __        __                              

/\  _`\                               /\ \/\ \  __/\ \__    /\ \                             

\ \ \L\ \_ __    __    ____    ____   \ \ \/'/'/\_\ \ ,_\   \ \ \         __     __     ___  

\ \ ,__/\`'__\/'__`\ /',__\  /',__\   \ \ , < \/\ \ \ \/    \ \ \  __  /'__`\ /'_ `\  / __`\

  \ \ \/\ \ \//\  __//\__, `\/\__, `\   \ \ \\`\\ \ \ \ \_    \ \ \L\ \/\  __//\ \L\ \/\ \L\ \

   \ \_\ \ \_\\ \____\/\____/\/\____/    \ \_\ \_\ \_\ \__\    \ \____/\ \____\ \____ \ \____/

    \/_/  \/_/ \/____/\/___/  \/___/      \/_/\/_/\/_/\/__/     \/___/  \/____/\/___L\ \/___/

                                                                                 /\____/     

                                                                                 \_/__/      


I wanted to explore the notion of freedom within a press kit.

The basic idea behind the press kit is that every element holds the other element to complete a form.

Also lego is a press kit, as others, it doesn’t have any degree of freedom.

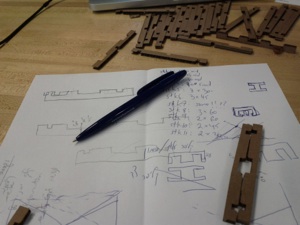
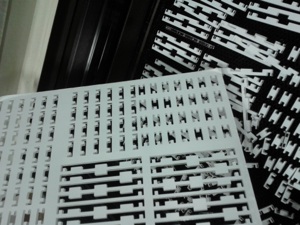
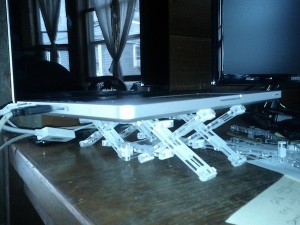
This is class assignment was my opportunity to learn on the machines and CAD design. I tried and “hopefully” succeeded to create interlocking elements in 30 60 and 45 degrees.

The lessons learned will be posted with the source design if you wish to create such a kit for yourself.

I was inspired by a childhood game that I don’t really remember - but the elements remind me of such a game.


Interlocking Lego


  1. 1)Decision making - 3D or 2D design tool?


I have never really used a design tool more complex than mspaint. Since I played with some 3D design tools (sketchup , blender) I was sure that it will take me less time to learn a 3D

tool than a 2D tool. I found this to be right but the lessons from my first attempt at learning a 3D design tool  is the next lesson


  1. 2)Workenv - Cardboard + Autodesk Inventor


I started with Inventor since we had a nice tutorial in class and it seamed really powerful, well it is, especially the parametric and associative parts, but the workflow was too complicated - and I was not able to learn it as fast as I wanted (i.e. on the go).


... I managed to create one set of elements using Inventor - but:

  1. *export from Inventor to a DWG that the Coral Draw can work with was problematic - Solved by exporting it in the Inventor as Coral Draw DWG.

  2. *export as DXF didn’t work also - solved by opening it in  Rahino and saving it again


...in the end with help of many good friends that came to the rescue I have succeeded to cut my first run with cardboard on friday.


.... I learned that:

  1. *the shapes i designed in general are ok for what i wanted - no major “redesign” - but i had no pressure element - so I needed to design elements that will press-fit and enclose the interlocked elements.

  2. *Inventor is too complicated and not fun and gives me a lot of headache when exporting

  3. *I learned that cardboard is way not strong in the size if elements i was using - but it is excellent material to start and get idea about the forms that will be used.


  1. 3)Second Attempt - Solidworks and Acrylic 5.25 mm


  1. 4)Third Attempt - Solidworks and Acrylic 5.24 mm


  1. 5)Lazer is thick

  2. 6)Acrylic does not cut in one round

  3. 7)Tolerance and pressure

Lessons Learned (skip to third run to get the bottom line)

First Run - Cardboard

In this run the move to solid works payed off in the export process and the alignment of the assembly was easier and the import to coral draw was a breeze


... this time the problems were:

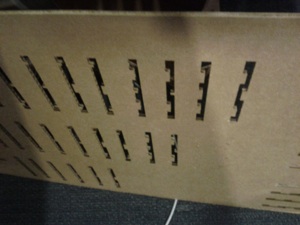
  1. *I had to run the job for 3 times to complete cutting of the pieces.

  2. *There was no press fit at all the pieces fell off

  3. *I needed other pieces to complete the lego configuration (i was missing parts that go in and out of other parts


... so I learned that:

  1. *cutting settings that i used are wrong - I used :

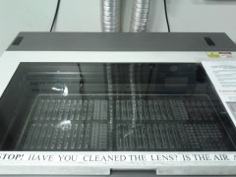
100% power , 4.7% speed 1000 ppm - but - also with 2.4 speed - this did not cut through 5.25mm of acrylic

  1. *eventually 2 runs in 4.7 and one run in 2.4 speed cut off the pieces - so don’t use these settings although its in the recommended settings file ... my recommended settings are below in the third run.

  2. *The design didn't take into consideration the cutting offset i.e. assuming there is no “width” to the cut .... very wrong approach...I would recommend taking too much and relaxing the constraints approach and not the approach i was taking - assuming the cut is perfectly accurate and start iterating on adding offset

  3. *The two piece design that i made (2 symmetric pieces held together) I think made the structure stronger but I’m not sure.

Second Run - Acrylic

In this run I had a guardian angel coming by the lab one with saying “I wouldn’t peal off the white cover of the acrylic, and speed would be very low something like 1.1” - and guess what - surprisingly listening helps (... but you need to listen to the right person ...)


... so this time I learned

  1. *recommended settings for cutting 5.25mm acrylic are:

100% power, 1.1 speed, 1000 ppm 

  1. *leave the lamenting cover than you get nice cut without discoloring of the pieces by debris from the laser cutter.

  2. *add a 0.8 mm to the thikness of the cut in your calculations i.e. if you want to make a cut that will fit the width of 5.25 mm you need to make it 5.09 wide

==> preparing the drawing for print - don’t make one assembly and one the drawing and export it ... make several small drawings that can be combined and repeated (copy past) in the coral draw application, because:

  1. *when you import a DXF there is no “shape” just “edges” so you need to select all the edges of a shape and group them. if you have many repetitions of the same shape I’d do the repetitions after i have grouped the shape in the coral draw and not before the export

  2. *Grouping helps the cutter make one shape at a time (although  its plan is not constrained to finish one piece before the other) , grouping makes the movement between shapes more effective (since it is not running to do one edge here one edge there) and the overall result is faster and easier to remove.


... oh and last thing ... that i learned...

  1. *invest enough time in the assembly design make sure you know what you are making and not just pieces - this will make the manual assembly much easier

  2. *some expert students also engraved assembly instructions (shape numbers etc) on the shapes themselves to make it even easier to assemble ... i did not  ;-(

Third Run - Acrylic