Press Fit Construction Kit
By using the laser cutter, I created a wooden press-fit construction kit that when assembled, formed a hexagon shaped jewelry stand.
The Problem | A lack of organization
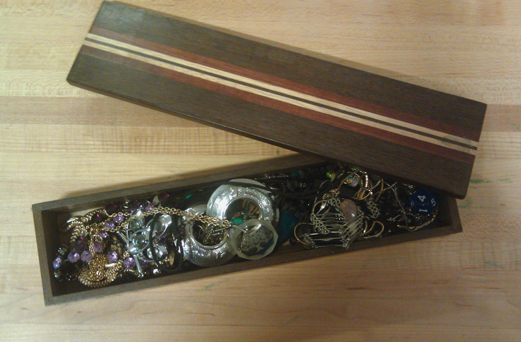
I keep all of my (very cheap) jewelry in a wooden box. It's a poor system that usually results in me having to dump everything out to get the pieces I want, and generally all of the items end up hopelessly tangled. I decided to build a better solution, a jewelry stand.
Step 1 | Design the model
I used illustrator to mock up some basic ideas for the design. I knew I wanted my new stand to be a six-sided cylindrical shape. I started with the basic pieces for the hexagonal base and the general connectors.
I knew that finding the right fit would be the hardest part, so I started just by cutting some test connectors and holding off on the rest of my design process until I got that right.After about 5 tries, I found a good fit, about 0.202 inches wide and 0.75 inches deep I wasn't planning on dissembling the stand once it was completed, so I opted for a tighter fit.
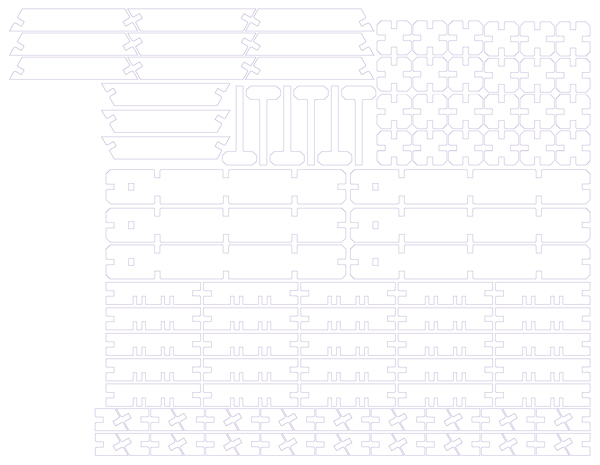
I designed the corresponding pieces and assembled them in a single document. Download the .pdf of the full set of pieces here
Step 2 | Cutting
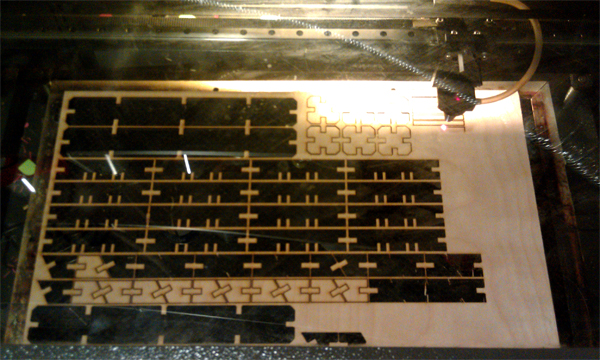

I began by cutting out the base and two of the struts for the stand, along with the interconnector pieces. I used 1/4 inch birch plywood which I found varied slightly in thickness and density along different pieces. I had to occasionally adjust the laser speed and power to accommodate for this. It also meant that there was some additional trial and error here with sizing for the notches. I had to try a few different widths for the notches for the earrings and tested them out with the pair I was wearing at the time to make sure they'd fit correctly. Once I was sure I had the right width and settings, I took a deep breath and cut out the entire set of pieces.
Step 3 | Assembly
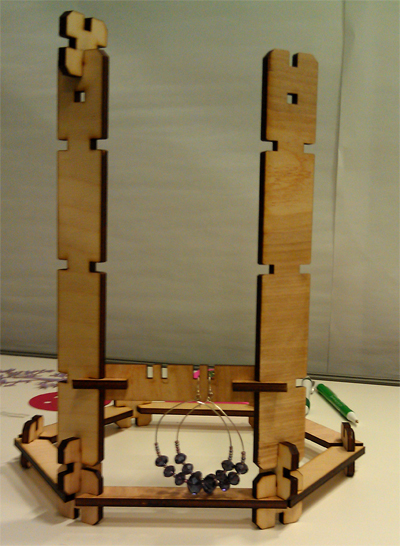
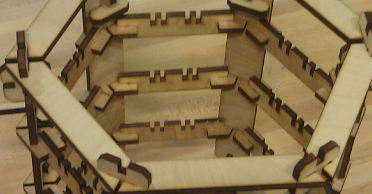
Once I had all of the pieces cut, I assembled the model. I tested a few configurations out with some of the pieces before putting everything together.
I knew fitting in the 6th strut would be tricky, so I assembled them each in sequence and gently and slowly moved the last strut into position. I then attached the top and bottom hexagons and added in the necklace holder pieces. I originally cut the necklace holder pieces as thin strips, but after placing them, I realized that they fell out relatively easily and bent down with the weight of the necklace, so I added counterweight tabs on the backs to prevent this from happening and re-cut them
Solution | A finished jewelry stand
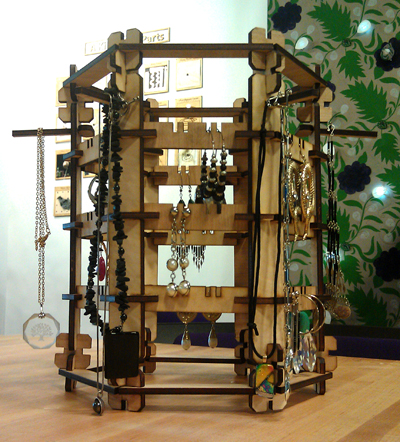
Here's the final piece, all assembled and holding jewelry! Note my incredibly cheap taste :) The next step is to add a rotating base so that I can spin it to see the full range of contents.