Molded and Cast Figurine
My goal for this project was initially to cast a small miniature of my DnD character, but I quickly realized that given the time and materials, a modeling project of this nature would be too ambitious. I settled for attempting to model a simplified version of her that could be cast as a series of figurines with variations in their paint jobs.
Step 1 | Sketching the figure
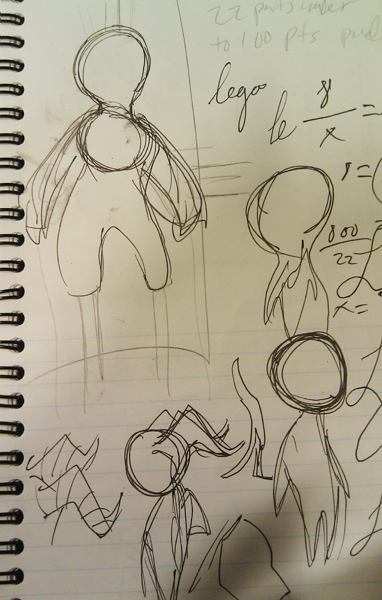
I began by performing a number of basic sketches. You can see the rapid succession from overly complex to relatively simple. I settled on a form with wide legs for balance and a few interesting details (like horns).
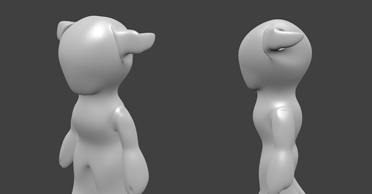
Step 2 | Modeling the figure
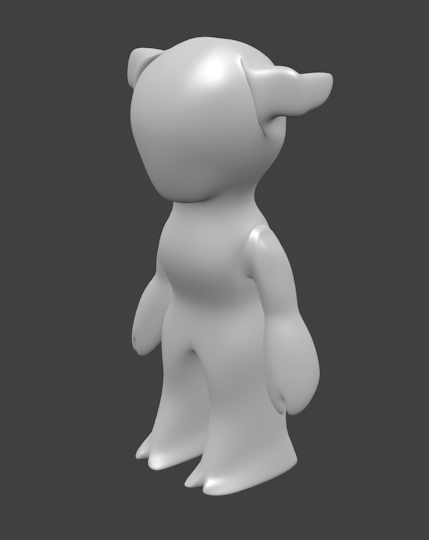

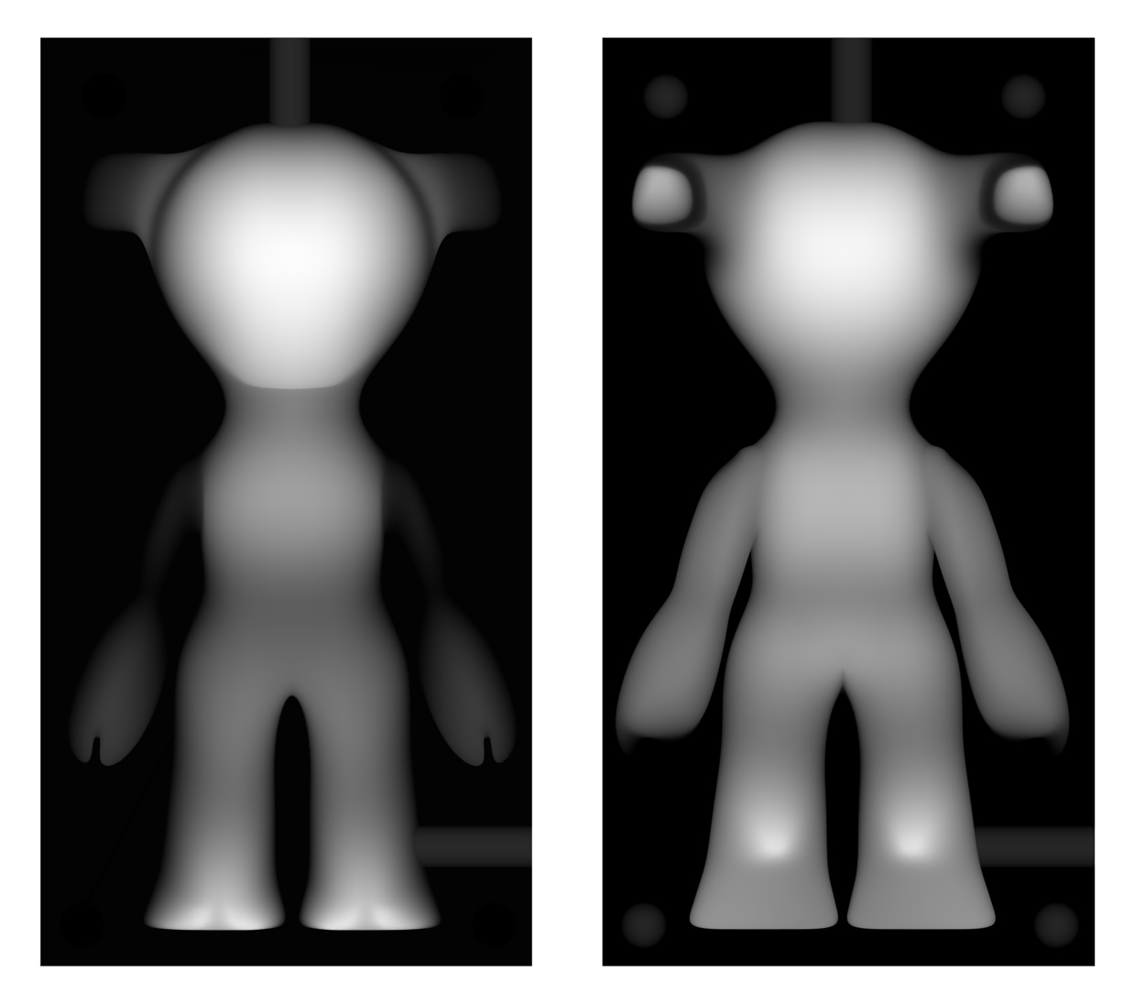
Blender is the 3d software that I am most comfortable in for character modeling so I modeled the main body of my character in that using the mirror modifier to speed the process up. After she was done, I created a chamber to hold the silicone, registration points, as well as a vent and a sprue, each set to 1/8" in diameter. I also went through and altered any points in the model that might have required undercutting.
Step 3 | Rendering the png

At this point, I exported my blender model as an .stl and hit a major stumbling block. Because my character was a fairly complex mesh, I couldn't easily join her with the larger structure of the model. Therefore the fab module software had difficulty creating a .png from the complex .stl file. It would have been too labor intensive to manually merge the meshes, so with the assistance of Valentin, we brought my .stl into cinema 4d and generated a .png ourselves by doing a render of the model with a camera set very far away from the mesh, but with a long focal depth. By accessing the depth map of the render, we were able to successfully generate a usable .png file.
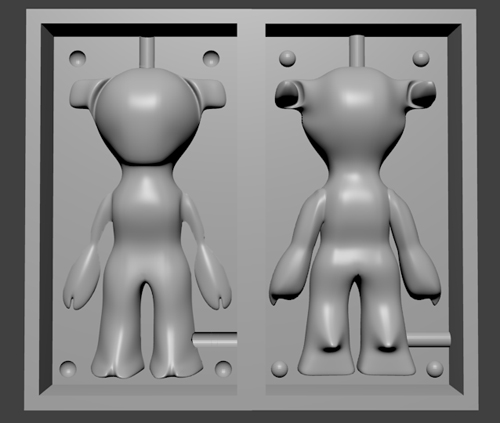
Step 4 |Cutting the mold
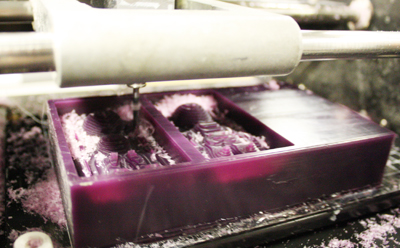
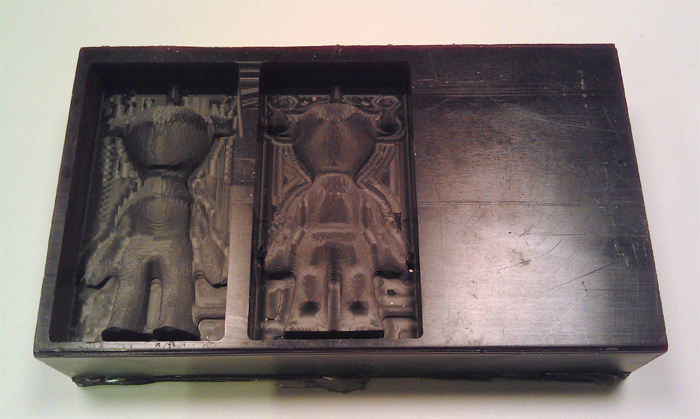
I uploaded the png using the fab modules and manually set the max z-depth in the 3d settings to the depth of the .stl (12.467mm). I ran the .rml with a speed of 40, an x min of 2 and a y min of 1.5. I then waited.. and waited and waited some more for the mold to be cut. When it was finished, I did some touchups with an exacto knife.
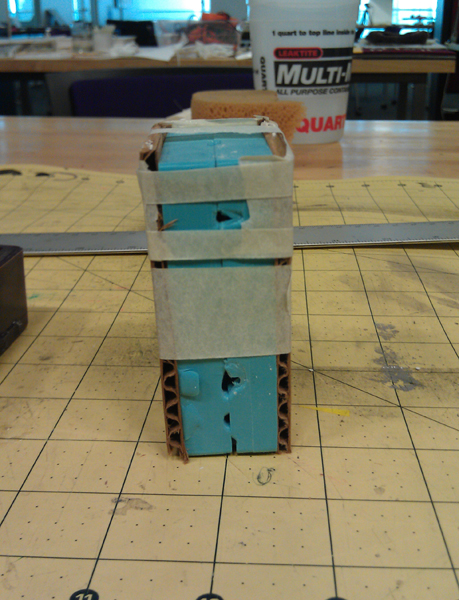
Step 5 | Pouring the silicone

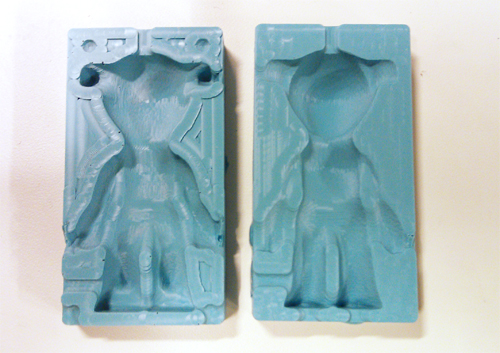
I mixed the silicone and poured it in a very thin bead as to avoid any bubbles. Afterwards, it removed surprisingly easily from the mold, however I noticed that my negative registration marks had not been cast.
Step 6 | Casting the figure
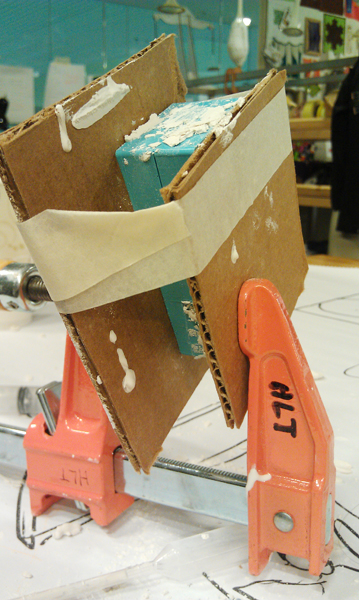
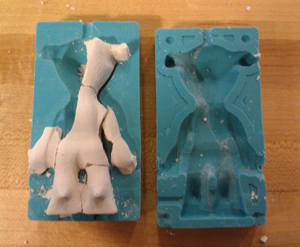
I found the figure very difficult to cast. I ended up inserting hydrostone very slowly with a syringe, but IŐm not sure this was an effective method as the figure unfortunately came out broken and somewhat unevenly filled. I think this was the result of my inadequate clamping of the mold, and my lack of a vent in the left horn area, both which I attempted to rectify for the next cast, by more firmly securing the mold and cutting an additional vent by hand
Thanks to Valentin for his help in generating the png.