Project: Design, Fabrication, and Programming of a Microcontroller Circuit

Machine(s): Roland Modela Mill | Material(s): FR1, SMD Components


Back to Main Page

Official Assignment Description:
'read a microcontroller data sheet
program your board to do something, in as many different programming languages as possible'

This week's project required us to make a board (relatively easy once I figured out the quirks of EAGLE), and then program the board to do something (very frustrating). I have some experience programming Arduinos, so I decided to focus on learning various programming languages / approaches. This would hopefully give me a basis for choosing hardware / software / IDE in the future...

Design, Fabrication, and Programming

Step 1: Design the circuit in Eagle. Eagle was pretty easy to learn and use, but the process / program has some annoying quirks..first, make sure you set the 'grid' to finest (or you will have trouble getting your wires to go where you want them); secondly, double check that the parts you are using actually exist in the Fab class inventory even though you will probably not find the right parts in the Fab Eagle library (standard size is 1206). I'm a big fan of the Sparkfun Eagle library, which has pretty good explanations for parts. I added a power regulation circuit (based on what I'd seen on other boards) [blue], added easier connections for 4 ADC channels [red], added and bank of +/-Vout pins [orange], and added an ICSP connector for two servo outputs [green]. A very useful Eagle tutorial: http://www.sparkfun.com/tutorials/109
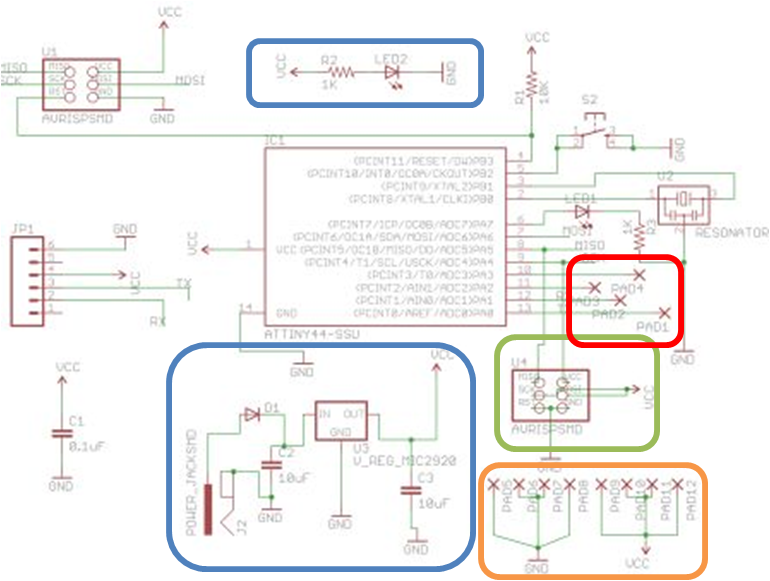
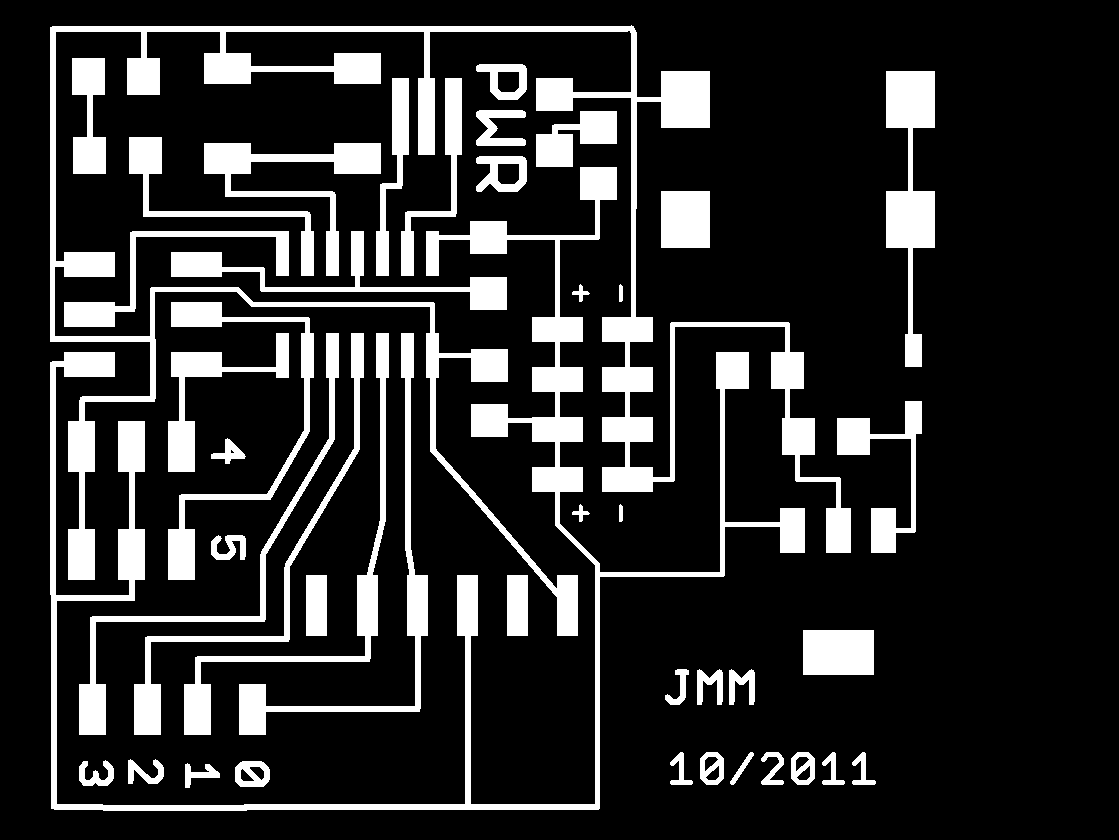
Serial Echo Hello-World Board.sch , Serial Echo Hello-World Board.brd

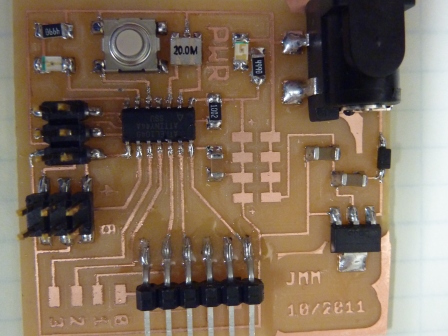
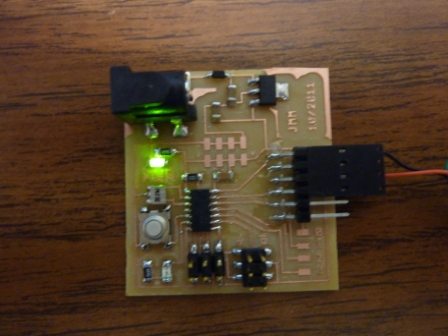
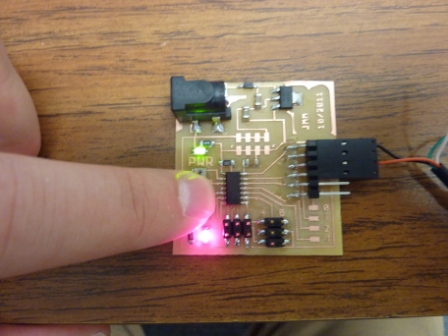
Step 2: Mill out the circuit and stuff it. Test all connections with multimeter and test power circuit with 9VDC supply.
serial echo hello world board traces.png

Step 3: Now time to program. This was probably the most difficult of the process...not because it's hard...but because there are about one thousand ways of doing this and ten thousand things that can go wrong. In general, I found these two tutorials to be most helpful:
Understanding AVR
Beginning Embedded Electronics 2-4
Good Example Programs
Here is the basic process I followed to make my LED blink:

  1. Use WinAVR and Programmers Notepad to make an example file: test.c
  2. Use Makefile to make the test.hex file: Makefile
  3. Plug FabISP board into my computer's USB part. Make sure I have the correct driver. It shows up as USBtiny.
  4. Connect my hello.ftdi.44 board to the FabISP board with the IDC ISP cable (oriented the right way). As we desoldered one of the jumpers on the FabISP board I must provide external power (through the FTDI cable) to the board.
  5. Upload the test.hex file to my hello.ftdi.44 board with the following command prompt line: "avrdude -p t44 -c USBtiny -U flash:w:tst.hex" (or just do Tools->Program in Programmers NotePad)

Step 4: Try the same program in Assembler. Here's a nice website for learning etc, and here's a great document with helpful examples.
AVRAssembler1.asm

Step 5: Try another program (back in 'C') that will turn the LED on when the button is pressed.
button.c

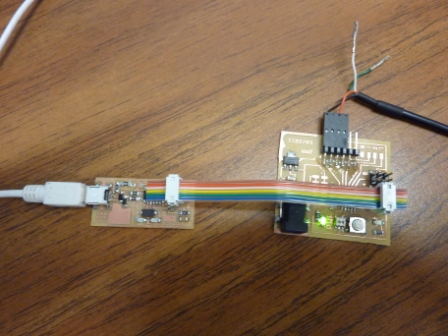
Step 6: Try a program to enable one-way Serial Communication with my computer via FTDI cable. As I am using Windows 7, I had to download Tera Term onto my computer.
printing.c

Step 7: Now try to write a program that commands two servos and prints status for debugging purposes.
servo.c

Tips and Lessons Learned

  1. This week is very tough if you don't have a lot of experience with programming microcontrollers. First, just focus on the process required to program your attiny. Second, try to write your own programs. Don't try to do it all at once!
  2. Perhaps the most frustrating part of programming microcontrollers is that there appear to be an infinite number of ways to accomplish the same thing... but only a few of them are forgiving to mistakes. Everyone on the internet seems to take a different approach, making it very hard to debug specific problems. If you're more interested in results than learning proper programming, I suggest starting with a program you know works (probably someone else's...) and building on it. Writing from scratch is a great skill...but will make your week very frustrating...
  3. Programming in C and Assembler was pretty easy for operations such as pulling a pin high or low...but was much more difficult for more complicated operations (e.g. involving memory). I'll be switching to Arduino (unless memory is a prohibitive constraint) after this week, thank you very much!

Back to Main Page