SOMETHING BIG - CNC CUT BENCH
Designing:
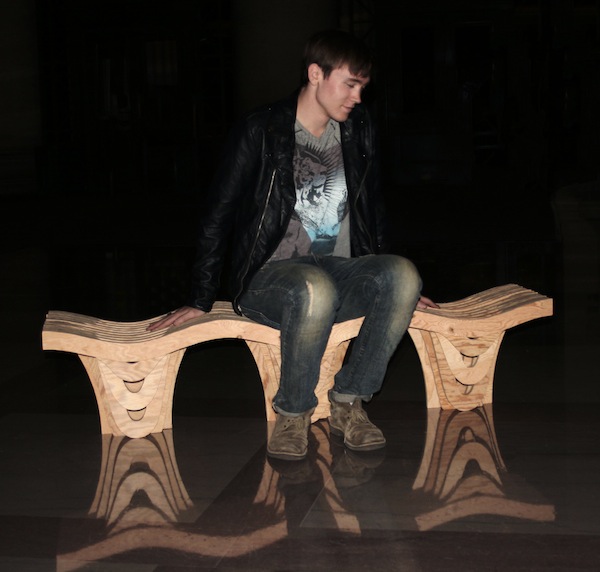
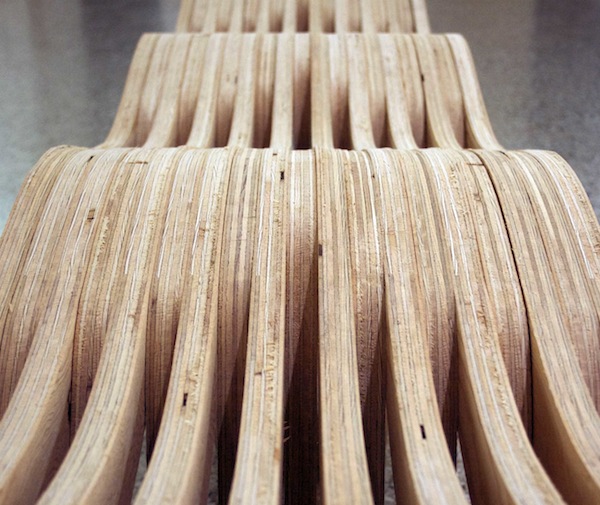
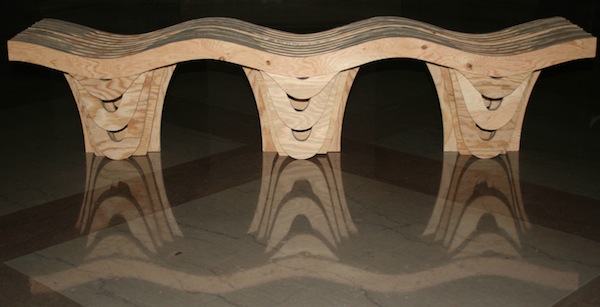
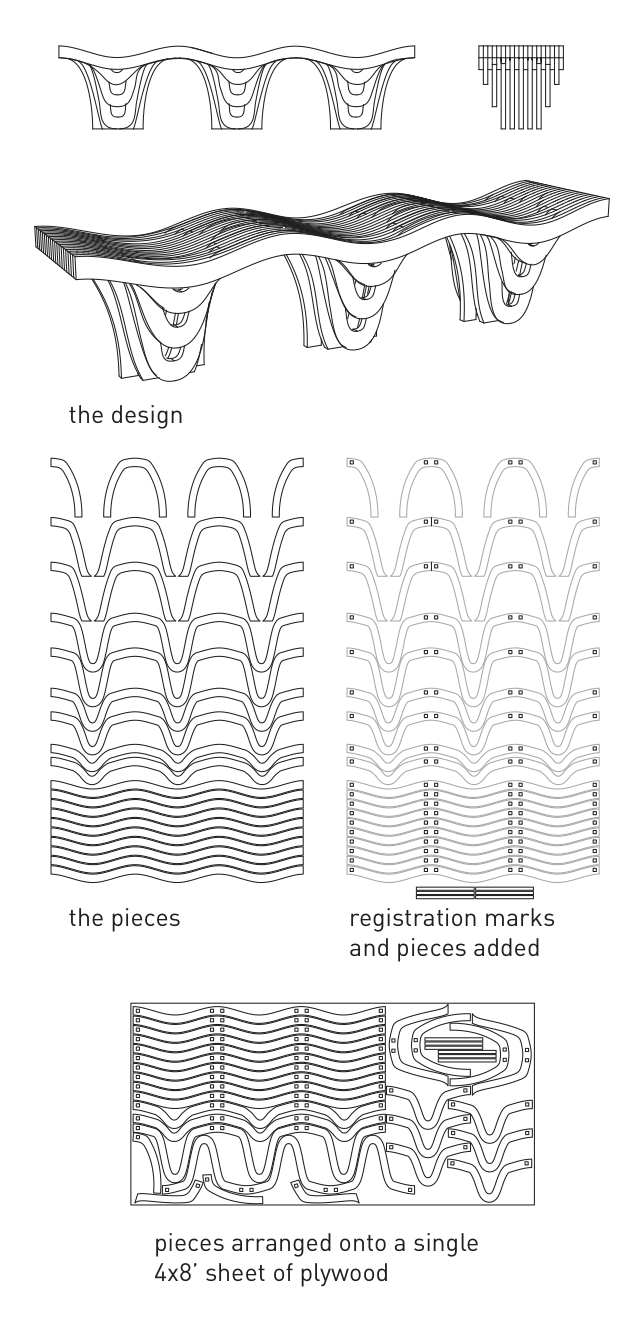
I designed a bench composed of a series of sandwiched parts of plywood on rhino. The curving shape designates three places to sit and very other piece is a duplicate of the basic curving form. The pieces between those, however, grow downwards and form the legs that support the bench.
Once I had the basic design, I consulted Costanza and he suggested two things. The first was to change the placement of the supports (make four, not in a row) to make it more stable. I didn't do this (perhaps for a later revision). The second was to cut rectangular registration marks and rods that would keep the pieces in place and aligned properly. This turned out to be extremely useful and made construction quick.
I then tried to assemble the pieces onto a single sheet of plywood. I found that it was necessary for me to cut some pieces in thirds so that they would pack better. I eventually got it to work after some time.
CNCing:
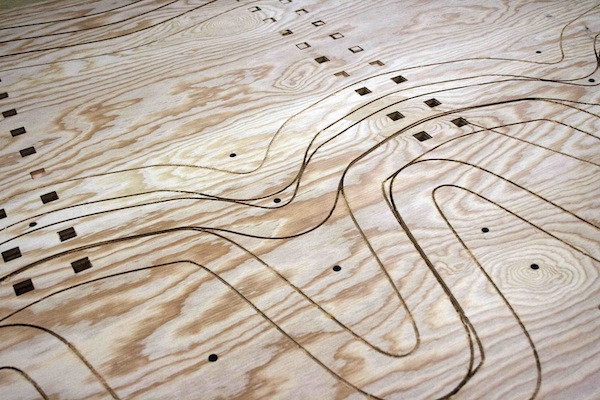
Thank you Moritz for helping me all of Thursday morning! Our procedure was somewhat convoluted. I had made a single tool path file and figured it would be simple to just run the file. But, Moritz advised that we do a series of different cuts because some could be treated different than others and we needed to test each of them separately. After much consideration, we decided to should do four different cut files.
1. The first was about 50 drill marks used for indicating safe places to screw the plywood down. We used a 1/8" drill bit and after running the file screwed the plywood down. We used many, many screws because I had many pieces and very small gaps between them.
2. The second file was the registration holes. This was also pretty straightforward. We had the 1/8" bit and had it make three passes for the holes and 1 pass for the pockets (done at the same time).
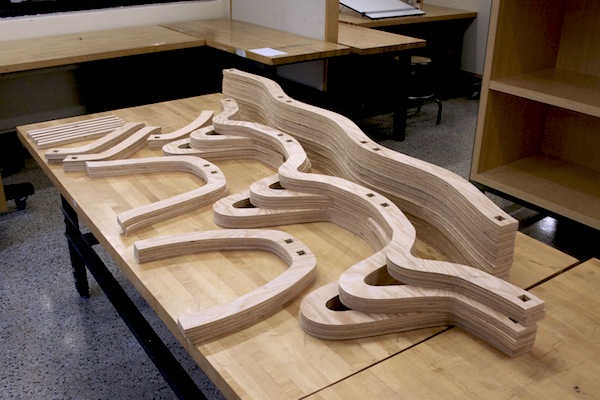
3. Now here’s were it got weird. We started to run the file with the primary geometry once and the wood started to smell as if it was burning. Moritz said this was bad and it meant the bit was getting too hot and would eventually break. So we corrected this by lowering the feed rate and doing three passes. However, I had a large distance of lines to cut and was running out of time (someone else needed the CNC at a certain time). As a result, we ran the file but told it to do only two out of the three passes. Once that was done, Daniel suggested drilling pieces around the edges of my panel and marking the zero so that I could come back the next day and be able to quickly reorient the panel and the zero position. So after the CNC cut the first two cuts of all my geometry I did this.
4. The following night, I went back and put the panel back one. The edge markers working wonderfully and I was able to zero the tool very close the the original (thanks Daniel!). When I ran the final cut file, the zero was about a half a millimeter off. So I stopped it, corrected the zero and ran it again. This time it worked out perfectly and managed to cut everything.
Assembling:
Due to the registration marks, this was quite easy. I did, however, have to sand down some of the registration rods due to variation in the materials. After that, I simply slid the pieces onto the rods and it was done.
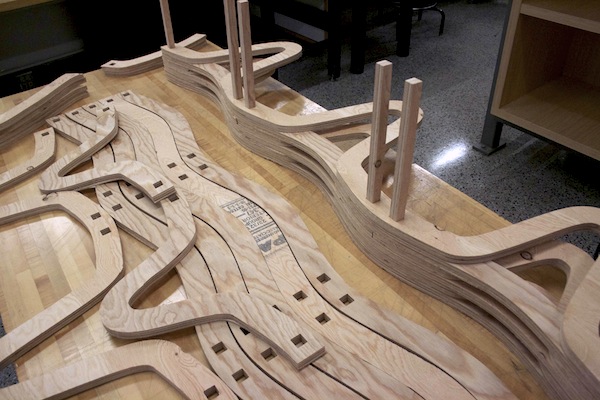
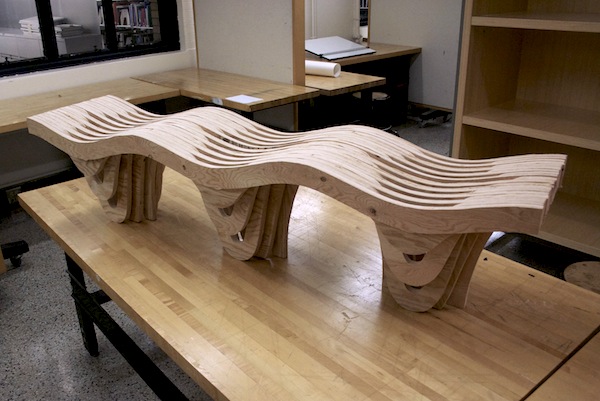
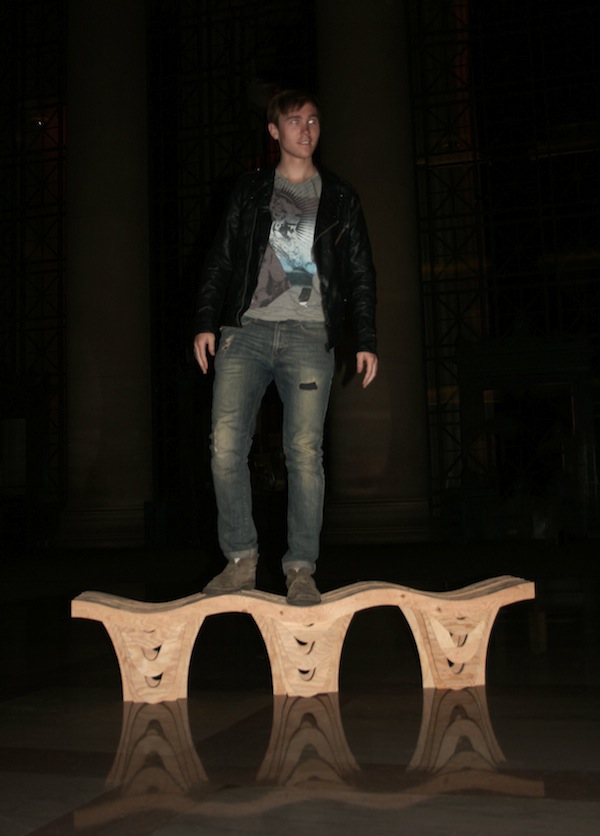
I was quite happy with the result. Though, as Costanza had warned it's a tiny bit unstable (I can still stand on it without too much danger); maybe that's a correction I'll make the next time I build it.