This week, the assignment was to create a mold and cast a part. This process involved three steps: (1) modeling the positive of the desired part and machining a rigid mold (2) creating a flexible mold of the negative and (3) casting the final part.
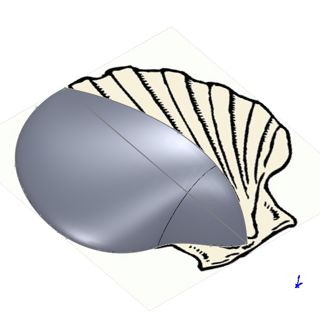
Rigid MoldThe first step was to design the final part and the rigid mold in SolidWorks. I did this by initially creating two separate parts, (the part and the surrounding wax) and then combining them to model the final mold. I decided to model a simple shell shape, in order to play with modeling surface features in SolidWorks and to practice developing a mold that would have both convex and concave contours. The shell shape was developed by inserting a 2D image of a shell as a sketch picture, scaling it down to the required size, and then roughly tracing it's outline to start with a realistic shape. The shape itself was constructed as a lofted feature. To accomplish this, I drew two sketches, on the top plane and the right plane, making sure they intersected at the axis of rotation. Note: In order for the loft to work properly, you'll need to move the blue dots that will appear on both sketches, on top of each other. After creating the top curvature, I added another layer of detail to the bottom, and then mirrored the features to obtain a symmetric part.
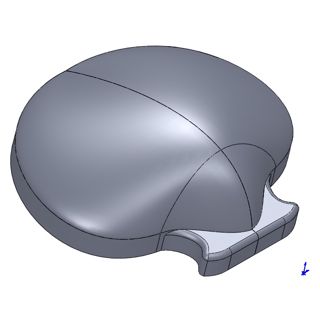
I modeled the wax block as a separate part, which allowed me to play around with the spacing easily in the assembly view. When all of the details were finalized, I saved the assembly as a part, combined the shell positive and the wax block models, and saved it again as an .stl for the Modela.
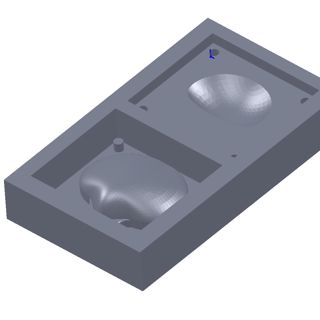
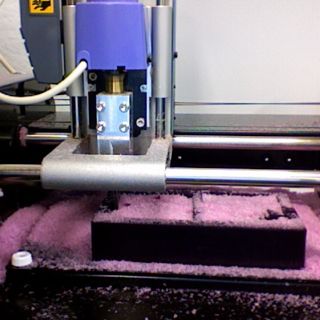
The wax was machined on the Modela, using the fab modules. Make sure to set the 3D toolpaths (ztop=0, zbottom=lowest cut, zstep= 2mm), and be sure to type in the conversion from whatever units you used to mm. Also, do not forget to set the offset to -1, and check that the toolpaths are correct before continuing. I had heard that the tool paths took >3 hours for some people, so I adjusted the height of the features to reduce machining time. It took about 1 1/2 hours to run a rough cut and two finishing cuts.
In order to have a chance of getting your parts out, you'll want to create a flexible mold from your rigid mold. I used Mold Star Slow 15, which took about 4 hours to cure, but apparently is more resistant to tearing. Since I had made the walls of my mold thinner to reduce machining time, this more robust type of silicon was perfect. I mixed equal parts (in volume) of the two compounds, shearing instead of scooping to avoid bubbles. When pouring into the mold, a trick is to hold the cup high about the part to create a thin stream, which helps reduce trapped bubbles.
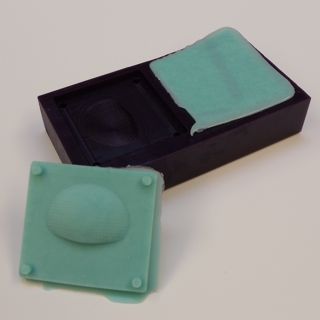
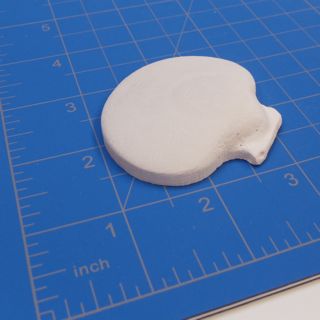
Initially, I had made the sprue hole too small, which made casting a messy and time consuming process. The Drystone had actually cured before I had a chance to fill the entire mold. I then cut a larger opening using an exacto knife and tried casting again. This time, the process went much more smoothly. One note is that the cast will pick up all of the tooling marks, which could be good depending on the texture you are looking for, but they can also be easily smoothed out with sand paper.