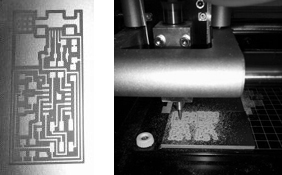
1. When putting the driller on the copper imbed it just a little bit, but do not scratch the board.
2. Keep holding the driller when you screw back the nut, so the driller won’t jump.
3. Stay focus! Watch what you are doing! Pay attention to what kind of driller (1/64 or 1/32) is set in the fab moduleand that you are making the right rml file.
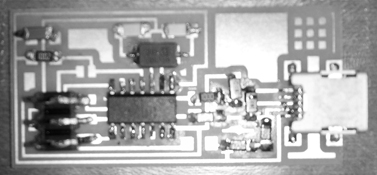
1. Use double side type to pin the board to table and prevent it from twisting around, but don’t press it to hard so you will be able to pull the board out easily and rotate it in the way that allow you a better access to other sides of the board.
2. Push the tin wire on the tip of the soldering iron so you will have a blub of tin on it at the size that you need. Because the tip is hot the tin will stay liquefy for relatively long time, that way you can put it wherever you want and when ever you fell ready. I found it easier to solder that way, instead of soldering directly on the board itself.
I managed to program the board with help of David Mellis.