![]()
![]()
- 1. project description
- 2. details & files
- 3. tutorial notes
1.1. Concept:
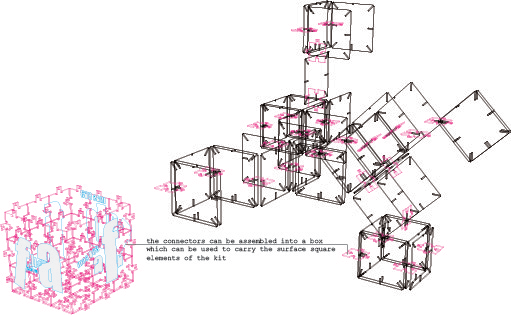
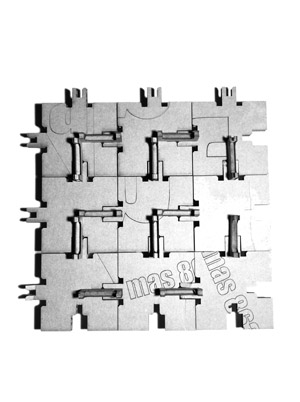
This week's assignment was to design, make, and document a press-fit construction kit. My idea was to make an assembly of square pieces which can be connected vertically or diagonally so as to create various spatial configurations. I decided not to connect these pieces directly with each other but to introduce another element, which ironically does not quite fit in the picture in the sense that it is recognizably also part of something else. In this case the connectors are puzzle pieces of a box in which one can carry the square parts of the construction kit. Therefore, when someone wants to disassemble the construction and transfer it to another location, they already have the kit in which to carry the parts [hence the title of the project]. The puzzle pieces are scored with the message "fab mas.863". If one is patient, there is a way to assemble the connectors so that this message is created in the box surfaces.
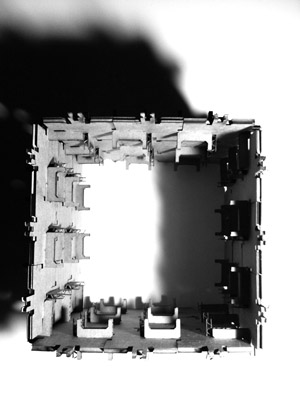
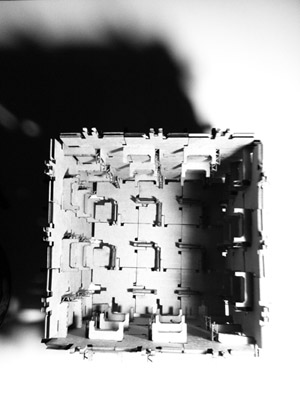
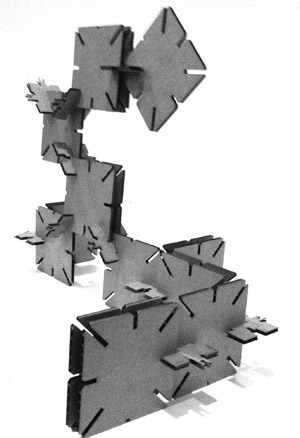
Figure 1: in "PacKIT" the kit are the parts; the magenta pieces that make the box are also the connectors which allow to assemble the contents of the box in different spatial configurations
1.2. Parts:
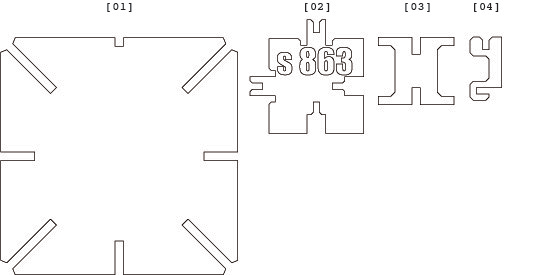
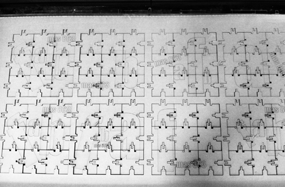
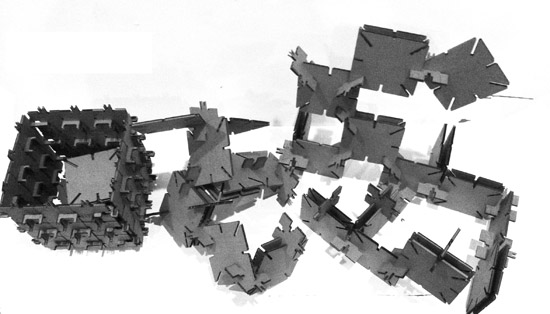
This kit consists of four pieces: [01] the square parts of the space structure [02] the puzzle connectors [03] connectors for the puzzle pieces so as to maintain them planar [04] connectors for the corners of the box. I decided to use a 275 lb. heavy duty corrugated pad so I specified the width of the notch as 3/16". However, as you will see in 1.4 it is a good idea to actually measure the material thickness before designing the notches of your pressfit instead of relying on the material description you find online.
Figure 2: The parts; I decided the exact size of the notches after modeling a potential assembly in Rhino OSX
1.3. Modeling:
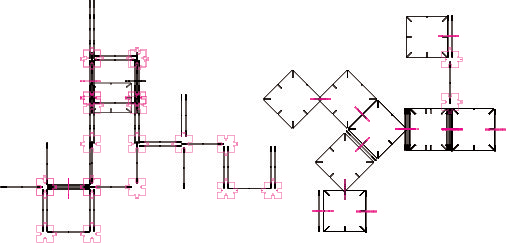
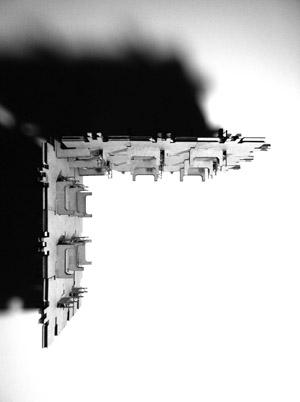
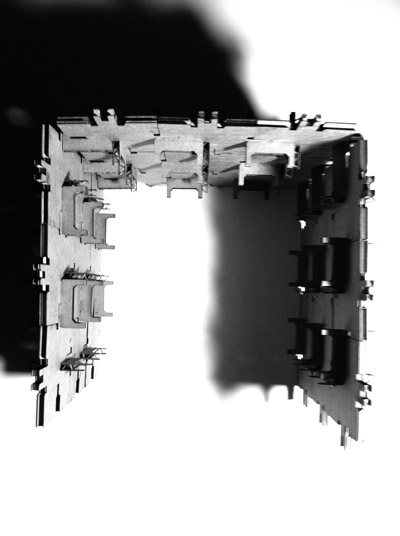
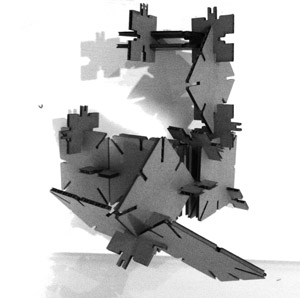
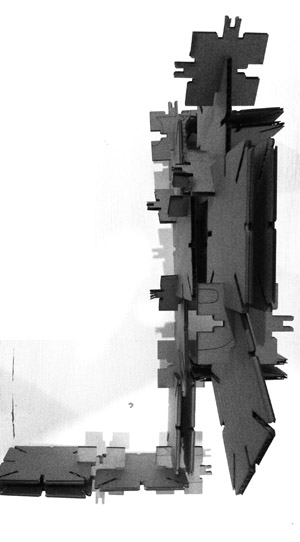
This order to ensure that I had properly designed the notches and to experiment with possible configurations I made a 3d assembly in Rhino OSX. My main concern was to see how deep the notches should be so that the pieces placed diagonally and the pieces placed orthogonally maintain the same grid pace in the 3d assembly. In Figure 1 you can see the perspective view of one potential configuration of the parts; below are the plan and section. Two qualities that I found interesting in this system was the thinness of the plan in conjuction with the opaqueness of the elevation, as well as the possibility to layer the squares and create different densities.
Figure 3: Plan and section of a potential assembly
1.4 Computer Controlled Cutting:
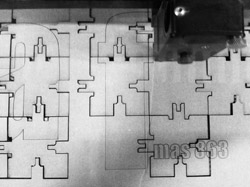
This the Rhinoceros model allowed me to get an idea of the characteristics of the construction it had the big disadvantage of not offering the possibility for a parametric modelling of the notch. In the first test that I did in the lasercutter I realized that the prescribed thickness of the cardboard I was using was different that its actual thickness, causing the pieces to be loose. I therefore had to test multiple times and then adjust the drawings of the pieces manually. Instead of remodeling all the pieces I decided to try scaling them down. After more than 5 tests I realized that in order for the pieces to fit tightly I had to scale my original design by 75%!! I probably made the pieces slightly tighter than I should have just to be on the safe side, which made things a little harder when I was assembling them. However, the chamfered edges of the notches (see Figure 2) considerably facilitated the assembly. The pieces for the kit were cut in the Universal X2 600 laser cutter at the CBA shop. To cut I used 80 power, 12 speed and to score 50 power and 30 speed.
1.5 Assembly:
This the assembly of the pieces I first made the box by using parts 02, 03, 04 (see Figure 2)
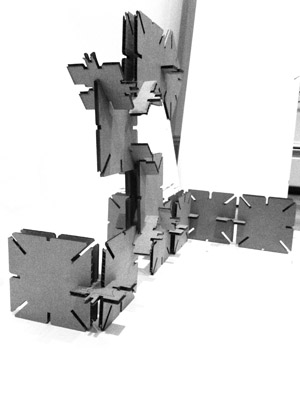
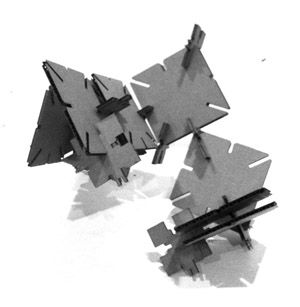
And then experimented with different configurations (sometimes gravity kicked in):
1.6 Important lessons learned:
[1] Model the notches using a parametric software so that you do not have to change everything. I had to scale down my model by 75% to make the notches the right size.[2] Test before you cut; the thickness of the material is often far from the prescribed. A good tip is to measure with precision the actual material you have at hand. However, if you can't do that, step 1 is always helpful!
[3] Chamfer the edges of the notch to allow the pieces to slide in each other - especially when things are a little too tight
[4] And a small design tip: Leave time to experiment and develop intuition for the combinations of the parts; there is so much that a kit can contain. Instead of 3d - modeling the assembly (as I did in Rhino) and then just "executing" it with the physical parts you can be very creative by allowing the testing in the physical world inform your design. So design some pieces, cut them, play with them and redesign them. This loop between the computer and the physical model can be trully creative.
tool description: Laser cutter
model:X2 600
manufacturer:Universal Laser
specifications: 100W CO2 Working area 813 x 457 mm (32" x 18")cut file: pacKIT
What I used to cut:
power: 80
speed: 12What I used to score:
power: 50
speed: 30On Wednesday morning John and Tom gave us a tutorial on how to use the laser cutter. Here is a transcript of the notes that I kept along with some tips from personal experience.
3.1. Safety first:
It is quite usual to see a small flame when the laser is cutting the material. If a small flame worries you then you can open the lid and cover the flame with a piece of acrylic. If the flame is big or the material catches on fire then you open the lid, close the air valve and call 100.3.2. How to put the material on the laser bed:
The origin point is the top left corner. Make sure your material is the right size; in the Universal Laser Cutter at the CBA shop the bed is 32*18". You might need to use some tape to attach the material to the edges of the bed if it is not completely flat (this is for example very usual with cardboard)3.3. How to adjust the height of the laser bed:
Use the marked metal rod to measure the height between the cutting tool and the material you have placed on the laser cutter board. Press Z and use the Up and Down arrows to bring the cutting material to the edge of the metal rod. You will know that the height is right when the pin does not let the board to go any further up.
The check button moves to smaller digit precision for height refinements with the up and down arrows. Once you have found the right height press Z again to exit.3.4. How to send your files:
3.4.1. If you are using Inkscape:
1. Prepare your file and export it in 300dpi. Keep in mind that the white part is the one cut with precision so your offsets are "eating" off the black part.
2. Go to fab > run in terminal
3. Select the Universal laser cutter and define power and speed. Make sure that you set the pulses per inch (ppi) to be less than 500 if you are cutting cardboard. If you are cutting acrylic you can do almost 300.
4. Specify xmin and ymin. This is how far from the top left corner (origin) the machine will start cutting the file.
Hit make .uni
6. Send!3.4.2. If you are using CorelDraw (Windows):
1. Import your file
2. Make sure all your lines are Hairline (No thickness)
3. Optional step: You might want to offset your lines for precision. Go to Effects>Contour and do an Outside offset of 0.005 (or around that) Then do Arrange and break contour group apart.
4. Go to File>Print>Properties and set Power and Speed per color
Press Set to register your changes
6. Print!3.4.3. If you are using Rhino or AutoCAD (Windows) you can set the speed and power per layer through the print menu. Make sure you SKIP all the layers you do not want to cut and that you select the area you want to cut with a print window and that all your lines are 0 thickness or hairlines. In Rhino you can set the size of the print window and then Move it in the correct spot in the screen. You send your file by hitting print.
3.5 How to cut your files:
Find the right file! If you send multiple files you can navigate through them with the >> and << buttons.
2. Do a test run. It is recommended that you do a test run to confirm that the path is right. Just press the green button <|> while the lid is open.
3. Cut! If all looks fine close the lid and press <|> to cut.