![]()
![]()
- 1. action plan and questions
OR ----------------------------------------------------------------------------------------------------------
How to make tools that show us how we use them
The general concept of my final project is tools for reflection on action; tools which collect and visualize use data in real time, bringing forth the tacit, the automated or the seemingly mundane. This is along the lines of a broader research question of how we can use sensing and actuating to create environments that are not only "intelligent" but can also be reflective (ie. inform the users about their spatial habits).For the MAS863 final project I want to focus on cooking utensils. The source of inspiration for this project was Patrick Olivier's presentation at the 7th International Conference on Intelligent Environments where I participated this past summer. The presentation was about the Ambient Kitchen project, developed by the Newcastle University Culture Lab. This project explores the use of pervasive computing in domestic settings, trying to fully integrate the sensors and actuators in the fabric of the kitchen itself. It consists of projectors, wireless sensor network, RFID readers, cameras, and floor sensors which sense the user activity and perform multiple functions, from recipe recommendation to medication reminders.
What I found fascinating in this project was the embedding of mote-based sensors in kitchen appliances and utensils so as to be able to trace user activity in a non intrusive way. The Ambient Kitchen project is mainly framed as an assistive system (elderly people, patients with dementia etc).
1.Goal:
My vision is to use its general principles to create a portable kit (kitchen utensils and a cutting board) which can sense and visualize user activity. Instead of using the sense data for different kinds of recommendations this system will create light patterns on the surface of the cutting board in correspondence to the use of the kitchen utensils, engaging the users in real time play with the formation of an interactive light field. This process will visualize the choreography of cooking movements bringing forth the complexity and grace of one of our most everyday activities. Apart from working out the intricacies of the system (wireless network, displays etc) I am very excited about the product design aspect of the project; designing and fabricating a full set of kitchen utensils, where the mote-based sensors will be embedded.
Figure 2: Final project concept sketch; systems and components
2.Prior Art:
After doing some research in this area I came across Sajid Sadi's reflectOns project realized at the Fluid Interfaces group, at the MIT Media Lab, which is in very close proximity with what I am planning on doing.
The Ambient Kitchen and the reflectOns project are the main prior art for my project. What excites me in this case is to put the pieces of the puzzle together and to design and make everything from scratch.
Other helpful sources can be the Sensor Network Research group, along with many other communities on WSN
the Fluid Interfaces group at the MIT Media Lab, the Tangible Interfaces group at the MIT Media Lab
Also, for the utensil design Alessi, Greg Lynn's kitchenware can be sources of inspiration.
Finally, as far as data visualization is concerned, Theo Watson's interactive installations are a great precedent.3.Systems and components:
3.1. Knife
3.1.1 Handle
Process: Scan existing knife handle in Konica Minolta [12/12], 3d print handle [12/12], Mold and cast a plastic new handle along with the electronics board;
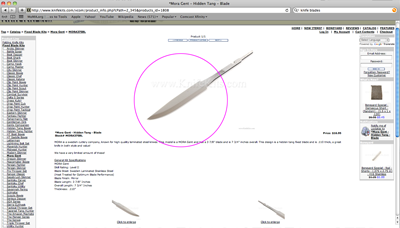
3.1.2 Blade
Order online for $19.95 or ideally waterjet;
3.1.3 Board
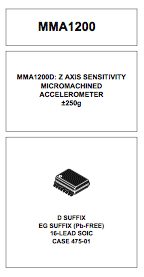
Components: MMA1200D Accelerometer; RGB LED; ATTiny 44; resistors, capacitors, voltage regulator, all from CBA inventory
Process: Design board in Eagle [12/07], mill it in Roland Modela [12/07]; stuff it [12/07] and then program it [12/07]3.2. Cutting board
Process: Design cutting board in Rhino and mill it out of 3/4" plywood ($44.97 per 4*8 ft piece) [12/13]3.3. Visualization
3.1.1. Projector
Borrow pocket projector from MIT Design and Computation Group
Process: Get input from accelerometer and interface it with screen through Processing [12/14];
3.1.2. Projector mounting
Process: Design mounting in Rhino [12/12] and lasercut it at the CBA shop, probably in plexiglass [12/13]
4.Questions I will need to answer:
4.1. hardware
4.1.1. Sensor enhanced utensils
- How to make connect the MMA1200D accelerometer to the ATTiny microcontroller;
- How to embed the board in the knife; How thin it should be;
- How to make the knife waterproof so that the board is not damaged when the knife is washed;
- How to allow for the replacement of the board;4.2. software
- How to I program ATTiny44;
- How to collect the data from the different sensors and the sensing surface;
- How to visualize the data in a meaningful and expressive way;5.Progress until 12/12:
Electronics
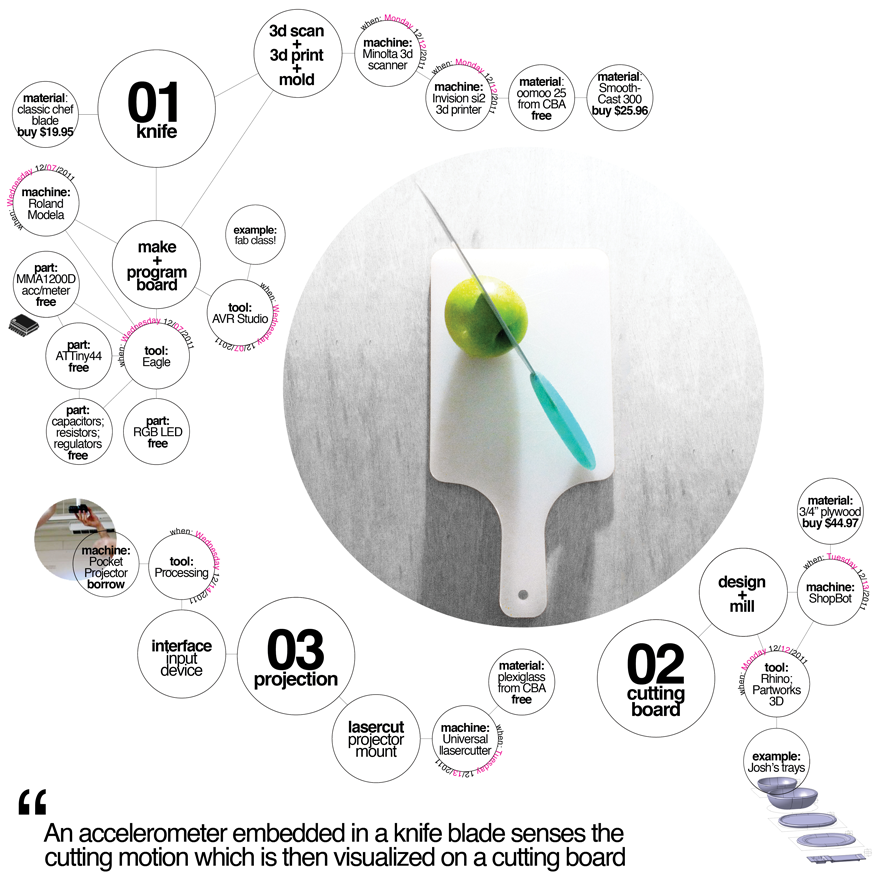
Figure 3: The part that I will be using for my final project
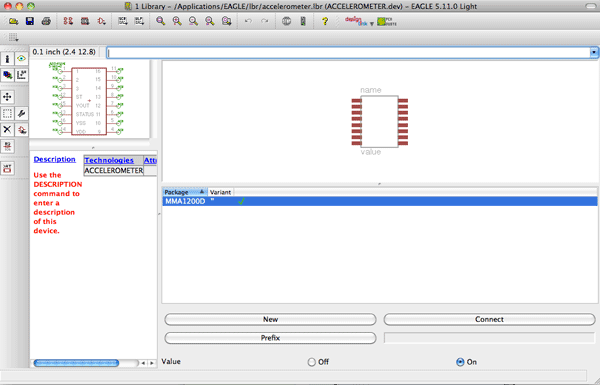
For my final project I will be using the Z axis Micromachined Accelerometer from the CBA inventory (MMA1220). I spent some time looking at the datasheet in order to understand how it works. The accelerometer outputs voltage so it should be easy to modify one of Neil's codes (e.g the light sensor) in order to program it. The part did not exist in the Eagle library so I designed it from scratch. It was an interesting side-lesson and made me understand the part better. I followed a very good tutorial from Instructables.
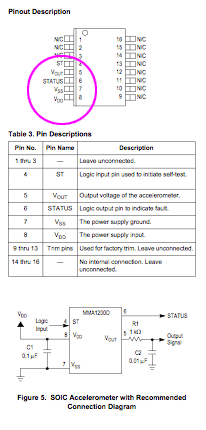
Figure 4: Making the part in Eagle
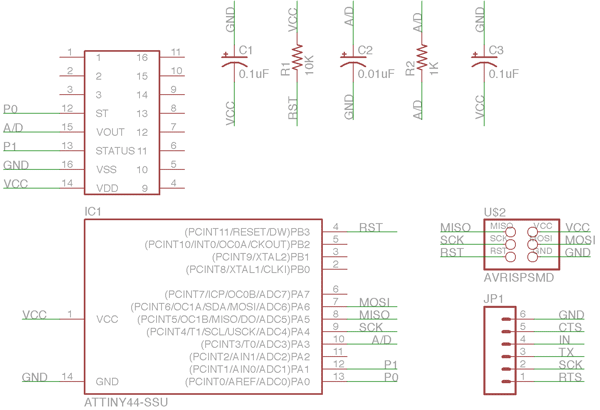
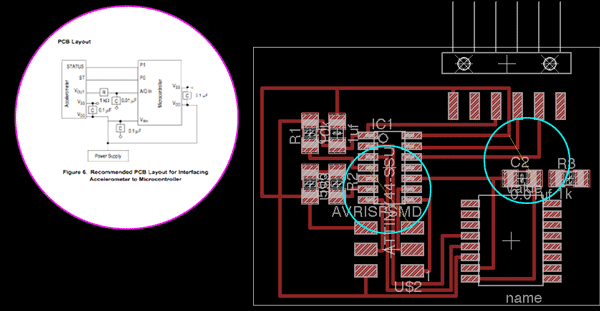
After I made the part I looked at the recommended PCB layout at the Datasheet in order to design the board in Eagle. I am still sketching and trying to figure out routing. Useful observations are: 1) the board might need to be double sided 2) I might need to find a way to remove the six pin header after I have programmed it 3) I will also need a good way to power it. I do not know if the FTDI caable is the best option.
Figure 5: Accelerometer Schematic
Figure 5: Accelerometer Board (routing efforts)
Hardware
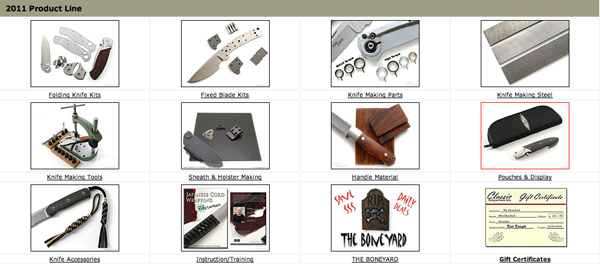
After browsing through custom knife making websites and ordered my knife blade.
Figure 6: Hardware considerations
Today after class I will focus on finalizing the board design in order to design the blade and start making the molds for it.
OR How to make tools that show us how we use them
The general concept of my final project is tools for reflection on action; tools which collect and visualize use data in real time, bringing forth the tacit, the automated or the seemingly mundane. This is along the lines of a broader research question of how we can use sensing and actuating to create environments that are not only "intelligent" but can also be reflective (ie. inform the users about their spatial habits).For the MAS863 final project I want to focus on cooking utensils. The source of inspiration for this project was Patrick Olivier's presentation at the 7th International Conference on Intelligent Environments where I participated this past summer. The presentation was about the Ambient Kitchen project, developed by the Newcastle University Culture Lab. This project explores the use of pervasive computing in domestic settings, trying to fully integrate the sensors and actuators in the fabric of the kitchen itself. It consists of projectors, wireless sensor network, RFID readers, cameras, and floor sensors which sense the user activity and perform multiple functions, from recipe recommendation to medication reminders.
Figure 1: How the University of Newcastle Culture Lab's "Ambient Kitchen" helps make a cup of tea
What I found fascinating in this project was the embedding of mote-based sensors in kitchen appliances and utensils so as to be able to trace user activity in a non intrusive way. The Ambient Kitchen project is mainly framed as an assistive system (elderly people, patients with dementia etc).
1.Goal:
My vision is to use its general principles to create a portable kit (a knife and a cutting board) which can sense and visualize user activity. Instead of using the sense data for different kinds of recommendations this system will project light patterns on the surface of the cutting board in correspondence to the use of the knife, engaging the users in real time play with the formation of an interactive light field. This process will visualize the choreography of cooking movements bringing forth the complexity and grace of one of our most everyday activities.
Figure 2: Final project concept sketch; systems and components
2.Prior Art:
After doing some research in this area I came across Sajid Sadi's reflectOns project realized at the Fluid Interfaces group, at the MIT Media Lab, which is in very close proximity with what I am planning on doing.
The Ambient Kitchen and the reflectOns project are the main prior art for my project. What excites me in this case is to put the pieces of the puzzle together and to design and make everything from scratch.
Other helpful sources can be the Sensor Network Research group, along with many other communities on WSN
the Fluid Interfaces group at the MIT Media Lab, the Tangible Interfaces group at the MIT Media Lab
Also, for the utensil design Alessi, Greg Lynn's kitchenware can be sources of inspiration.
Finally, as far as data visualization is concerned, Theo Watson's interactive installations are a great precedent.
4.Questions I will need to answer:
4.1. hardware
4.1.1. Accelerometer and RGB LED Board
- How to make connect the accelerometer with the ATTiny44 microcontroller;
- How to embed it in the knife;
- How to make the knife waterproof so that the board is not damaged when the knife is washed;
- How to allow for the replacement of the sensors;4.2. software
- How to program the microcontroller;
- How to visualize the data in a meaningful and expressive way;
- (How) Can the user intervene in the way the data is visualized?On Wednesday morning John and Tom gave us a tutorial on how to use the laser cutter. Here is a transcript of the notes that I kept along with some tips from personal experience.
3.1. Safety first:
It is quite usual to see a small flame when the laser is cutting the material. If a small flame worries you then you can open the lid and cover the flame with a piece of acrylic. If the flame is big or the material catches on fire then you open the lid, close the air valve and call 100.3.2. How to put the material on the laser bed:
The origin point is the top left corner. Make sure your material is the right size; in the Universal Laser Cutter at the CBA shop the bed is 32*18". You might need to use some tape to attach the material to the edges of the bed if it is not completely flat (this is for example very usual with cardboard)3.3. How to adjust the height of the laser bed:
Use the marked metal rod to measure the height between the cutting tool and the material you have placed on the laser cutter board. Press Z and use the Up and Down arrows to bring the cutting material to the edge of the metal rod. You will know that the height is right when the pin does not let the board to go any further up.
The check button moves to smaller digit precision for height refinements with the up and down arrows. Once you have found the right height press Z again to exit.3.4. How to send your files:
3.4.1. If you are using Inkscape:
1. Prepare your file and export it in 300dpi. Keep in mind that the white part is the one cut with precision so your offsets are "eating" off the black part.
2. Go to fab > run in terminal
3. Select the Universal laser cutter and define power and speed. Make sure that you set the pulses per inch (ppi) to be less than 500 if you are cutting cardboard. If you are cutting acrylic you can do almost 300.
4. Specify xmin and ymin. This is how far from the top left corner (origin) the machine will start cutting the file.
Hit make .uni
6. Send!3.4.2. If you are using CorelDraw (Windows):
1. Import your file
2. Make sure all your lines are Hairline (No thickness)
3. Optional step: You might want to offset your lines for precision. Go to Effects>Contour and do an Outside offset of 0.005 (or around that) Then do Arrange and break contour group apart.
4. Go to File>Print>Properties and set Power and Speed per color
Press Set to register your changes
6. Print!3.4.3. If you are using Rhino or AutoCAD (Windows) you can set the speed and power per layer through the print menu. Make sure you SKIP all the layers you do not want to cut and that you select the area you want to cut with a print window and that all your lines are 0 thickness or hairlines. In Rhino you can set the size of the print window and then Move it in the correct spot in the screen. You send your file by hitting print.
3.5 How to cut your files:
Find the right file! If you send multiple files you can navigate through them with the >> and << buttons.
2. Do a test run. It is recommended that you do a test run to confirm that the path is right. Just press the green button <|> while the lid is open.
3. Cut! If all looks fine close the lid and press <|> to cut.