Flexible LED Array
Vinyl cutting and charlieplexing
The goal for this week: Use a microcontroller to make an output do something.
So, charlie what?
I had not heard of Charlieplexing until this week. For those students who are newer to the electronics side of things: Usually when controlling LEDs with a microcontroller each pin controls one LED. A 1:1 ratio means multiple microcontrollers for arrays of anything over 10 LEDs. With Charlieplexing, you can control a large number LEDs using just a few pins. To be precise, one pin per row. n pins can power n2-n LEDs
Method
1. Vinyl Cutter
The flexibility of the vinyl cut circuits is something I am planning to use for my final project, so I decided to make the Charlieplexing LED example from Neil's page with the vinyl cutter. I used force 75 and speed 2.5(tutorial)
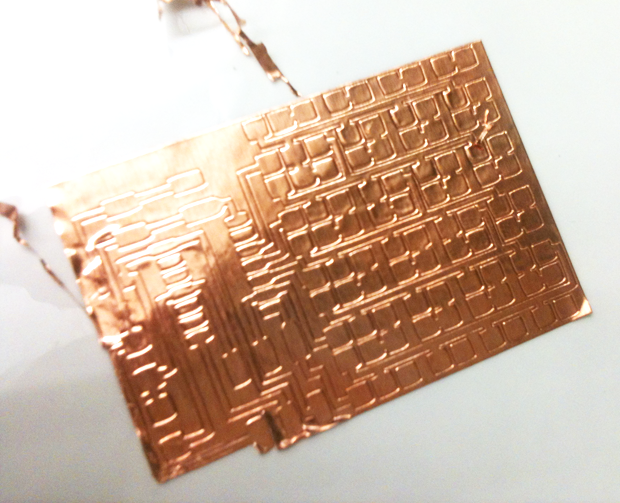
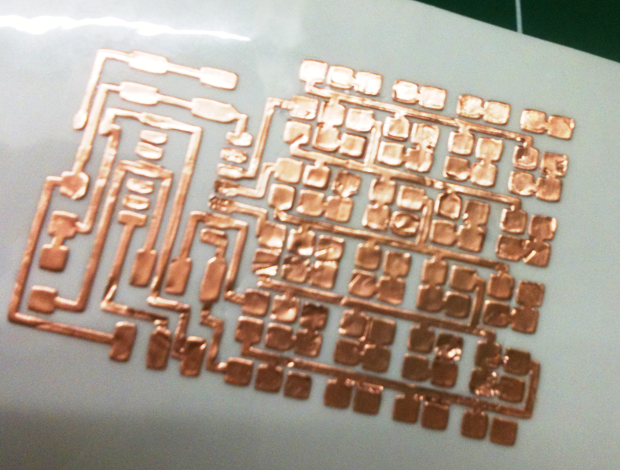
2. Weeding the Board
The Charlieplexing traces are cut very close together so weeding was a little tricky, especially in between the little pads for resistors and LEDs.
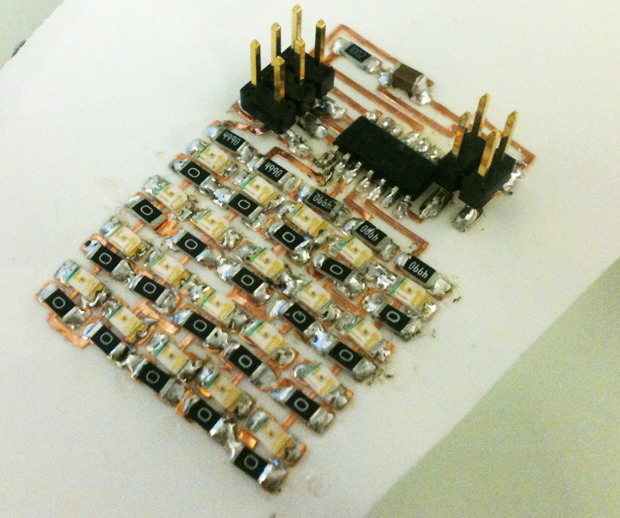
3. Stuffing
Soldering a vinyl cut board needs the greatest speed and deftness of hand. The small size and lack of a flux pen meant I over heated the traces a little and ended up with a decidedly messy board.
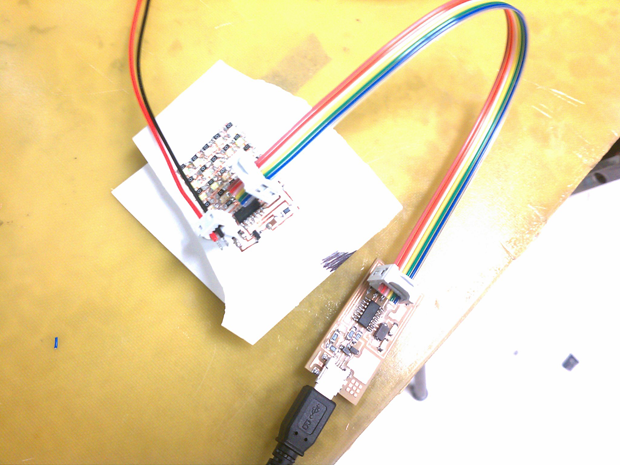
4. Programming
In order to program the charlieplexing board, you need to run "make", then " program-usbtiny":
5. Troubleshooting
When I tried to program the board it wouldn't program, and I got the response:
make: ***[program-usbtiny] Error 1
This usually means that there is a problem with the board. Some of the vinyl traces had moved, and some of the connections were either weak or too large.
6. Success!
7. Programming the .c file:
I started making changes to the c file to alter the light patterns. My goal for the final week is to create images with the LEDs, but I'm not quite there yet.