Electronics Fabrication
The assignment this week was to use the modela 3 axis mini-mill to make an ISP for the AVR line of microcontrollers.
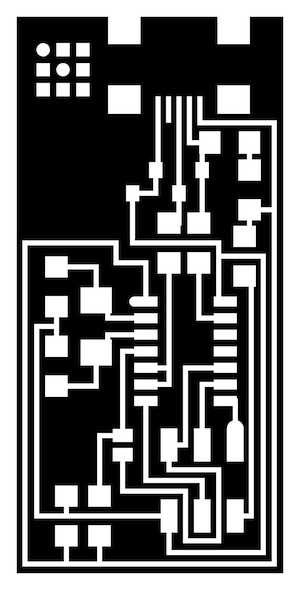
Fortunately, the fab module provided by Prof. Gershenfeld makes using the modela very easy. To mill a circuit from a png, you load up the fab module by running "fab" in the terminal. Select from .png to .rml and load the image of your board. Boards should be white where copper should be kept, and black where the copper should be milled away.
Select mill traces (1/64") from the drop down at the top of the window, and make path, checking to make sure none of your traces are too close together.
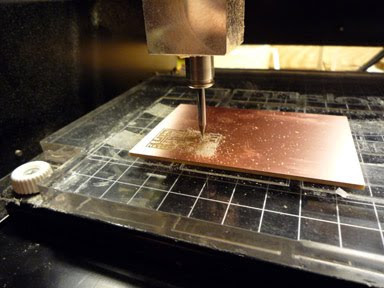
Confirm that the endmill in the modela is the right size, and hit the "view" button if necessary to take it out of view mode. Use the fab module to move the endmill to the lower left corner of where you want your board to be, and hit the down button on the modela until the endmill just pierces the copper.
Now that you have zeroed the mill, you can use the fab module to make rml and send to machine. The modela should begin to mill your board.
Once the traces have been milled, repeat the same process to cut out your board, using the outline of your board as the png, and selecting 1/32" instead of 1/64" (make sure to swap out the endmill).
Once the board has been cut out, solder each of the components to the board. It tends to be easier to place the smaller components first and work up to the larger ones.
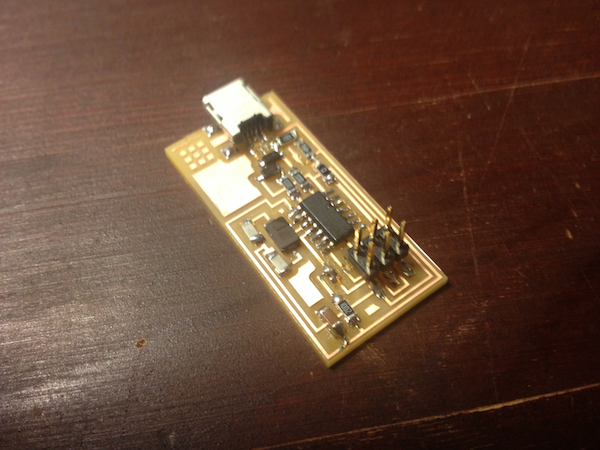
Now that the board is populated, download and unzip the firmware files. Plug the ISP you are making into the computer for power, and a working ISP into the computer as well as into the ISP you're working on. Download the firmware, unzip, and run make clean, make hex, make fuse, and make program, in that order. If all goes well and there aren't any hardware problems with your board, everything will program correctly, you can desolder the two jumpers, and you will have a working AVRISP!
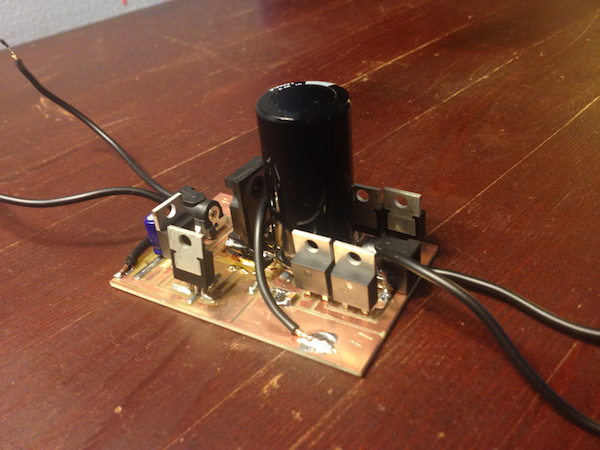
In the spirit of electronics fabrication, this week I began work on the circuitry for my final project by prototyping a board for the powersupply. This board should be able to provide 30V and up to 10A to the audio amplifier. For more information see my final project page.
Fortunately, the fab module provided by Prof. Gershenfeld makes using the modela very easy. To mill a circuit from a png, you load up the fab module by running "fab" in the terminal. Select from .png to .rml and load the image of your board. Boards should be white where copper should be kept, and black where the copper should be milled away.
Select mill traces (1/64") from the drop down at the top of the window, and make path, checking to make sure none of your traces are too close together.
Confirm that the endmill in the modela is the right size, and hit the "view" button if necessary to take it out of view mode. Use the fab module to move the endmill to the lower left corner of where you want your board to be, and hit the down button on the modela until the endmill just pierces the copper.
Now that you have zeroed the mill, you can use the fab module to make rml and send to machine. The modela should begin to mill your board.
Once the traces have been milled, repeat the same process to cut out your board, using the outline of your board as the png, and selecting 1/32" instead of 1/64" (make sure to swap out the endmill).
Once the board has been cut out, solder each of the components to the board. It tends to be easier to place the smaller components first and work up to the larger ones.
Now that the board is populated, download and unzip the firmware files. Plug the ISP you are making into the computer for power, and a working ISP into the computer as well as into the ISP you're working on. Download the firmware, unzip, and run make clean, make hex, make fuse, and make program, in that order. If all goes well and there aren't any hardware problems with your board, everything will program correctly, you can desolder the two jumpers, and you will have a working AVRISP!
In the spirit of electronics fabrication, this week I began work on the circuitry for my final project by prototyping a board for the powersupply. This board should be able to provide 30V and up to 10A to the audio amplifier. For more information see my final project page.