week two: press fit experiments
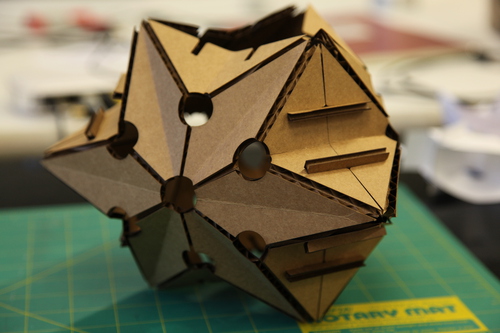
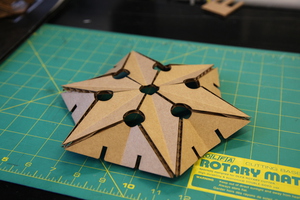
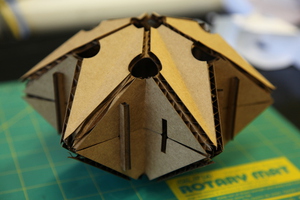
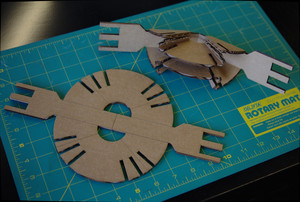
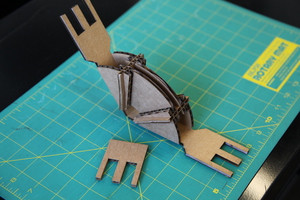
This week for our press-fit construction assignment, I wanted to experiment with rigid, finite-thickness origami patterns. Admittedly, this is double dipping with 6.849, but so it goes. Above is a picture of the result -- a polyhedra exploration kit using origami patterns. Each piece has a degree of freedom as the folds are flexed which varies the mean curvature (while the Gaussian curvature remains zero). By connecting these pieces along their borders, we can force the pieces into a particular curvature state. In this way, assemblies of the same piece can act flexibly to create many different polyhedra.
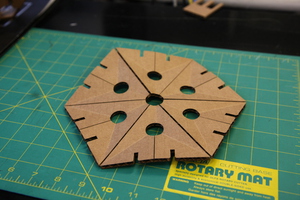
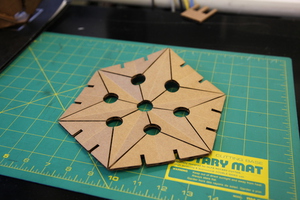
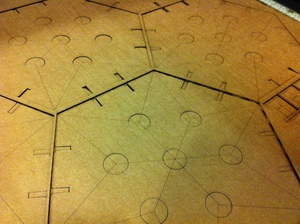
In the first two pictures below, each side of the hexagonal piece has scores to create the mountain and valley folds. In the third, the three-dimensional structure starts to show. This design is an adaptation of the bird base, a very common origami folding.
 |
 |
 |
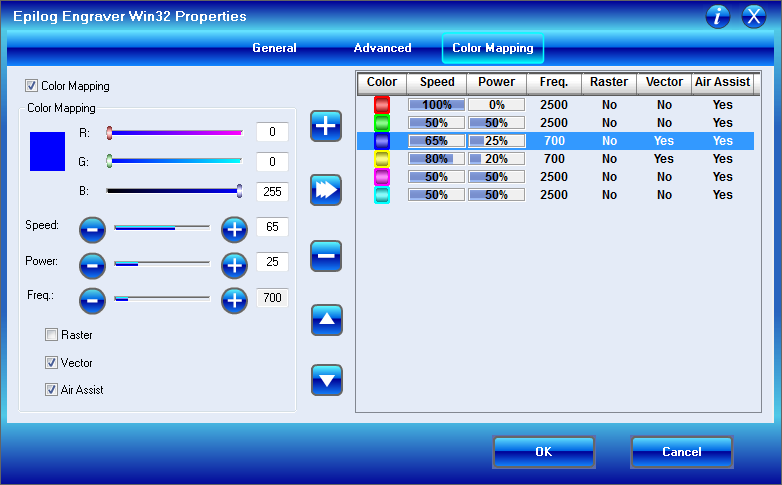
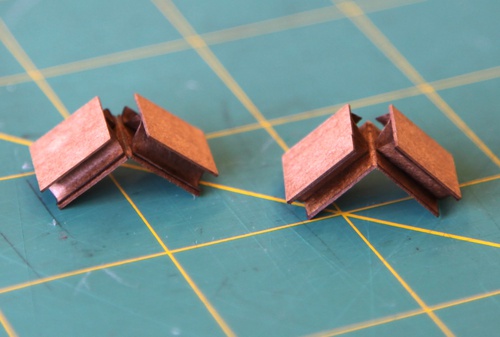
To get the score cut just right, I tested settings on a simple cut file, the tiny folded piece shown below. Contrary to the screenshot, the settings I liked (with freshly cleaned optics) were 100% speed, 17% power, and frequency 700. On the right below, the cardboard has been scored on one side and is ready to be flipped in place and scored again.
 |
 |
 |
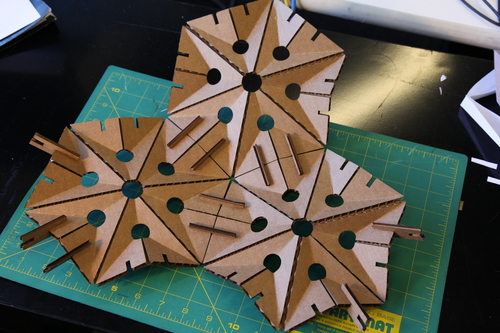
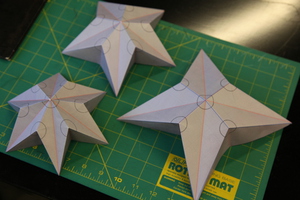
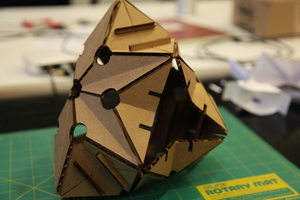
Before cutting cardboard, I made a bunch of paper models to get an intuition for which origami patterns would be realizable in thick materials. The first picture below shows a couple of them, results from the same script with different input parameters. The second two pictures show different configurations of the polyhedra construction kit.
 |
 |
 |
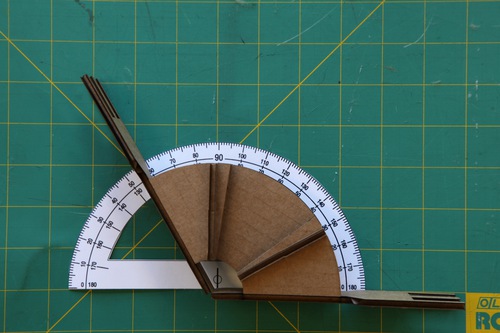
Before settling on this origami pattern, I designed a programmable angle mechanism based on foldings that are locked into place with a press-fit key. Like thickness, chamfering, etc., the bent angle is a parameter of the model.
 |
 |
 |
 |
 |
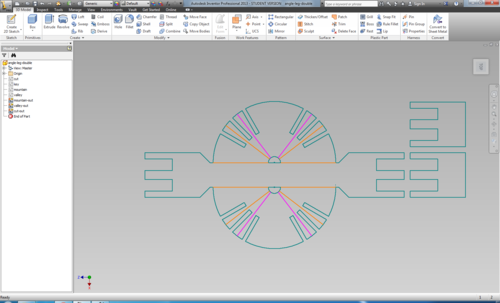
To design the polyhedra patterns, I used python + rhino. This page has information about this type of scripting on mac os. I like the greater control this gives over commercial software, such as Autodesk Inventor. I used Inventor to design the angle leg, but quickly remembered how much this software hates being used for 2-D design. In my experience, unless 2-D sketches are developed into 3-D features (e.g., via extrusion), there are very few options for managing them in the program.
The python script I used to generate the polyhedra pieces, as well as several types of keys, is here. Please excuse the embarrassingly obfuscated and redundant code -- it was a speed hack on Wednesday afternoon. As you can see, there are some annoying features of the rhinoscriptsyntax module. In particular, python seems to want me to download a .NET version of numpy in order to use it. There are a few nice geometry libraries I'd like to use that depend on numpy and scipy, and as I'm really only using rhino as a viewer and exporter, I'd really like to ditch it. If you know of a dirty GUI to view, change parameters, and export 2-D and 3-D data (or want to help me write one), let me know...
Oh, and the reason I'm not fond of kokopelli for this type of design is that I explicitly want vector constructions for the score marks. A volumetric description of this feature seems ill-fitting, and the path generation would likely see the scores twice (as it tries to find the outline of a very thin rectangle).