week five: hello board.
This week we fabricated the first boards of our own design. In this case, the design was a simple modification of an existing design, the Hello FTDI board. We were to add a button and LED in a safe way, so that we could program the board to do something interesting with the two. Wait, what if the LED could light up when you press the button!?
Like a lot of others, I think, I refered to Dan Novy's page for help during the project. My board (shown below next to the original board) turned out very similar to his, with only a couple differences.
 |
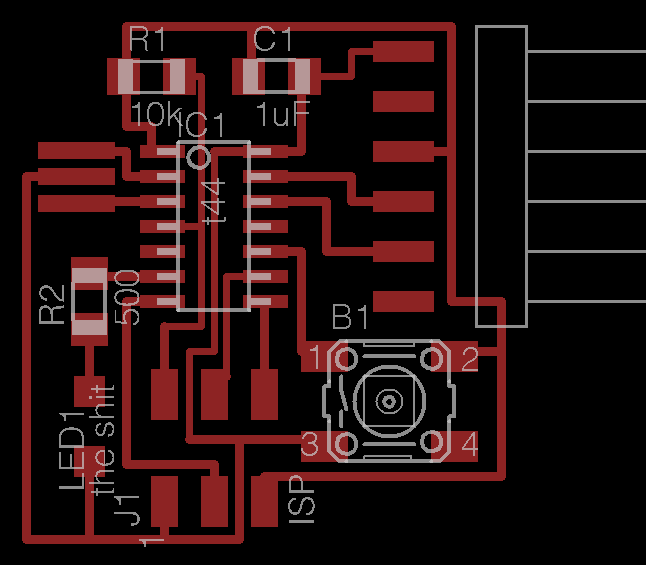 |
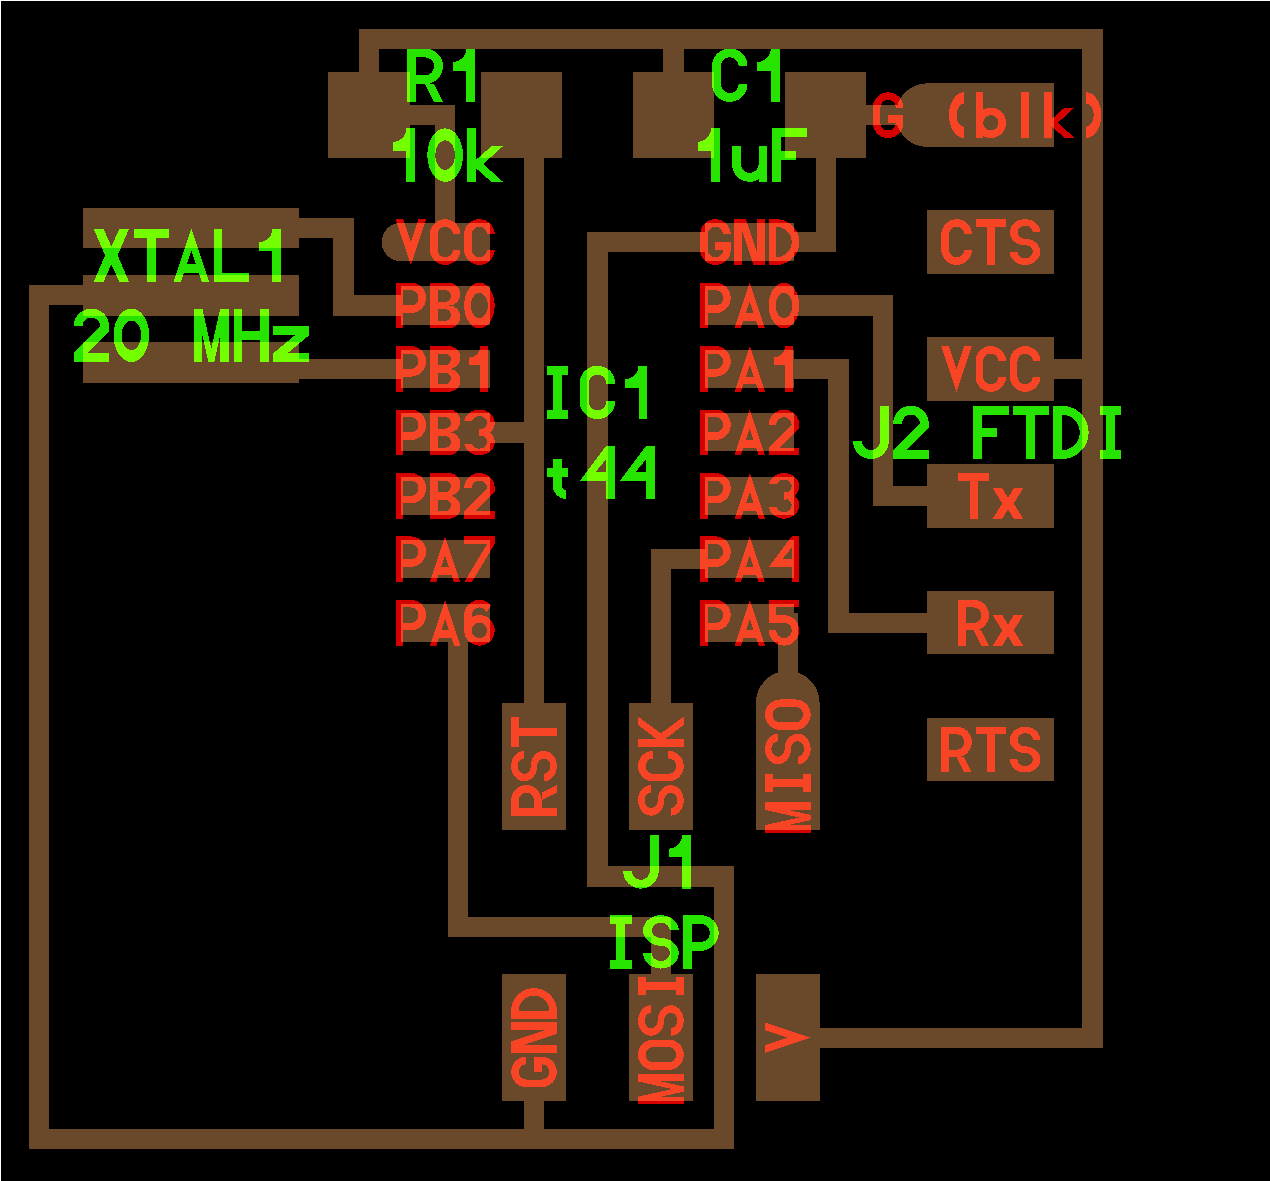
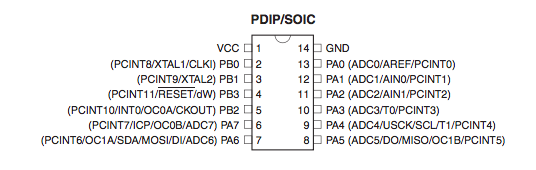
The main difference between my board (besides some shuffling) is the omission of the 10k pull-up resistor for the button pin. As Dan notes, the datasheet for the tiny44 shows the included pull-ups.
 |
 |
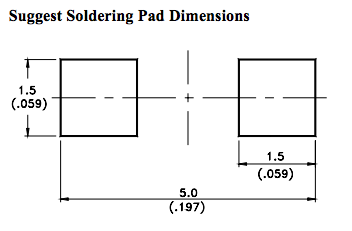
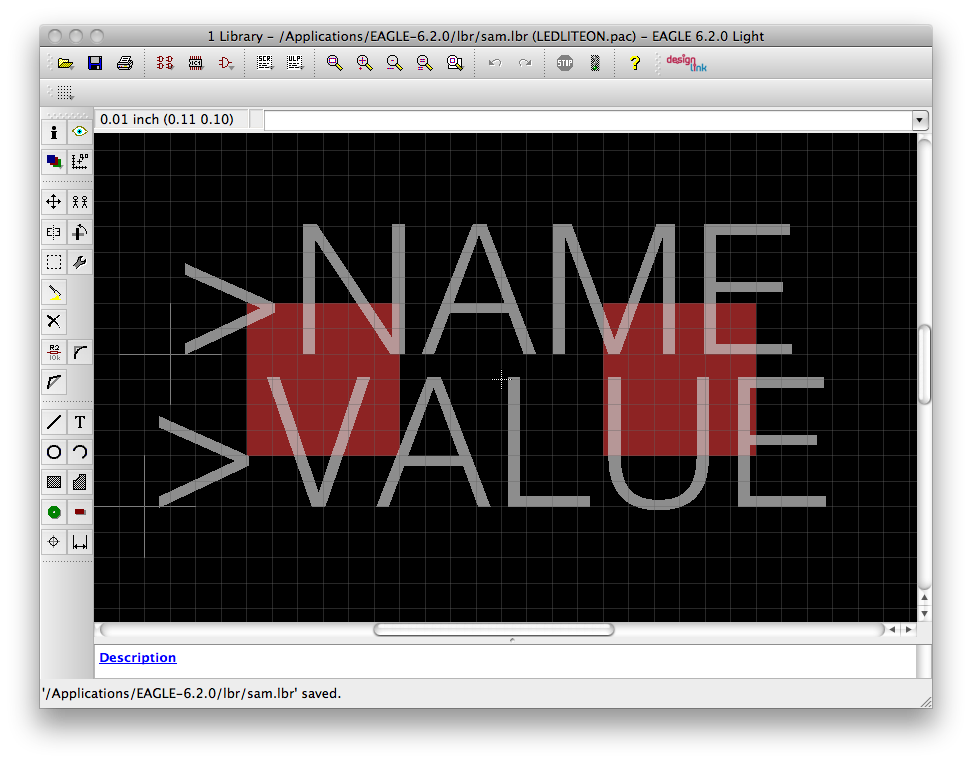
I had never used Eagle before, so this project was a learning process with the software. Overall, it seems like a nice way to lay out boards quickly. At first I got hung up on tracking down the right libraries and parts to include in my board, but before long I just started drawing them myself based on the datasheets. Eagle doesn't seem to provide adequate places for metadata when you make a part, and so when looking at parts from other folks, there was always some uncertainty. The fab library from the content archive was helpful for this (because there were fewer parts to be ambiguous about), but for some parts it was easier to recreate the footprints and avoid guesswork. Below is the soldering suggestion from the LED datasheet and the Eagle file I made from it.
 |
 |
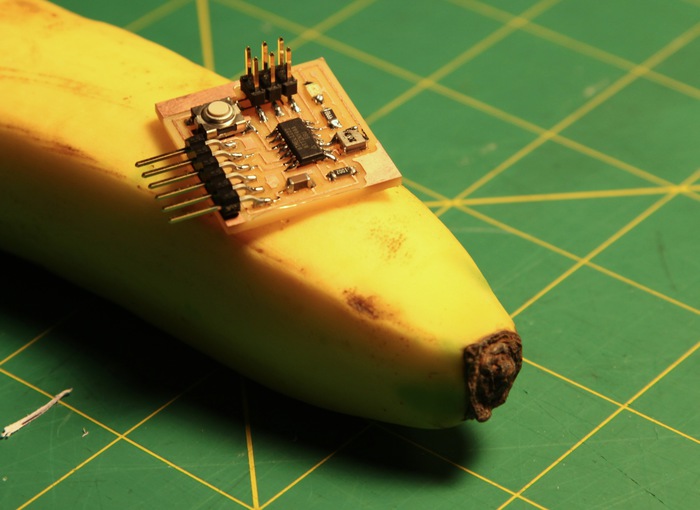
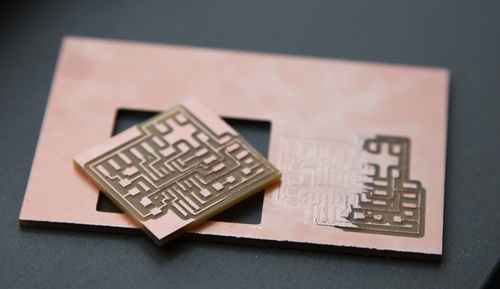
After the board design, the rest of the project had only a few hiccups to deal with, including the 1-bit indexed PNGs from eagle (fixed with Neil's patch, or via GIMP/Preview), noncommunicative Modela (fixed by checking connections), and uneven sacrificial layer (shown below, fixed by moving to a more level spot). Also, I'm starting to love soldering really tiny shit.
Files: