Light Sensing Beds
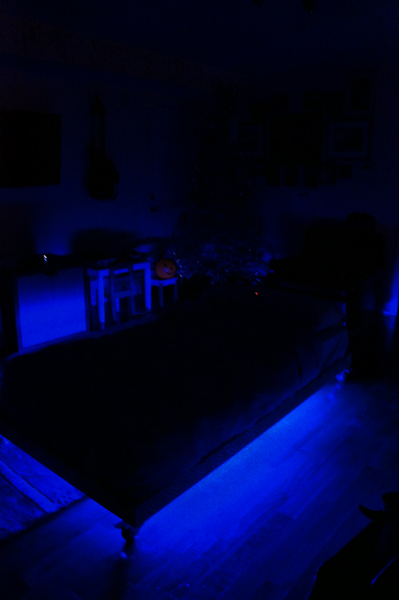
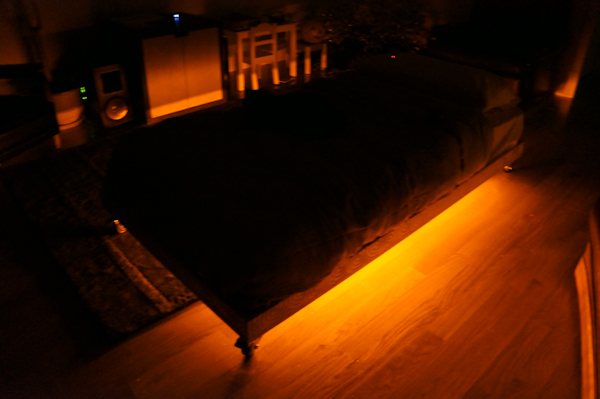
When the lights go off, the beds go on.
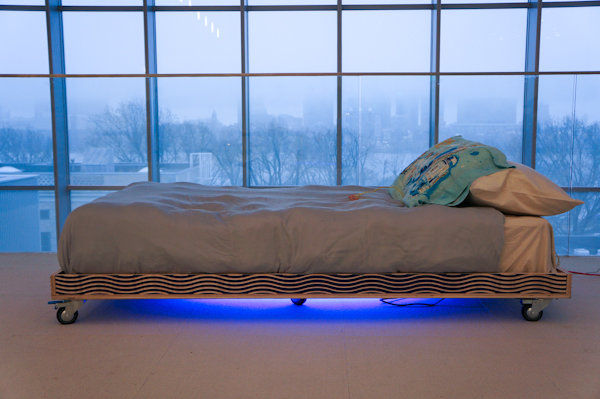
The beds are done! For my final project I designed interactive beds for my two kids aged 4 and 2. The idea is that they are simple platform beds, low to the ground (my kids are young and tend to fall out of bed which is why they currently sleep on the floor), and on casters so that the kids can push them around and reconfigure their room. When the lights turn off, the beds glow and do various kinds of ground effects.
Illustrator/ShopBot Design Files

Illustrator files for the ShopBot. Note that the platforms in these files are missing holes for air circulation which I added later.


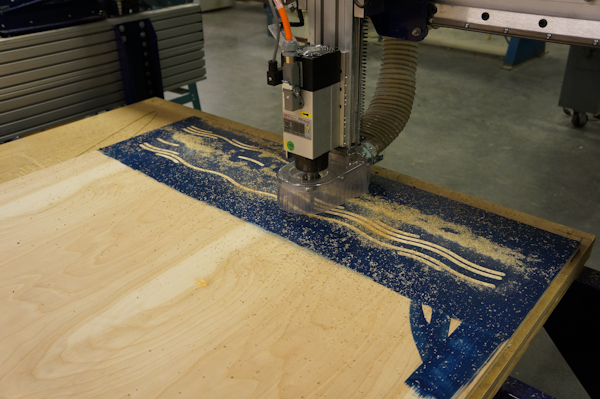
The wood I'm using is birch. The rails of the beds have decorative designs on them.
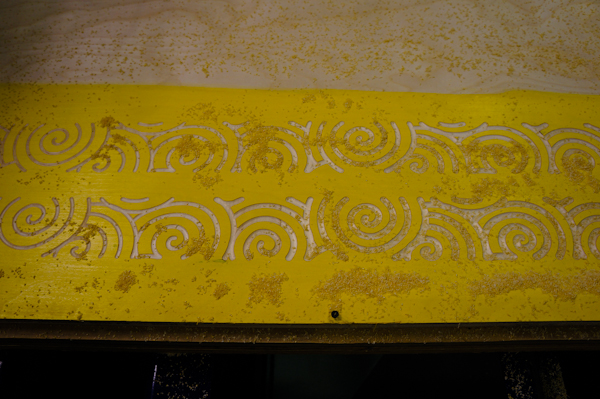
I stained the wood first and then used a 1/2 inch ball-nose endmill to engrave the designs for a two-tone effect. One hiccup during this process is that I realized I could have done a better job of fastening the wood to the bed. It was slightly uneven which made for varying thicknesses in the engraved design (which looks fine but is something to note for the future). John D. showed me afterwards that you really need to pre-drill holes before you put the screws in.
Assembly
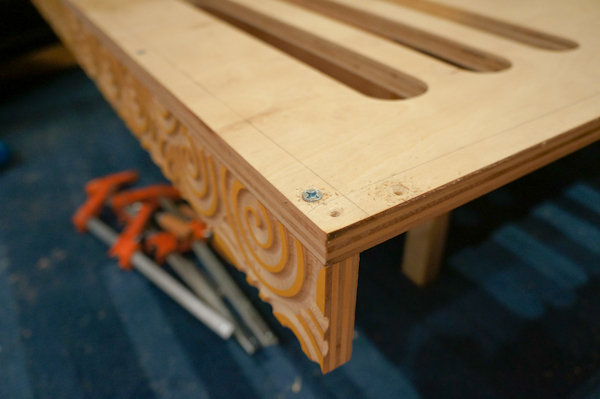
My husband helped me assemble the beds. We pre-drilled holes in the platform and in the rails and then screwed them together. For the casters, we used washers, bolts and self-locking nuts to make sure things wouldn't come loose. We ended up using 6 casters per bed - one on each corner and two in the middle for structural stability when the kids jump on the bed. In retrospect, it might have been cool to think about some kind of peg system or something that would make the beds easy to take apart.
LEDS

I used one 40" strip of blue LEDS for the blue bed and 2 40" strips of yellow LEDS for the yellow bed from superbrightLEDS.com. The blue are truly "superbright" and the yellow less so.
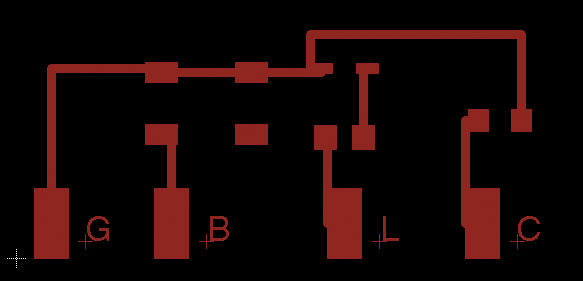
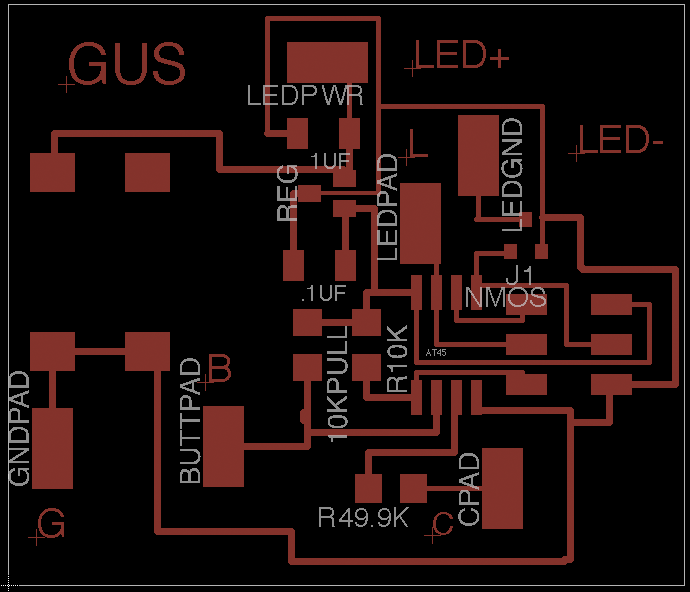
Eagle
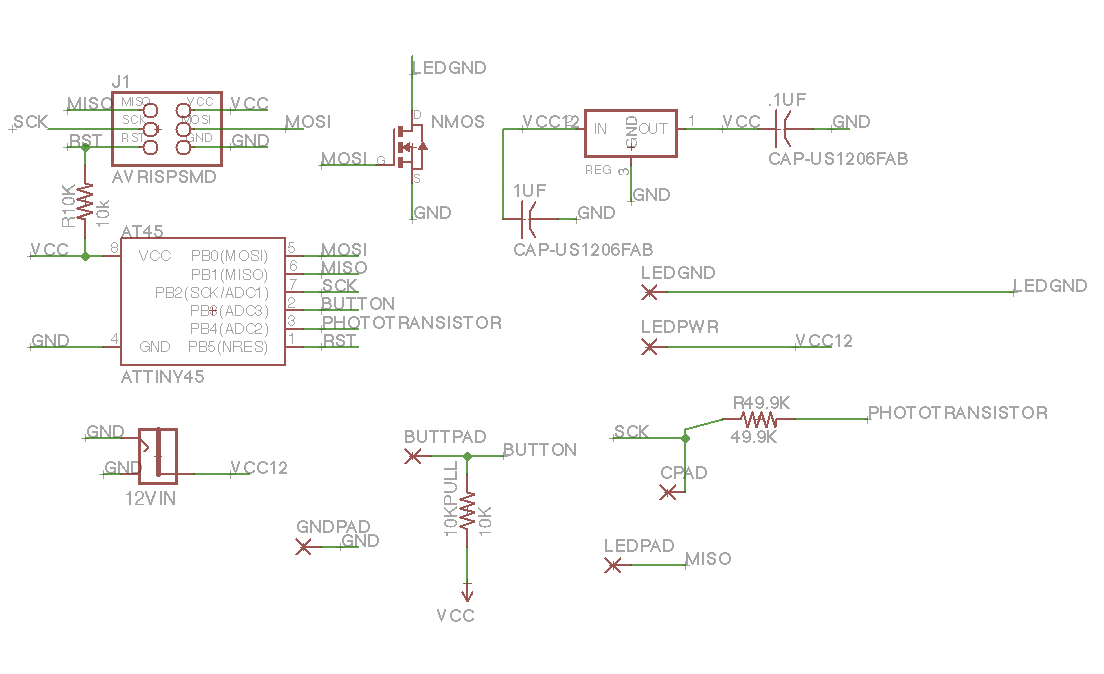
Here's my schematic and board from Eagle. One note is that I had to rewire the indicator LED to the MISO pin instead of the SCK pin because I was already reading the phototransistor on the SCK pin so this schematic is a little out of date.
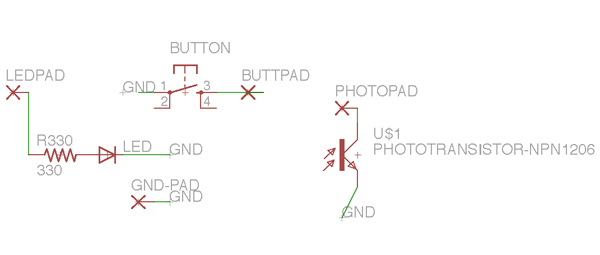
This is the little breakout board which has a button (to turn system on/off and to switch between ground effects modes), the phototransistor (to detect the light level in the room) and an LED (to indicate the system is on/off).