
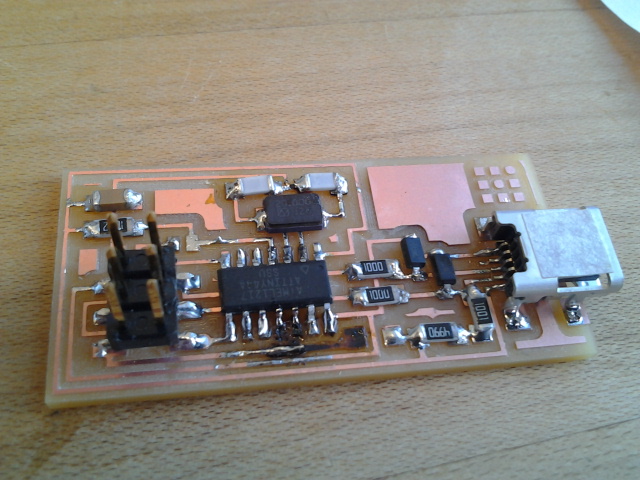
Damaged board: damage from lowering of endmill, and some tracks milled twice
To Make a FabISP In-Circuit Prgrammer
Began (Friday morning) by making some errofs that you could call pilot errors. First, lowered the z-axis of the Modela endmill far too much to damage the center of the PCB board. This required that the milling area had to be carefully adjusted to avoid the damaged portion. For a reson that I don't understand yet, this adjustment was hard becuase the milling progressed to the bottom-left from the endmill's initial position, instead of towards top right. This made the calculation super hard. Then, we reset Modela and the PC, and the problem went away.
Second problem was that I milled the same PCB twicce. This too was a pilot error because when I made the path for the interior, I forgot to make the .rml, and when I issued the print command, it printed the traces again over the same area. I decided to throw out this board as it was printing the traces again because I thought I had done something horrible. In retrospect, it was not necessary to throw it out. below is that first PCB.

The next board had to be thrown because the bed was tappered, and the front of the board got milled and the back did not. I learned that I'd have to deburr the bed and makesure the bed is flat.
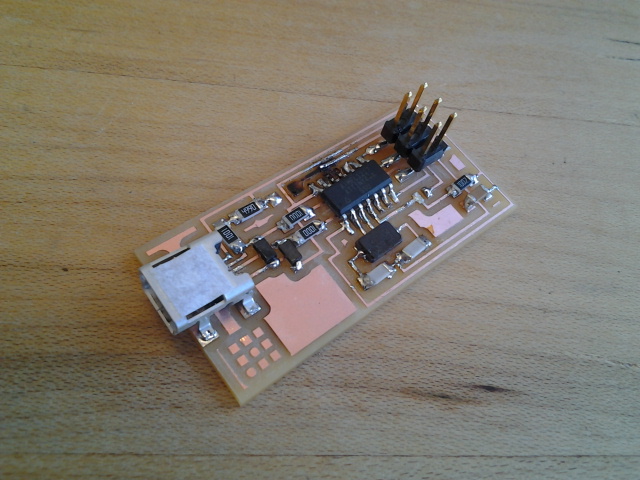
After these mis-steps, we could cut three boards (one for me, and two for two other classmates).
The total process until this point took 5 hours.
I decided to solder the IC first. This was a bad choice. I was not comfortable with soldering yet. I should have soldered other individual components before going to something complicated. The first time I soldered the IC, once side touched the board, but all the pins on the other side remained slightly raised (I think this was the case because I had used a massive blob on one side to tack the IC). I decided to proceed anyways. I just made taller blobs of solder material to connect pins on the side that was raised. I thought this should work, but I ended up burning two tracks (pins 3 and 4 on the shorter side of the board as shown in the diagram). I thought I was doomed; will have to make one more board. Luckily, these pins are unused, so I could proceed. I removed the IC with a heat gun and resoldered it.
One more mistake I made, which did not luckily hurt me was that when I replaced the capacitors and removed the jumpers, I simply used tweezers and solder iron to pull off these components. Doing so began to peal off the tracks . I should have used the braid first. Luckily, here too the tracks that got ripped off could be repaired, or were unused, so I was saved.
By the time I soldered the IC, I had learned to solder. I now understood the meaning of heating up the pin on the component, heating up the track, putting the solder iron on the track about 1mm away from the pin, touching the solder wire to the pin to let it flow to the iron. Worked great. Now, I soldered rest of the components.
Connected to AVR. Kept getting make fuse error. It said no USB device found. First problem was that the Makefile had to be changed to recognize AVR (someone had changed the Makefule as they had to take AVR away momentarily). Second, I had not connected my ISP to the PC (i.e., PC->AVR->my ISP were connected, but myISP->PC was not). So my ISP was getting no power. Once makefile was fixed and I connected myISP to the PC, AVR light went green, and make fuse worked.
Now, make program started to fail. The problem was that the IC was not receiving the clock signal from the crystal because I had, by mistake, used 1pF capacitors in place of the two 10pF capacitors. Once the capacitors were replaced, make program worked.
I now desoldered the two jumpers, and when it connected it to computer, Fab ISP got recognized.

I am now making Andy's FabISPKey version. I have milled and cut it out. It requires stuffing.