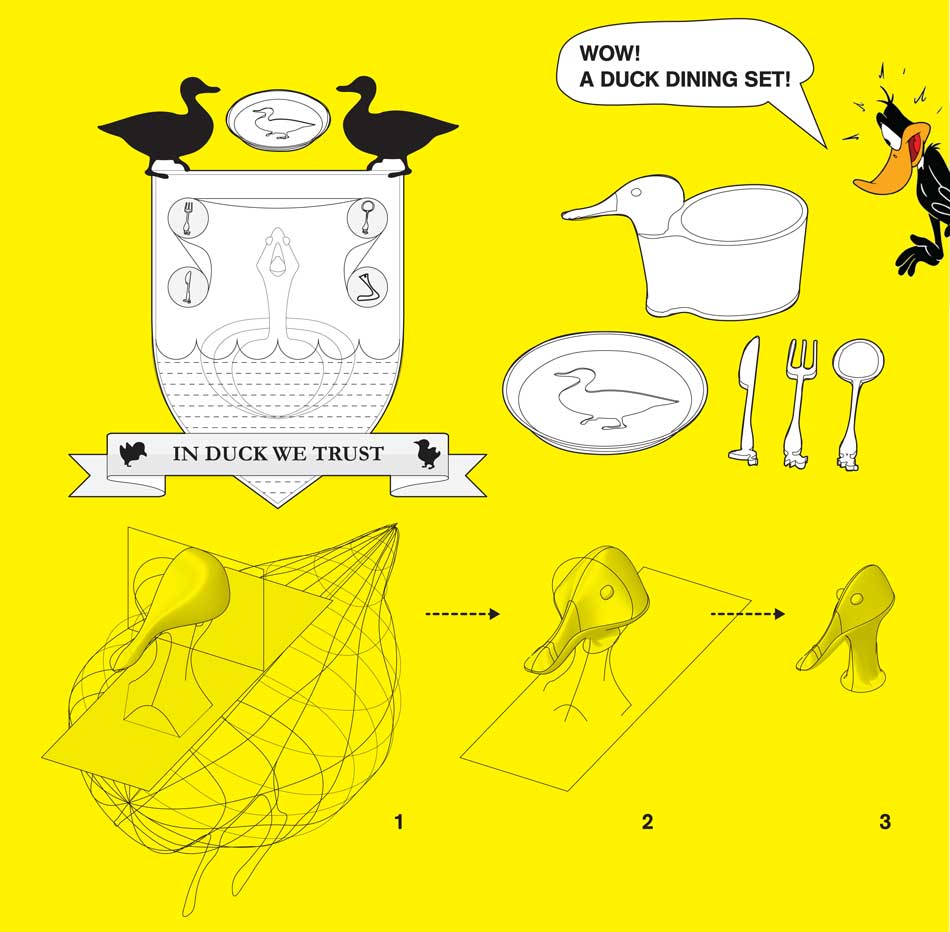
Modelling Duck's Head
This week's task is to do both 3D Scanning and 3D Printing. For the 3D Printing, I decided to send my job to the ABS Dimension Printer as I've never used it before. It's slower than the ZCorp Powder Printer but, it allows for thinner and stronger print result.
To continue building up towards my final proposal, I modelled a duck head using Rhino. To achieve the complexity of the form, I ended using lots of "Sweep 2" command. Instead of just printing a duck head, I made the latest design from the Duck Kingdom: The Duck Dining Set -- come with a plate, a mug, a fork, a spoon, and a knife!
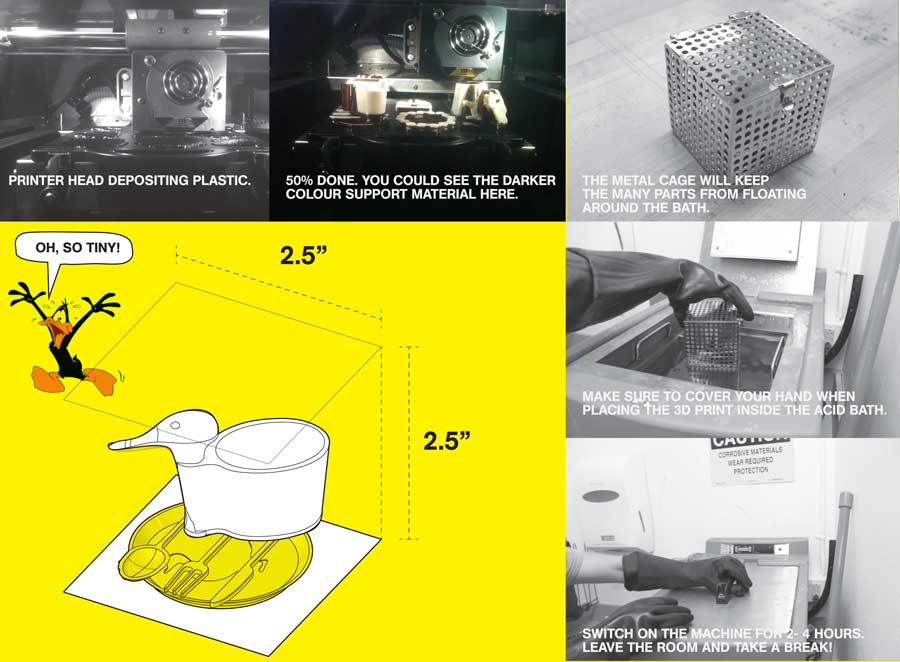
Printing and Dissolution
The models were compacted into 2.5" x 2.5" bounding box. We sent approximately six printing jobs as a batch. It took around 24-30 hours to complete the jobs. ZCorp is definitely much faster than this!
The gaps between the models were filled with supporting materials, which will be dissolved in an Acid bath; this process takes between two to four hours -- depending on how much support materials you need to get rid of.
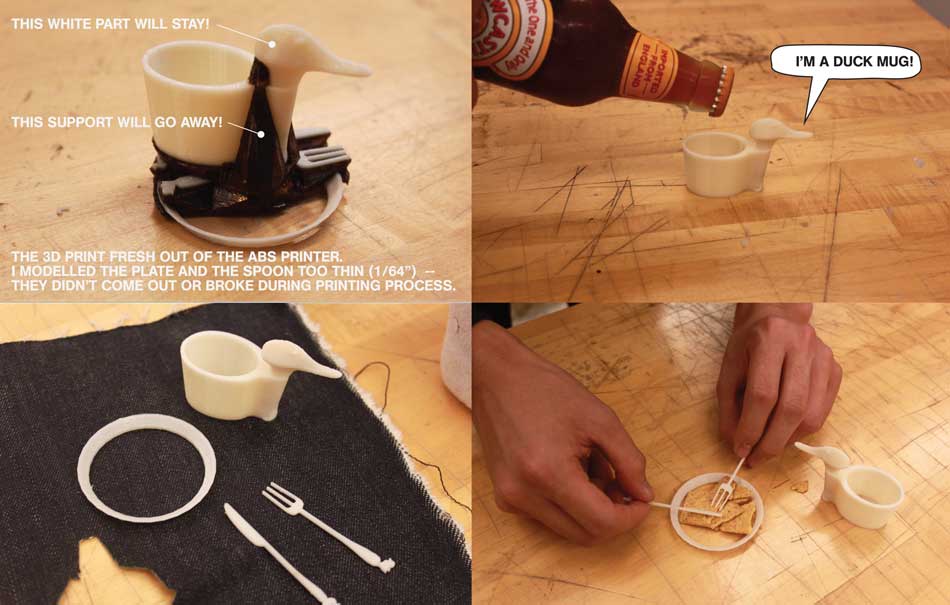
Process and Result
One thing which I underestimated was the thickness of the material when still modelling in Rhino. For most part, it's thicker than 1/32", which I believe the ABS is still capable of handling, but a few were made as thin as 1/64". Despite the supporting materials, the latter parts won't print at all or they might have broken during the printing process itself.
It also depend on the geometry of the object that you're printing, for example, a solid or continuous object will be able to stand up with less or thinner material.
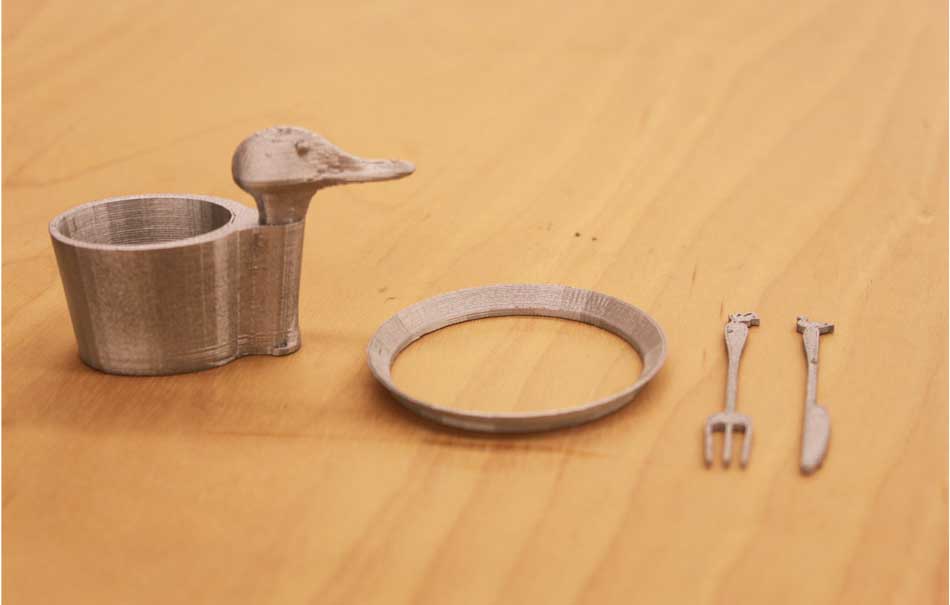
Chromeware Duck Dining Set
To finish up, I spray-painted the print outs with Chrome colour. Now, this becomes a Chromeware Duck Dining Set ready to be mass produced!
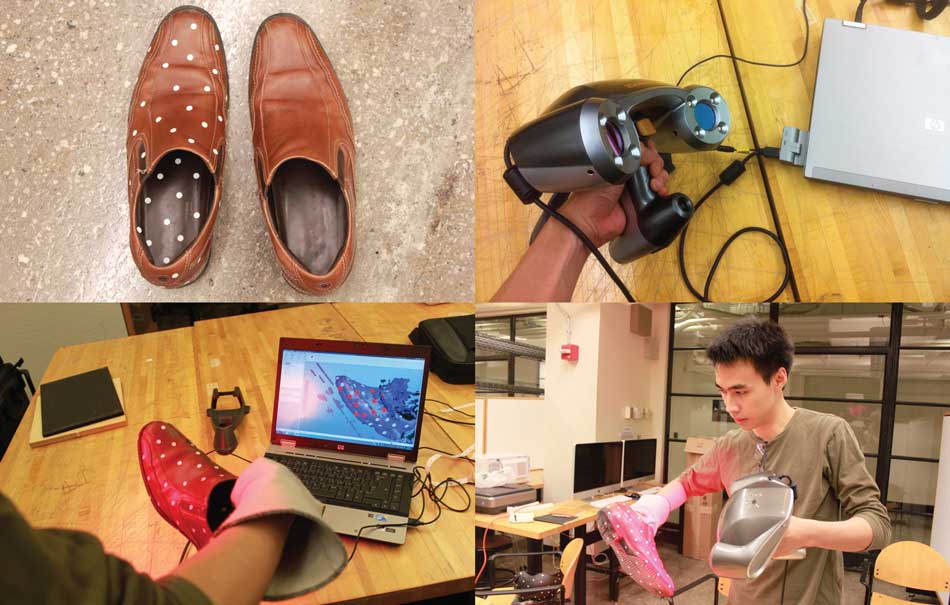
Scanning My Shoe with ZCorp Scanner
I tried to do 3D scanning using two methods: With the ZCorp portable scanning device and with 123D Catch. With the help of our awesome TA James Coleman, I scanned my brown leather shoe using the ZCorp Scanner.
There are a few steps that I learnt from this exercise. Here are a few notes on scanning a 3D object which might be useful:
1. Place reflective dots -- spaced around 1"-ish -- around the object you want to scan. The scanner will read the triangles created between the points as registration marks.
2. Calibrate the scanner, by pointing onto the pad with the cross, on the 14 positions required. Then, configure the strength of the laser beam that will suit the materials of the object best.
3. Scan the targets, i.e. the marking points, then select to scan the surface. If the object is made out of two or more materials, you can go back to calibrate the scanner using the settings for this material.
4. Keep on scanning until youÕre happy with it. Do a bit of post-processing and then export the STL to further develop in other program, e.g. Rhino.
Another way of doing this is by placing the object stationary on a black mat with regularly spaced grid of dots. In this case, you need to be careful not to shift the object, and this wouldn't give you the underside object's texture or surface.
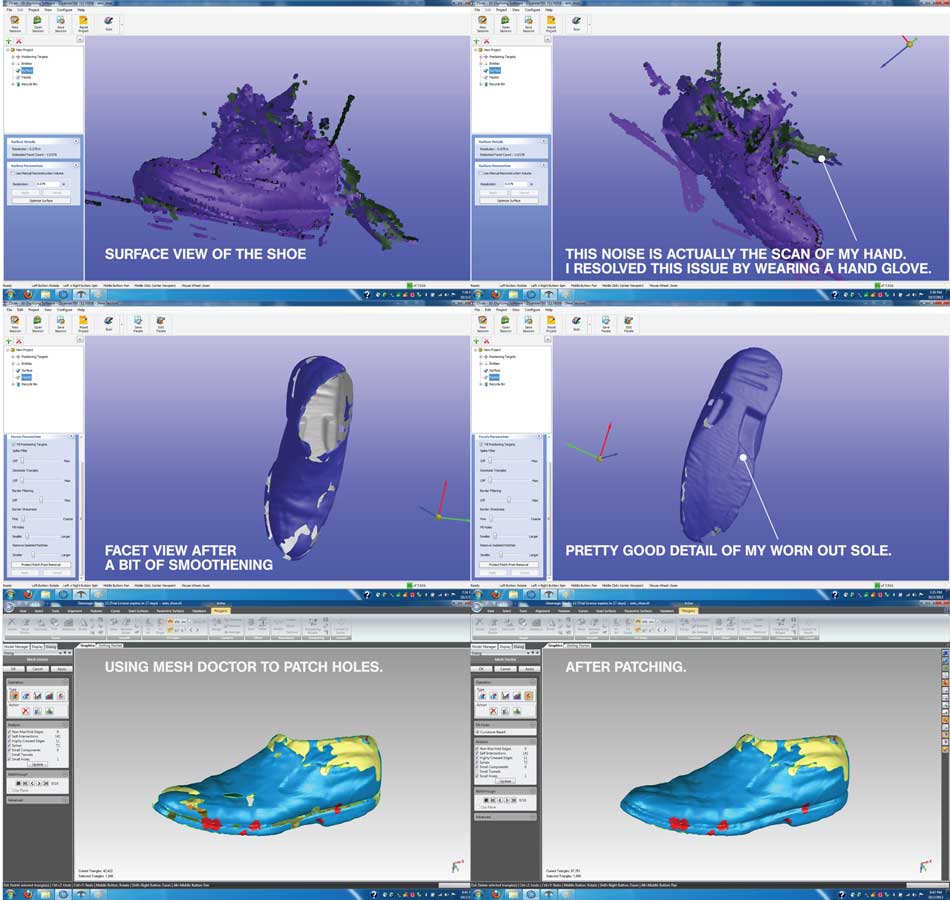
Scan Results
To fix the incomplete geometry, I used the GeoMagic software to fill in the gaps. Unfortunately, itÕs the trial version that the school's laptop has. Thus, I wasn't able to save it as an STL file, but I managed to do a few screenshots of it.
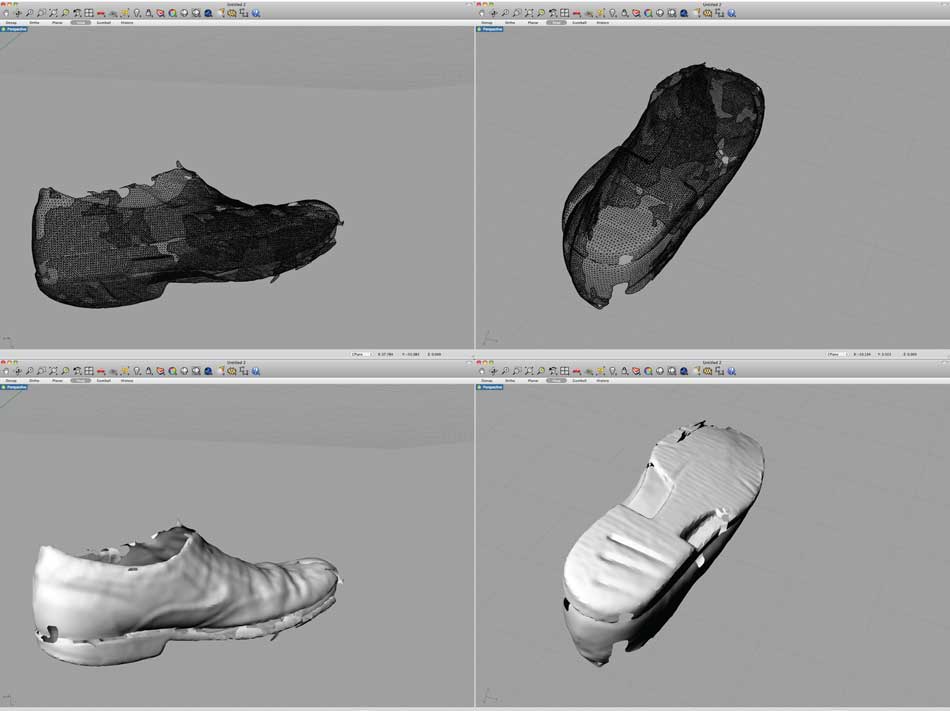
STL File Views
When opened in Rhino, the STL file shows the surface as series of triangulated facets. For most of the time, this won't be ideal to use as a final digital model or even 3D Printing -- a post-processing is necessary to perform any of those operations.
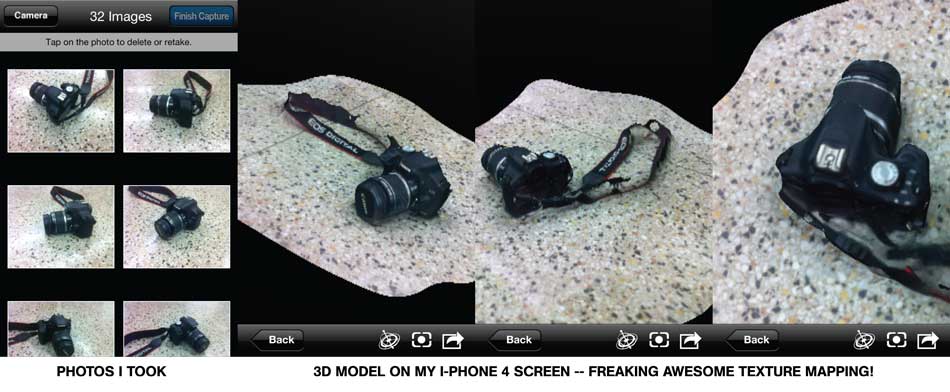
Photo + 3D Model
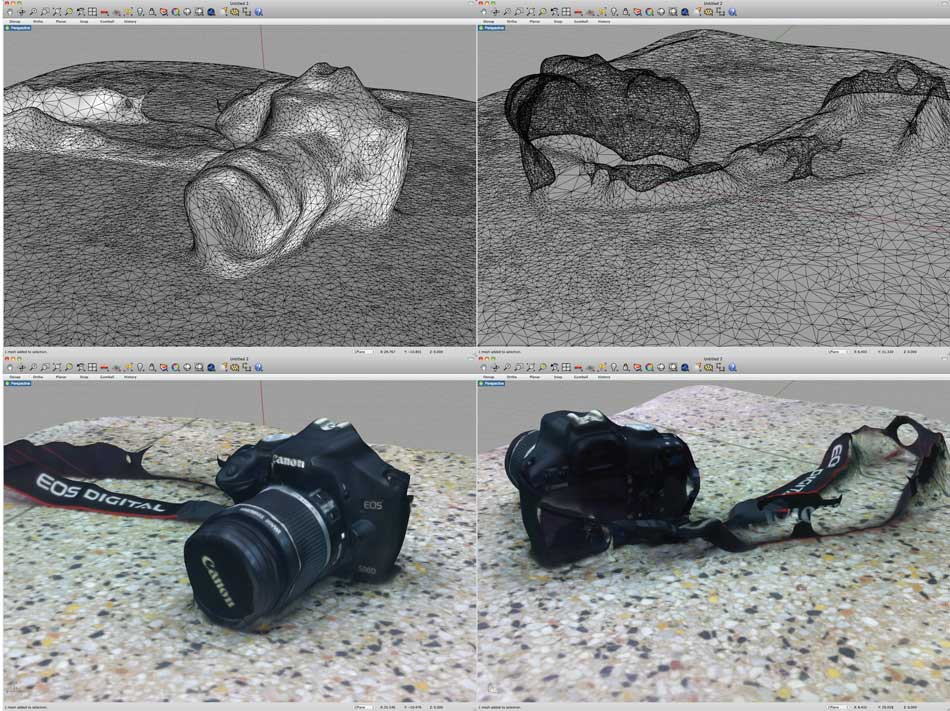
For my second scan, I used my I-Phone 4 with the 123D Catch App, that you can download for free. For a result with better resolution, one can use a DSLR or any better cameras.
1. I placed my object, my Canon camera. I put it on a shiny background so that I would get the contrast between the object and it that I hope will help creating a better result.
2. With the app, I took around thirty 360* pictures. It then photomerged everything and gave me the 3D model to view on my phone screen right away (!).
3. The file is stored online at 123D Catch webpage and I imported the zip file, which includes the .obj file with the texture map visible when viewed on Rendering mode.
A Few Comparative Notes
The ZCorp portable scanner is definitely a winner for scanning objects with more complexity. It seems it performs better when scanning a medium - large size object compared to a tiny - small one. It's relatively pretty expensive device to buy too. Last time I heard that the company doesn't provide anymore technical support but, I'm sure thereÕre other portable scanners that can also match its capabilities.
The 123D Catch is definitely much quicker and more fun to do, but it won't give you detailed models. You can scan almost anything at virtually no cost at all.