Although my initial proposal was to make a prototype of the patent of invention for a high-rise evacuation system I have decided to postpone that project for a later moment. My final project will be an interactive cradle for my son, who will be born next April. I want my son to experience his first moments interacting with the environment that surrounds him and the cradle is the place where he will spend most of his time.
what will it do? The cradle will react to the external conditions and respond to the inputs from the environment and from my son. For that I will use various input devices that will activate some output devices. The stimuli that will be generated by the output devices will be simple and clear: some lights, sound and movement.
who's done what beforehand?Many people. A cradle is an old object we all have passed some time in.
what materials and components will be required?
INPUT: Proximity detector, Light sensor
Output: fan, LEDs
Structure: plywood
Mobile: paper for clouds + cables and wire.
where will they come from?Most of the material will come from the shop inventory.
how much will it cost?Not much.
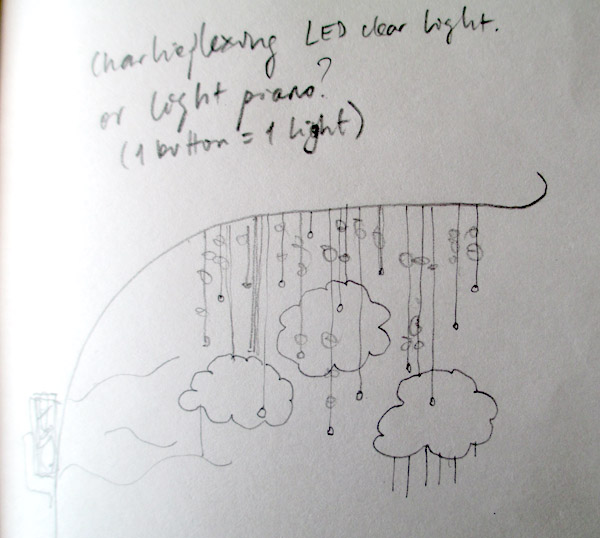
what parts and systems will be made?Wood structure + mobile device. Mobile device will be formed of paper cut clouds, hanging LED lights (stars) and thin metal tubes (aluminum or steel) to make sound when moved by fan.
what processes will be used?The cradle structure will be made out of CNC cut and milled wood (N51 Shopbot). The mobile parts will be cut in the Vinyl cutter (laser cutter is impossible to use this days!). I will make two different input controllers to activate the fan and the LED lights. The charlieplexing LED array board will be reconfigured and reprogramed. It will be activated through light sensor or button. So the total processes to be used are: Computer aided design, CNC cutting, CNC machining, Input devices, Output devices, Networking, embedded programing, electronic design and application programming.
what tasks need to be completed?
1. Structure: design, layout drawings, generatetoolpaths, mill, glue and build. Upholster (probably after end of semester)
2. Mobile: design cutouts, cut in vinyl cutter, design boards, mill and stuff boards, program boards, check they work, mount on structure.
what questions need to be answered?How will I power the cradle (batteries or plug),
what is the schedule?First 2 days: cradle structure will be made out of CNC cut and milled wood (N51 Shopbot). Day 3-4: Input/output devices. Day 5: mount and test
how will it be evaluated?By my son living in it.
PROJECT DEVELOPMENT:
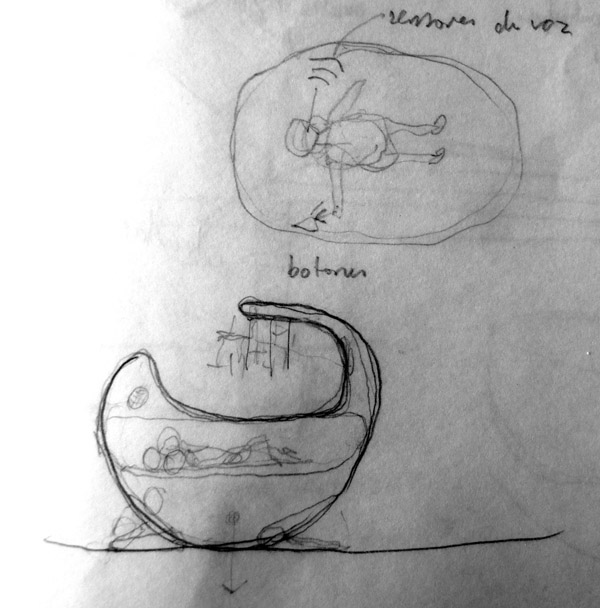
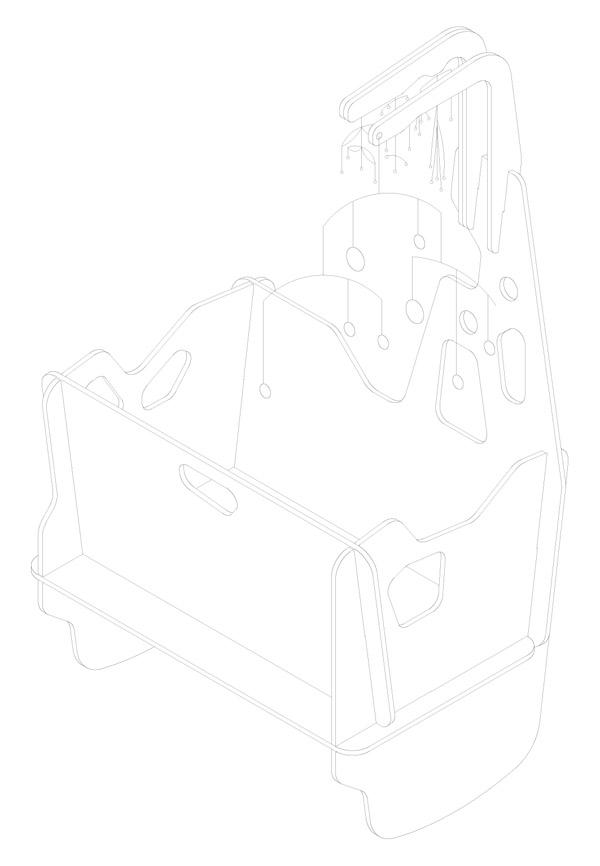 axonometric view of cradle and mobiles
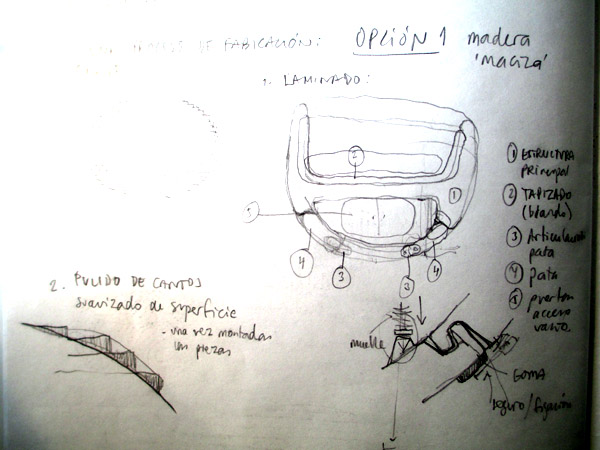
1. Structure: In order to simplify the process, instead of creating a complex 3D surface with double curvature, the cradle is designed as a press fit MDF structure that can be milled in 2D in the shopbot. Two arms are needed for the mobiles. The mobile with the clouds will be held by a simple layered arm with a hole to tie the mobile. The LED array mobile will be held by a double layered arm that has pockets inside to house the cables and the battery. The board will be stuck to the outside of the arm. The board is designed to be seen.
Processes:
- CAD design and drawing of the parts.
- Generation of toolpaths in Part Works.
- Assemblage of the parts
- Painting and upholstering (to be done after end of class)
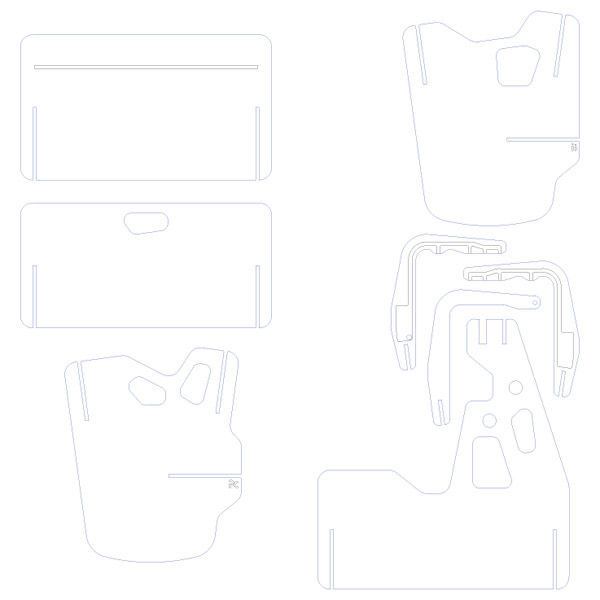 Structure toolpaths
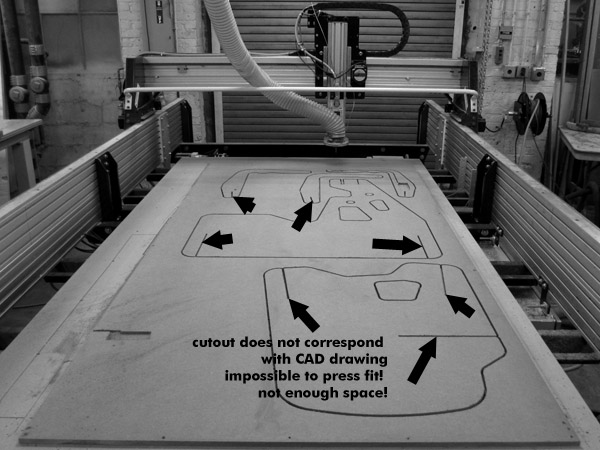
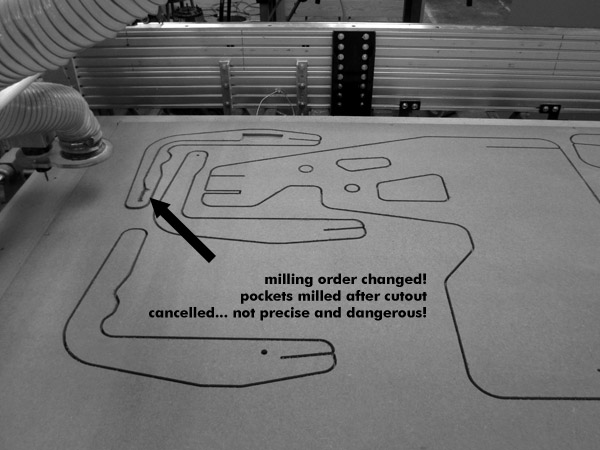
I had a lot of problems machining the MDF boards. First the shopbot at N51 was occupied, then there was no TA until 6 PM. I reserved that time, but when I got there the machine was being used and stuck with a bugged file. I had to wait for 1,5 hours until I could use the computer to make the toolpaths. Then, when I milled the machine didn’t respond to the toolpaths I had creted. The order of milling was set to do first the pockets so that the pieces don’t move, but the pieces were cut out first, then the inner cuts for the press fit were too small and it is impossible to join the pieces together. The TA had to leave and I could not retry to make the structure. I will try to do it first hour in the morning before class.
2. Mobile 1: the first mobile is a set of hanging cloud that move on top of the baby’s head. The clouds are drawn in the iPhone directly with the finger and the image is exported as a PNG that can be used in the Fab Modules to create a toolpath for the vinyl cutter. There are three types of clouds cut in three different dimensions. The clouds are hung from steel wires with fishing cord.
Processes:
- Drawing of clouds
- Cutting in vinyl cutter
- Assemblage of the parts
 Drawing of clouds
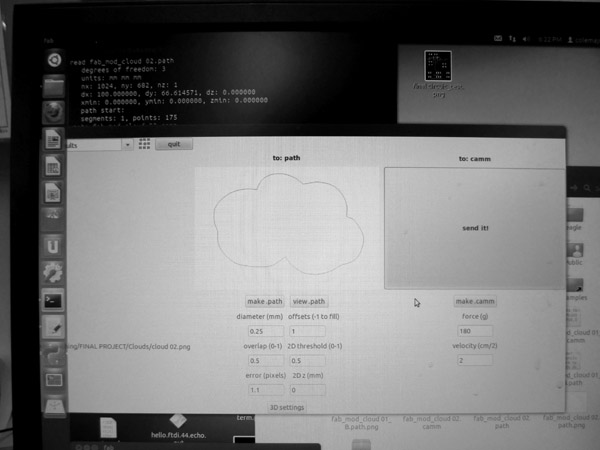 toolpath in fab modules
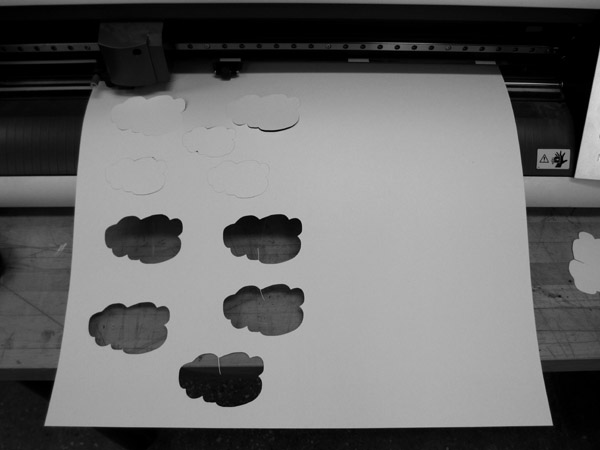 cutout of clouds in vinyl cutter
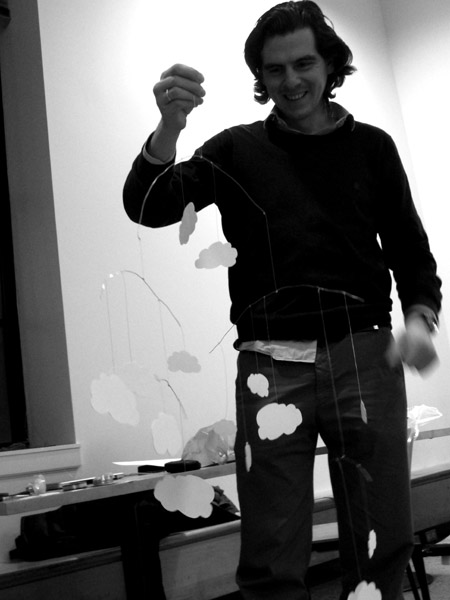
cloud mobile and happy father
3. Mobile 2: the second mobile is a LED array of ‘floating lights’ that will change the way they light depending on the amount of light in the room. There are 20 LED lights connected to the board with cables that are soldered to it. The electronics are made as a compound board between the charlieplexing board I did during output devices week and the light sensor board.
Processes:
- Design of the board: the board is designed in Eagle. The hardest part of the design has been to keep the topology of the charlieplexing board in an expanded and non orthogonal array. The first idea was to hang the LEDs directly from the board, so I wanted the LEDs to be placed in a random order (I wanted to avoid the grid), although in the final design, the cables are enclosed in the arm that hold the mobile, so the board could have been arranged in a grid.
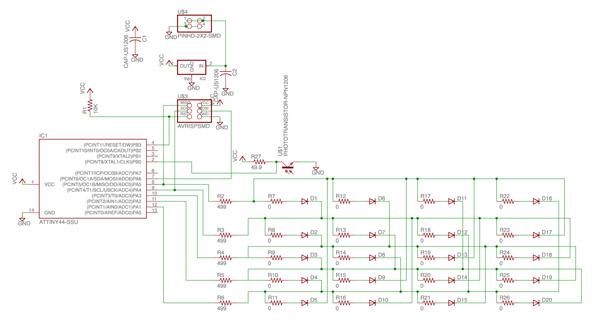
schematic
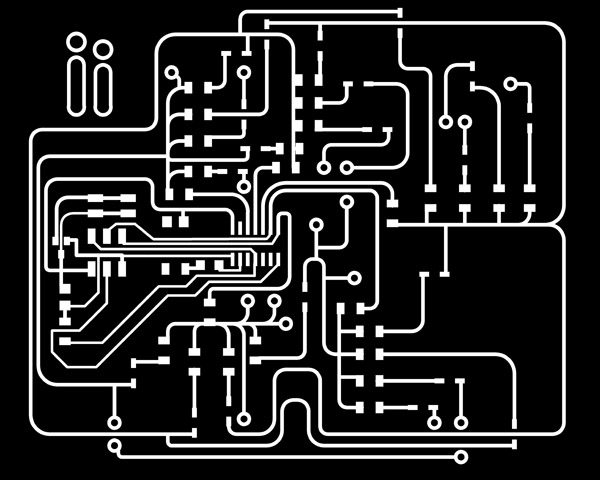
traces (layer 1)

traces (layer 2)
- Mill the board in the Roland Modela. This task wasn’t easy, as we were out of large boards in the arch shop. I first tried to use an old sacrificial board, but the board did not fit. The second attempt, once the large boards had arrived, did not work because the traces were too close to each other and the joined creating short circuits.
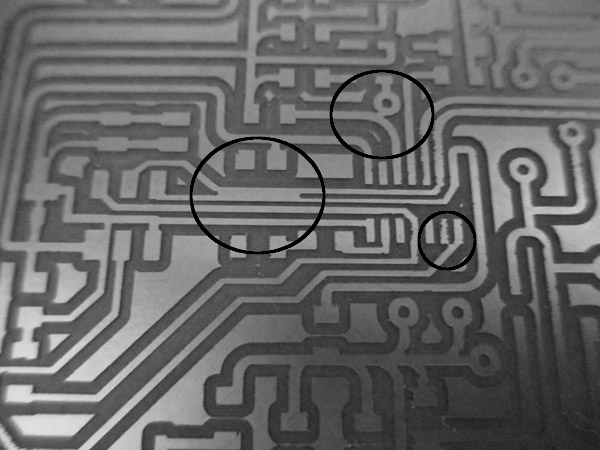 joined traces (second attempt to mill the board)
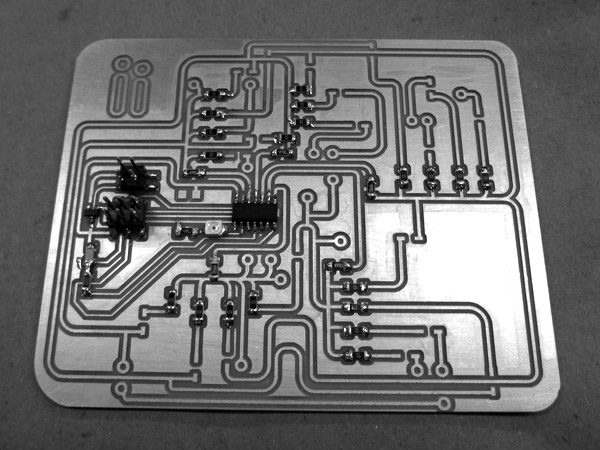 final board without LEDs
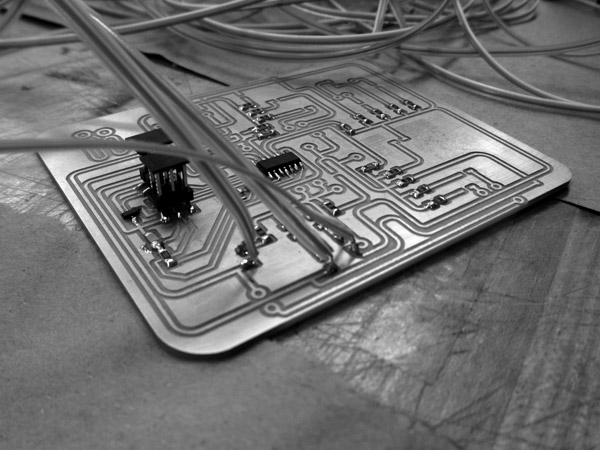 soldering of first cables
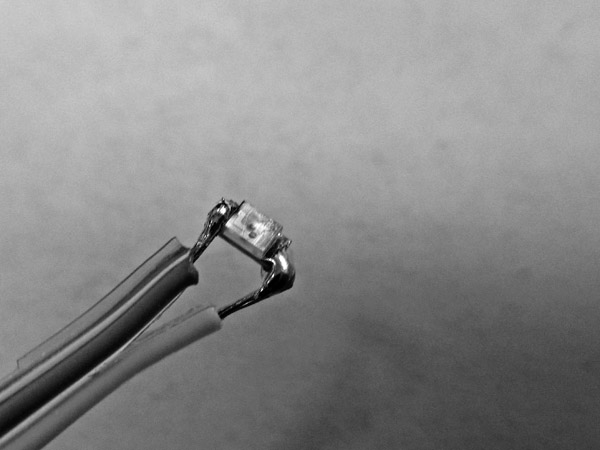 LED detail at end of cable
LEASONS LEARNED: Time management is crucial!!! (Real time also!) I could not finish my project, and I am very sad about that because I think it is going to be very nice. I am definitely going to finish it before my son is born, but I would have enjoyed being able to show it to the class. I am happy to see that I have learned a lot during the semester, and that not having the project ready is a question of time. I will see how many more hours I am going to need...
:) Ignacio Peydro. December 12, 2012