Final Project | RoboFish


Overview

Interactive Robotic Fish
Don’t you hate it how fish seem to never pay attention to you! How kids violent tap on the glass hoping to get a response? Well my goal for my final project is to make an interactive fish tank where the fish actually respond to your presence!
Interaction
While wearing the super LED embedded glove/thimble and by placing your finger on the glass of the fish tank, the fish will respond to your presence and swim towards you (or actually attracted to the bright light, its up to your interpretation :).
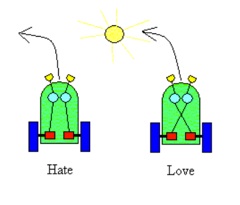
Making an Underwear Braitenberg Vehicle
Helpful Websites:
Questions:
1) what will it do?
See above description
2) who's done what beforehand?
From what I can find online mostly research groups.
Found one DYI website that made the Ariel fish
3) what materials and components will be required?
where will they come from?
how much will it cost?
Aquarium
-fluorescent colored acrylic (Note: have to specify color blue)
(12" x 12" x 1/4" Vendor: Mcmaster PN: 85635K431 QTY: 2 Total: $25.94)
(12" x 24" x 1/4" Vendor: Mcmaster PN: 85635K531 QTY: 3 Total: $57.48)
-acrylic cement
(weld-on 3 Vendor: Mcmaster PN: 7528A13 QTY: 1 Total: $15.95)
Fish
-machinable wax
(1.5" x 3" x 7" Vendor: Smooth-on PN: 18-0150307 QTY: 2 Total: $17.90)
-silicon glue for watertight seal
(Underwear Silicone Sealant Vendor: Mcmaster
PN: 7327A21 QTY: 2 Total: $15.16)
-silicon rubber cast (smooth-on's Oomoo 25/30/Dragon Skin)
(already have)
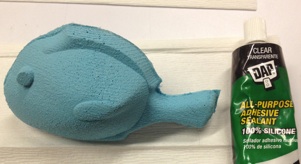
TODO: First try out using foam instead of wax for practice
Fish Bobber
-clear acrylic rod
(1/4" diameter 6ft length Vendor: Mcmaster PN: 8531K13 QTY: 1 Total: $2.01)
-foam boat/ducky
(already have)
Electronics
-light sensor (2 per fish)
-switch sensor (1 per fish)
-mini servo (1 per fish)
-attiny44 (1 per fish)
-9V batteries (1 per fish)
-5v regulator (1 per fish)
-20mhz clock (1 per fish)
LED Finger
-super bright LED
4) what parts and systems will be made?
Parts: Aquarium, RobotFish, Circuit, Fish Bobber, LED finger
System: Robotic Fish (input output control system)
5) what processes will be used?
-molding and casting (shopbot)
-input sensor (switch and light sensor)
-output sensor (servo)
-computer controlled machining (laser cutter)
-embedded programming
-electronics design and production
6) what tasks need to be completed?
Design 1: Just make a dumb fish that swims around randomly
Design 2: Make smart fish that swims toward light
7) what questions need to be answered?
-Water tight seal
-Flexible fish that can swim
-How to navigate underwear? (ie control system)
-Light sensor work underwater? And good for navigation as a sensor?
-Buoyancy (optional can be temporarily solved with bobber)
8) what is the schedule?
Work nonstop for the next week
9) how will it be evaluated?
One fish that is swimming around will make me happy
Process - Fish Mold

Process - Electronics

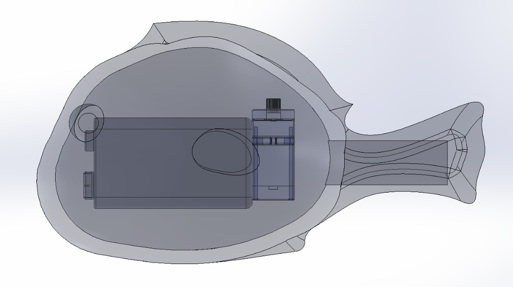
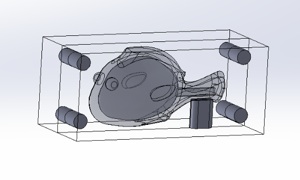
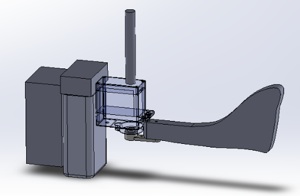
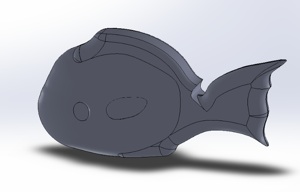
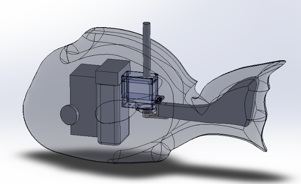
The fish model is the Dory fish model that can be found at grabCad here. I also found the 9v battery and the small servo online. I altered the fish model so that there was enough room to house the big components inside of the fish.
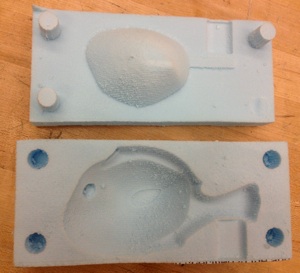
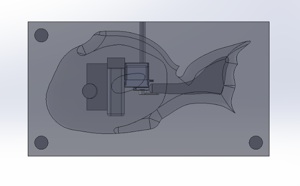
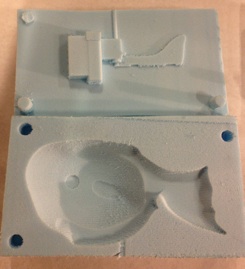
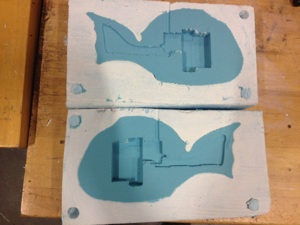
I molded the wax block that I will use as a mold. By using the cavity and split features for molds in solidworks, I created two mold pieces to create the shell of the fish.
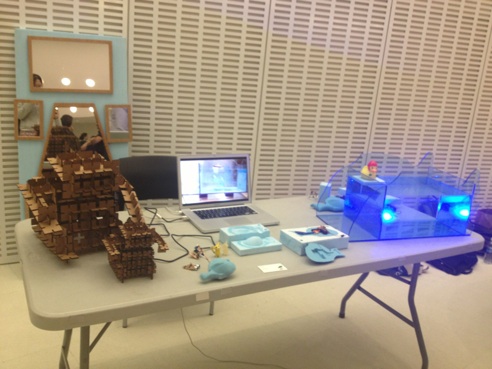
Process - Final Results


Version 1
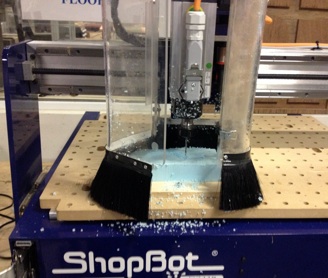
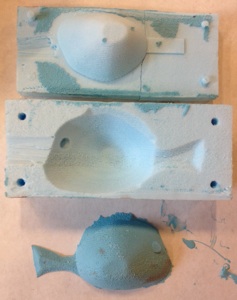
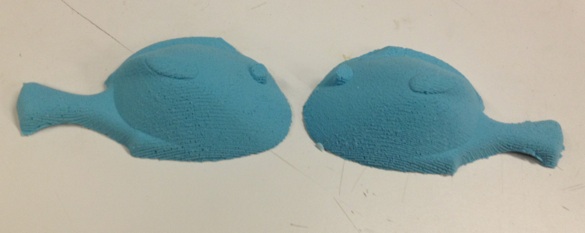
Using the shopbot, I milled the molds out of foam for practice before i use the limited machineable wax. There were a few problems with version of the fish:
1) tail was way too thin
2) sides of the fish was too flat and not nicely rounded
3) wall layer was too thin
4) registration pegs broke off
5) pour in spout needed to be bigger
This lead to version 2! See below!


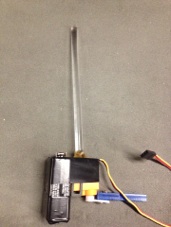
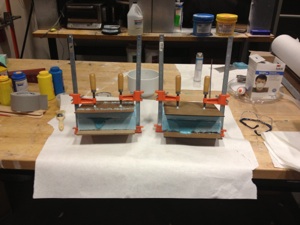
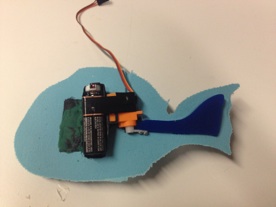
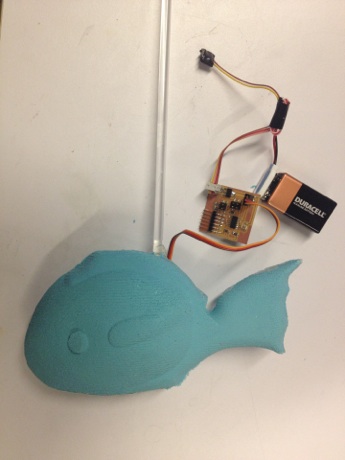
I stuffed the fish with the servo, servo wing, and battery. It was a bit snug of a fit. I attached the holding rod to the servo and taped the battery onto the servo. Those innards were then stuffed inside the fish. I wanted to go ahead and have a test run of how well the fish swims in the water. So I sealed the fish with the waterproof silicon sealant.

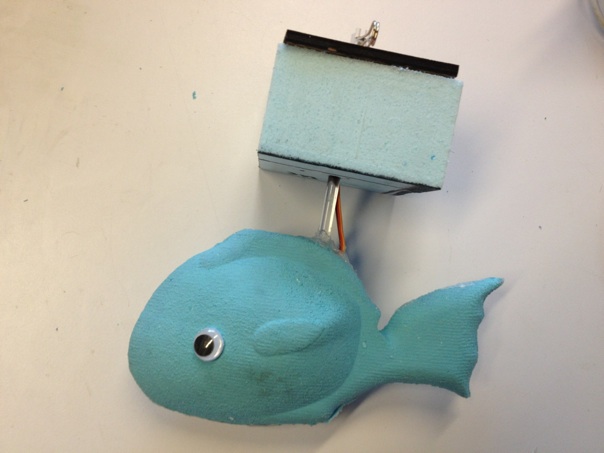
Version 2
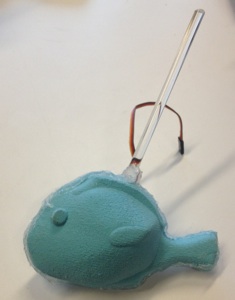
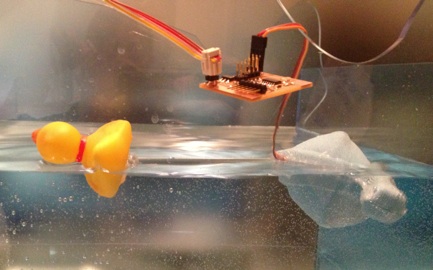
FIRST TEST RUN! Was a bust..Since the fish is full of air and also most likely because it has a very rounded bottom, the fish kept wanting to float up side ways. Time for design 3 with the following changes:
-
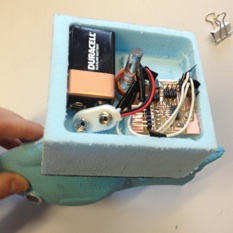
1)Exact modeling of the inside rig: servo, servo horn, holding rod, battery, battery connector, circuit
-
2)Bigger fin
-
3)Made the fish thinner so it would have a less rounded bottom. But this also meant that the fish had to get overall bigger as well.
-
4) Googly eye inserts

Version 3
Version 1
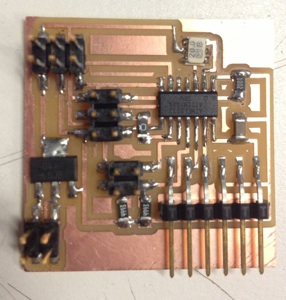
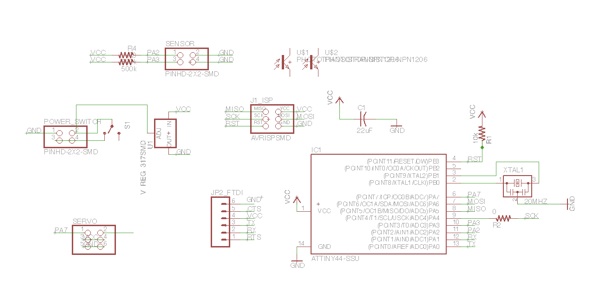
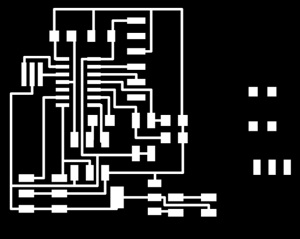
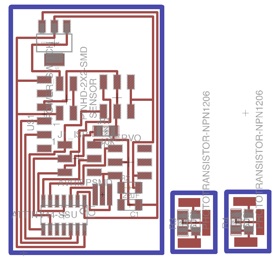
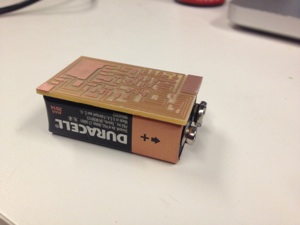
This board has a attiny44 microcontroller with an 20Mhz external clock. It has two channels for controlling two servos that run at 5Vs. The board can be power with a 9v battery (via 5v regulator) and there is a switch to connect and disconnect the battery. The board also has two light sensors.

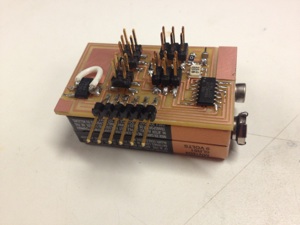
Version 2

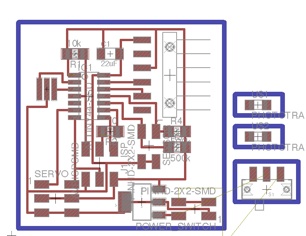
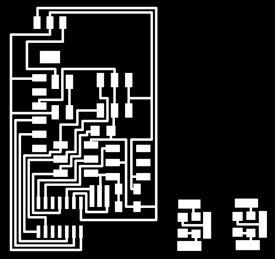
My circuit board was too big and square. I had to change the layout of the board so that it would fit on the back of the battery. And all the IO pins centered in the middle.

Gesso + Mold release = GREAT
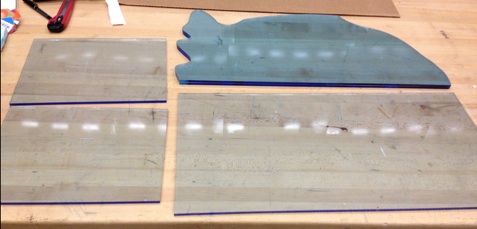
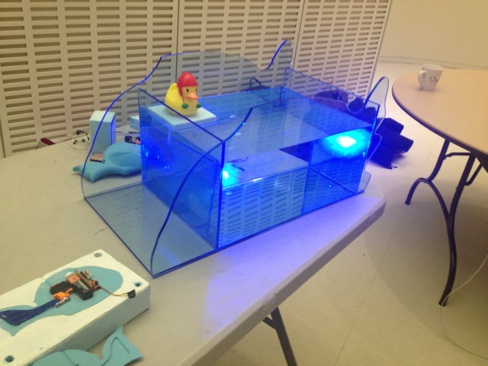
Process - Fish Tank

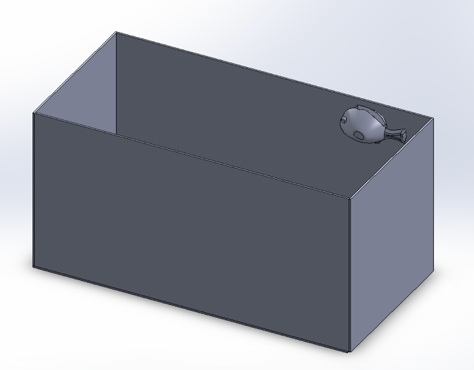
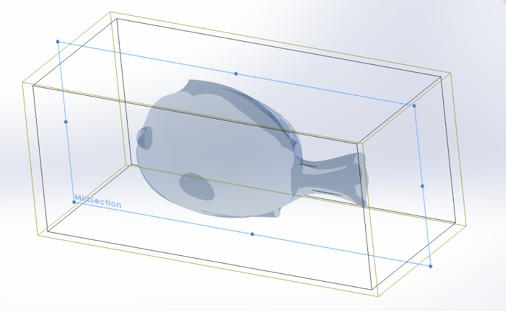
I first figured out the max size of my fish tank with the acrylic pieces i purchased and also got a handle of how big the tank was relative to the fish.
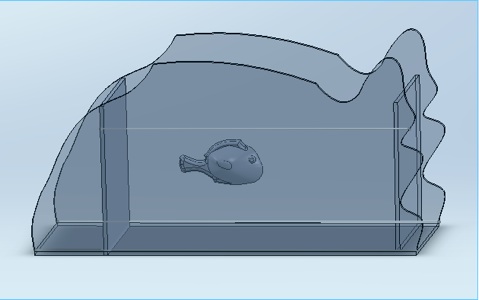
Why have a regular fish-tank? When you can have a fish-shaped fish-tank!!
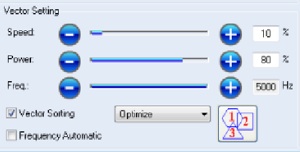
Laser-cutted the acrylic using 10% speed 80% power 5000 hz vector settings
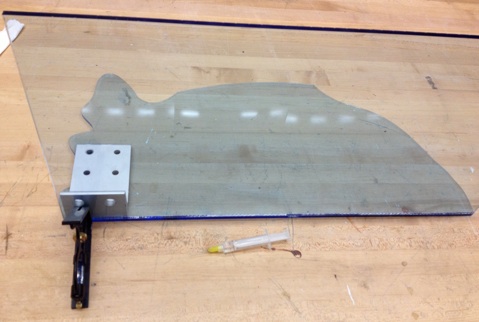
Use a needle syringe to dispense the weld-on 3 between the sheets of acrylics. You should see the liquid flow between the cracks. It dries in less than 75 seconds.
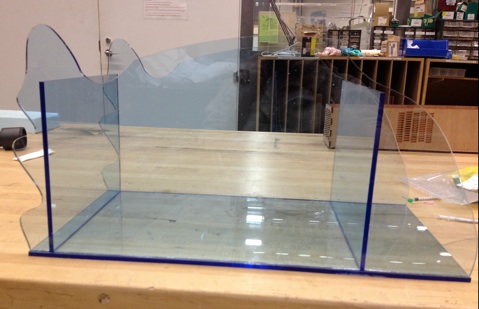
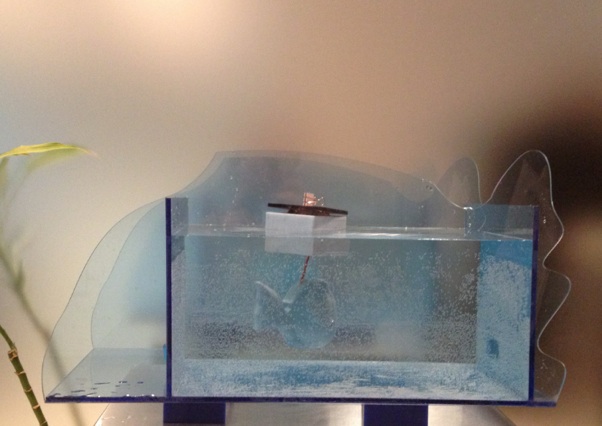
Fish-shaped Fish Tank
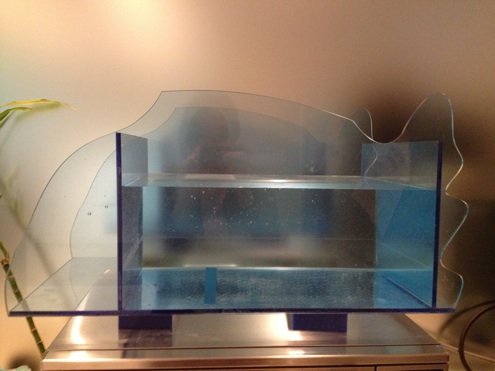
After testing with 60 lbs of water, there were a few leaks which I fixed with one more round of weld-on!
Future work

ToDo:
-Add second servo to have a better fin movement
-Dip entire circuit in a resin/epoxy
-Use Sil-Poxy to glue two sides together
-Re-design fish to have battery external
-Create swim controller
-Add interactive light component