
Week Two: Computer Controlled Cutting
lasercut cardboard and it will papercut you back...
Task
Design, make, and document a press-fit construction kit.
Result
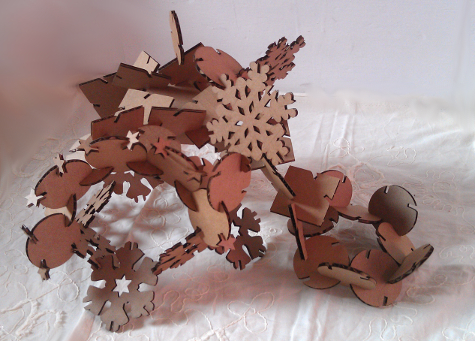
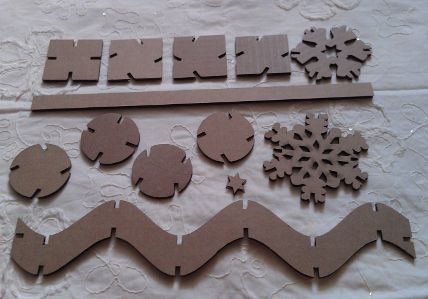
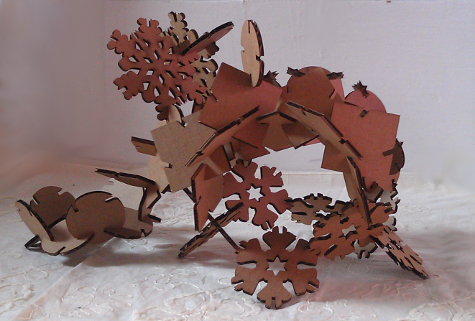
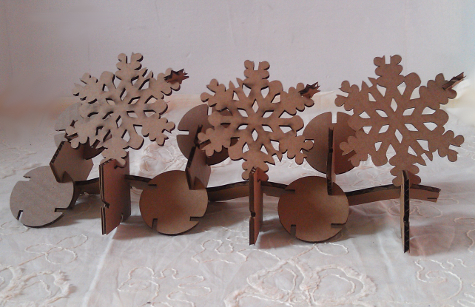
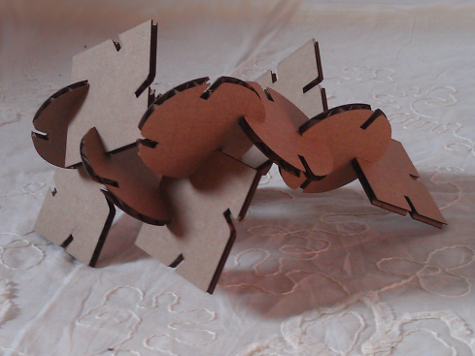
My press fit kit includes squares and circles with perpendicular and angled slots, sine curves, straight connectors, and two types of snowflakes. I also made some snowflake stickers.
Approach
Press Fit Kit
In making my press fit kit, I was interested in exploring curves and various ways to create them with basic shapes. I also ventured into slightly more intricate geometric objects like snowflakes and sine curves. I did most of my image creation using Inkscape, though for my sine curves I played with using R as a drawing tool.
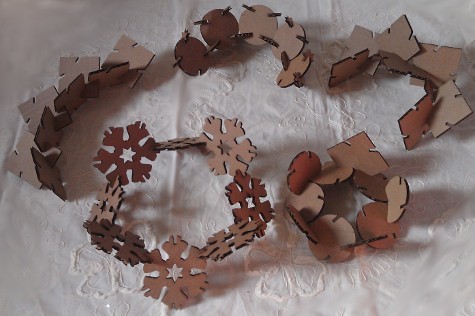
For my initial set of curve-creating, I used squares and circles as my basic shape. To give myself some curve options, I created four sets of pieces for each shape: one with perpendicular slots, and three with angled slots (all the same direction, all but one the same direction, opposing slots the same direction). This covers (almost) all the unique combinations of angle orientations given the symmetry of the shapes--I did overlook the adjacent angles matching configuration on my initial cut but I still ended up with more than enough options. I created the slots by grouping a triangle and a rectangle, and ended up with about a 0.45 mm slot width.
I created the snowflakes by importing existing images into Inskcape, cleaning them up, and adding slots. I was surprised how much fussing this took--even with what I thought was a very clean black and white image with bold lines the result of trace bitmap wasn't ideal. I tried using simplify to clean up the paths, but that generally was not effective.
My go-to Inkscape tools were:
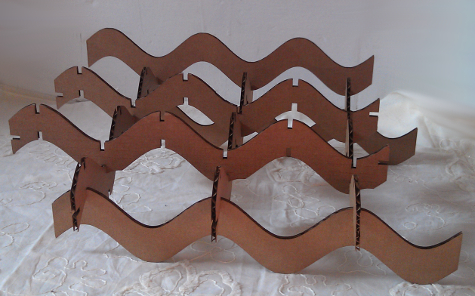
Since I wanted a "real" sine curve, I decide to play around with creating image files through R. This is likely not the most efficient approach, but R is my statistical programming language of choice and I figured it'd be interesting to try. I set the slot width, slot height, vertical function shifts, and plot limits as parameters. I used the curve, rect, and segments functions to draw the shapes. Because I set the image dimensions in pixels, it was a little difficult to estimate the cm dimensions of the written out image, though with a bit of work I could have put together a cm grid to overlay the plots for "sketching" purposes. As a temporary cheat, I imported it into Inkscape to verify and finalize the dimensions. Eventually I'd like to make the R version self contained and generalized to a variety of functions.
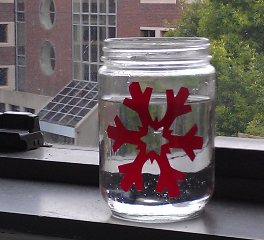
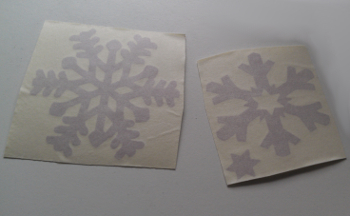
Stickers
I created the stickers using the Roland vinyl cutter with CutStudio. Here's a slightly more detailed version of the written instructions provided by Tom and John:
Images
I also played around with tuning up my website pictures (ex: blending out weird shadows) in GIMP a bit. I still need to refine my technique here, but some useful tools were:
Trials and Tribulations
I had a bad habit of accidentally using ctrl-d instead of alt-d for the clones and then driving myself crazy trying to figure out what went wrong. I also often thought I had selected one path when I actually had a different one--zooming in helped with this. Tiled clone was useful but never behaved exactly as I expected. I tended to under-use the Boolean operations (union, intersect, etc).
The laser cutter wasn't always cutting through cleanly when I was using it, for reasons not fully established. Cleaning did not help. Slowing down the speed and increased the power helped some, as did religiously using auto-focused and increasing the dpi on the exported image (~400). But too much of an increase in dpi made the file size too large for the fab modules to handle.