Week 4: 3d Scanning + Printing: Octovitruvian Man
This week for HTM(A)A, the mission was to 3D Scan an object and 3D Print an object. First up...3d Printing!
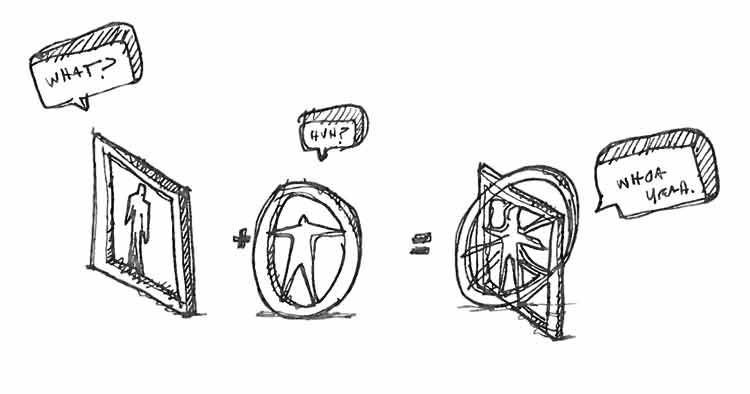
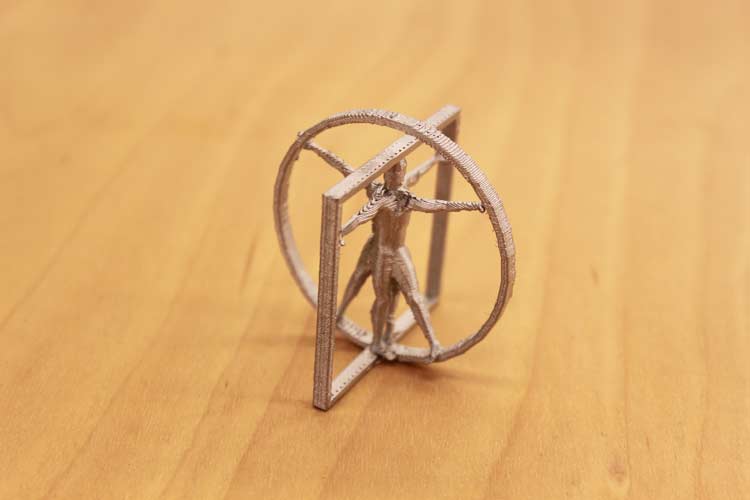
I wanted to do something that I couldn't really do by hand, so I decided to "3dize" Da Vinci's Vitruvian Man sketch. This would require a mesh model of a man oriented in two positions..and then joined at their centers, which I thought would be enough complexity to print! Also, being an architecture student, reinterpreting this famous drawing made it quite worthy as a 3d object.
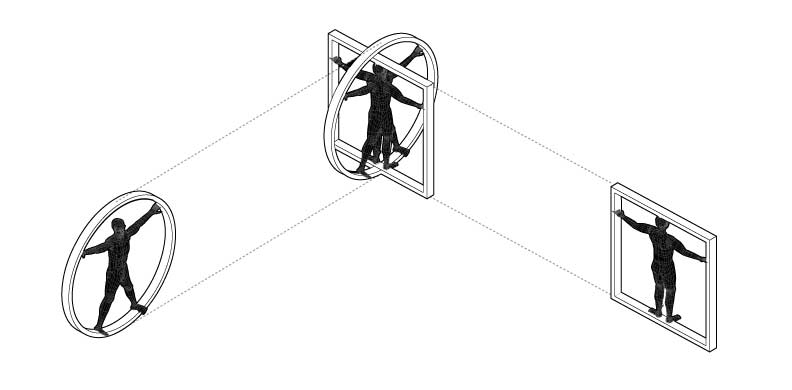
I found a mesh model of a man and imported it into rhino. I then made the simple circle and square, and altered the man's control points to put them in the right configurations.
One thing to remember when exporting to *.stl is to have all closed polygonal surfaces. Luckily, my altered mesh did not reopen the man. Intersecting all 4 components (circle,square,man,man) was enough to merge them together i.e. no meshboolean necessary :)
And off to the ABS Dimension 3d printer it went! I wanted to do ABS plastic, because I had quite small pieces, but also wanted something a little bit more sturdy. Another reason, was that I had already tried out the ZCorp (Powder) 3d printer in the past.
Total time to print was about 24 hours. Then another 4 hours to dissolve the structural material.
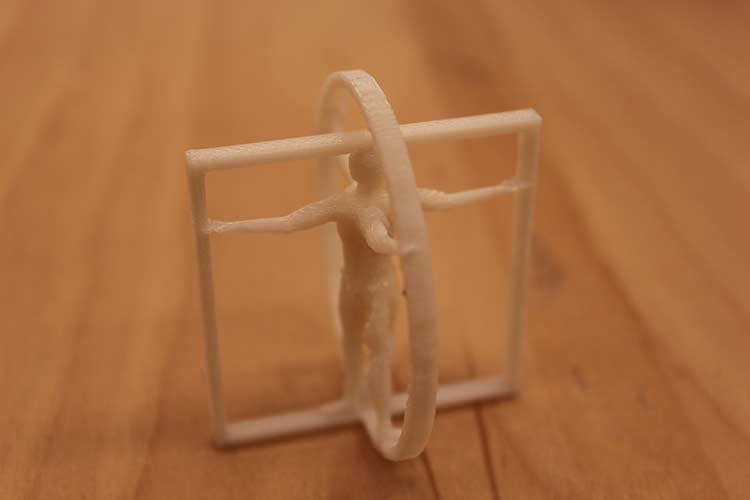
Here it is in the completed form. I think the detail would have been more crisp on the Zcorp, and also I think the print resolution could of been higher (of course this would increase time). I'm just glad nothing was too brittle and that it all stuck together!
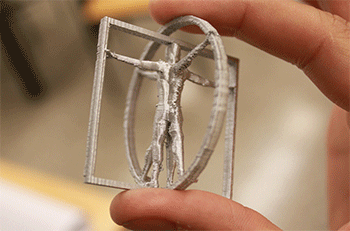
I thought the yellow plastic was kind of dull, so I sprayed it down with some Montana Acrylic spray paint (chrome). Much better i think, and it really accentuates the contours of the print! Now all it needs is a gangster chain to be a wearable pendant! Next up Scanning
3D SCANNING
For 3d scanning, we used ZScan. This is a laser-based scanning system that uses reflective dot stickers as a means of reference so you can move an object around without the software losing positioning.
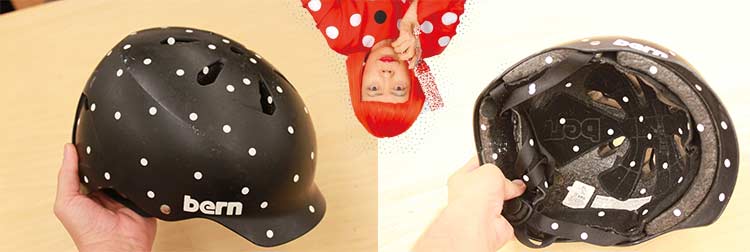
I chose to scan a Bern Bicycle Helmet. I like the form, and it has slight creases and punctures that would be interesting to 3d scan. I swear I felt like Yayoi Kusama, when applying the reference dots to this helmet. This was a pretty big object compared to some other scanned items, so it took a while to get both the top and bottom. Generally you want to put these dots about 1" away from each other and at an irregular pattern--This is so the laser crosshairs will always have at least 3-4 dots in sight for reference in order to position the object.
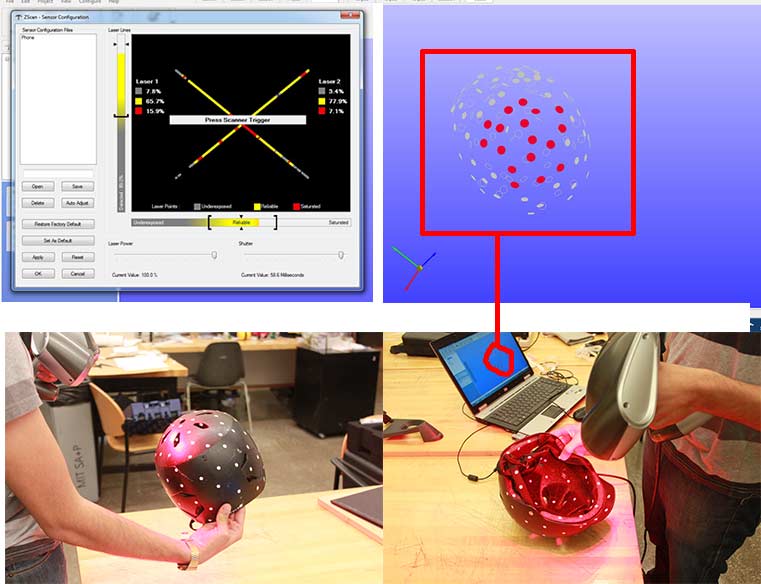
After passing the 14 level calibration test (which is not easy), It's time to calibrate for the material of the object. You do this within the Zscan software, by going to Calibration > Zscan Device > Configuration. You can do this multiple times and scan several passe if you're object is more complex.One configuration for me was fine.
You want to position the gun on the helmet and get both vertical and horizontal bars in the yellow threshold. My numbers for this were:
- Vertical bar: 65% yellow
- Horizontal bar: 77.8% yellow
After this you hit Apply and OK. Now we do Scan > Reference Dots. This is ... you guessed it..to scan all you're dots. As you scan them with the gun, they appear on the screen! I did this for the top and the inside!
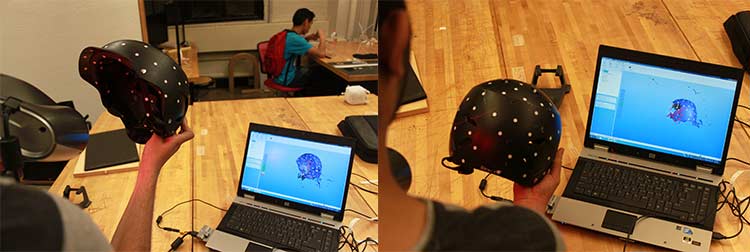
Next we do Scan > Surface. This is for the actual scan. There is a bar next to the left menu that indicates if you are too close or far. I found paying attention to this was super important, or the scan would not work properly. For me the single calibration worked for pretty much the whole helmet including the inside!
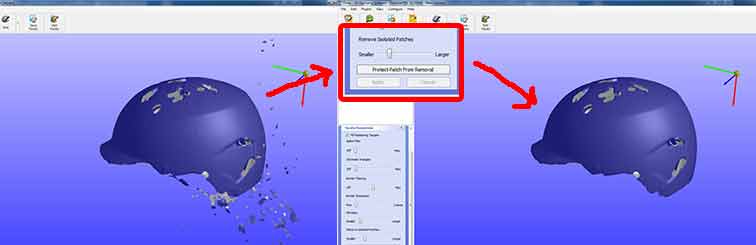
The left was the scan after selecting the "faceted" viewport in the menu. I got rid of the small unrelated scan fragments, by adjusting the Remove Selected Patches Slider and voila! We have helmet! The scan turned out pretty good! it got all of the small curves and fold details. The ventilation holes were difficult to completely get because putting dots in these was quite hard and it's also such a small space.
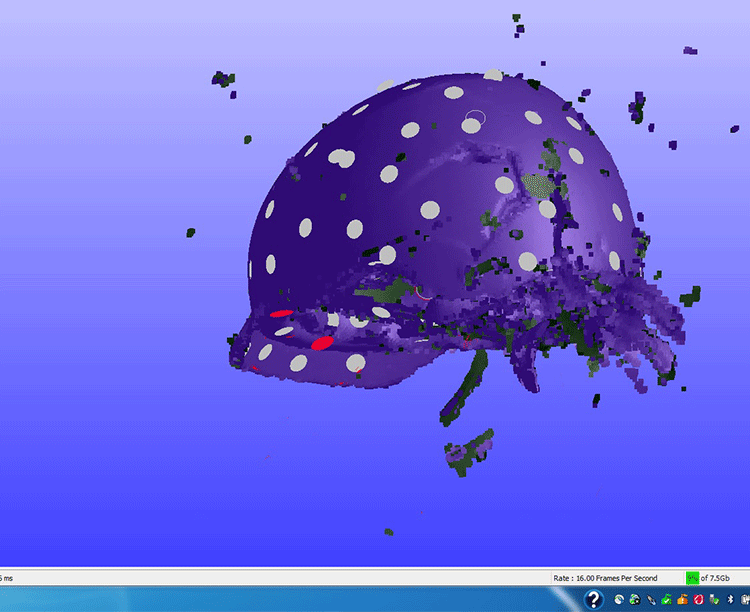
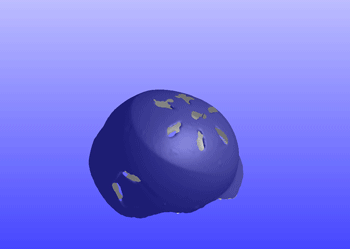
To the left above is what the scan looks like completely raw from scanning "surface" mode. Once in "faceted mode" The program smoothens out the surface. You can see my finished scan on the right--I was surprised got very minute details such as the padding texture on the inside of the helmet. Once done you can "save facets" as an .stl!
3d Scanning with 123D Catch
We also were asked to try Autodesk's 123D Catch. This is a free photo-based 3d scanner, meaning you take 30-40 photos of an object at different angles, and it generates a 3d file with textures from those images. This is a free solution and can be done with your iphone! Once done, the 3d model is available in obj (with material textures) and stl format from 123d's website.
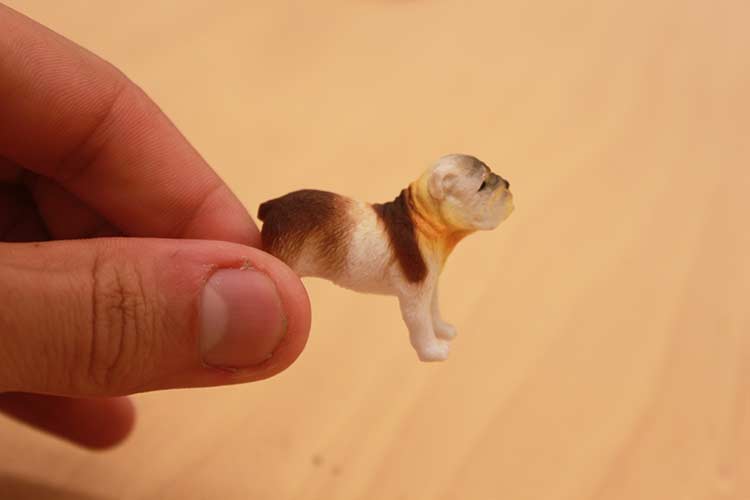
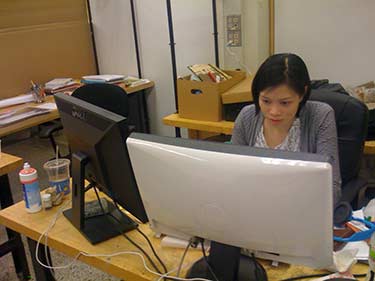
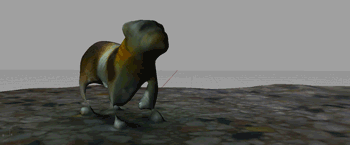
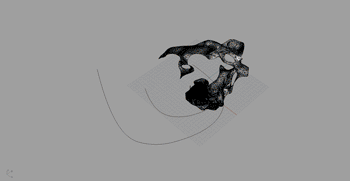
To use the software I used the iphone 4 app (FREE FREE FREE). First, I scanned my friend Clay's rubber bulldog. It came out ok, but not as accurate obviously as the zscan. Without textures, the scan's are quite inaccurate. My friend Li actually scanned another friend, Cecilia, and it worked quite well surprisingly. The scan picked up not only her body, but the iphone on her desk and the contents of papers and her monitor! It's not the best set of scans to say the least, but still pretty amazing :)
Pros/Cons Scanners
| Zscan | 123D Catch | |
|---|---|---|
| Pros | -Very accurate | -Free -Easy (iphone app or camera) -Texture mapping included |
| Cons | -Expensive ($40,000) -Long and Complicated Calibration Process | -Not super accurate |
What to Improve
- For the 3d prints, I think a Higher resolution print and maybe a chain to go along with my chromed out octovitruvian would be nice
- Putting more dots on you're object when scanning with the zscan would make my helmet model even better!
- Multiple passes and editing the mesh with Geomagic also would help to refine.
Tips
- For 3d printing, make sure your object thickness is at least 1/16" or things might break.
- For Zscanning, place a lot of dots.
- For Zscanning, A high yellow percentage is key when material calibration.
- For Zscanning, remember to position the gun perpendicular to the object and at the apporpiate distance.
- For 123DCatch, 30-40 photos is a must...no less.
- For 123DCatch, you want a noisey surface like the one I used for the pup scan. This helps!
- For 123DCatch, don't move the object or you're screwed