3D SCANNING AND PRINTING
After Neil's lecture on 3D scanning and printing, I was really excited by 123D Catch, an app
from Autodesk for iPhone, iPad, and PC that allowed you to take your own series of photos
that the would be stitched together using a cloud service to create a 3D model. I made
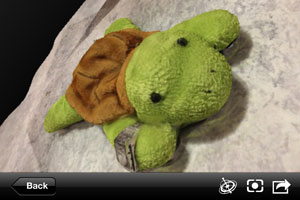
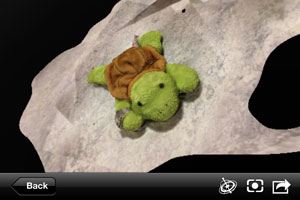
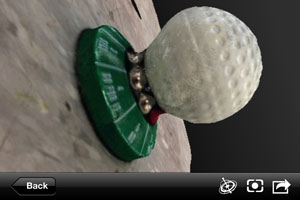
two different models: one of a plushie turtle and another of a golf ball decision maker
paperweight. The program asks you to take 20-40 pictures 360 degrees around the object with
a couple of constraints. The object and the background that you're take the pictures against
should not be shiny and should have some variation or randomness on the surface. The app
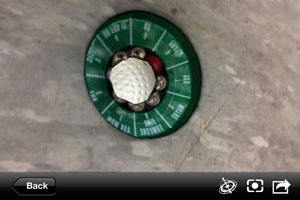
had a little difficulty "creating" the series of shiny ball bearings at the base of the
golf ball so they came out flat and warped instead of having their own shape. The 3D model
also seems to be more like a 3D surface because if you flip the model upside down, you can
see the reverse shape of your object underneath. It's also best to use a circular table or
something similar as a base so that you take equidistant shots from the object.
If you're happy with your 3D scan, you can export your model (in the PC app) to an .obj format
file. From there, you can download 123D Beta to help convert your .obj file to a .stl
(stereolithography format file) to send directly to the 3D printer. I had trouble getting it
export as an .obj file so since I was running out of time to meet the Sunday 6 p.m. deadline
for a 3D print file submission, I quickly modeled a cup that I would hopefully be able to use
later.

")

The MakerBot Blog is a great resource about 3D printing and scanning. Their support staff
will write different tutorials and articles about neat tools to help you create better
and faster. For example, an article
from earlier this year talked about Autodesk 123D Catch, the iPhone app that I used
to 3D scan my turtle plushie. Another useful tutorial
shows you how to clean up your 3D scans for a better 3D print.
The $40,000 3D scanner in the FabLab did not seem to work particularly well. After watching
our TA struggle to get through the 14 different calibration movements, the scanner finally
produced...a bunch of surfaces that were unable to be interpolated. 123D Catch seems to be
doing a better job so hopefully, I can get that working soon!
After modeling the cup in Rhino, I exported it as a .stl file using the option:
[ ] Ascii 784Kb
Opening up the .stl in Rhino, the cup became a series of triangulations that approximates
the curved shape of the original cup.

In the 3D printed cup, you can still see the triangulation of the original shape especially
on the ball-shaped handle; however, the inside was very smooth so I'm not sure how the 3D
printer processes the triangulations as it prints. The walls are quite thick, but the cup
survived the excavation process!!


Next step for the cup: a layer of super glue (and maybe something else?!?) so that I can
use it without breaking it!
