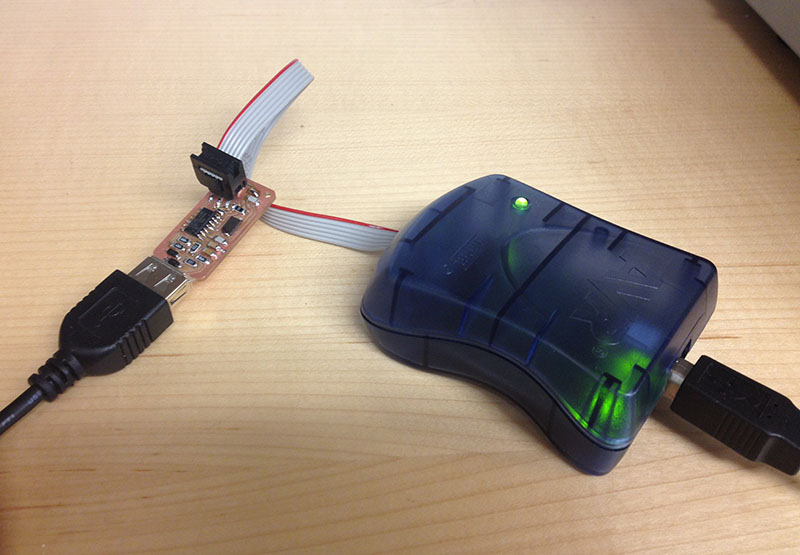
FABISPKEY
For this week's assignment, we were tasked to mill, stuff, and program the (wonderful and
mysterious) FabISP, a microcontroller with the ability to spawn more FabISP offspring.
We all started with a couple options (.png) to decide what we wanted to do. I really liked
the FabISPkey V2.3
design by Andy Bardagjy. Here is the link to a step-by-step guide to milling your board:
How to Make Circuits on the Modela Milling Machine (fab modules)
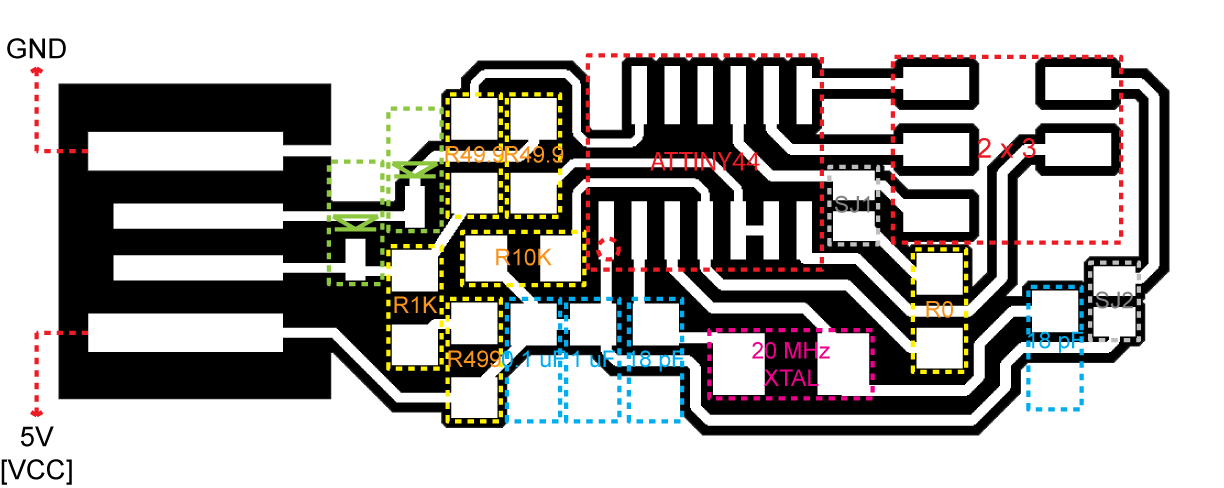
The FabISPkey requires different milling files compared to the original FabISP. We used a Roland
MODELA MDX-20/15 to mill the copper clad boards. These are the files for the interior circuit
detailing and the USB circuit outline to mill and cut the board:
FabISPkey Traces PNG
FabISPkey Cut Outline PNG
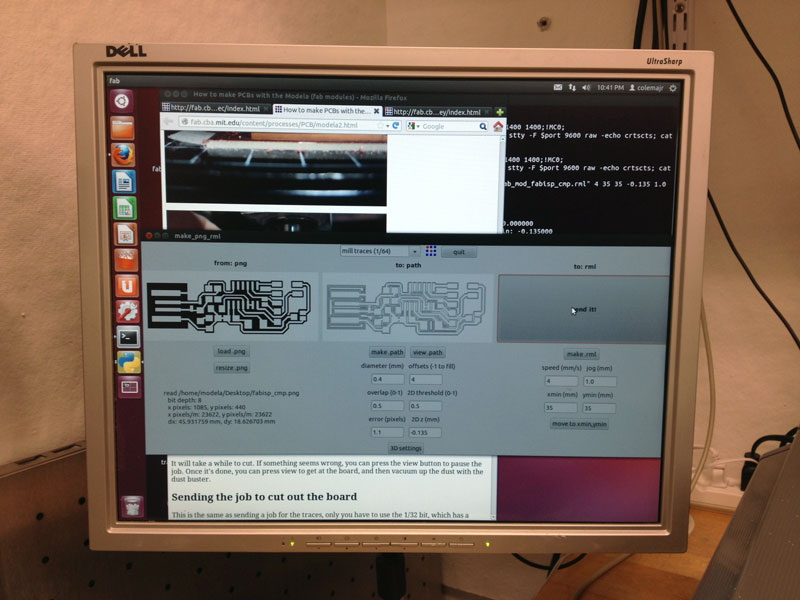
I started out by adhering double sided tape to the back of the board. Make sure that the
bottom copper plate is clean and flat, and tape the back of the copper clad board such that
(a) the tape does not overlap and (b) the edges of the board lay flat on the lower board.
It helps to extend the edge of the tape slightly from the edge of the board so that the
board will definitely be able to adhere completely to the bottom surface. Otherwise, you'll
break your first 1/64" drill bit when you turn around for a second only to look back and see
that your board has popped off and is spinning in circles around the (broken) drill bit.
If that happens, turn off the machine, and turn it back on. Hit "View", and then press both
the up and down arrows simultaneously until the green light next to "View" starts flashing.
Close Terminal, and open it back up again. To kill the file now stuck in the MODELA, type in
and enter:
ps -aux | grep cat
A list of all the open and running processes with "cat" will show up. Find the ID number
(near the left side of the Terminal screen) with Modela and Applications, and type in and enter:
kill xxxx [four-digit job ID number]
At this point, the light next to "View" should stop flashing, and you can reopen the fab
module to start a new job.
Despite trying your absolute hardest to make everything perfect, your board will probably still
not be entirely flat. My first (semi-)successful first pass almost succeeded except that the
end with the USB board connector still had a little copper that was only partially removed.
I reset the "2D z (mm)" to -0.12 (from -0.1) and hit "make .path" (don't forget to do this!!),
and after the next pass, the traces milling was finished.
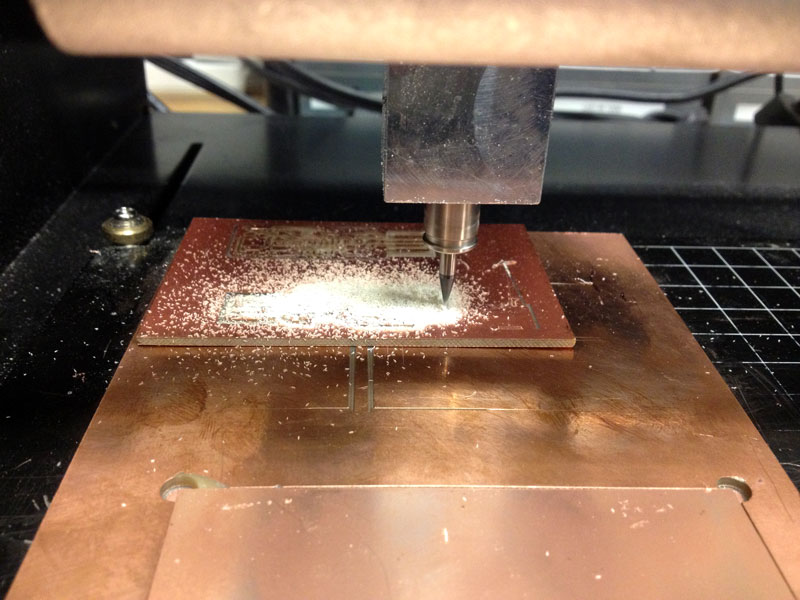
I had a lot of trouble cutting out the board. What not to do? Do not lower the endmill and
1/2" bit all the way down. I thought I was being clever by shoving the bit up as high as possible
before tightening the set screws and then lowering it the endmill down all the way by pressing
"down". Turns out, the spindle will not be able to drop any further so your board will not
cut through. Leave about 3/4" of the drill bit hanging out when you tighten the set screws,
and then lower the spindle and bit down until the end of the bit almost touches the board.
After extracting the PCB from the board, I used the
water soluble liquid flux pen to coat
the entire board (minus the USB board connector) in an invisible layer of goodness that
helps keep the solder from beading while helping it flow evenly over the components and
copper surface. If you intend on keep the board for a while, make sure to clean the copper
with soap and water to remove oils from your skin and the liquid flux to prevent corrosion.
Soldering on the surface-mount pieces proves to be difficult at first if your hands (like mine)
are not 100% steady. I did not use the GIANT magnifying glass and light, but it probably
would have helped. Especially with the FabISPkey, since the "ground wire" is actually
the entire copper perimeter of the board, try to cleanly solder each piece onto the board.
The Ubuntu computer could not find my first attempt at the FabISPkey so I made another one
and took special care to solder everything well (shiny, perfectly flowed solder joints).
Also, take care to clean the tip of the soldering iron of all the extra solder by wiping it
on the wet sponge or else the new solder will want to adhere to the iron and not the copper.
*SPOILER ALERT*
Tip from James the TA: Place a little blob of solder down where one of the legs of the component
will rest and get soldered in the end. Use the tweezers to the piece where it will eventually
sit, and heat the leg or solder. The solder blob will flow over the one side of the component,
and it will stay in place when you want to add solder to the other side (or other legs if its a
piece like the low power 8-bit ATtiny44A embedded microcontroller).
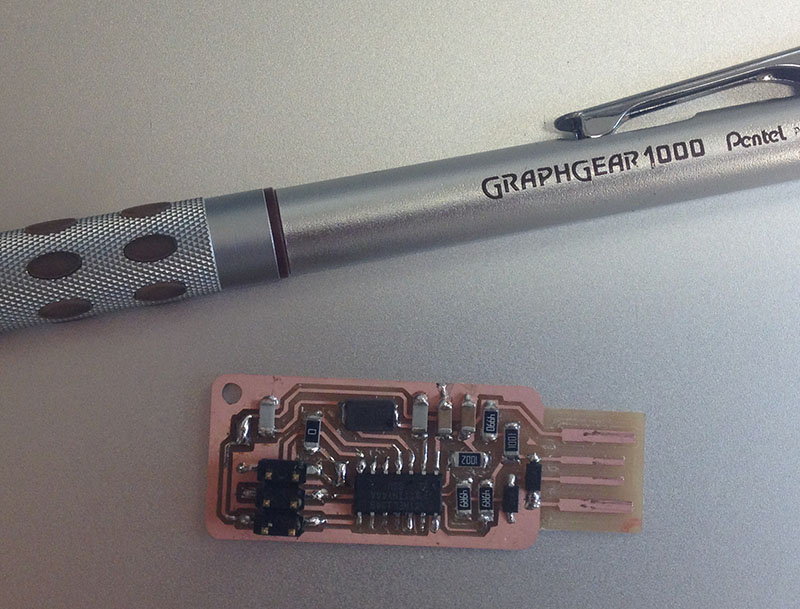
I used the
How to Assemble and Program the FabISP page from the Fab Academy to help with programming
my FabISPkey. The first couple of times, I kept getting an empty Makefile and did not know why.
I quickly figured out that I had missed an important step:
cd ~/Desktop/firmware
after unzipping the firmware.zip file. With the first iteration of my FabISPkey, the computer
could not find USBtiny, giving this error after the "sudo make fuse" command:
make: *** [fuse] Error 1
After plugging in my new FabISPkey, Jeremy helped me type while I held my USB key in place
to ensure the best connectivity. The depth of the FabISPkey is slightly smaller than an
actual USB so if you have an old credit card, cut a piece to glue underneath board connector.
I haven't tried to program another FabISP yet, but I hope to do so soon :).
