INSPIRATION AND EXPERIMENTATION
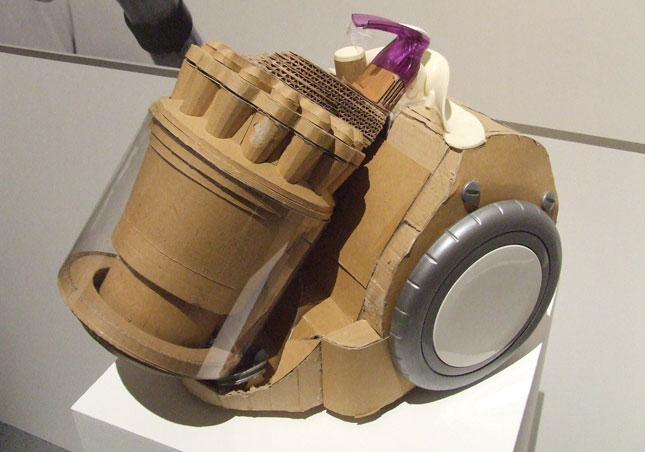
Scoring cardboard is a common technique used in the design industry to make beautifully curved shapes from just card. Dyson are famous for it in their legendary full scale cardboard prototype vaccuum cleaners.
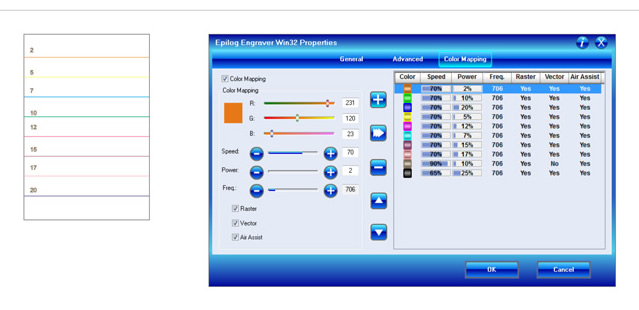
I tried to create this same effect by using the laser cutter to score some sections in the card shapes and thus create precise scored curved cardboard sections. I experimented with using different power settings on the Epilog laser cutter to cut only through the top layer of the cardboard, creating a score line. I used the colour mapping setting on the printer Properties to cut many different powered lines at the same time.
** THE BEST SETTING FOR SCORING THE CARDBOARD ON THE EPILOG LASER CUTTER IS:
SPEED = 70; POWER = 5; FREQUENCY = 700 **
**NOTE: It is important to chose simple colours for Colour Mapping, e.g. Red (255, 0, 0) or Blue (0, 0, 255), otherwise the printer can't recognise the line as something different than the black line it uses with the default cutting settings**
Dyson - cardboard prototype for a vacuum cleaner |
|
Colour Mapping settings for scoring tests |
|
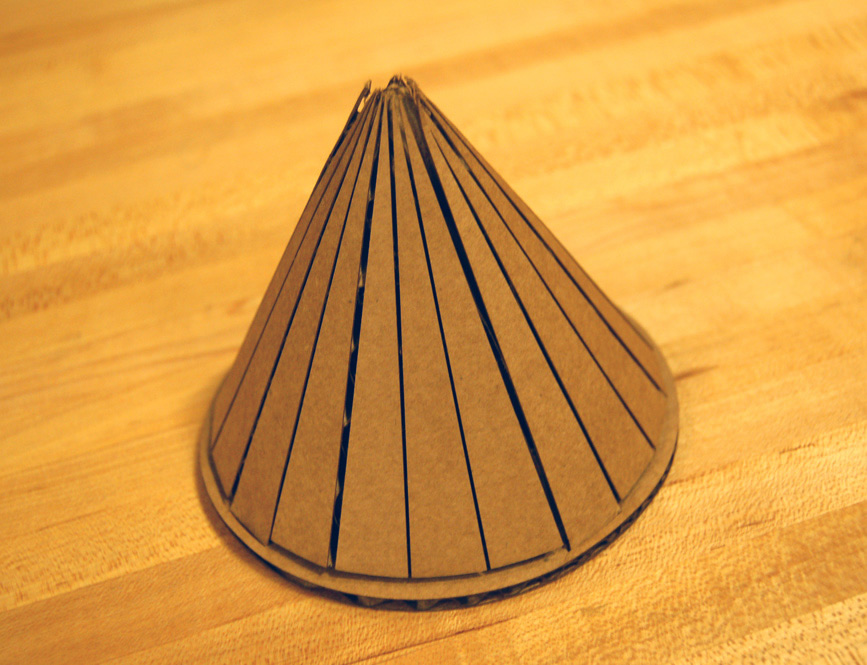
Cone made from solid piece of card |
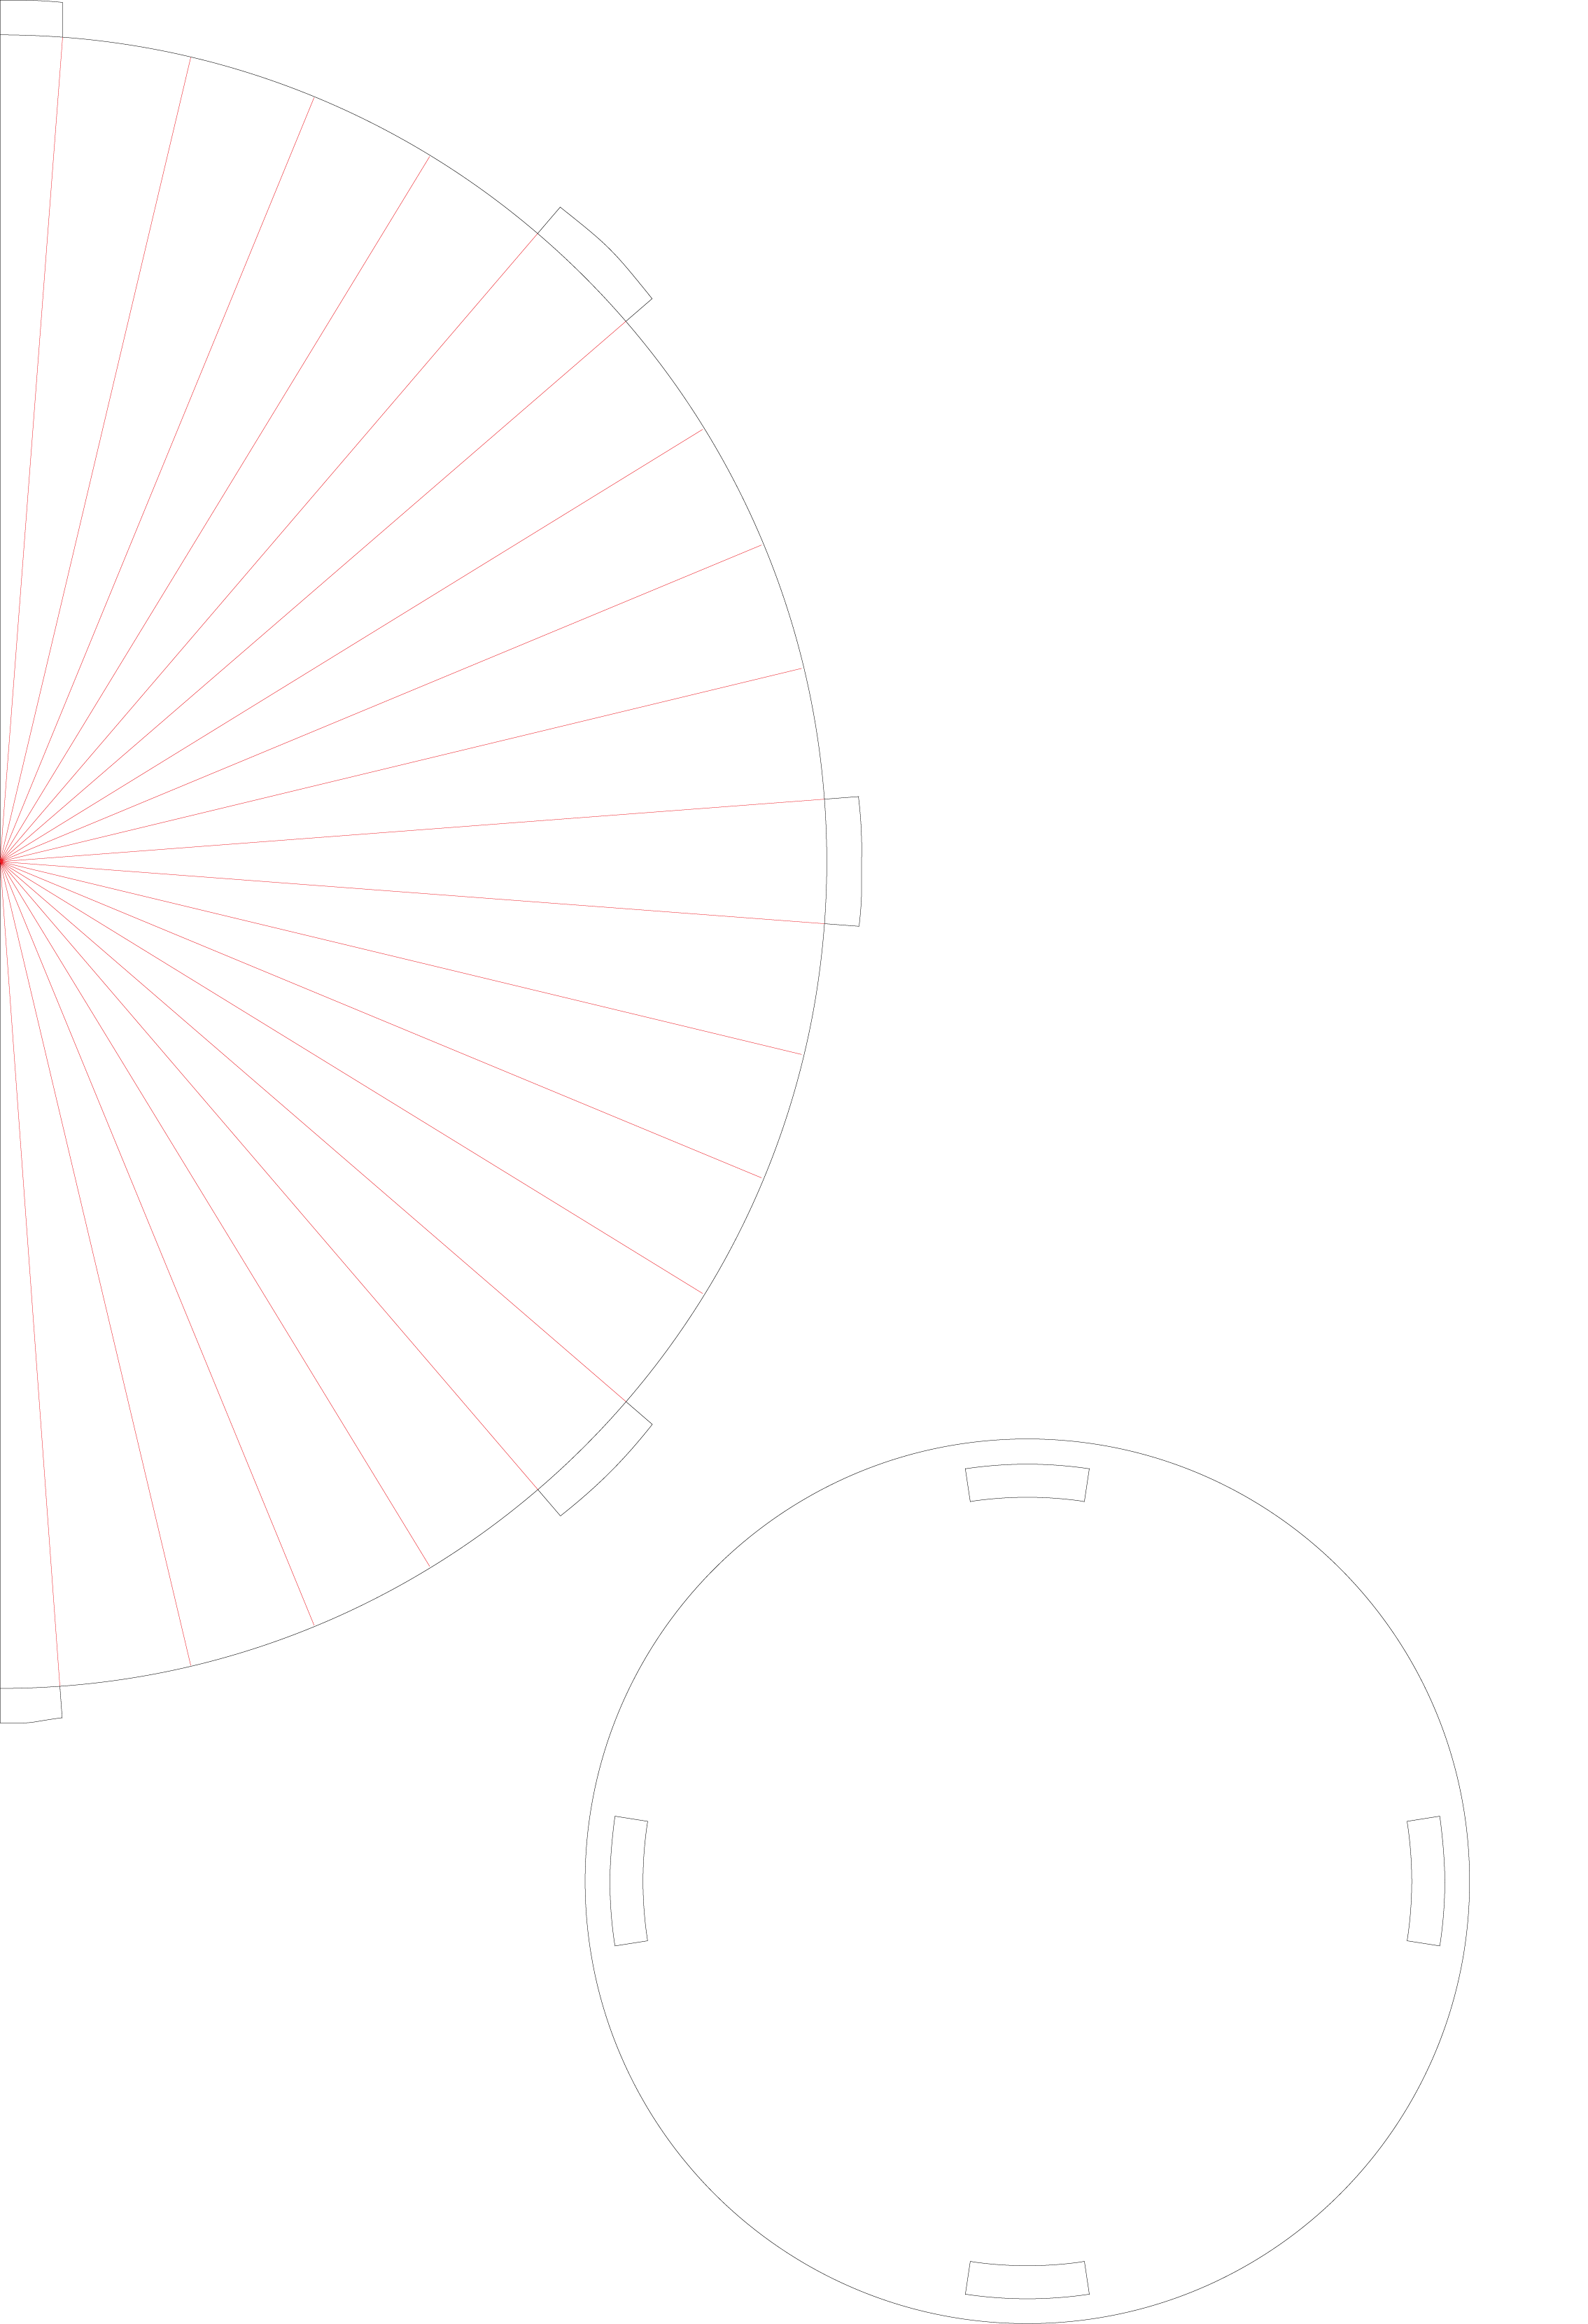
Pattern for cutting a cone on the Epilog laser cutter |


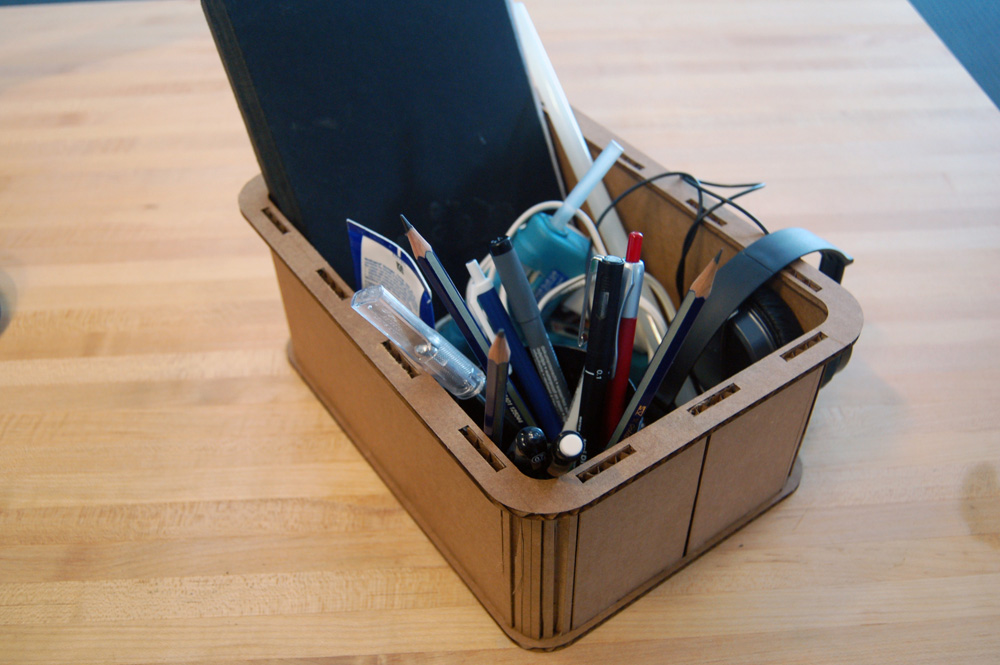
HOW TO MAKE A ROUNDED CORNERED CARDBOARD BOX
 |
1: MAKE THE PATTERNHere is a pattern for a 20x30cm box with roughly 5cm diameter rounded corners. |
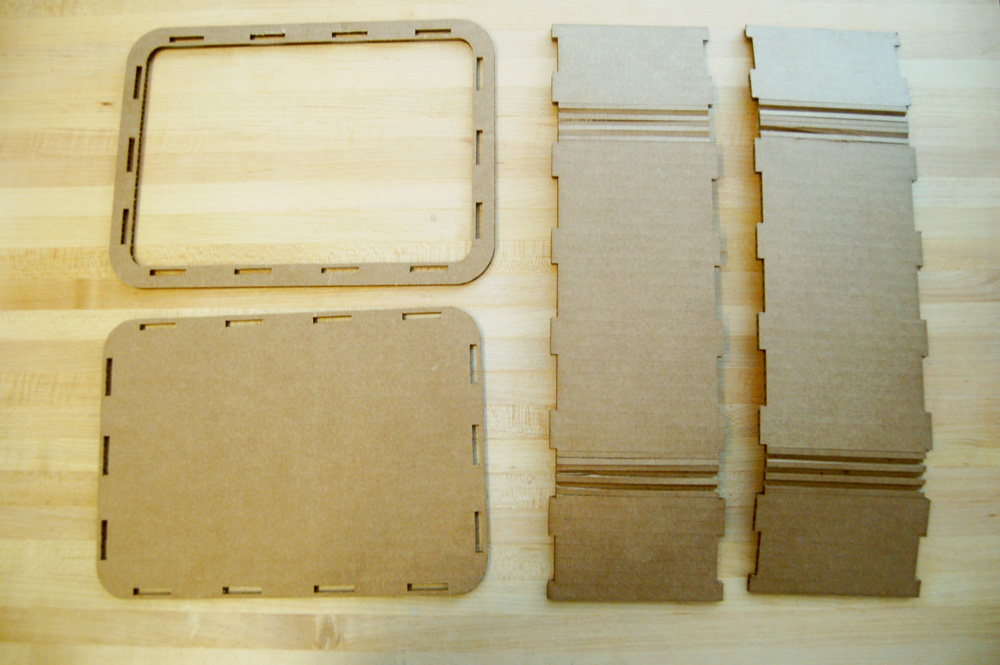 |
2: CUT OUT THE PIECES |
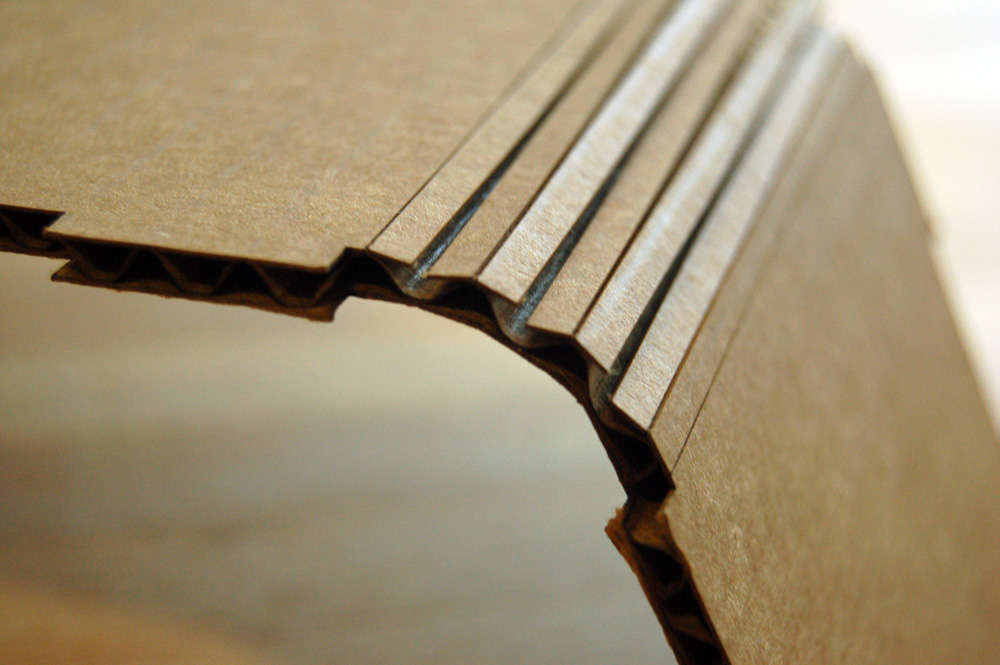 |
3: BEND THE SCORED SECTIONS The top surface of the scored sections should separate and allow you to bend the bottom of the card to the curve you want. **This may be harder if you've cut it perpendicular to the corrugations. Cutting the scores parallel to the corrugations makes it smoother to bend, but can sometimes mean the top surface falls off the corrugations** |
4: PUT YOUR BOX TOGETHER! Assemble the press fit sections, and ta da, you'll have a nice box with sleek rounded corners. You could even cover over the outside of the box with coloured paper to cover the scored lines on the outside of the corners. |