This week was all about 3D scanning and 3D printing. We had to both scan an object and print an object, though it didn't necessarily have to be the same object.
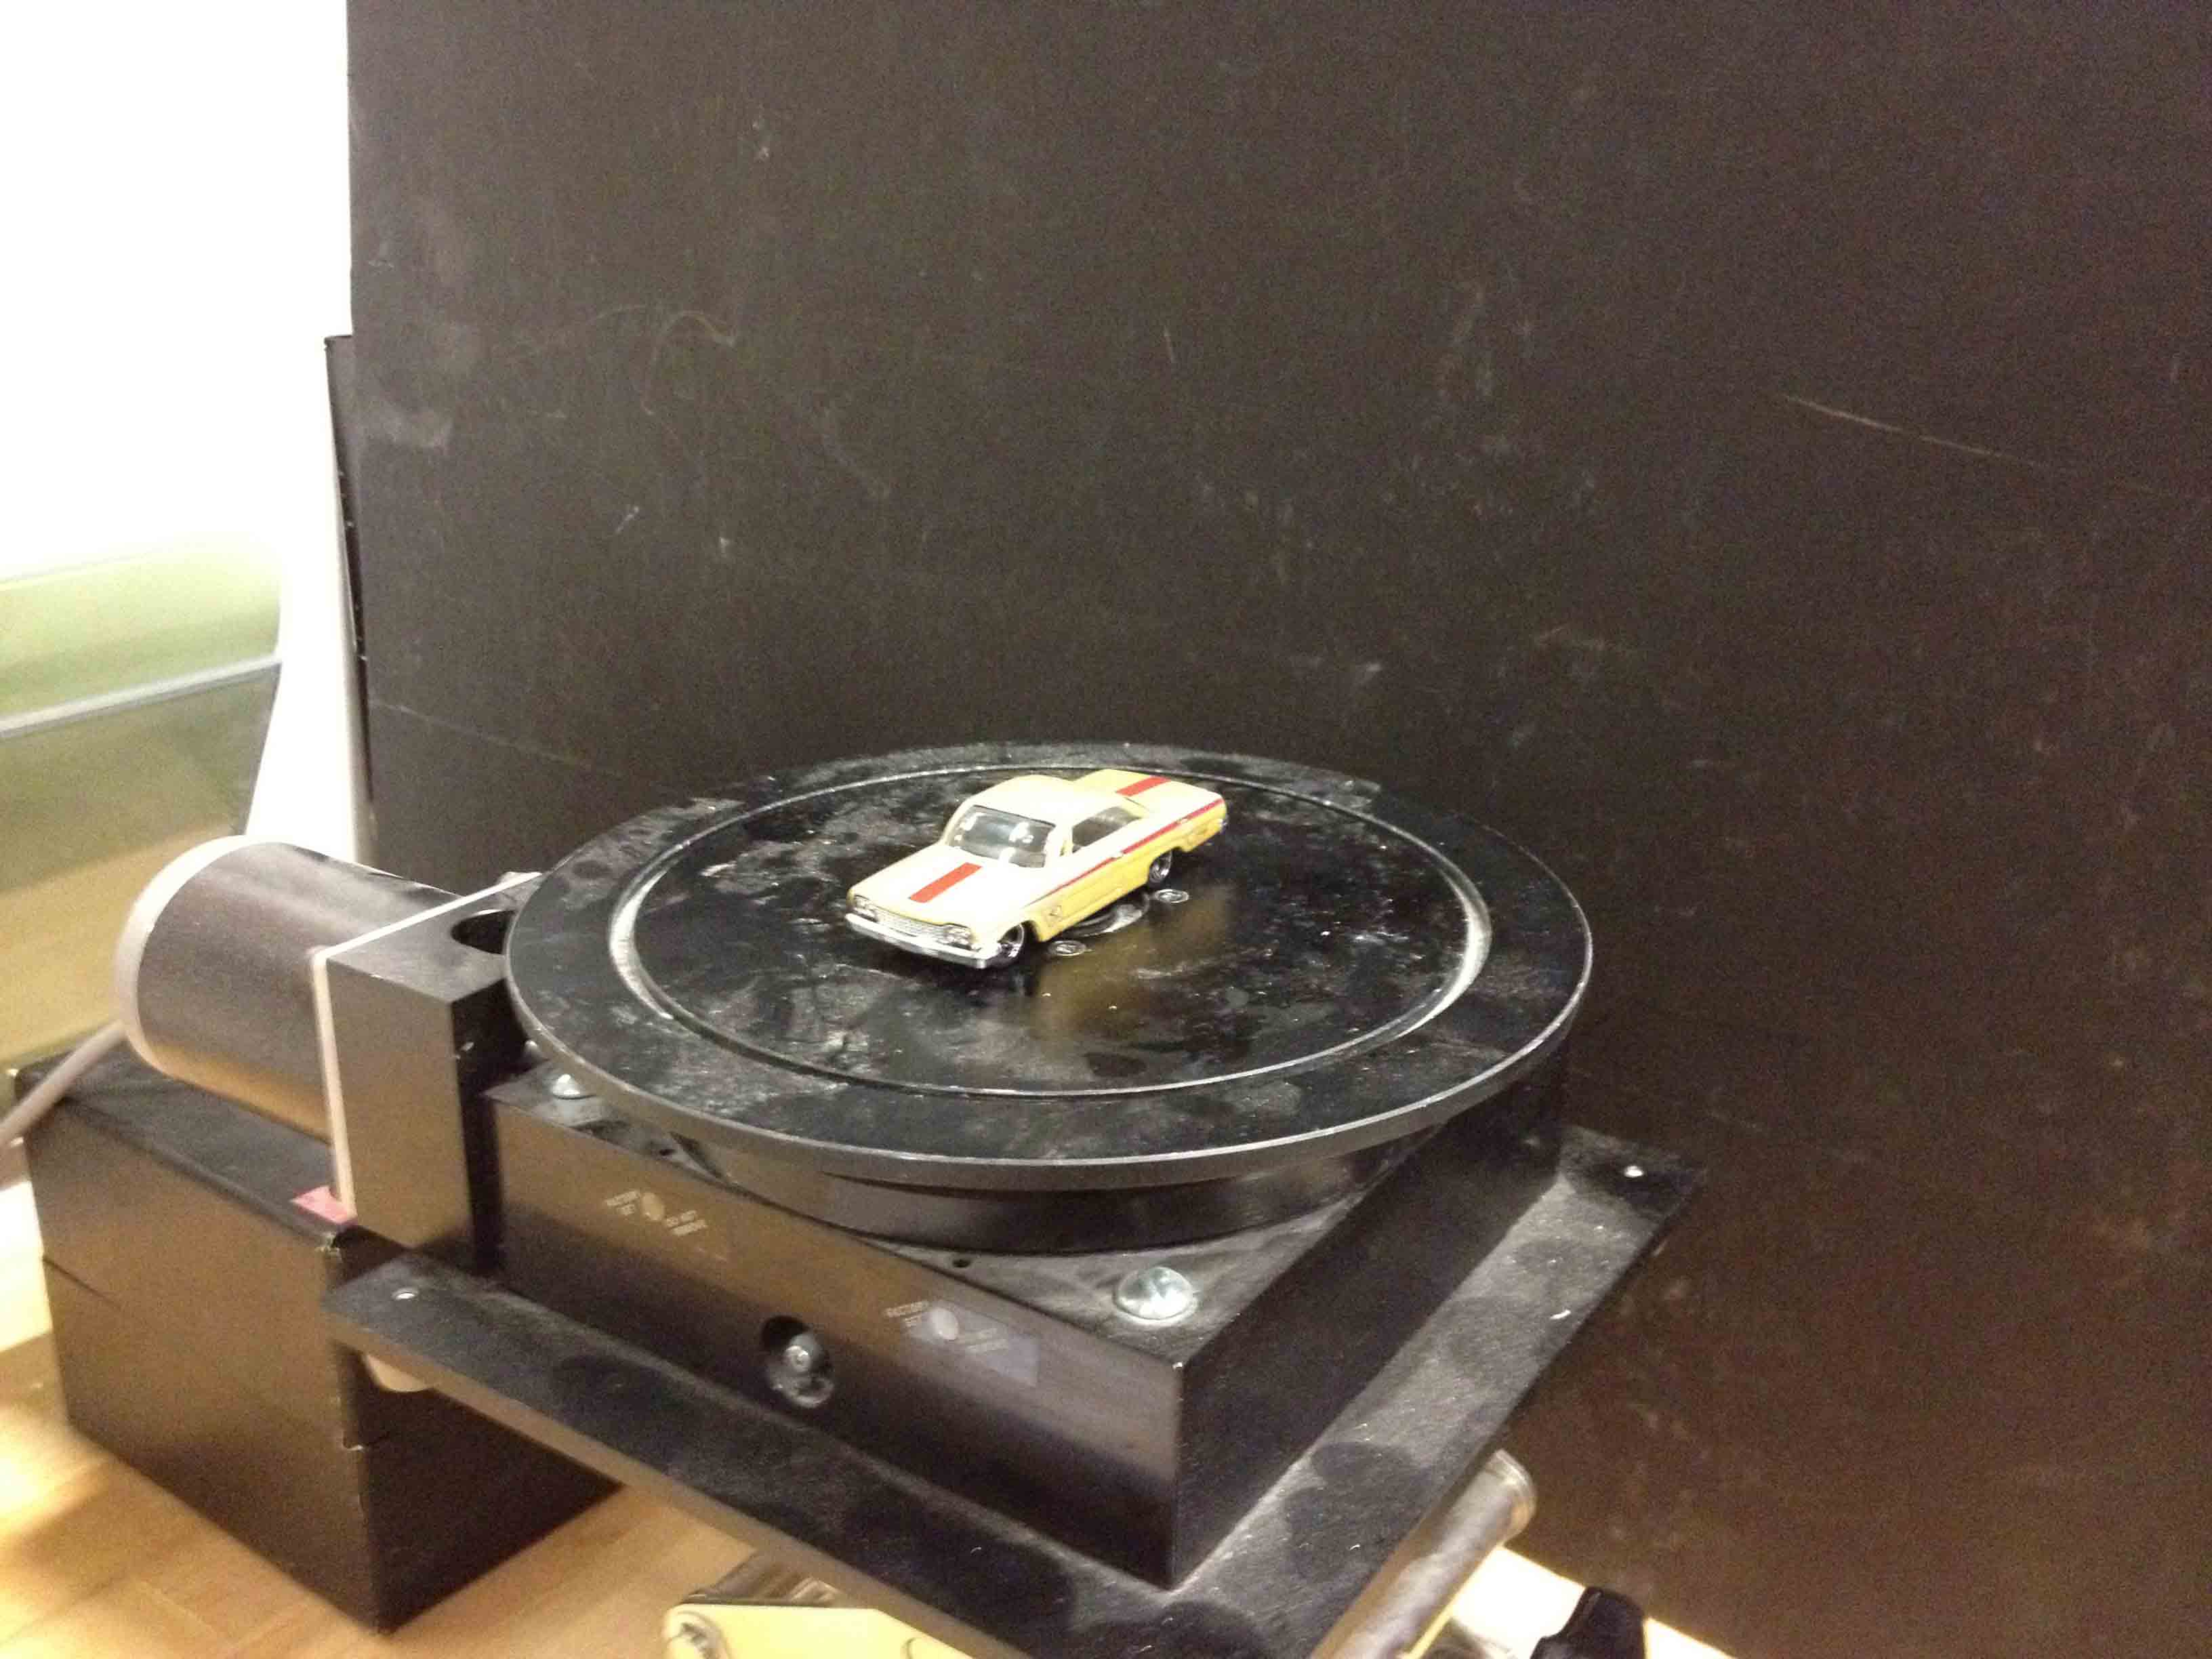
For the first half of the assignment, I decided to use to the Minolta scanner, but actually had a lot of trouble finding a good object to scan. I first tried scanning a toy, tin car, but it didn't come out too well.
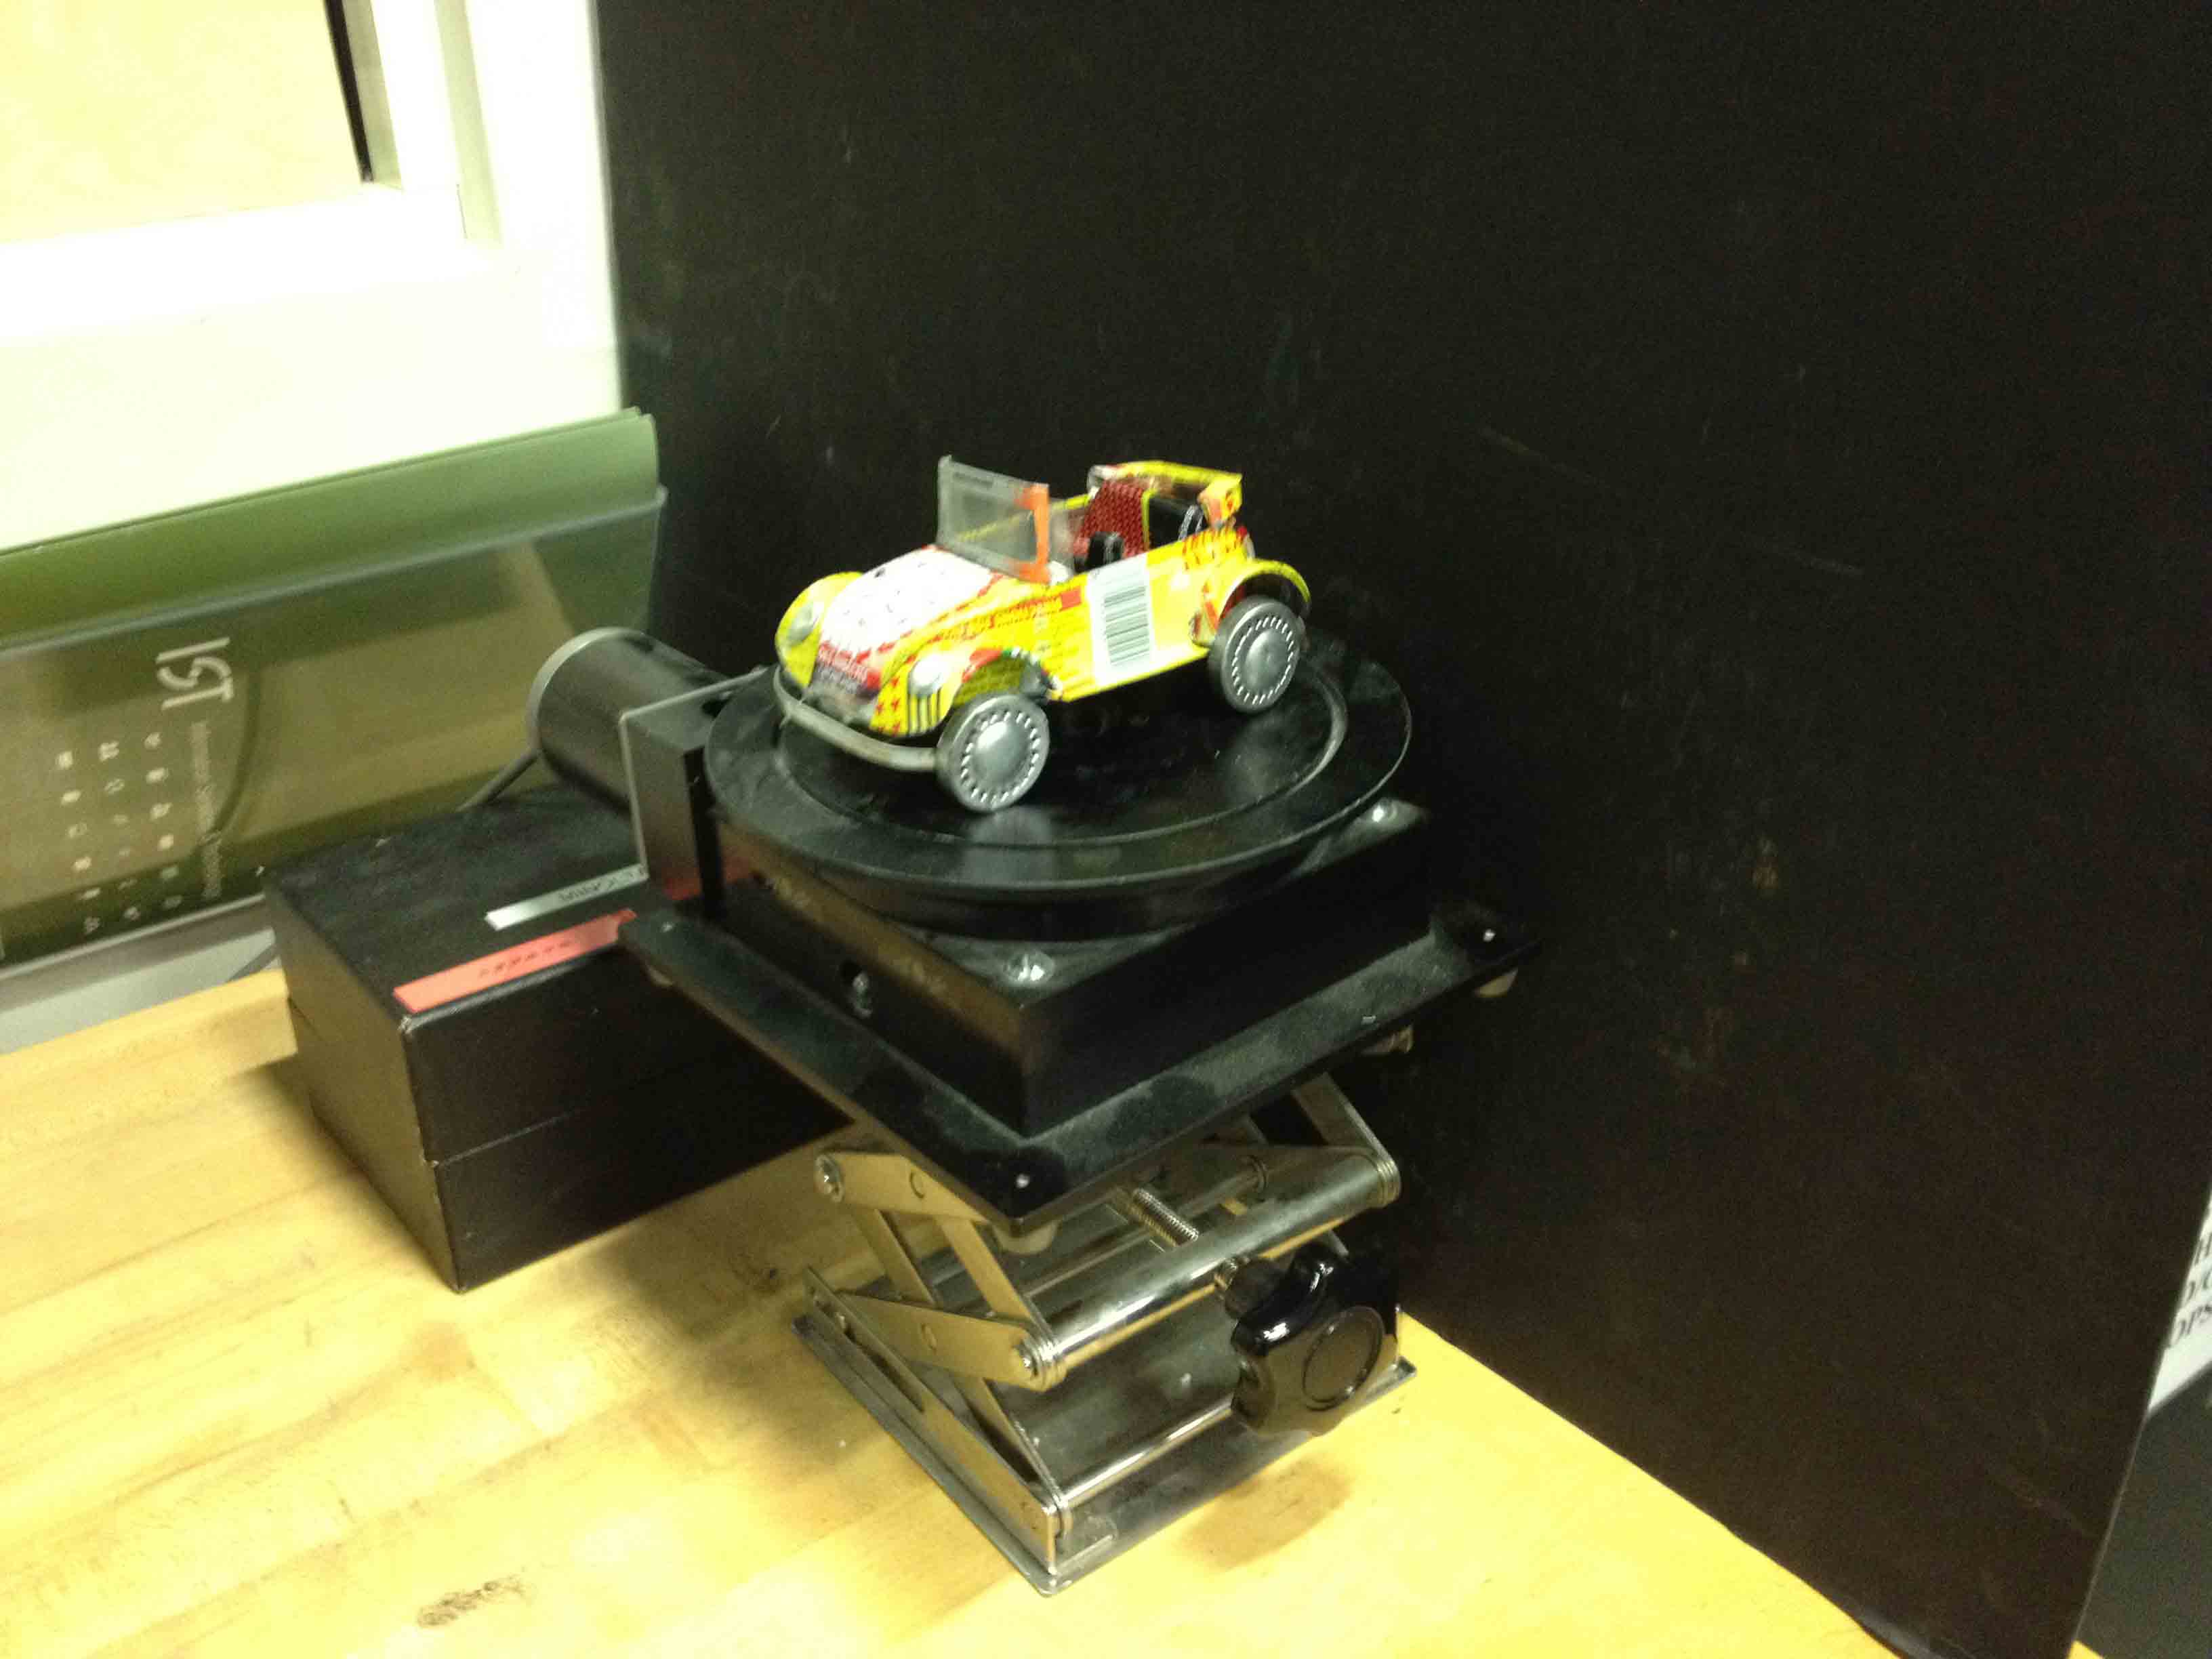
I even tried adjusting the focus manually until the live video feed showed a crystal clear image of the car, but it still wasn't much better.
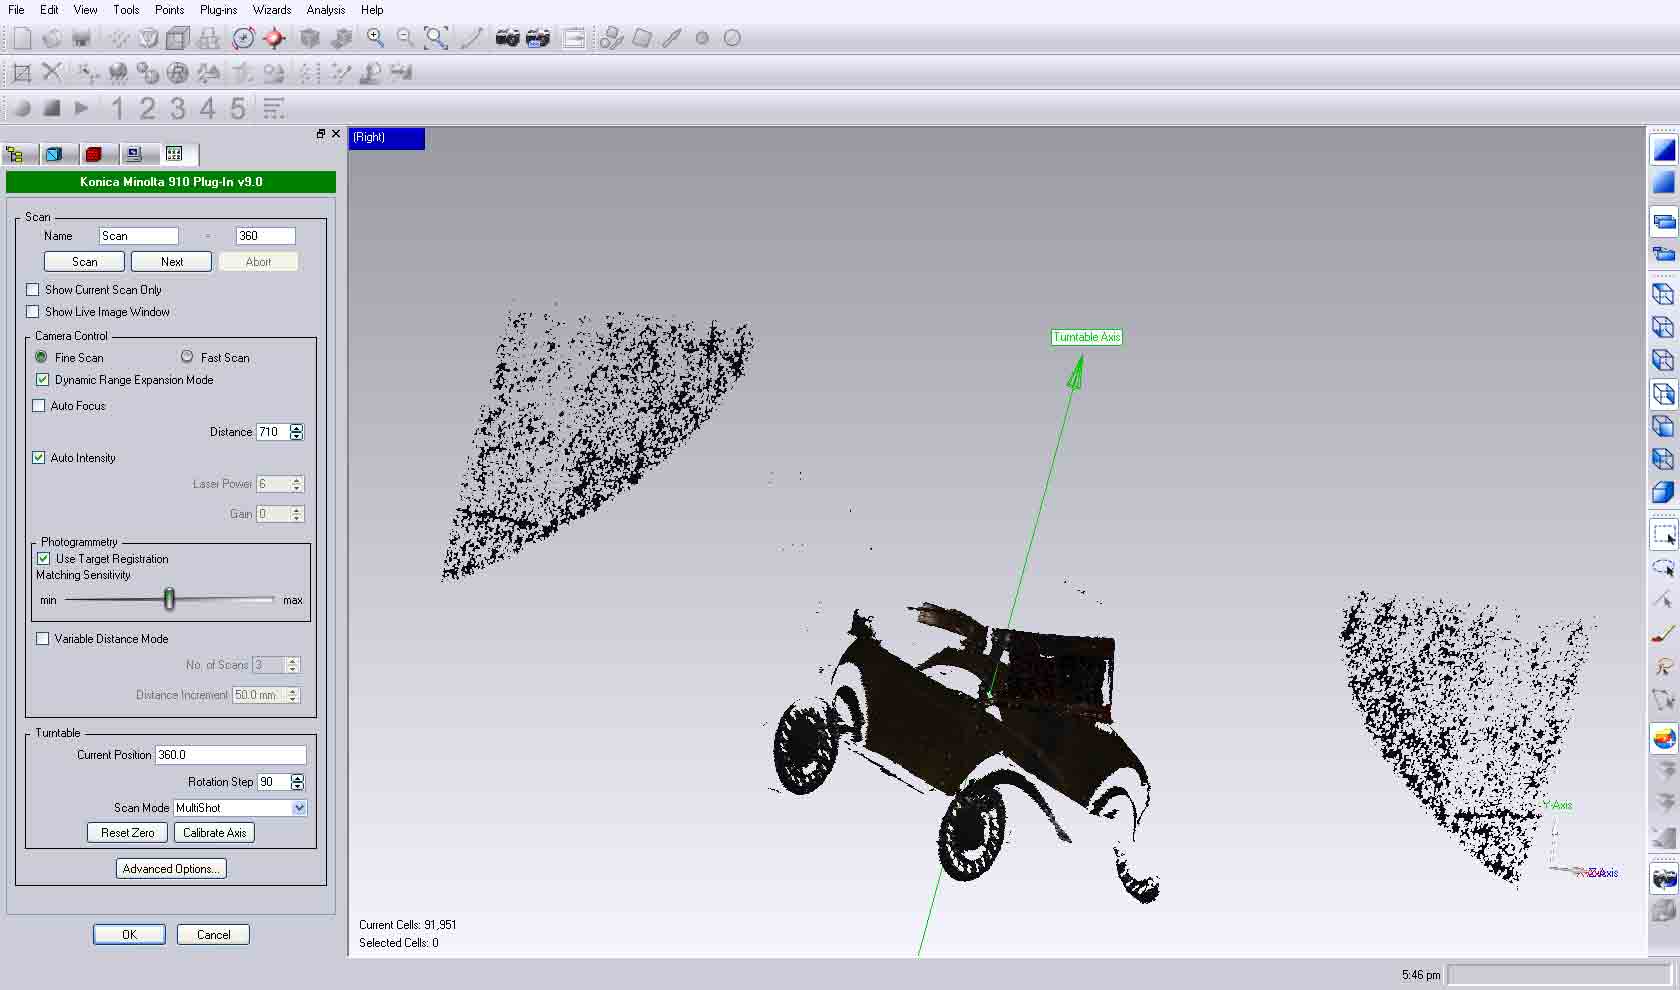
Looking at how that first scan turned out, in which it didn't see the car at all but rather only the background, I figured that the car must be too shiny and reflective for the laser to get a good reading on it.
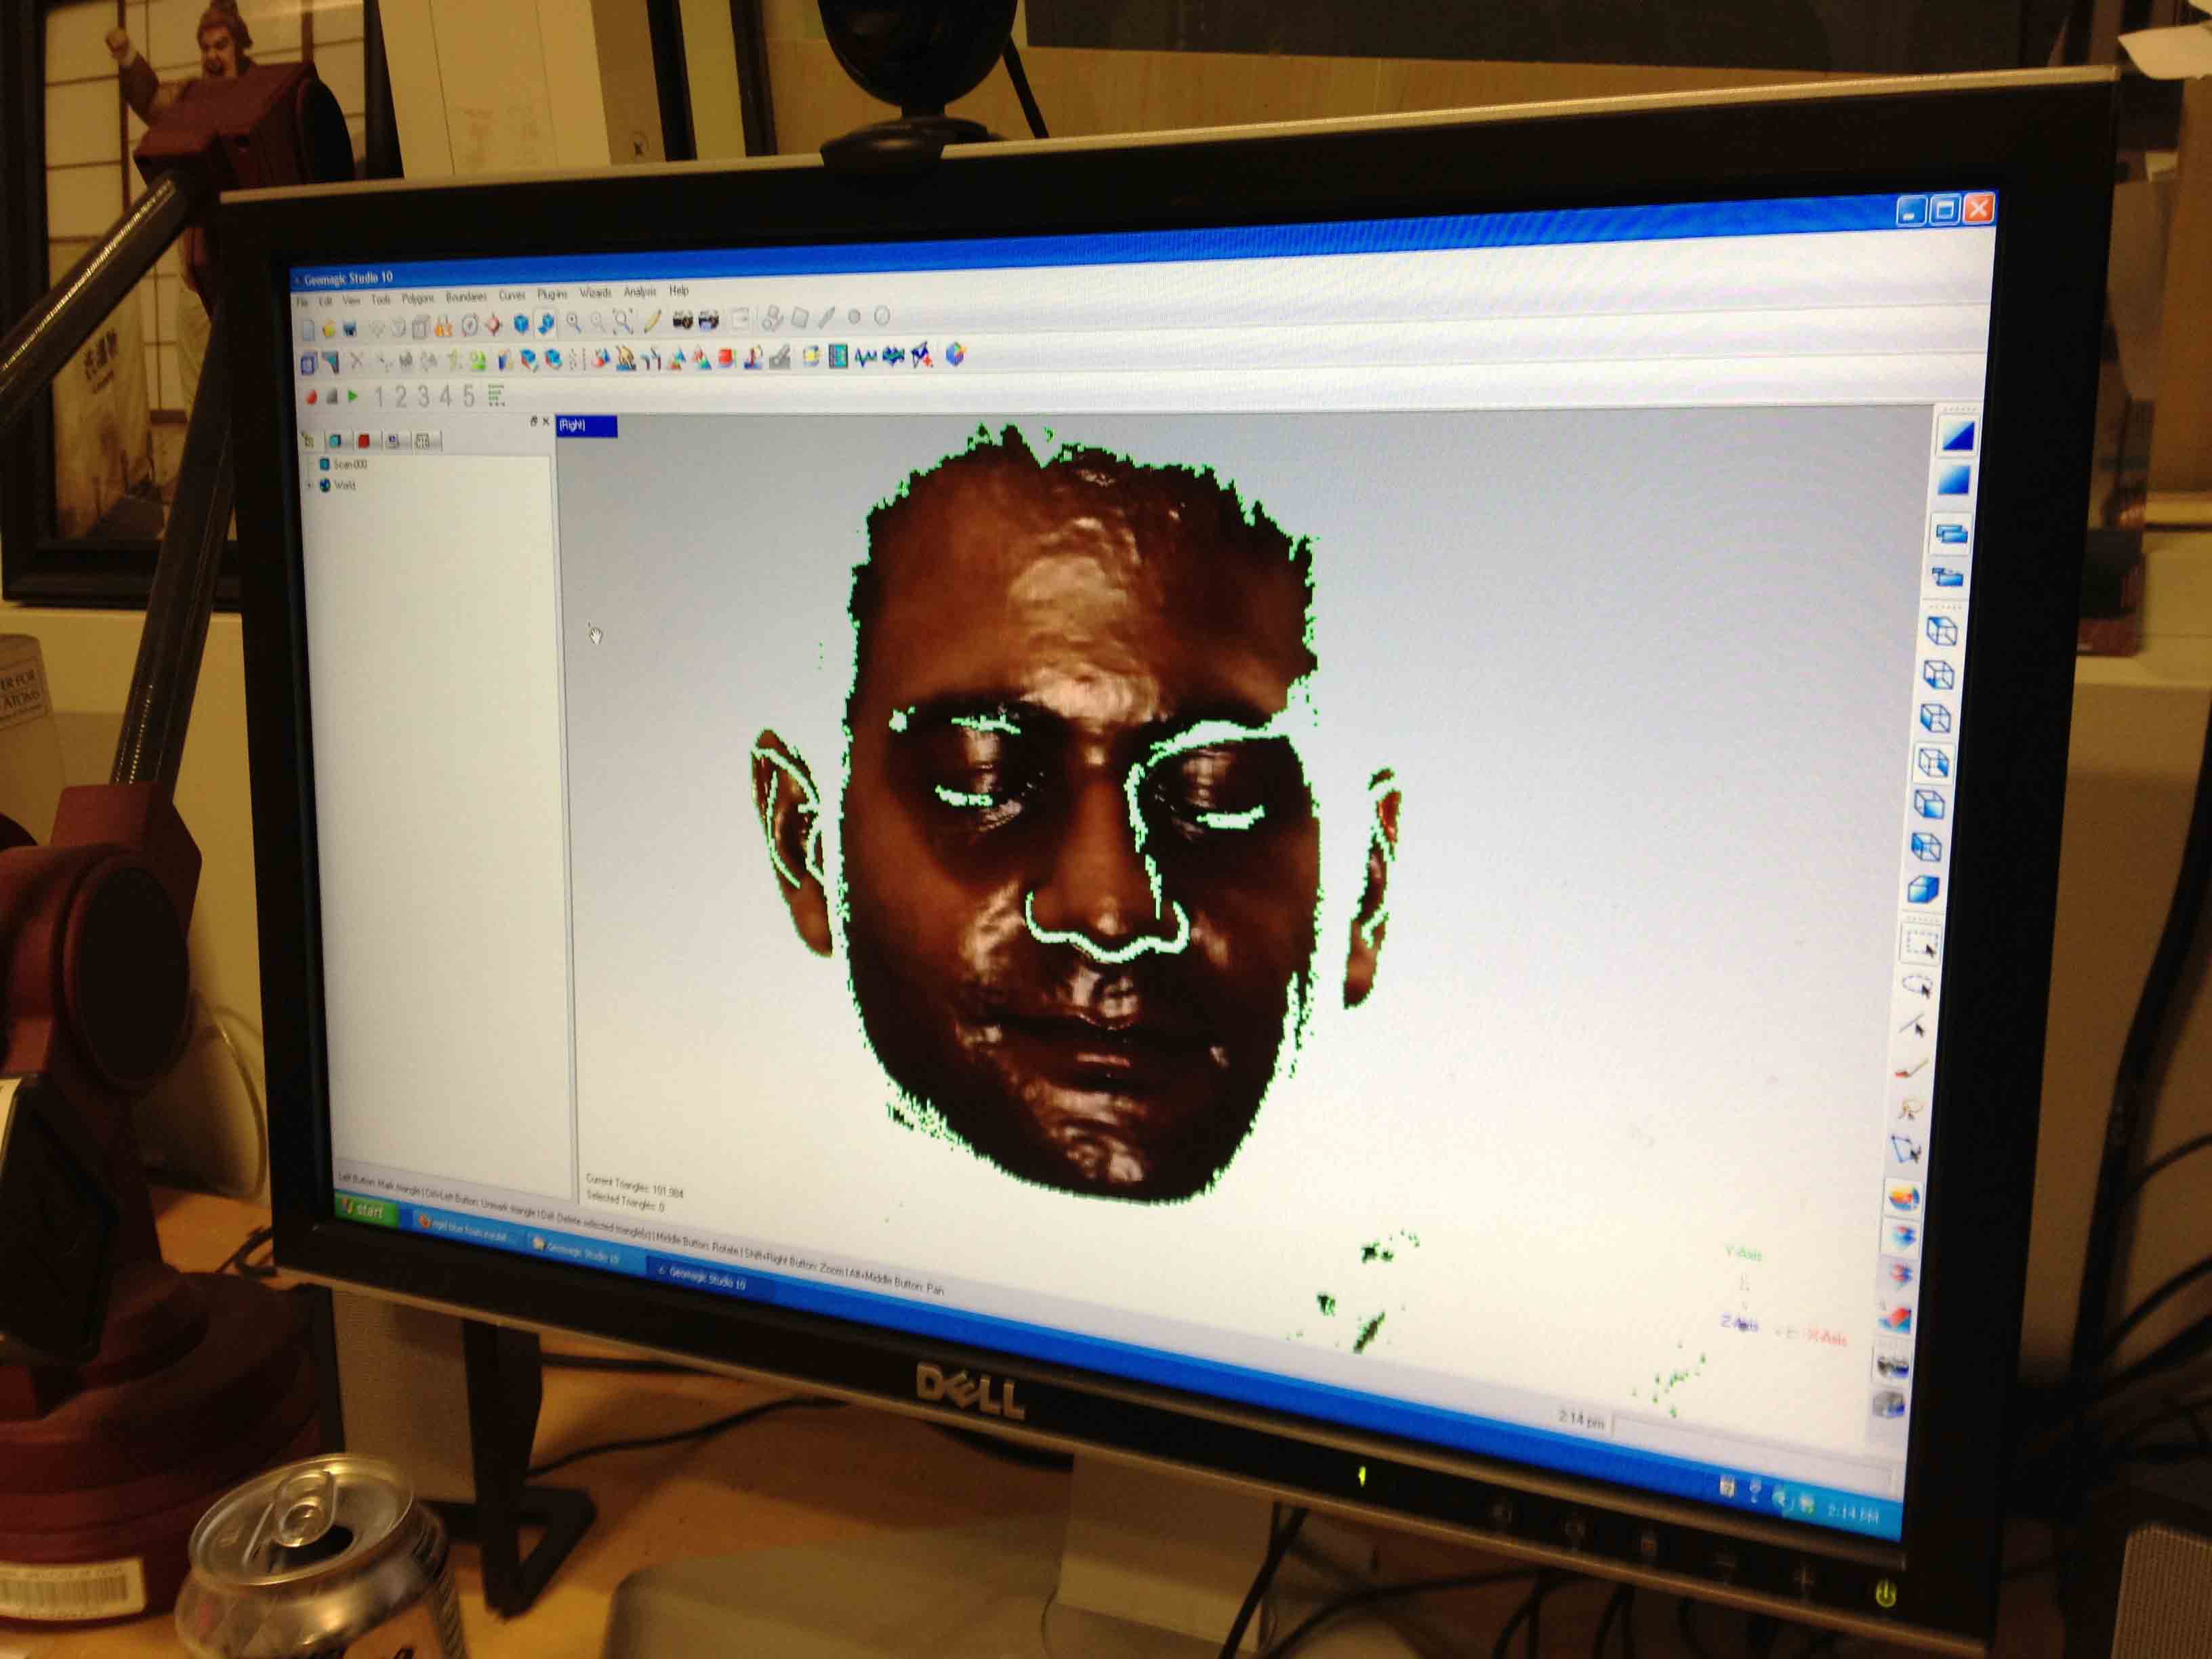
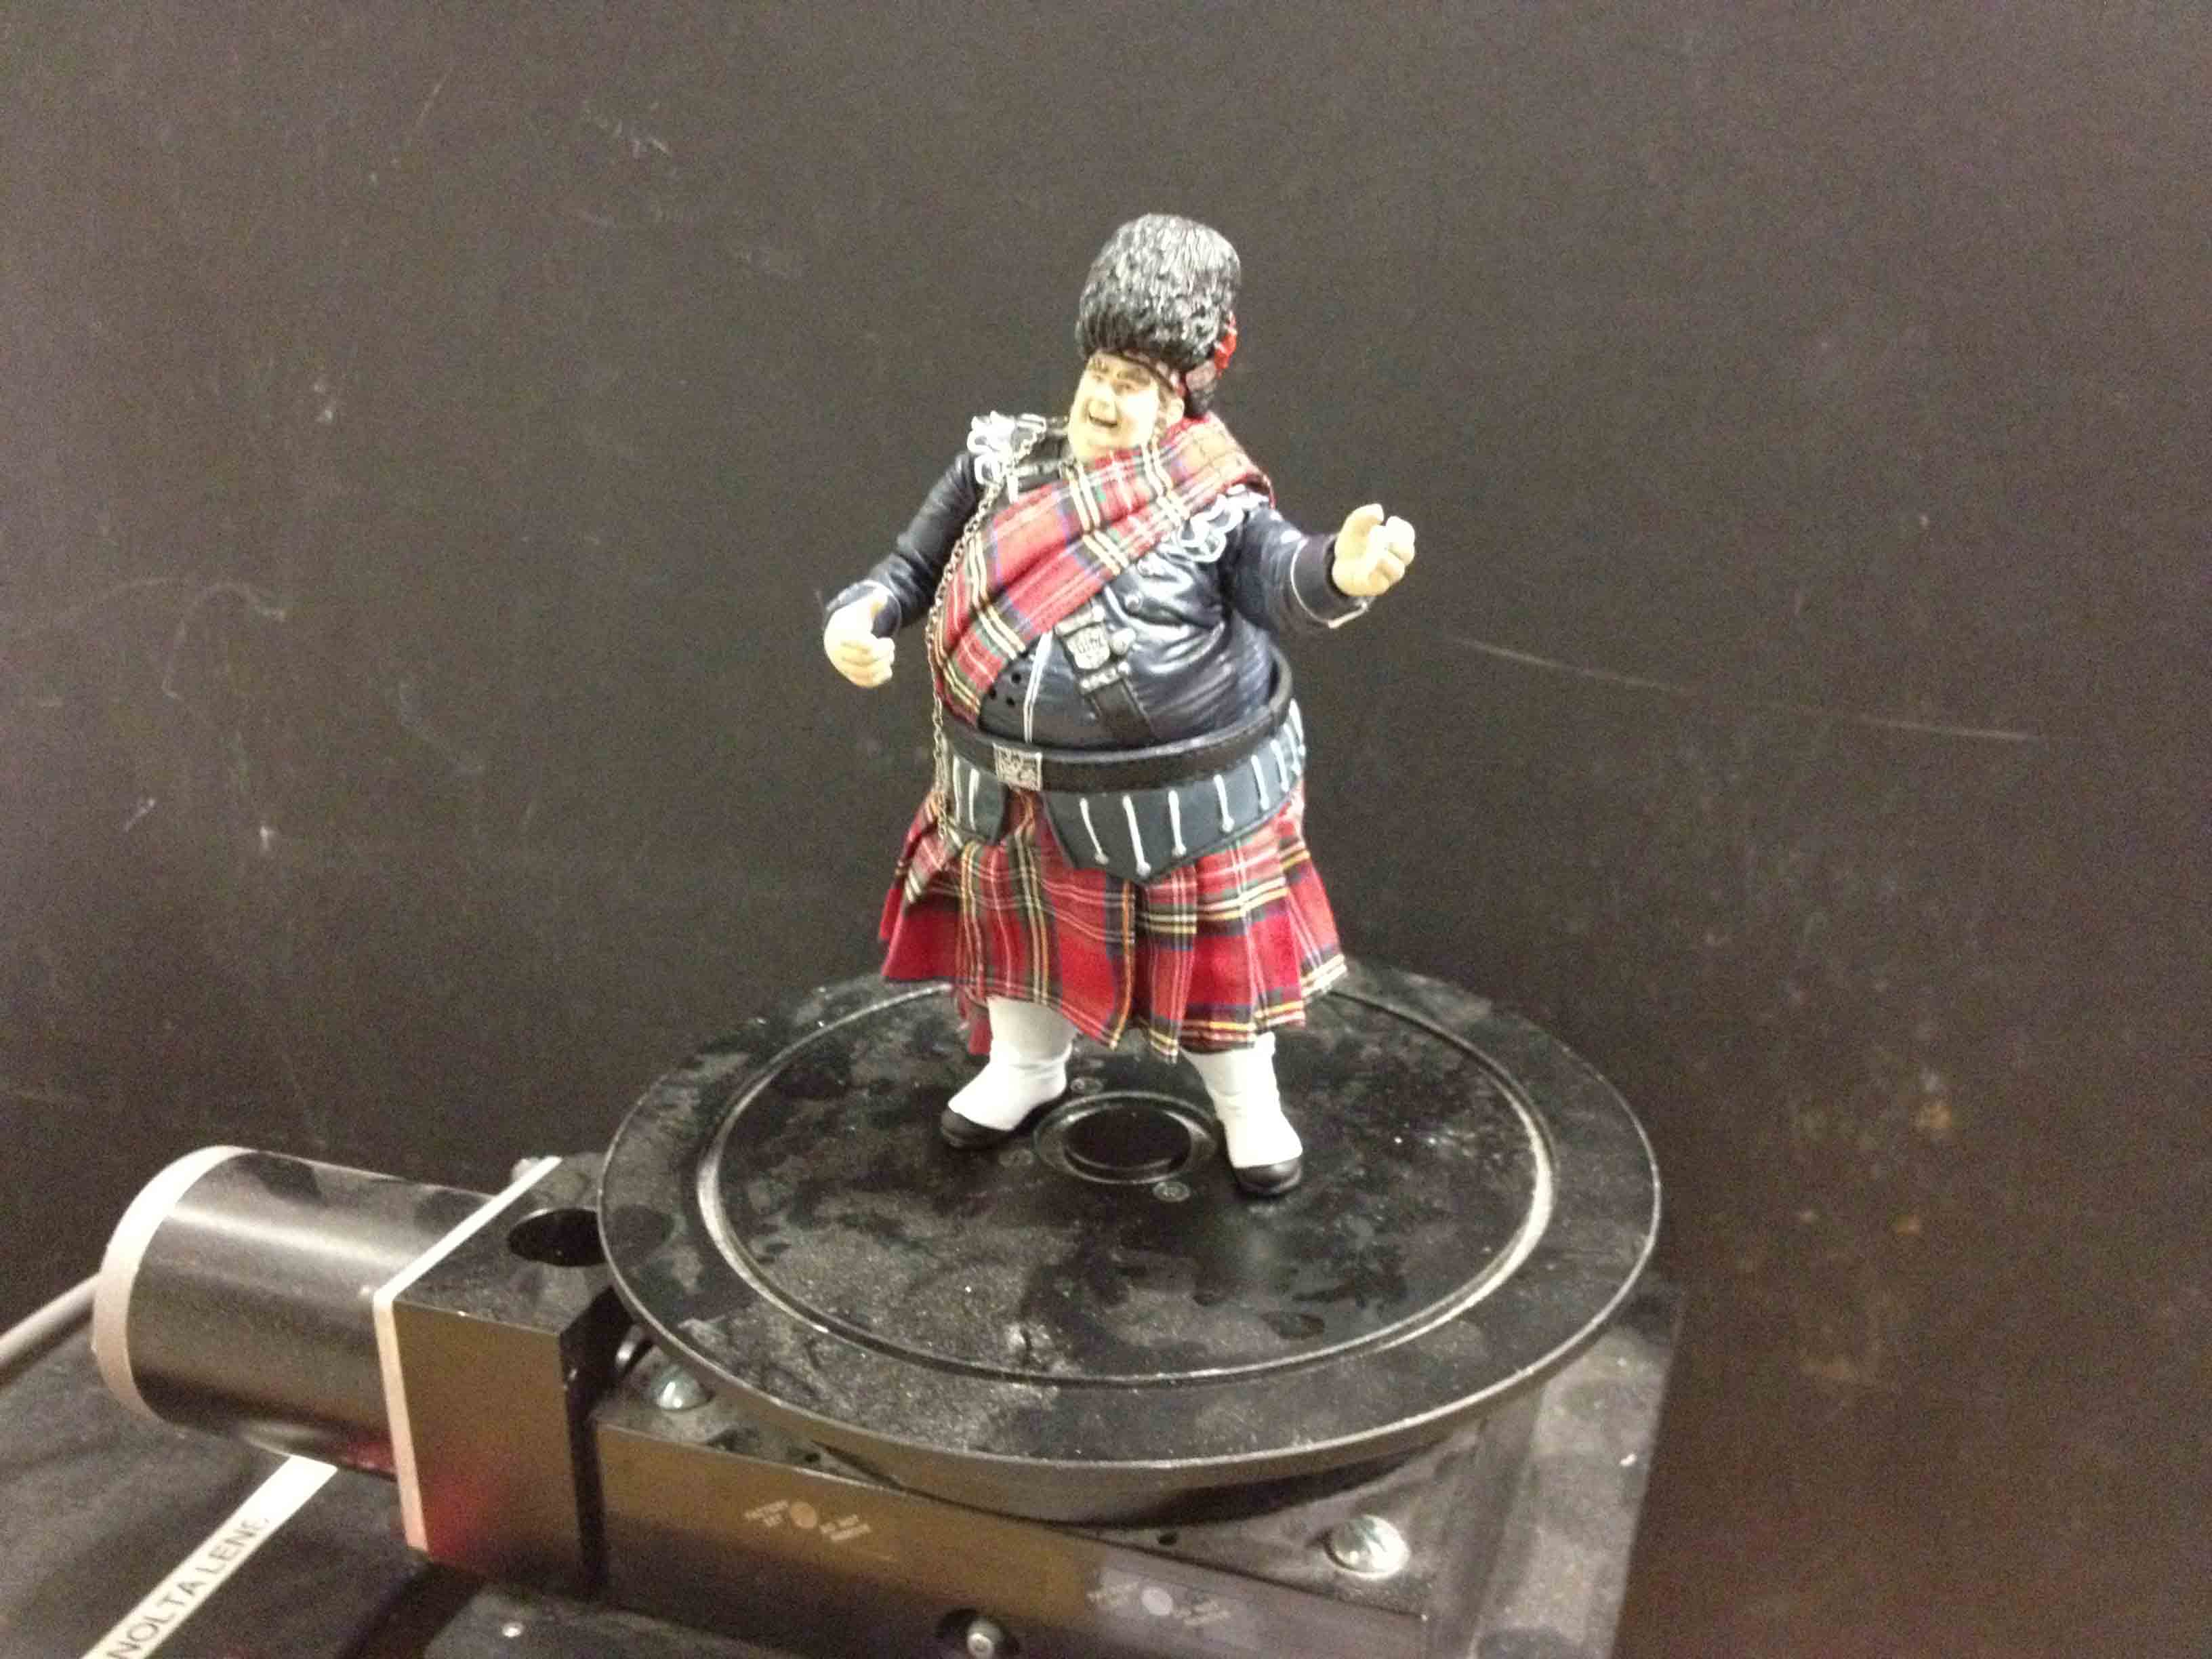
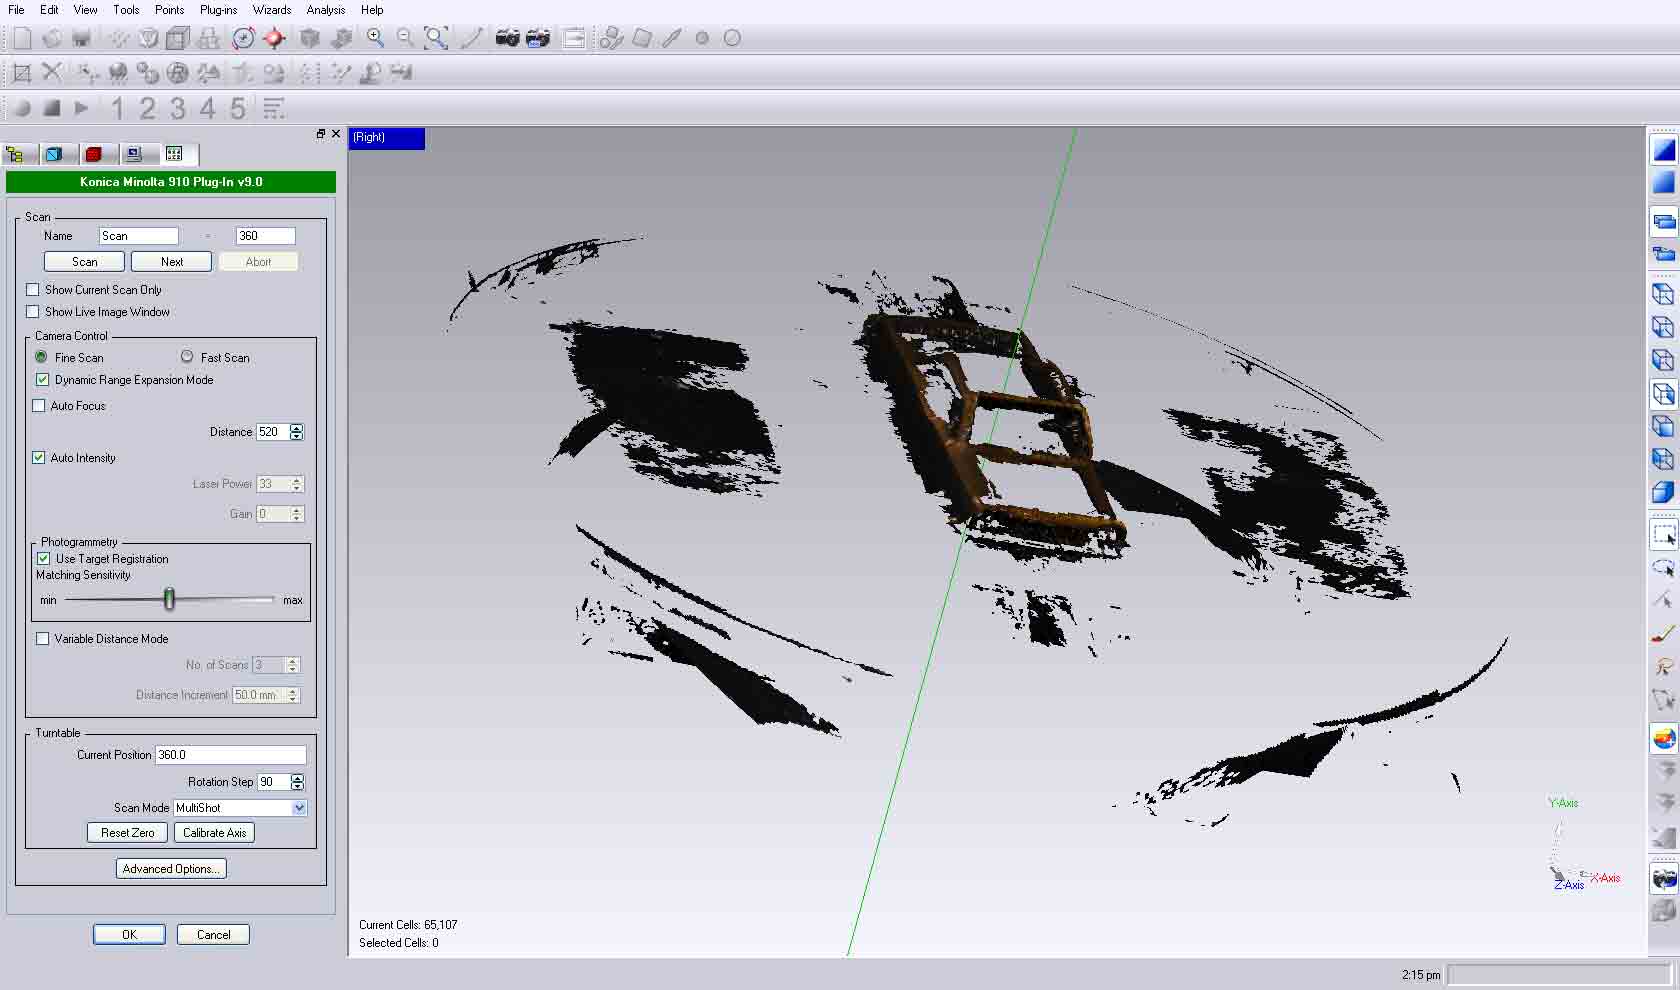
So I then moved on to scanning this little guy, which I found laying around the shop.
There were problems with him too, though, as numerous areas like his hat failed to show up in the scan.
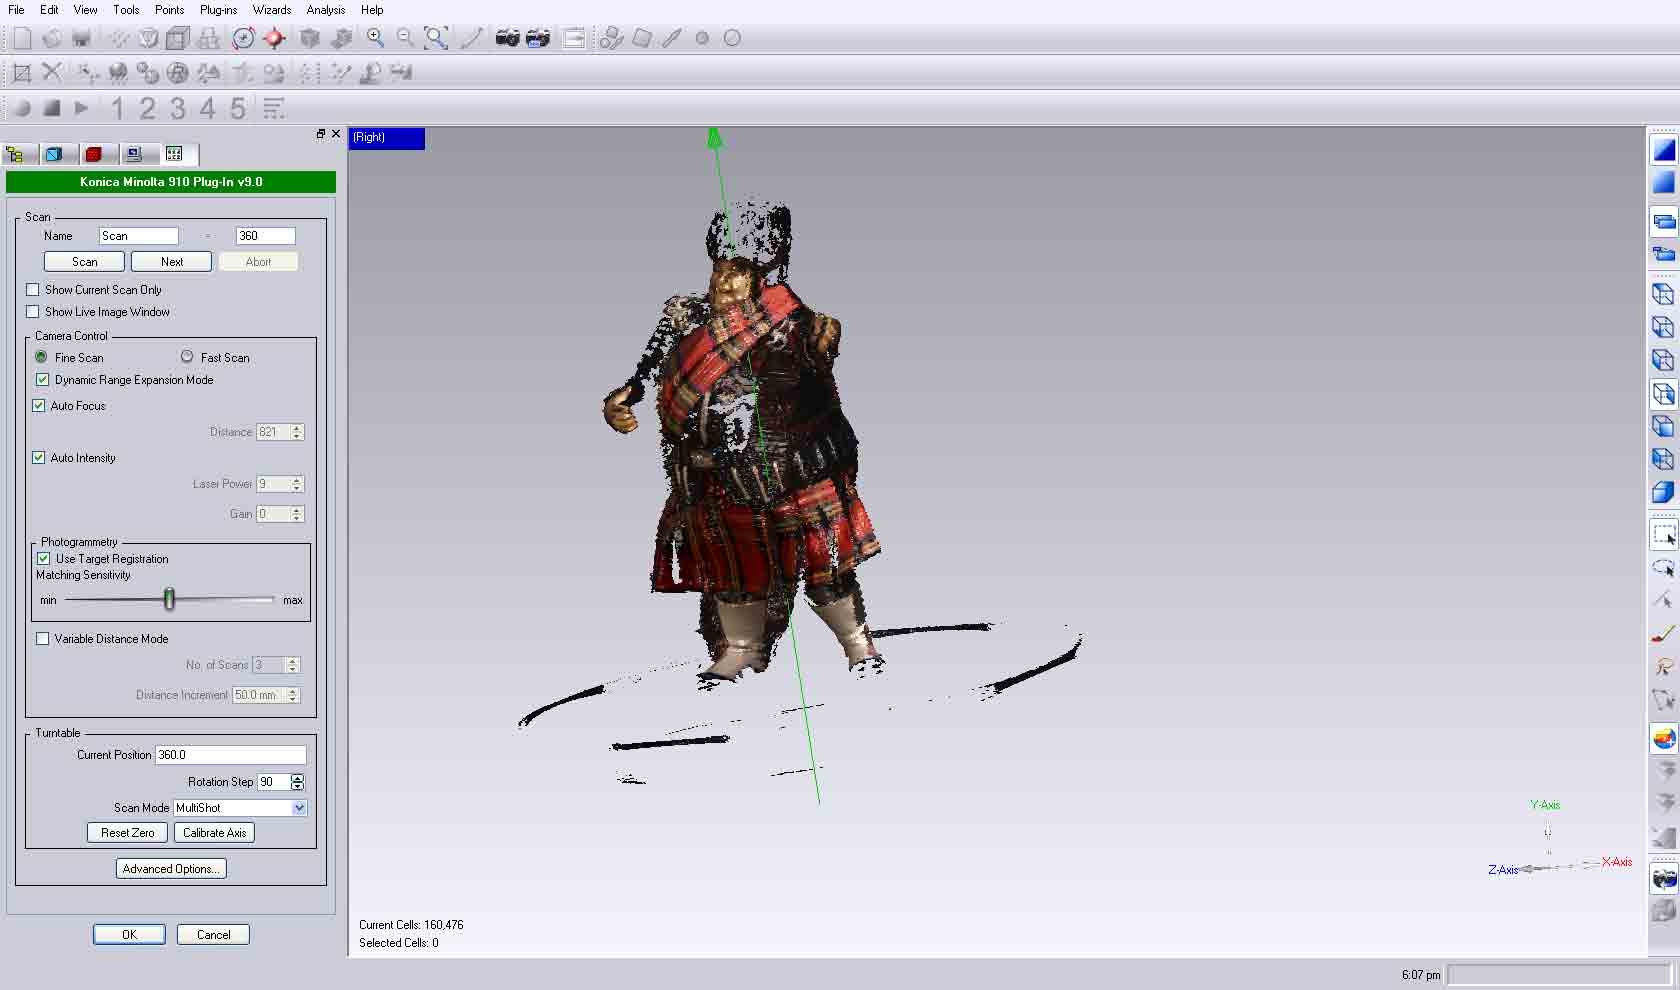
I figured that it must be tough for the laser to pick up dark or black colors, which is probably why we use a black backdrop when scanning objects.
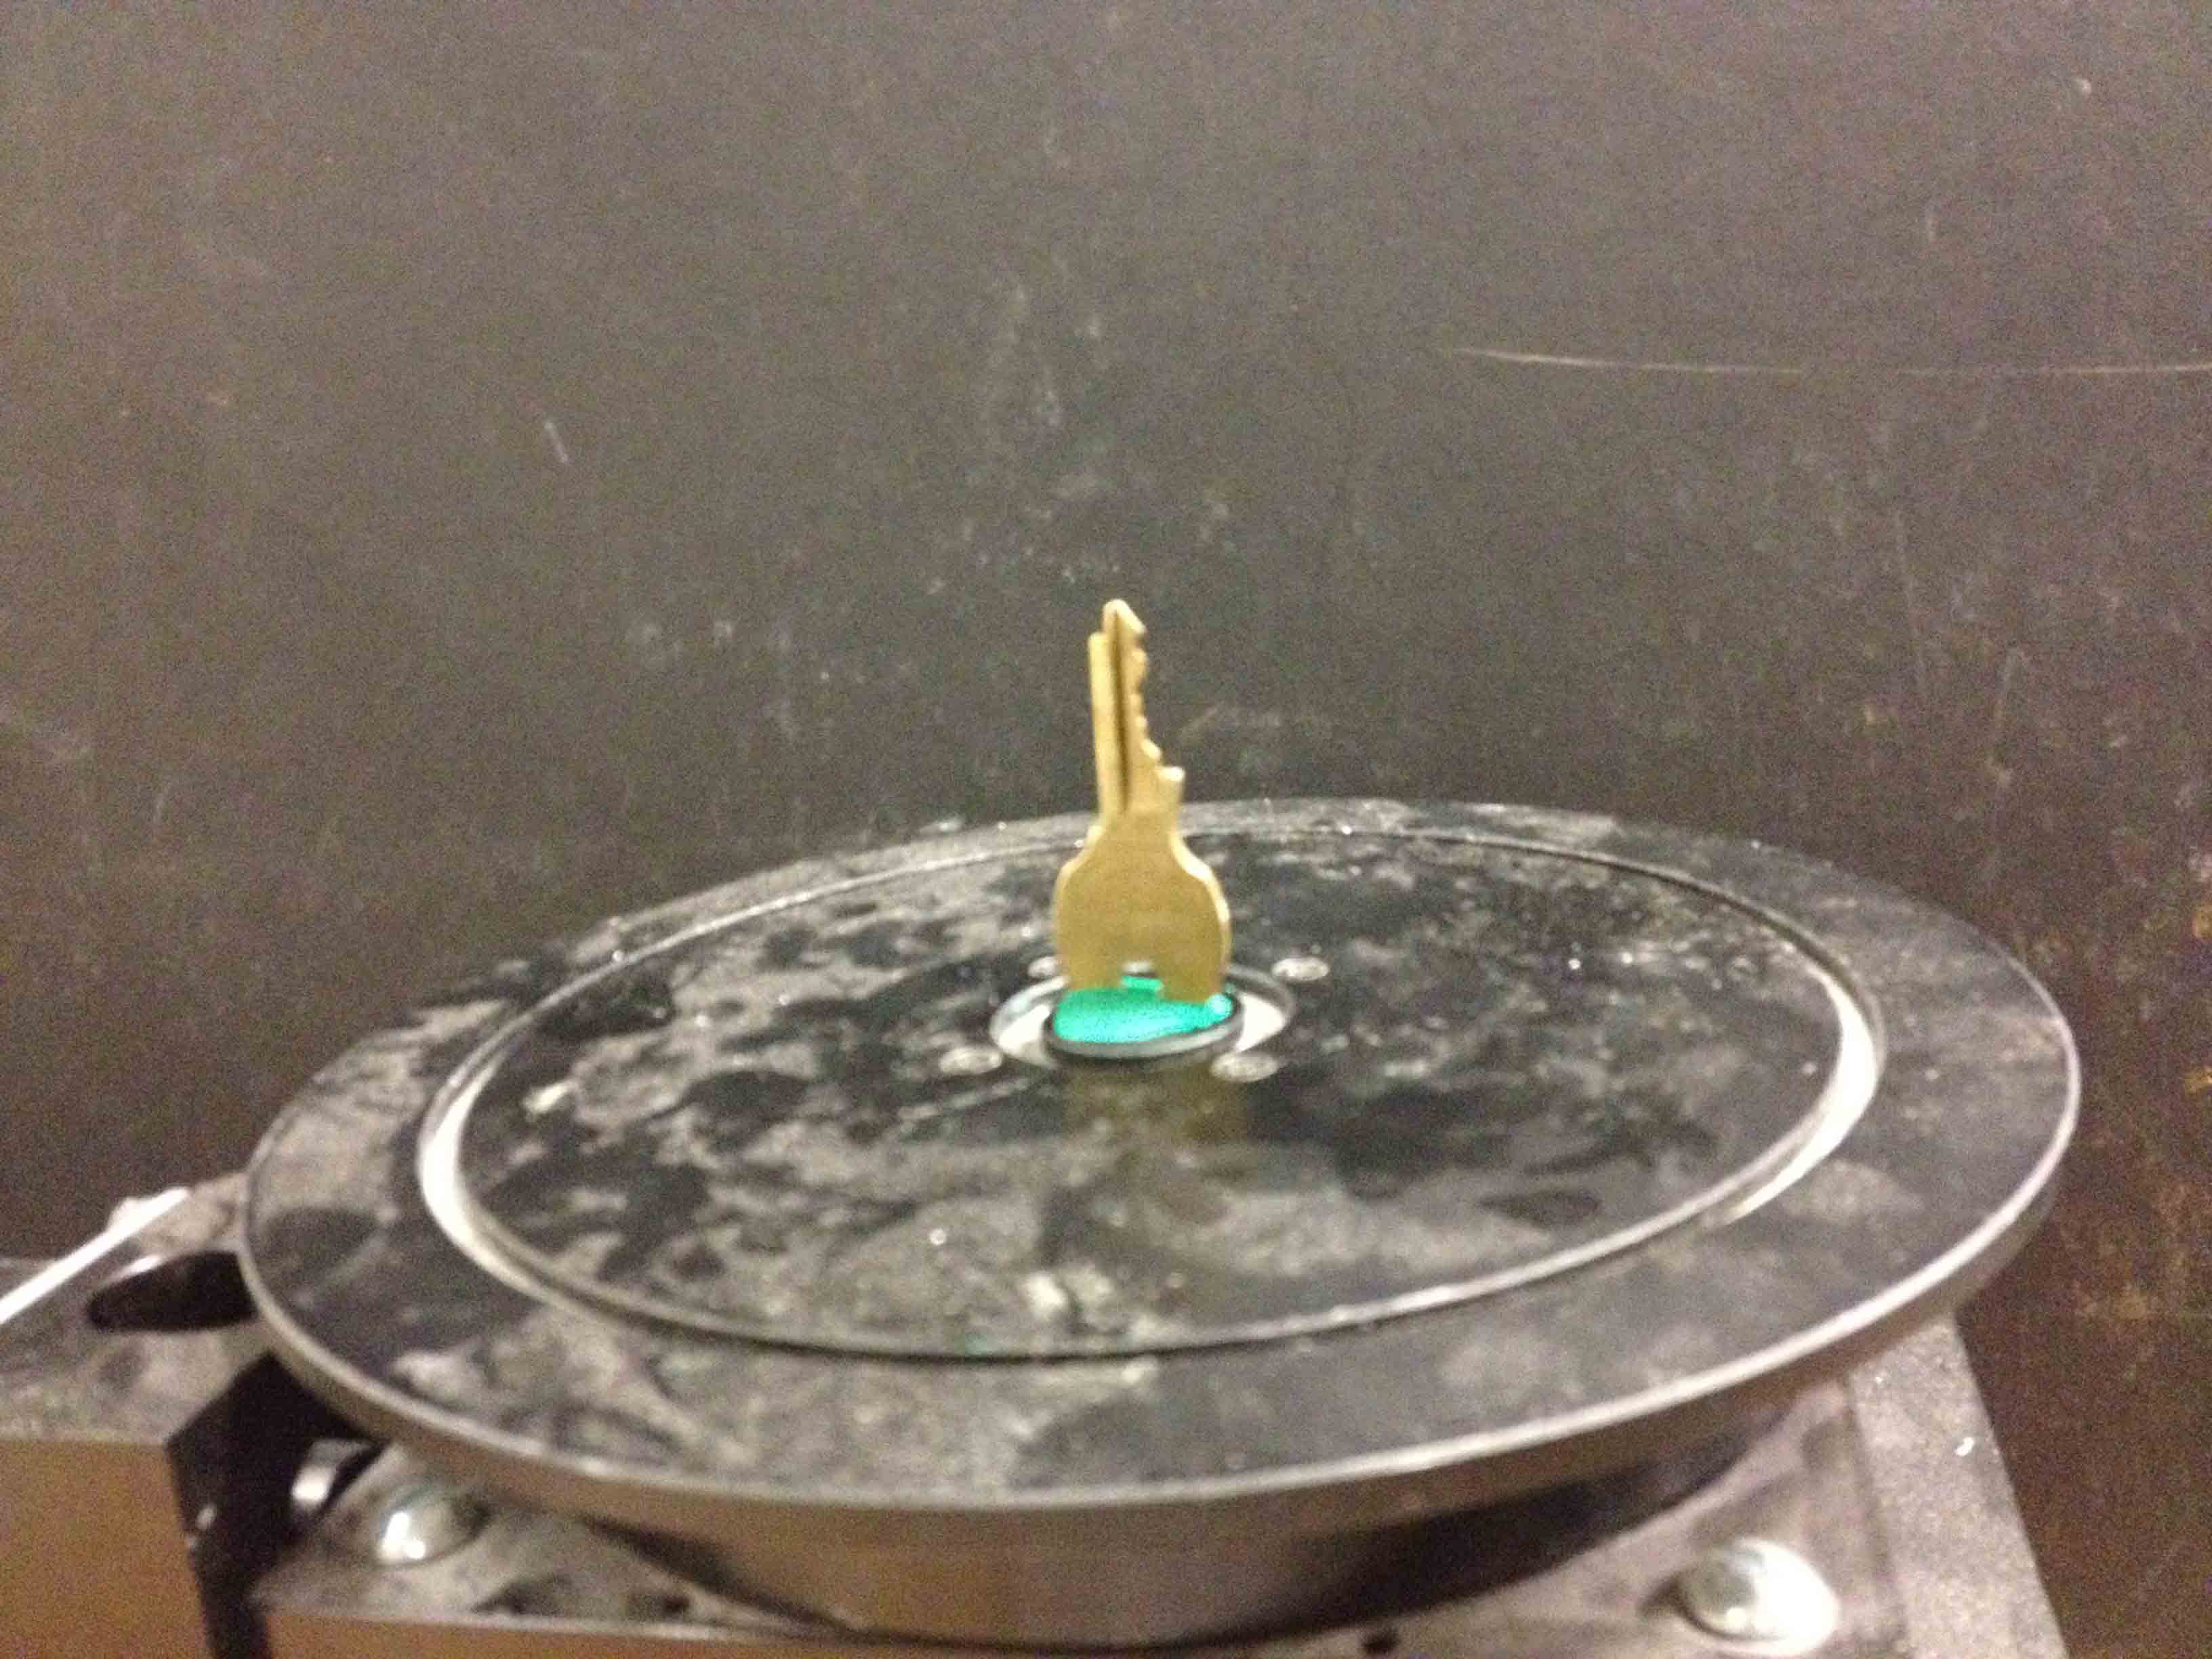
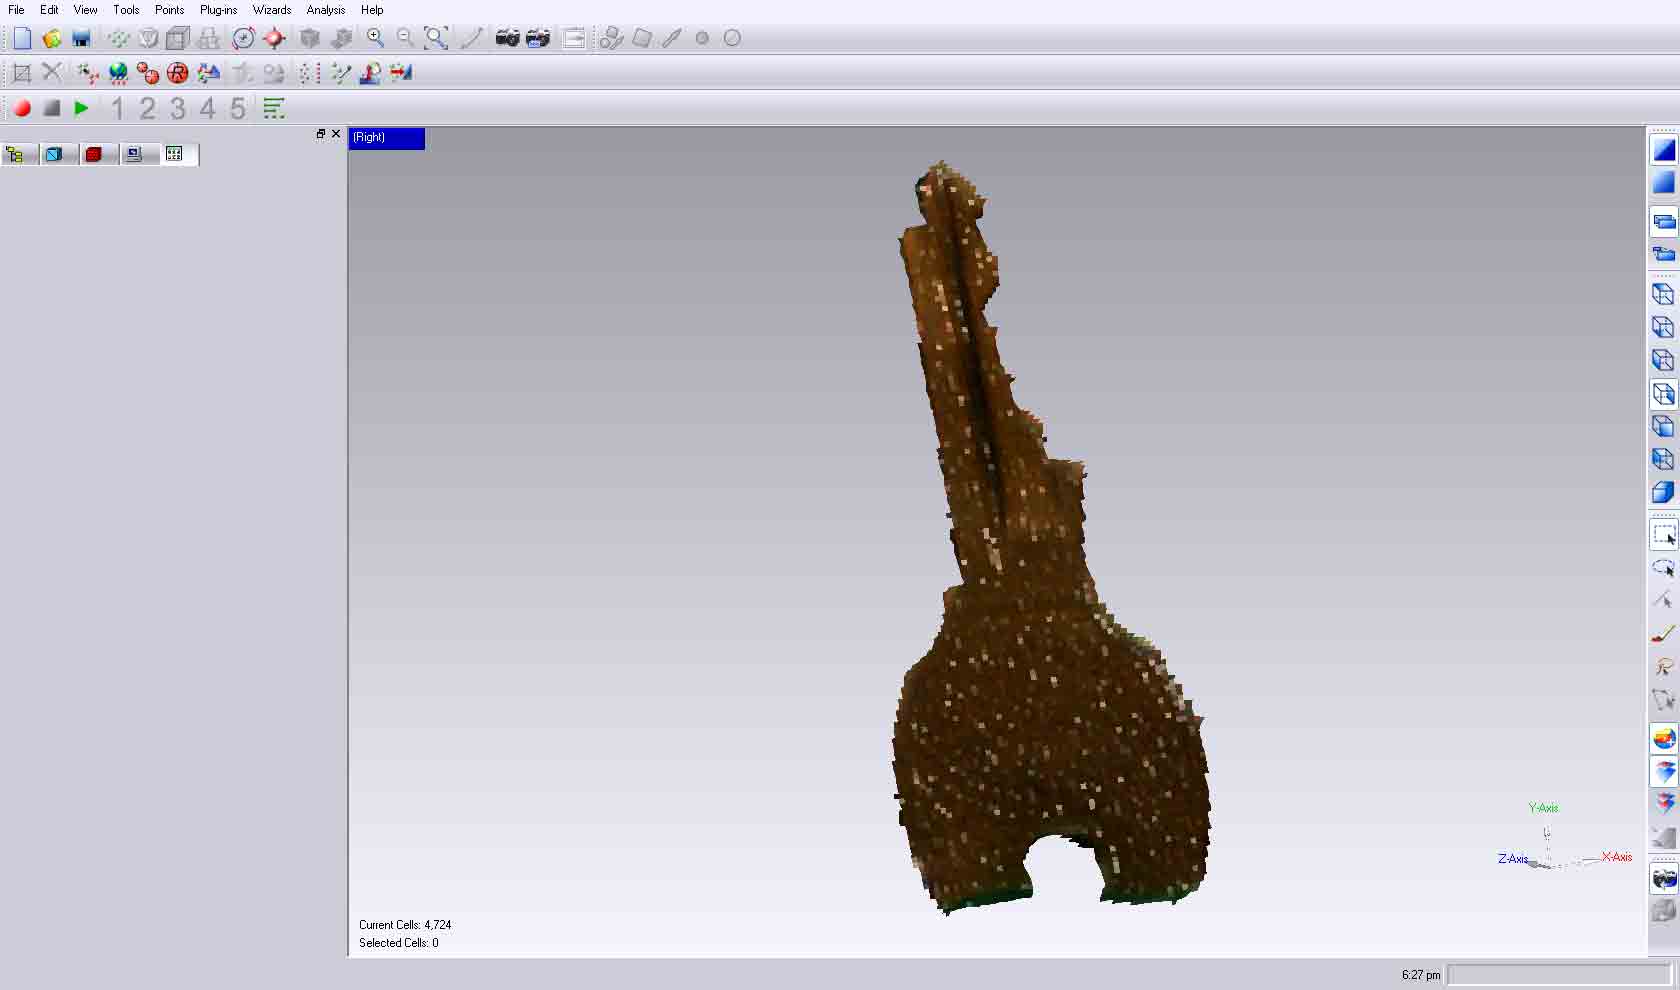
I then moved on to scanning my mail key, since I thought it would be cool if I could scan a print a working replica of a key. It worked better than the others, but after cleaning up the noise, I noticed that the thin side of the key failed to show up in the scan.

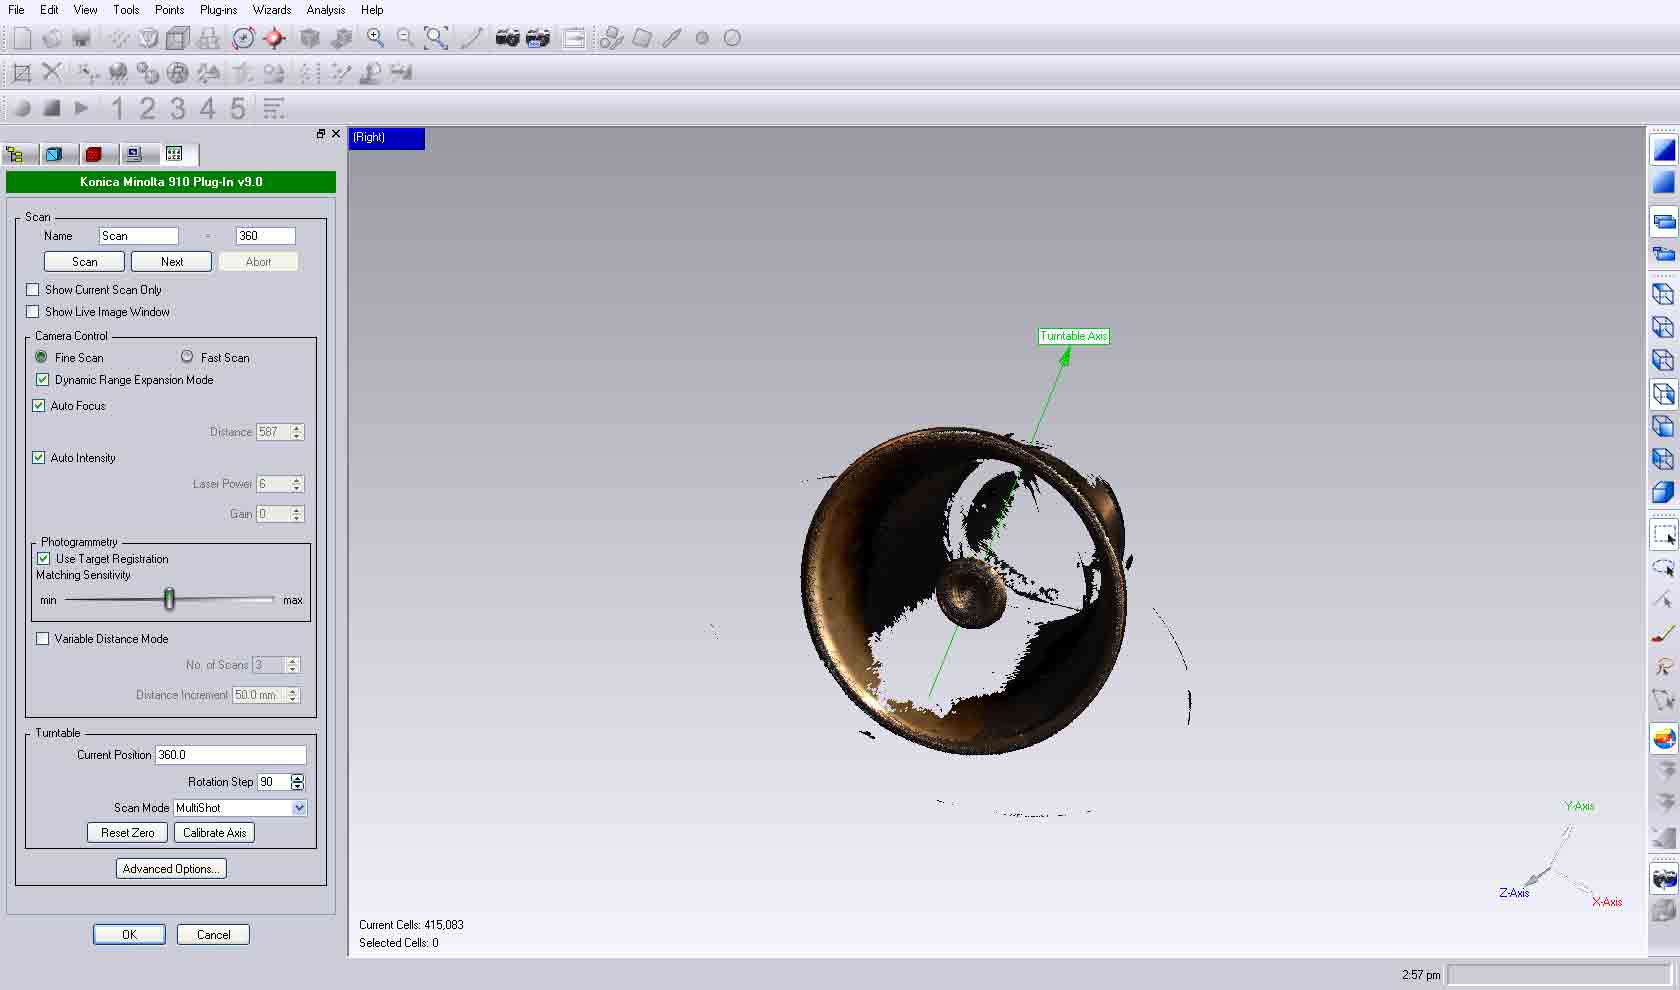
I then tried an old air raid siren that I bought at SwapFest as well as a small toy car, but the geometry of the siren cast dark shadows on the interior which didn't show up well, and parts of the car were too reflective.
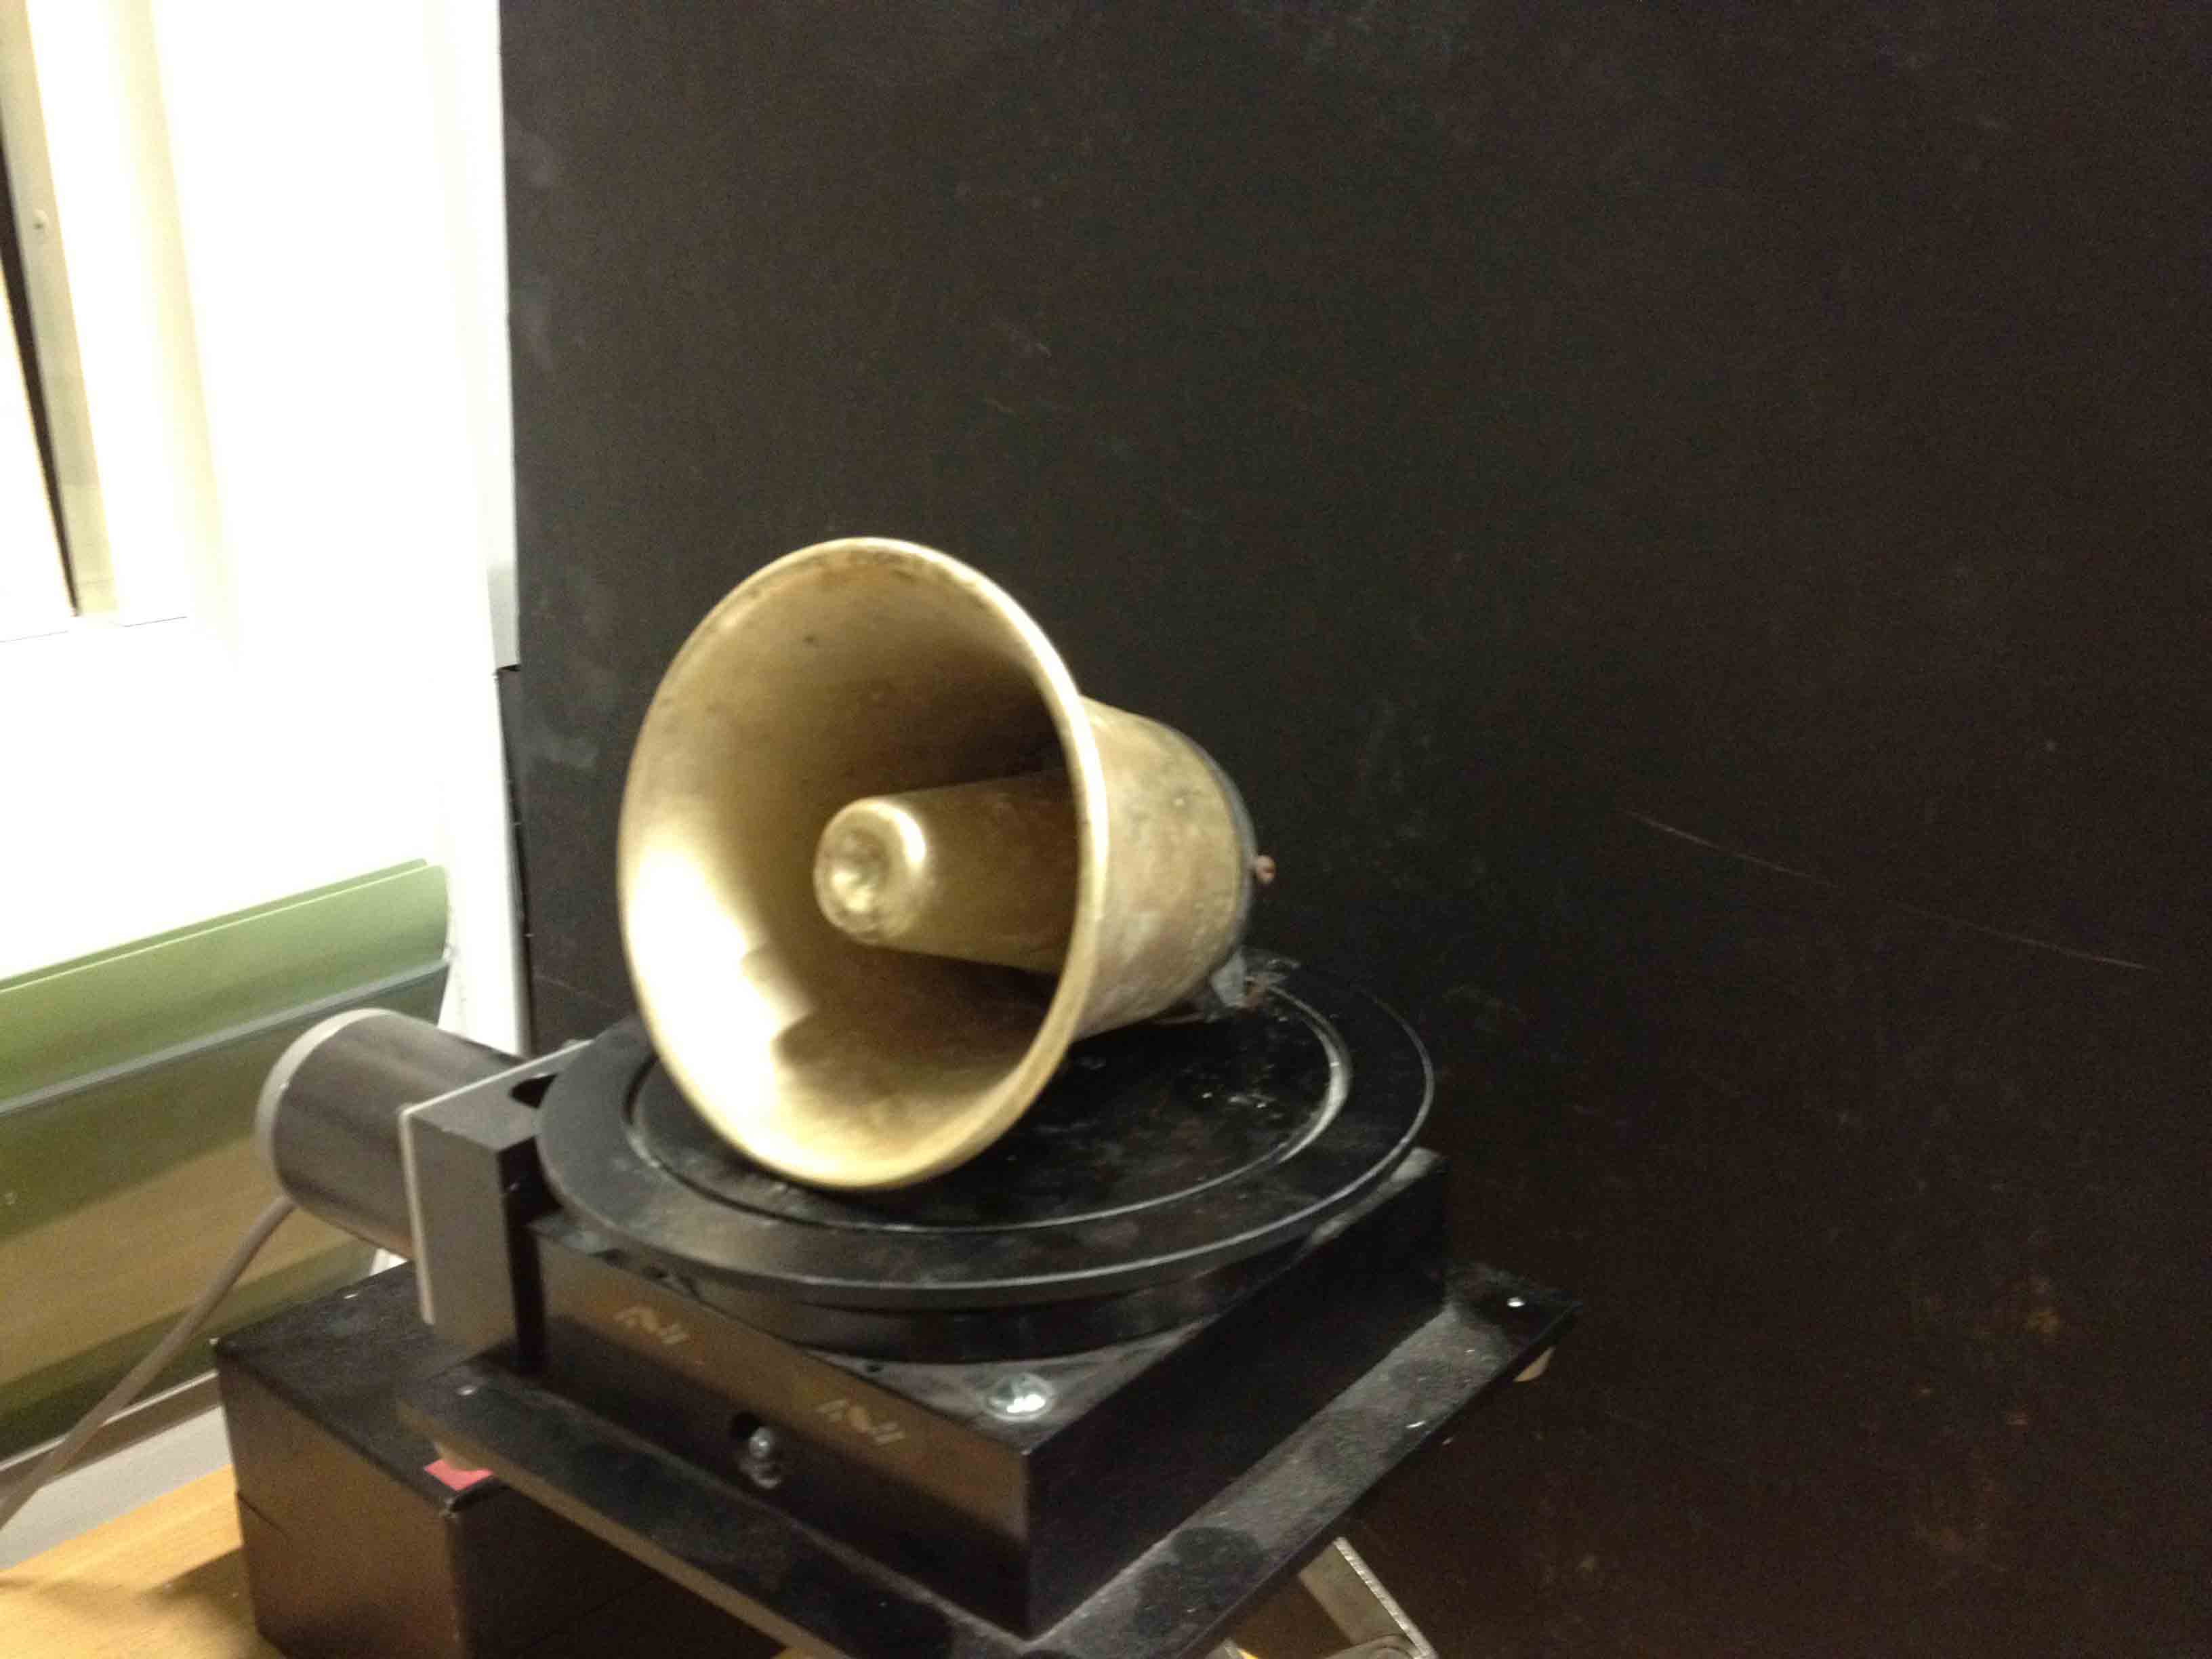
Eventually I tried a neat old two-way intercom (also from SwapFest), which worked pretty well.
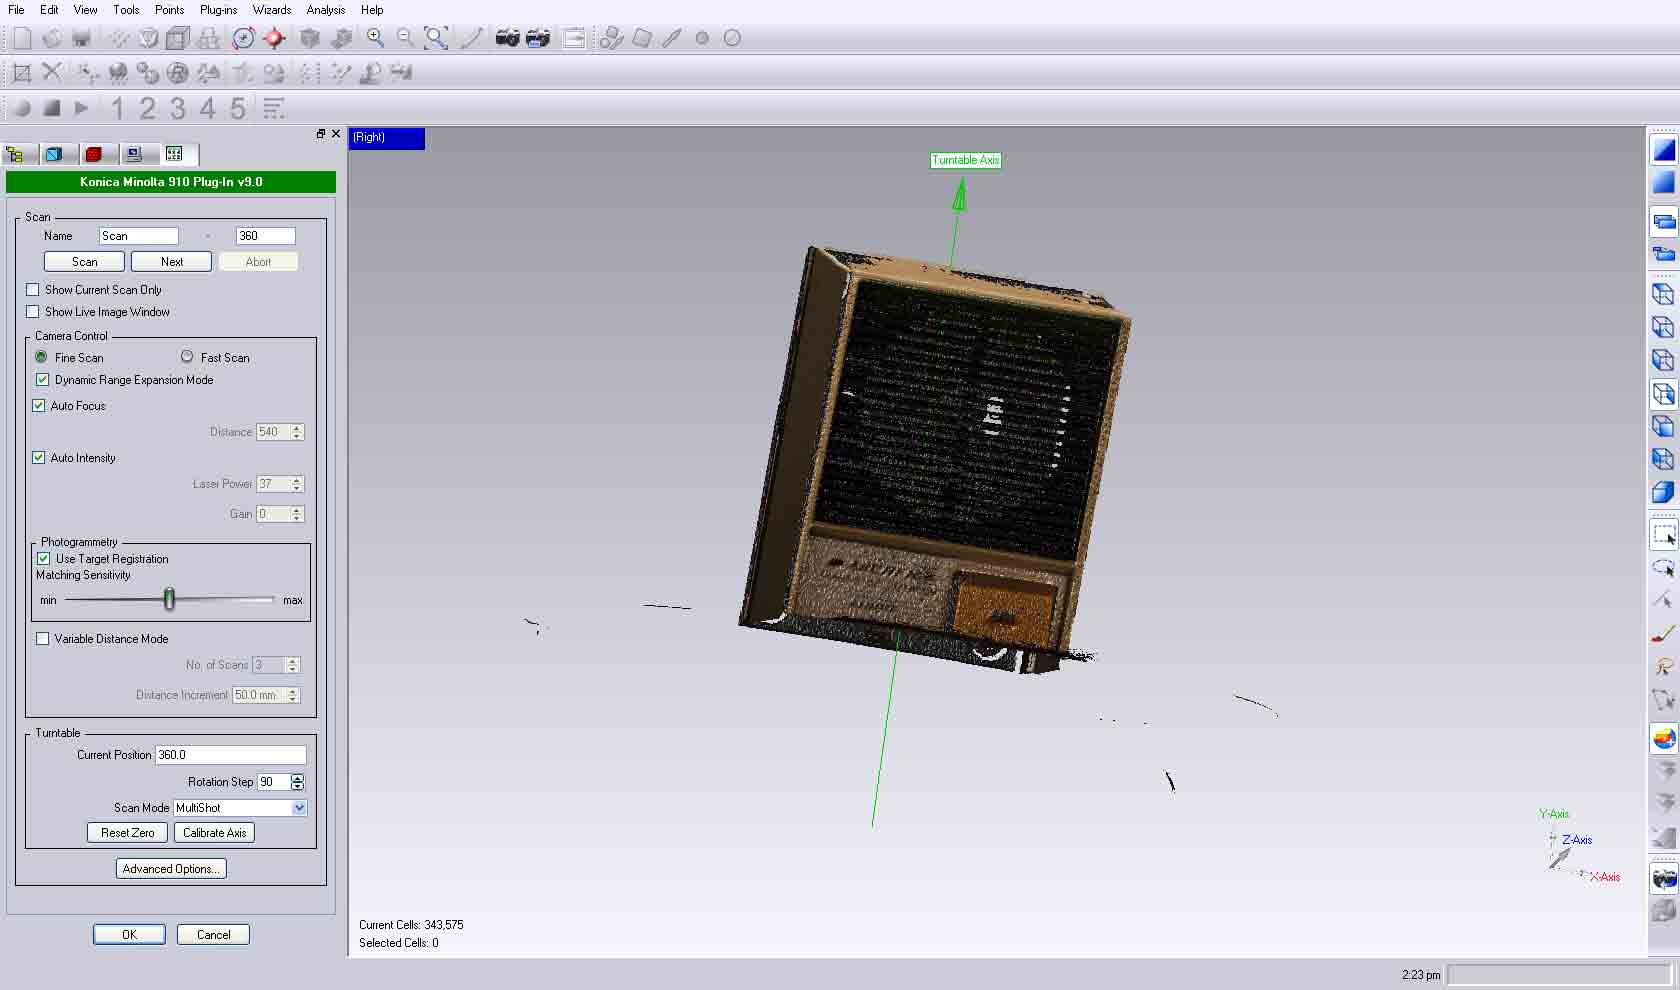
There were still a lot of holes in the model which I had to clean up, and I got most of the big ones, but there were too many small ones to do by hand.
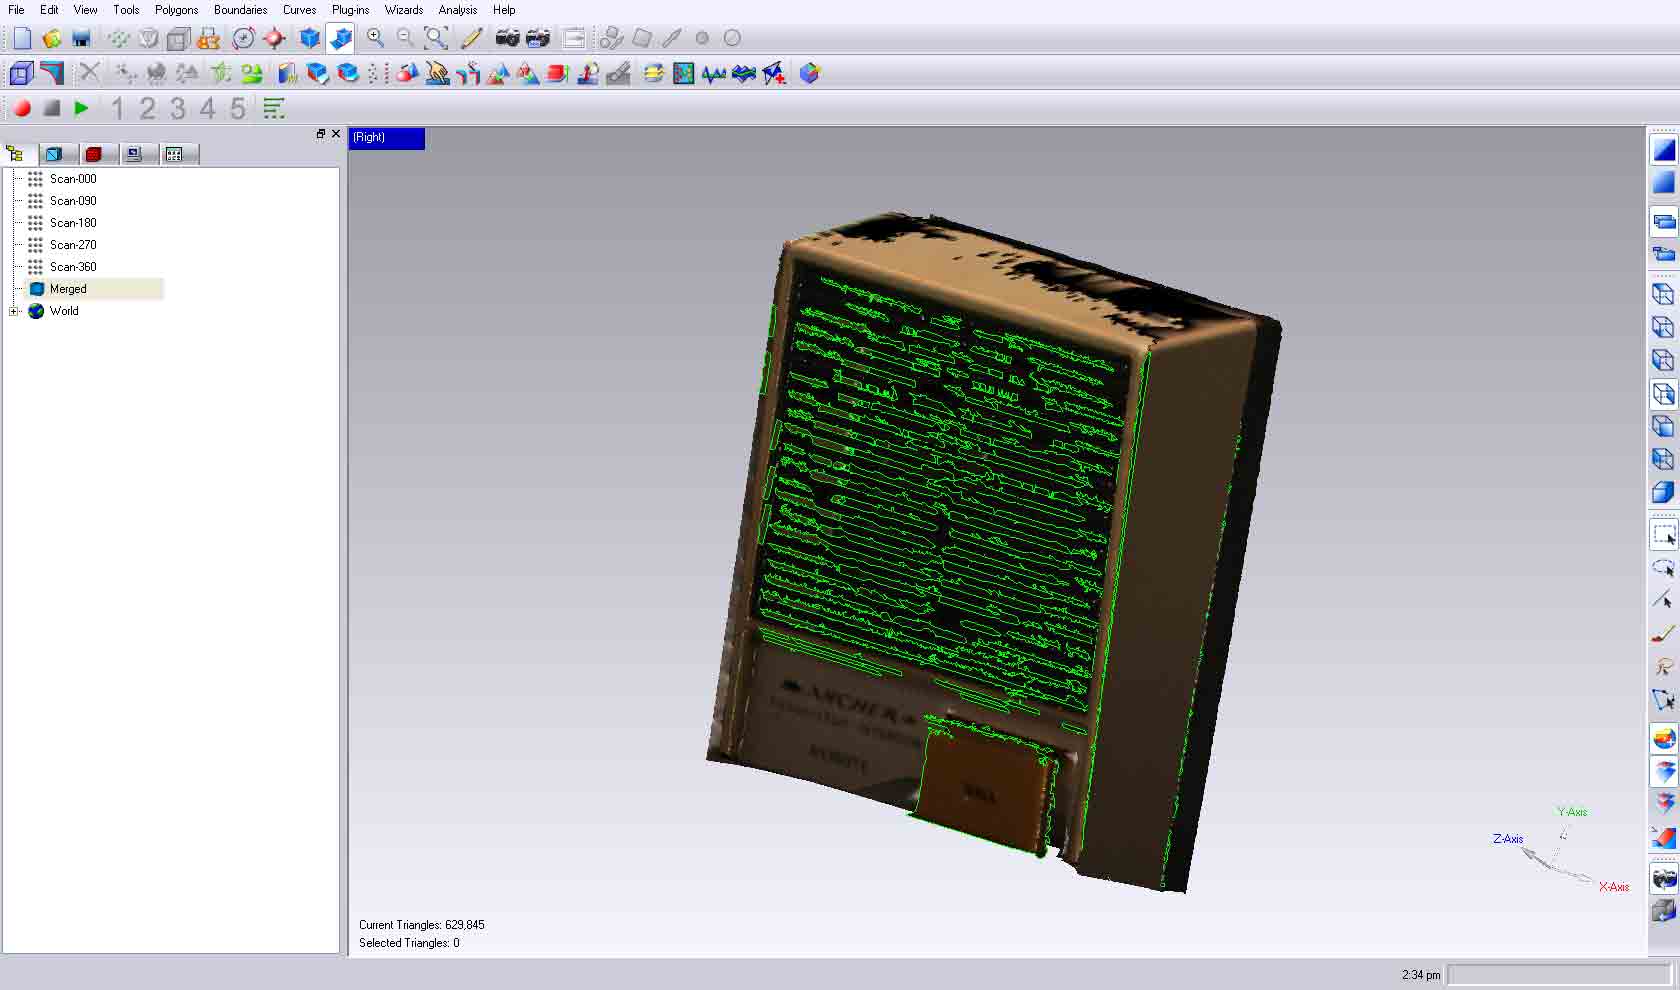
I attempted to click the "Fill All Holes" option, but I think it was too much for the computer to handle and the program crashed.
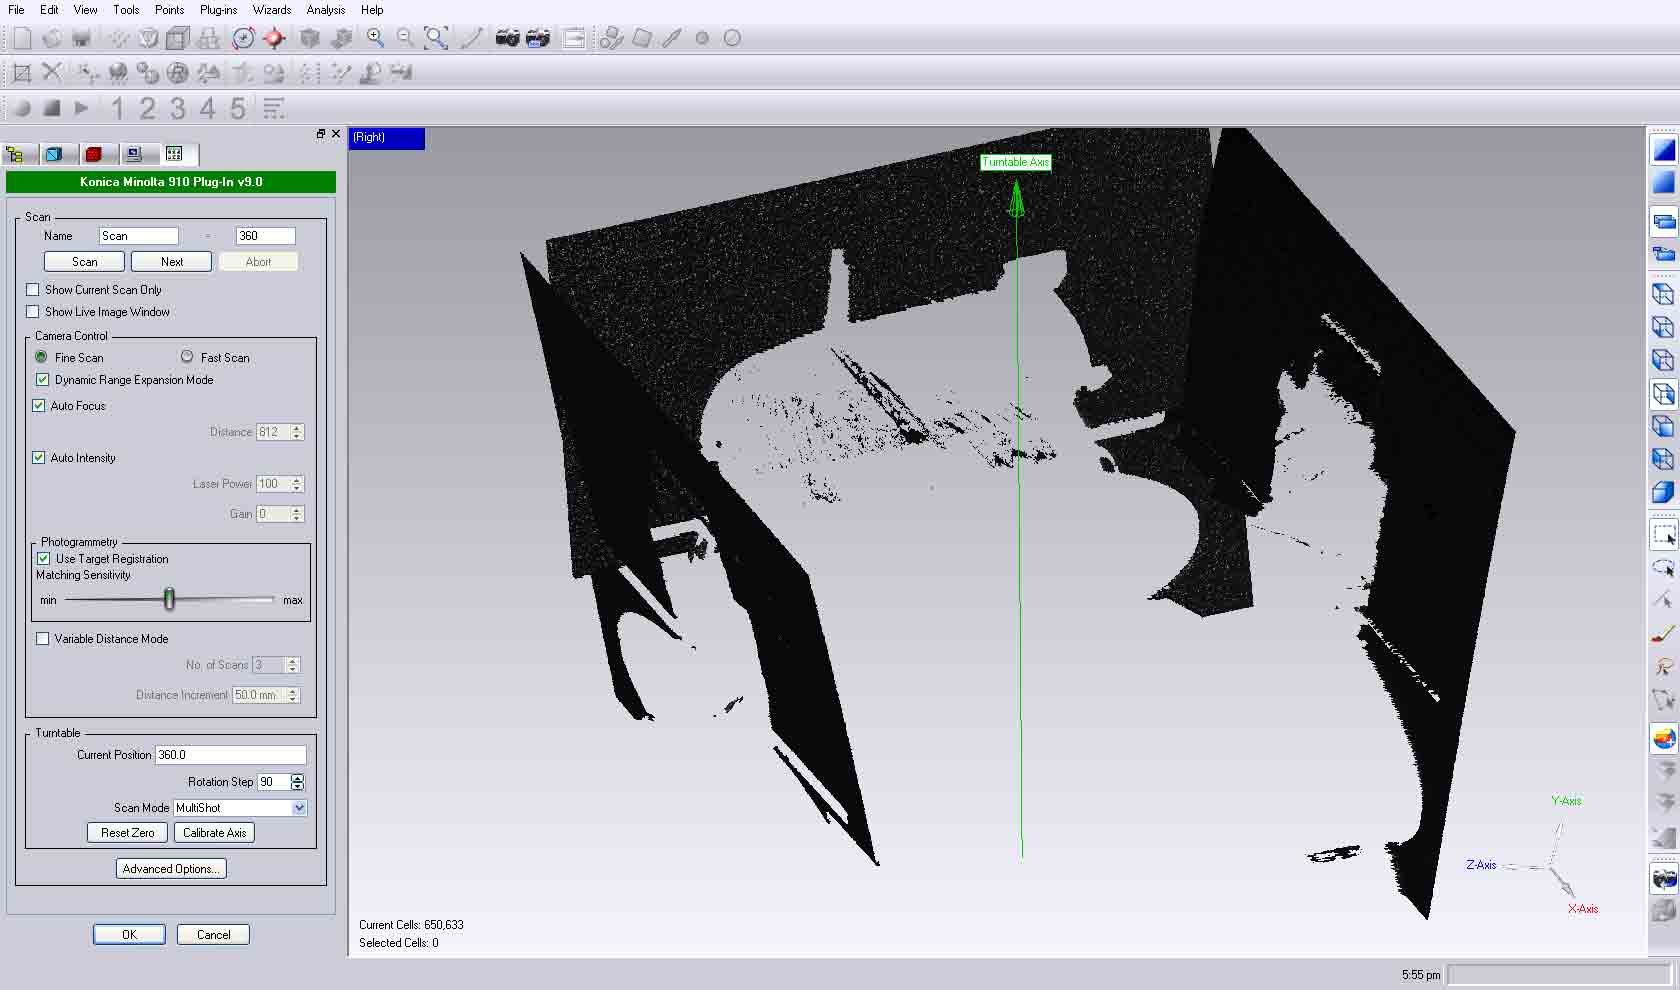
So in sum, this $75,000 Minolta scanner definitely has its limits -- it can't scan anything that's too shiny, too dark, too thin, or too complex. One interesting thing I noticed that may be helpful for future Minolta users is that it appears as though when the scanner is having trouble picking up an object, it runs the laser over it three times, whereas when it makes a good scan, it only needs to run the laser over it once. Notice in the following videos how the car and key get three passes, while the intercom only gets one.
The second half of the assignment was to design and print a 3D object, and I decided to take this opportunity to start working towards my final project by modeling and printing the chess pieces. The requirements for the pieces are simply that RFID chips need to be embedded in them, and also that thin metal plates need to line the bottom of them (so that the magnet below the board can move them around). Since the dimensions of the board, chip, and pieces are still uncertain, I wanted to work parametrically again, and took the opportunity to get some experience with Grasshopper for Rhino.
All in all, Grasshopper SUCKS. It is EXTREMELY slow to get anything done, since you need to find, click and drag a component onto the grid to do anything, even just a simple addition of two numbers. As a result, things get cluttered and chaotic very quickly, to the point where I can't imagine anyone practically designing anything in Grasshopper that's more complicated than a few chess pieces. Also, grasshopper doesn't have components available for all of the functions available in Rhino, which is extremely inconvenient. For example, there's no "Ellipse" component, so to make an ellipse in Grasshopper, you have to hack something together by first making a sphere and then scaling it in the X, Y, and Z directions individually. Honestly, Grasshopper is just as hard to learn as raw coding, but the graphical interface is not nearly as convenient and manageable as working with text. Here's what my program ended up looking like to generate six chess pieces (click to view larger).
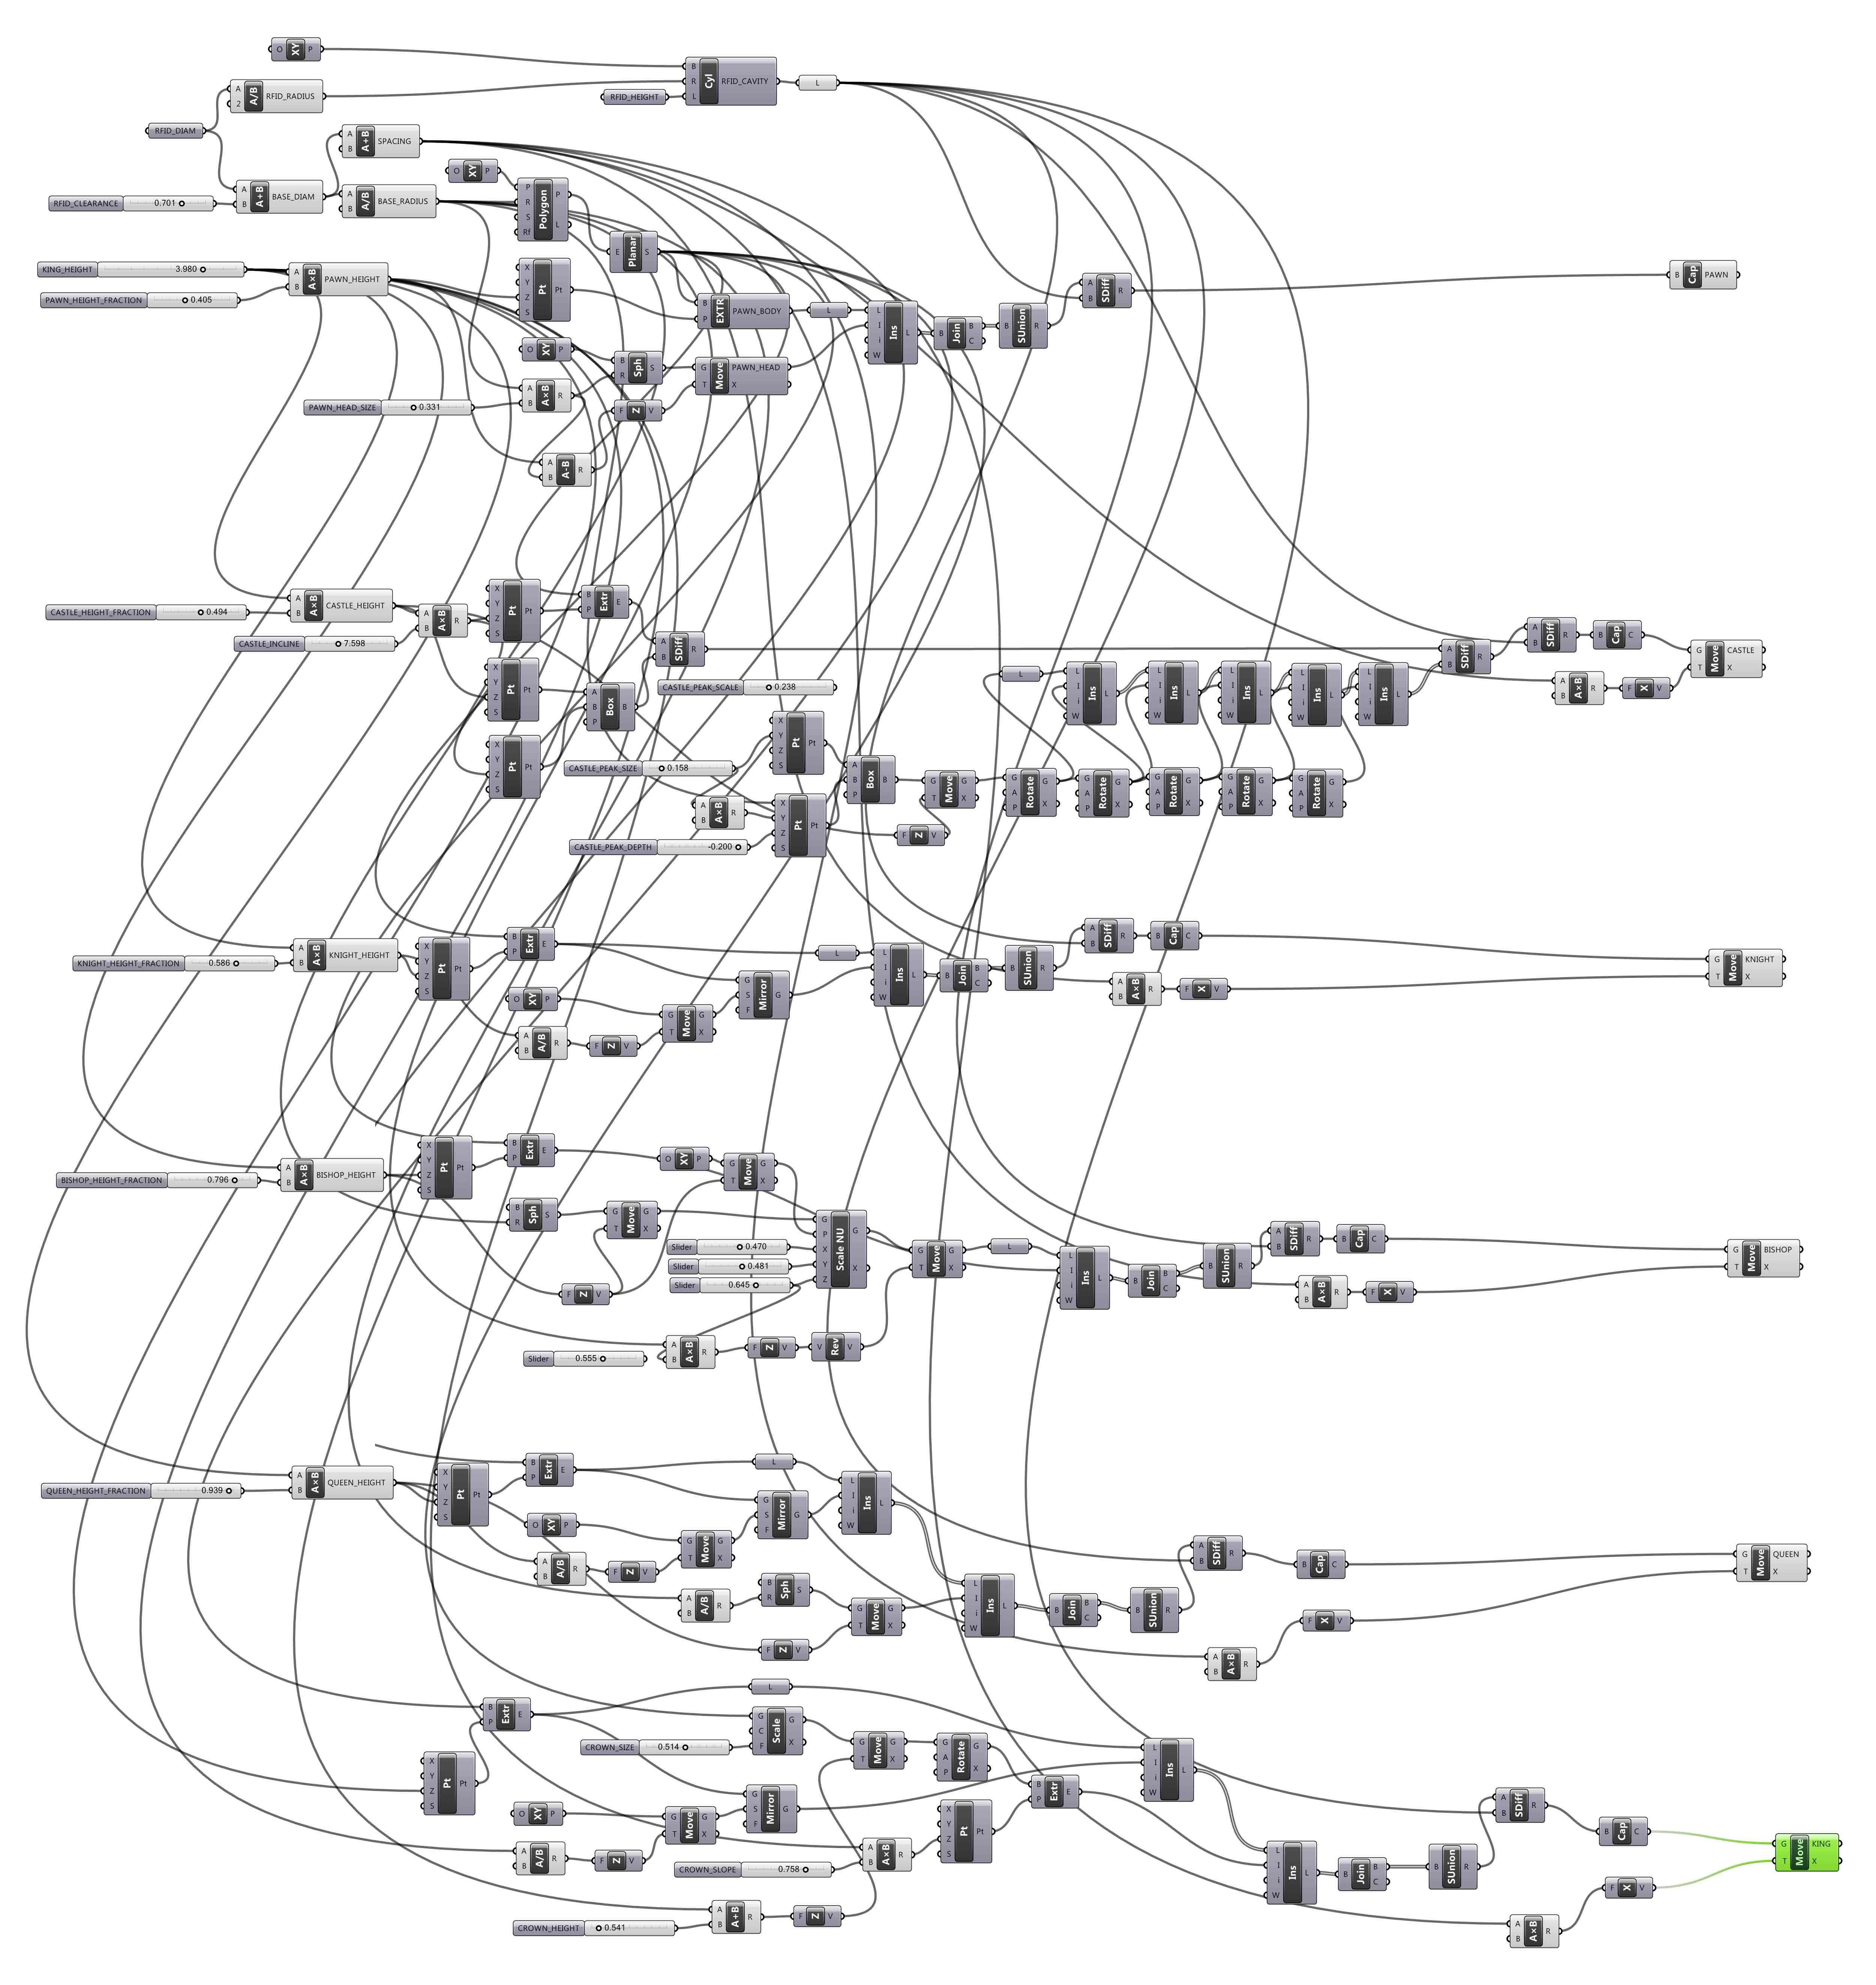
Despite the ordeal I went through to build this graph, it was nice to have a model that could change dynamically. In the following video, I show how I can use number sliders to adjust the shapes and sizes of the pieces. Oh, ALSO notice how Grasshopper is super slow to adjust the geometry when I change various parameters. I can only imagine how quickly its performance must degrade even with just a slightly more complex program.
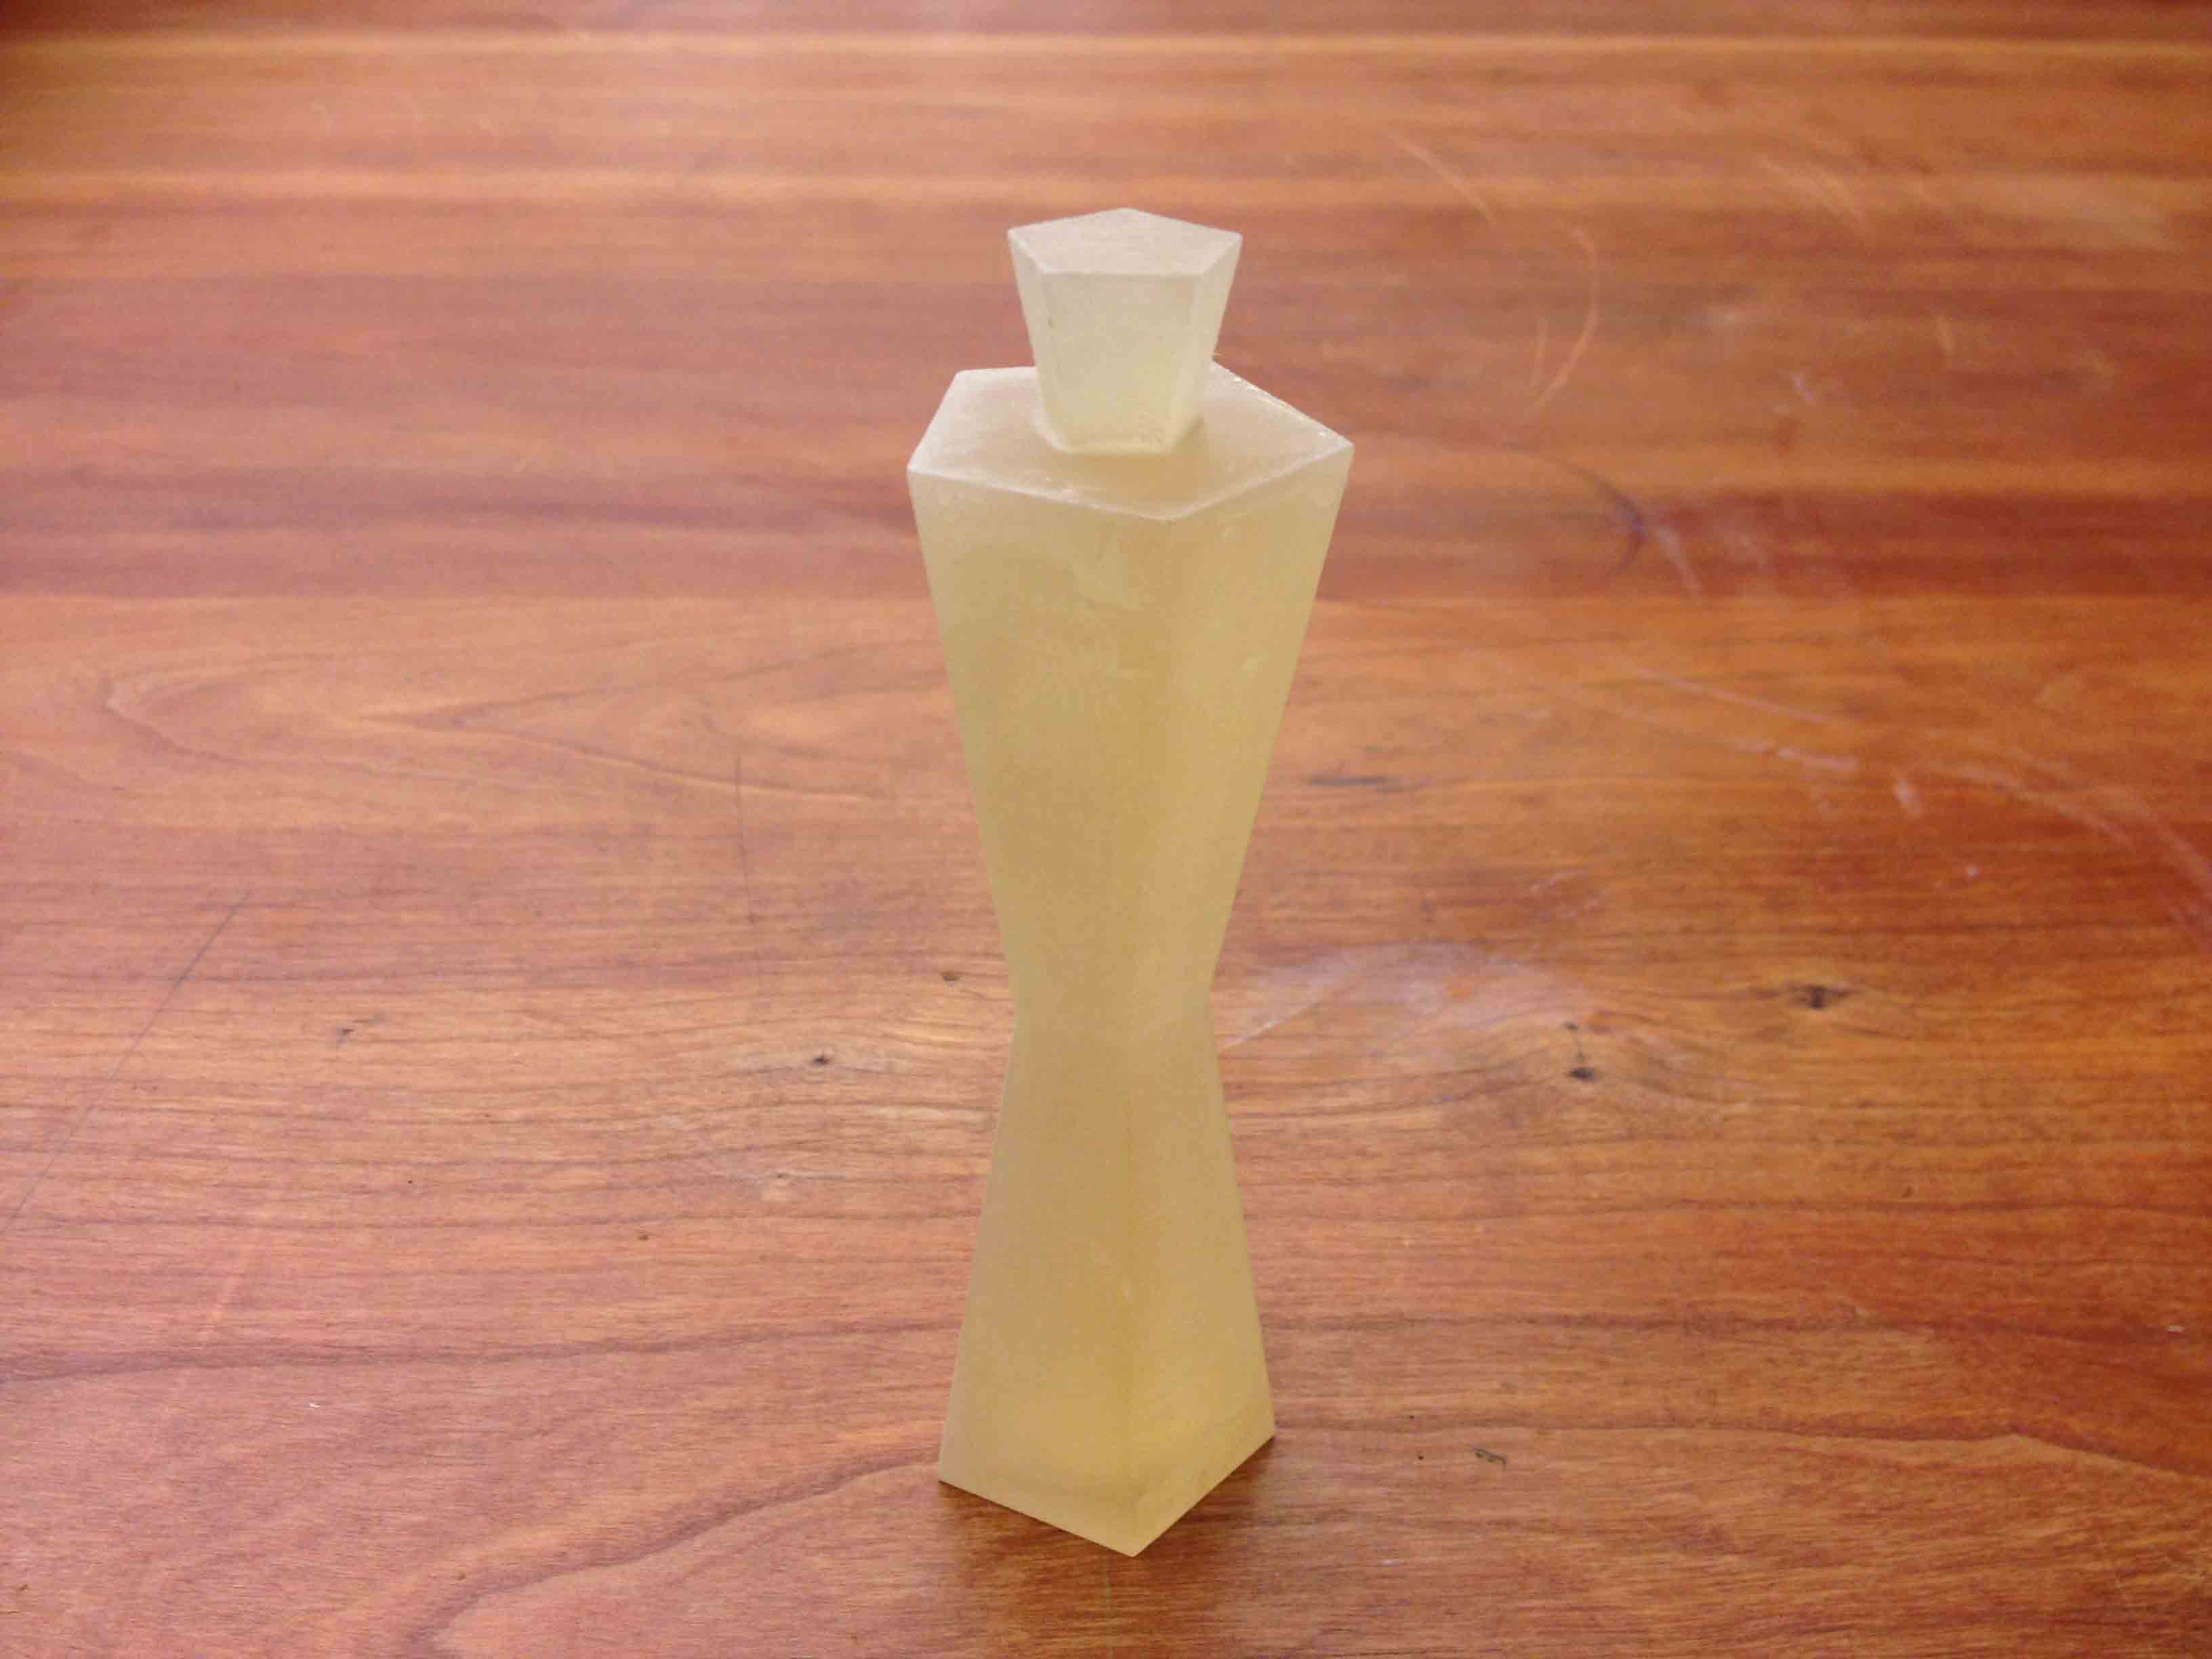
From the parametric design, I can then "bake" the pieces to make a real model out of them.
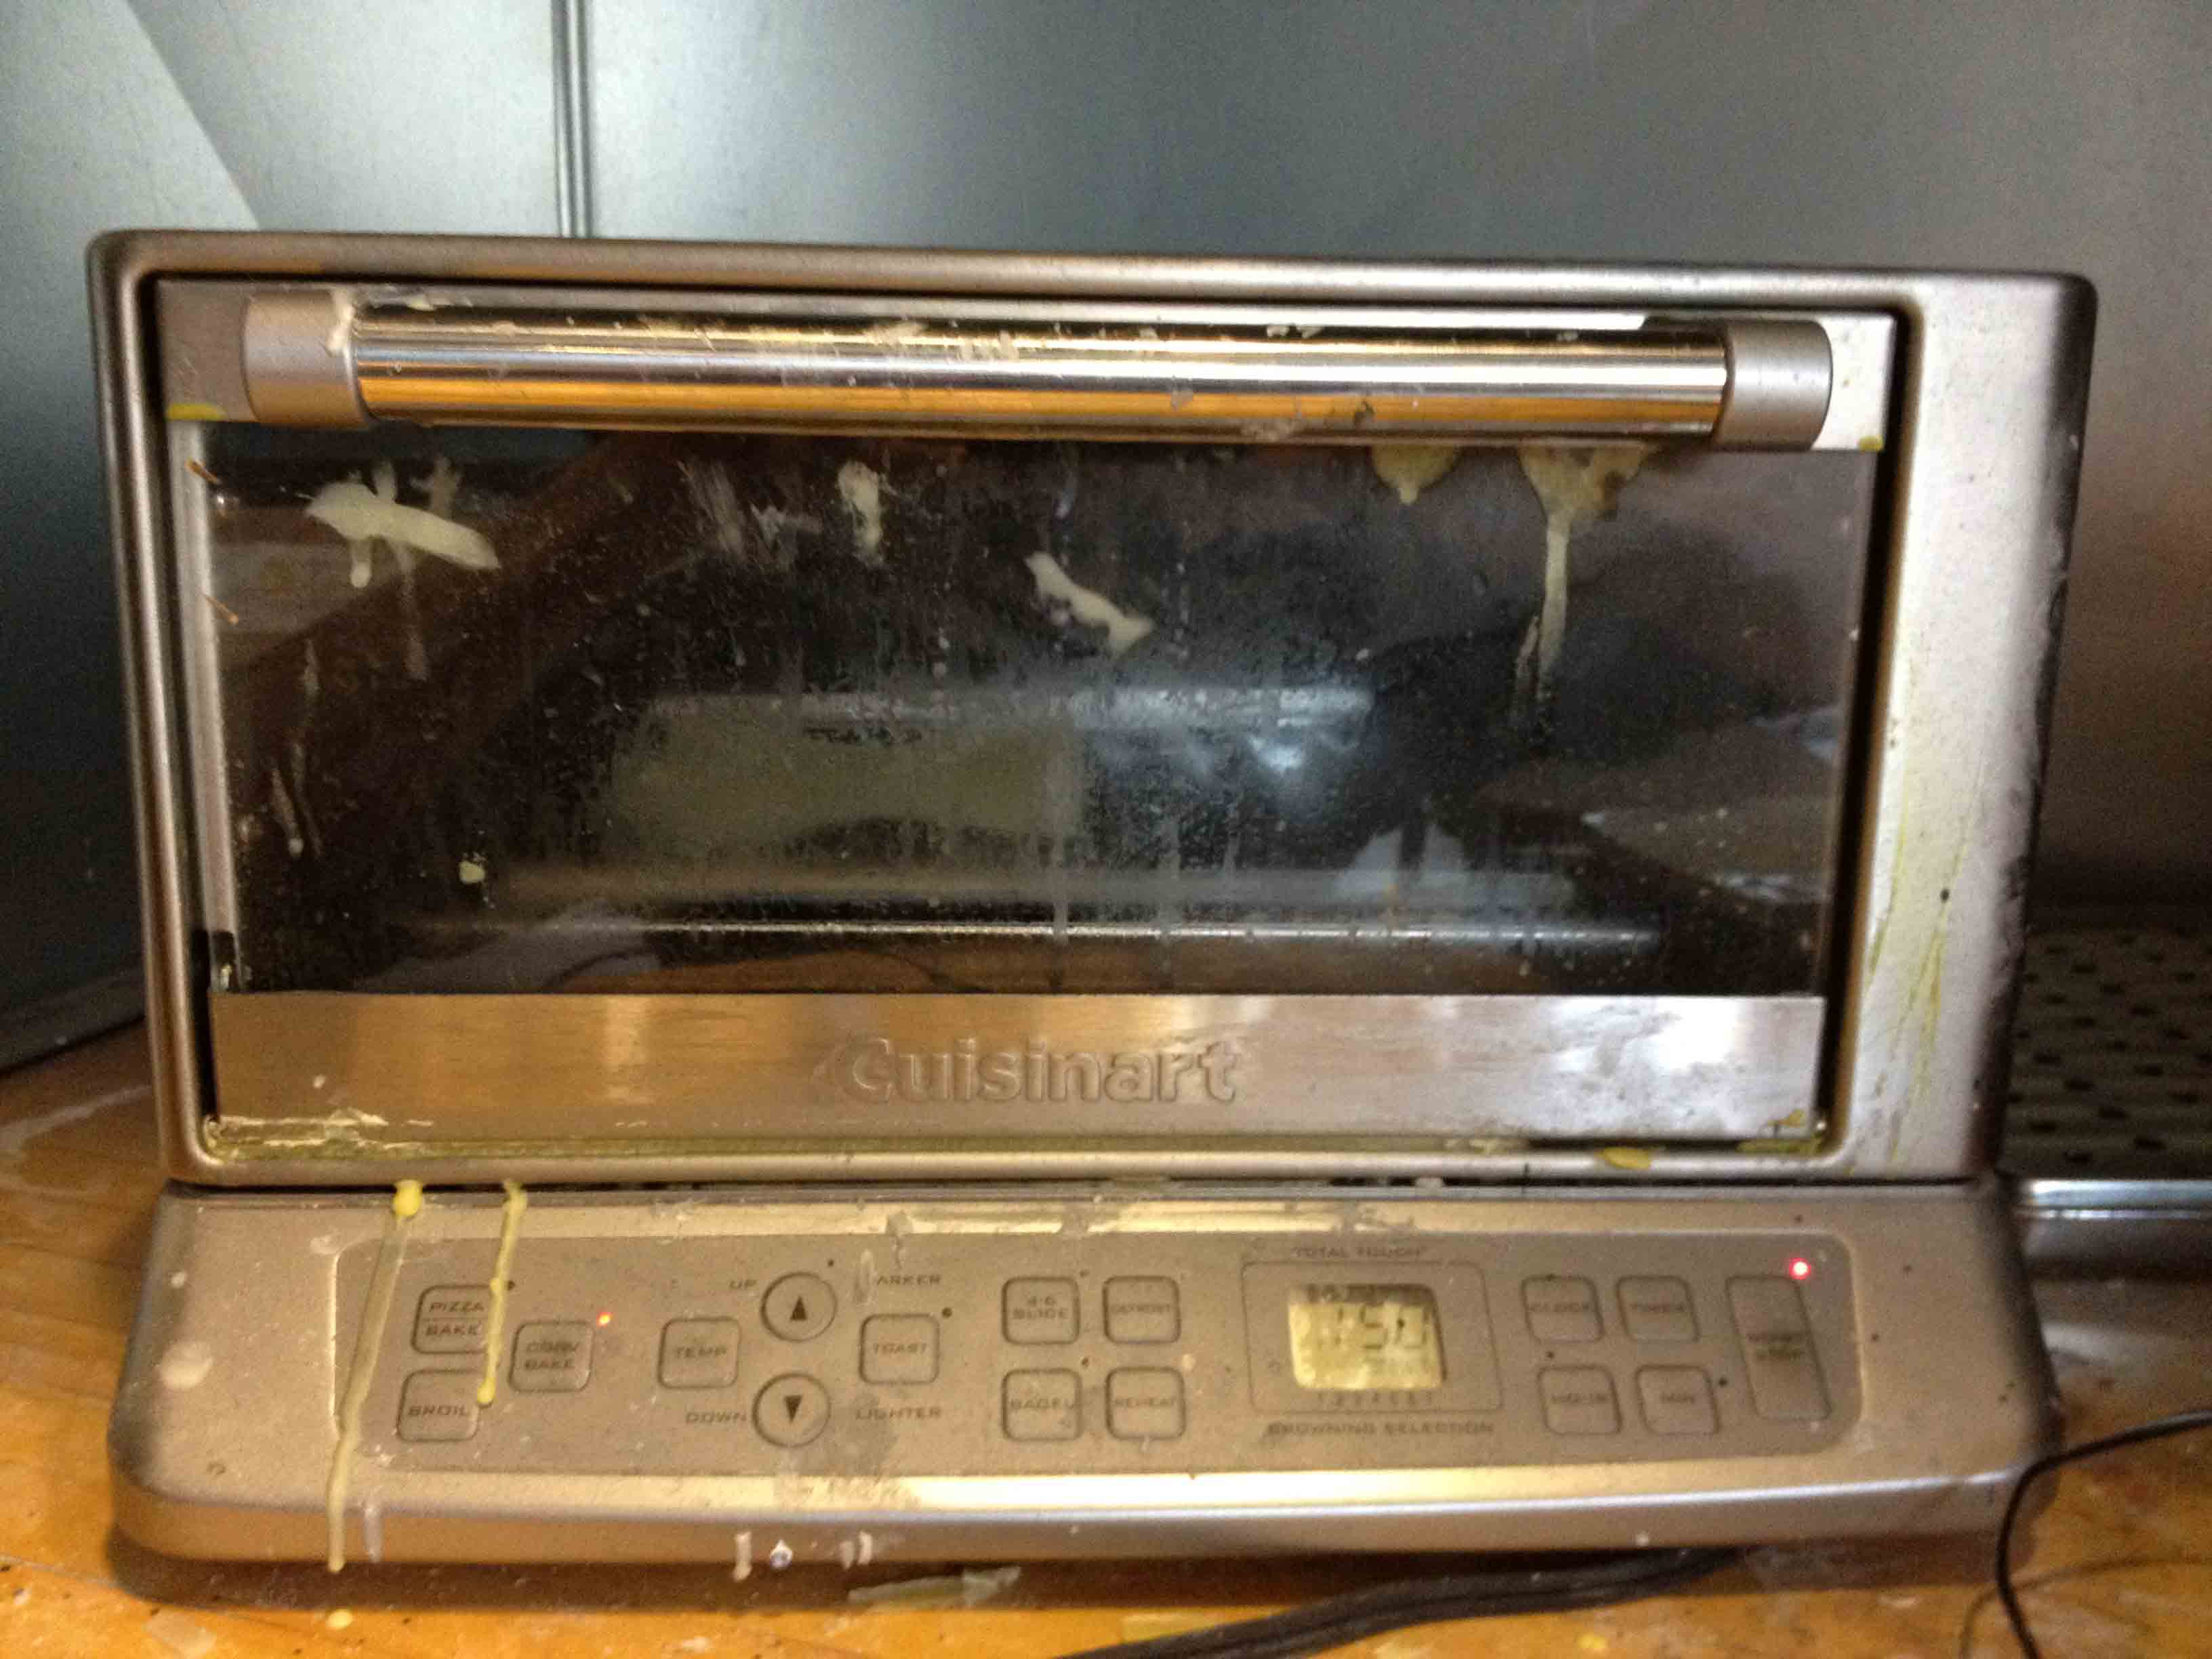
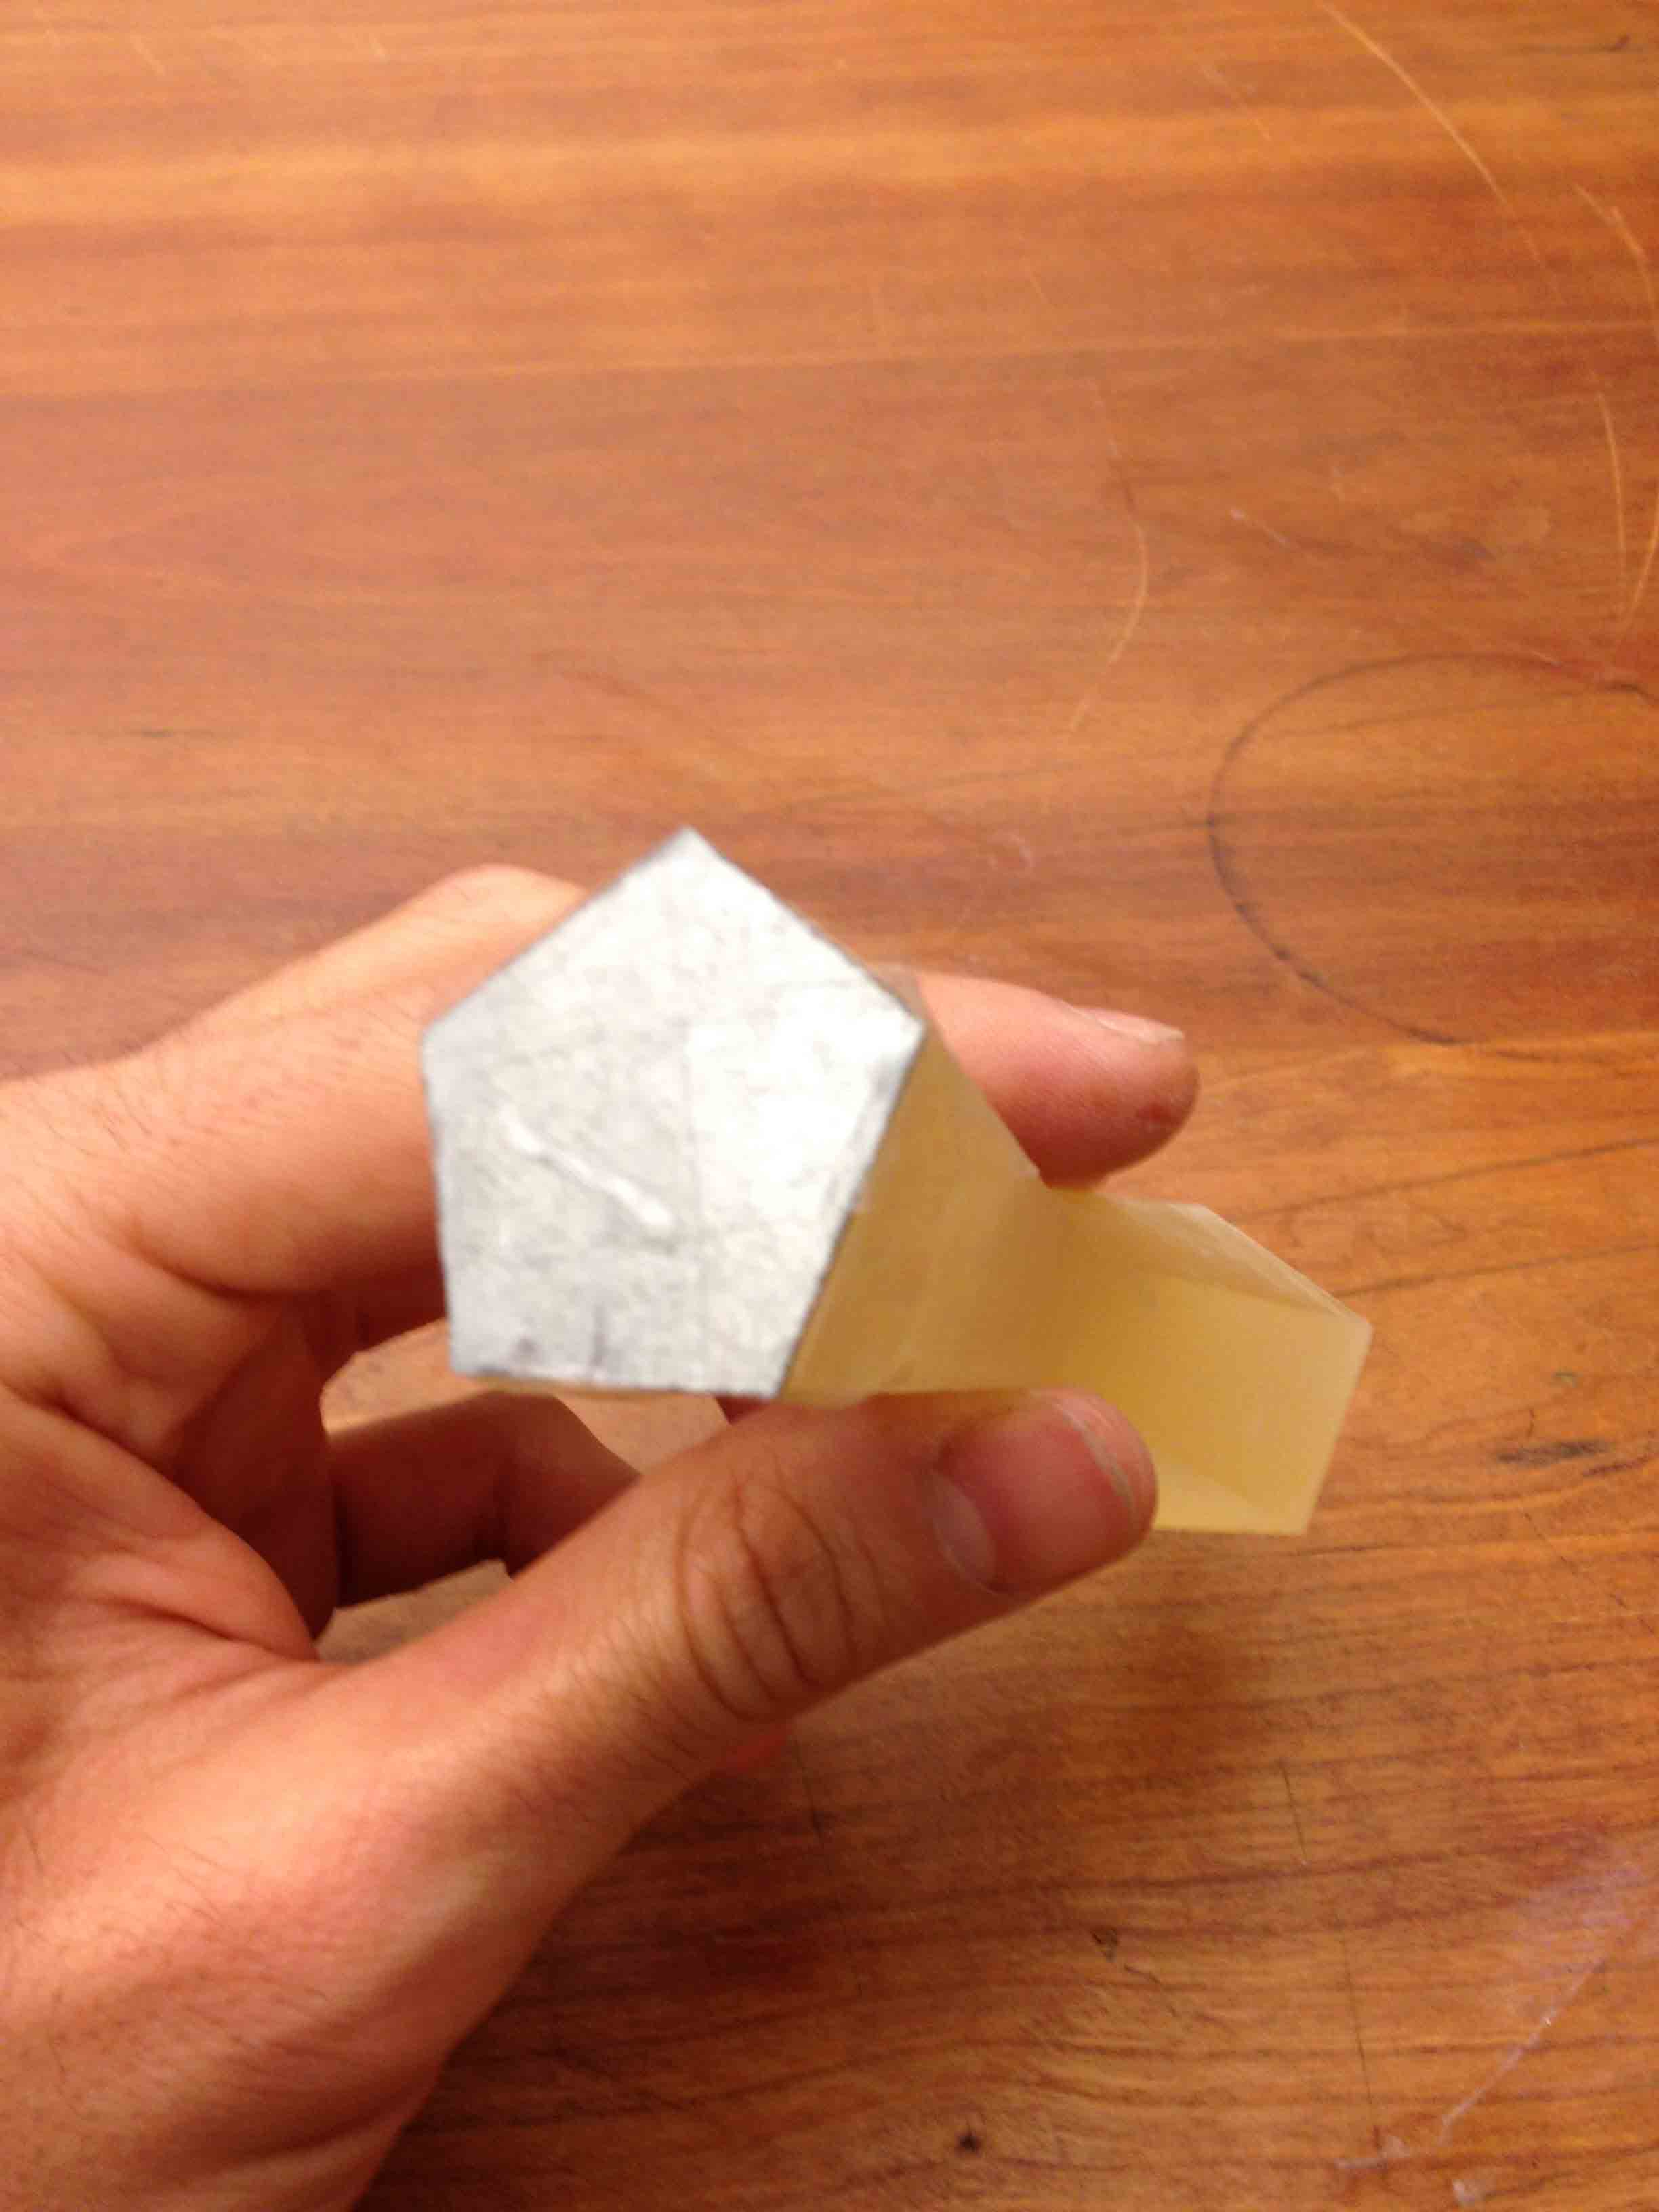
I then sent the king piece to be printed, and after some toasting to get rid of the excess wax support material, it came out pretty good!
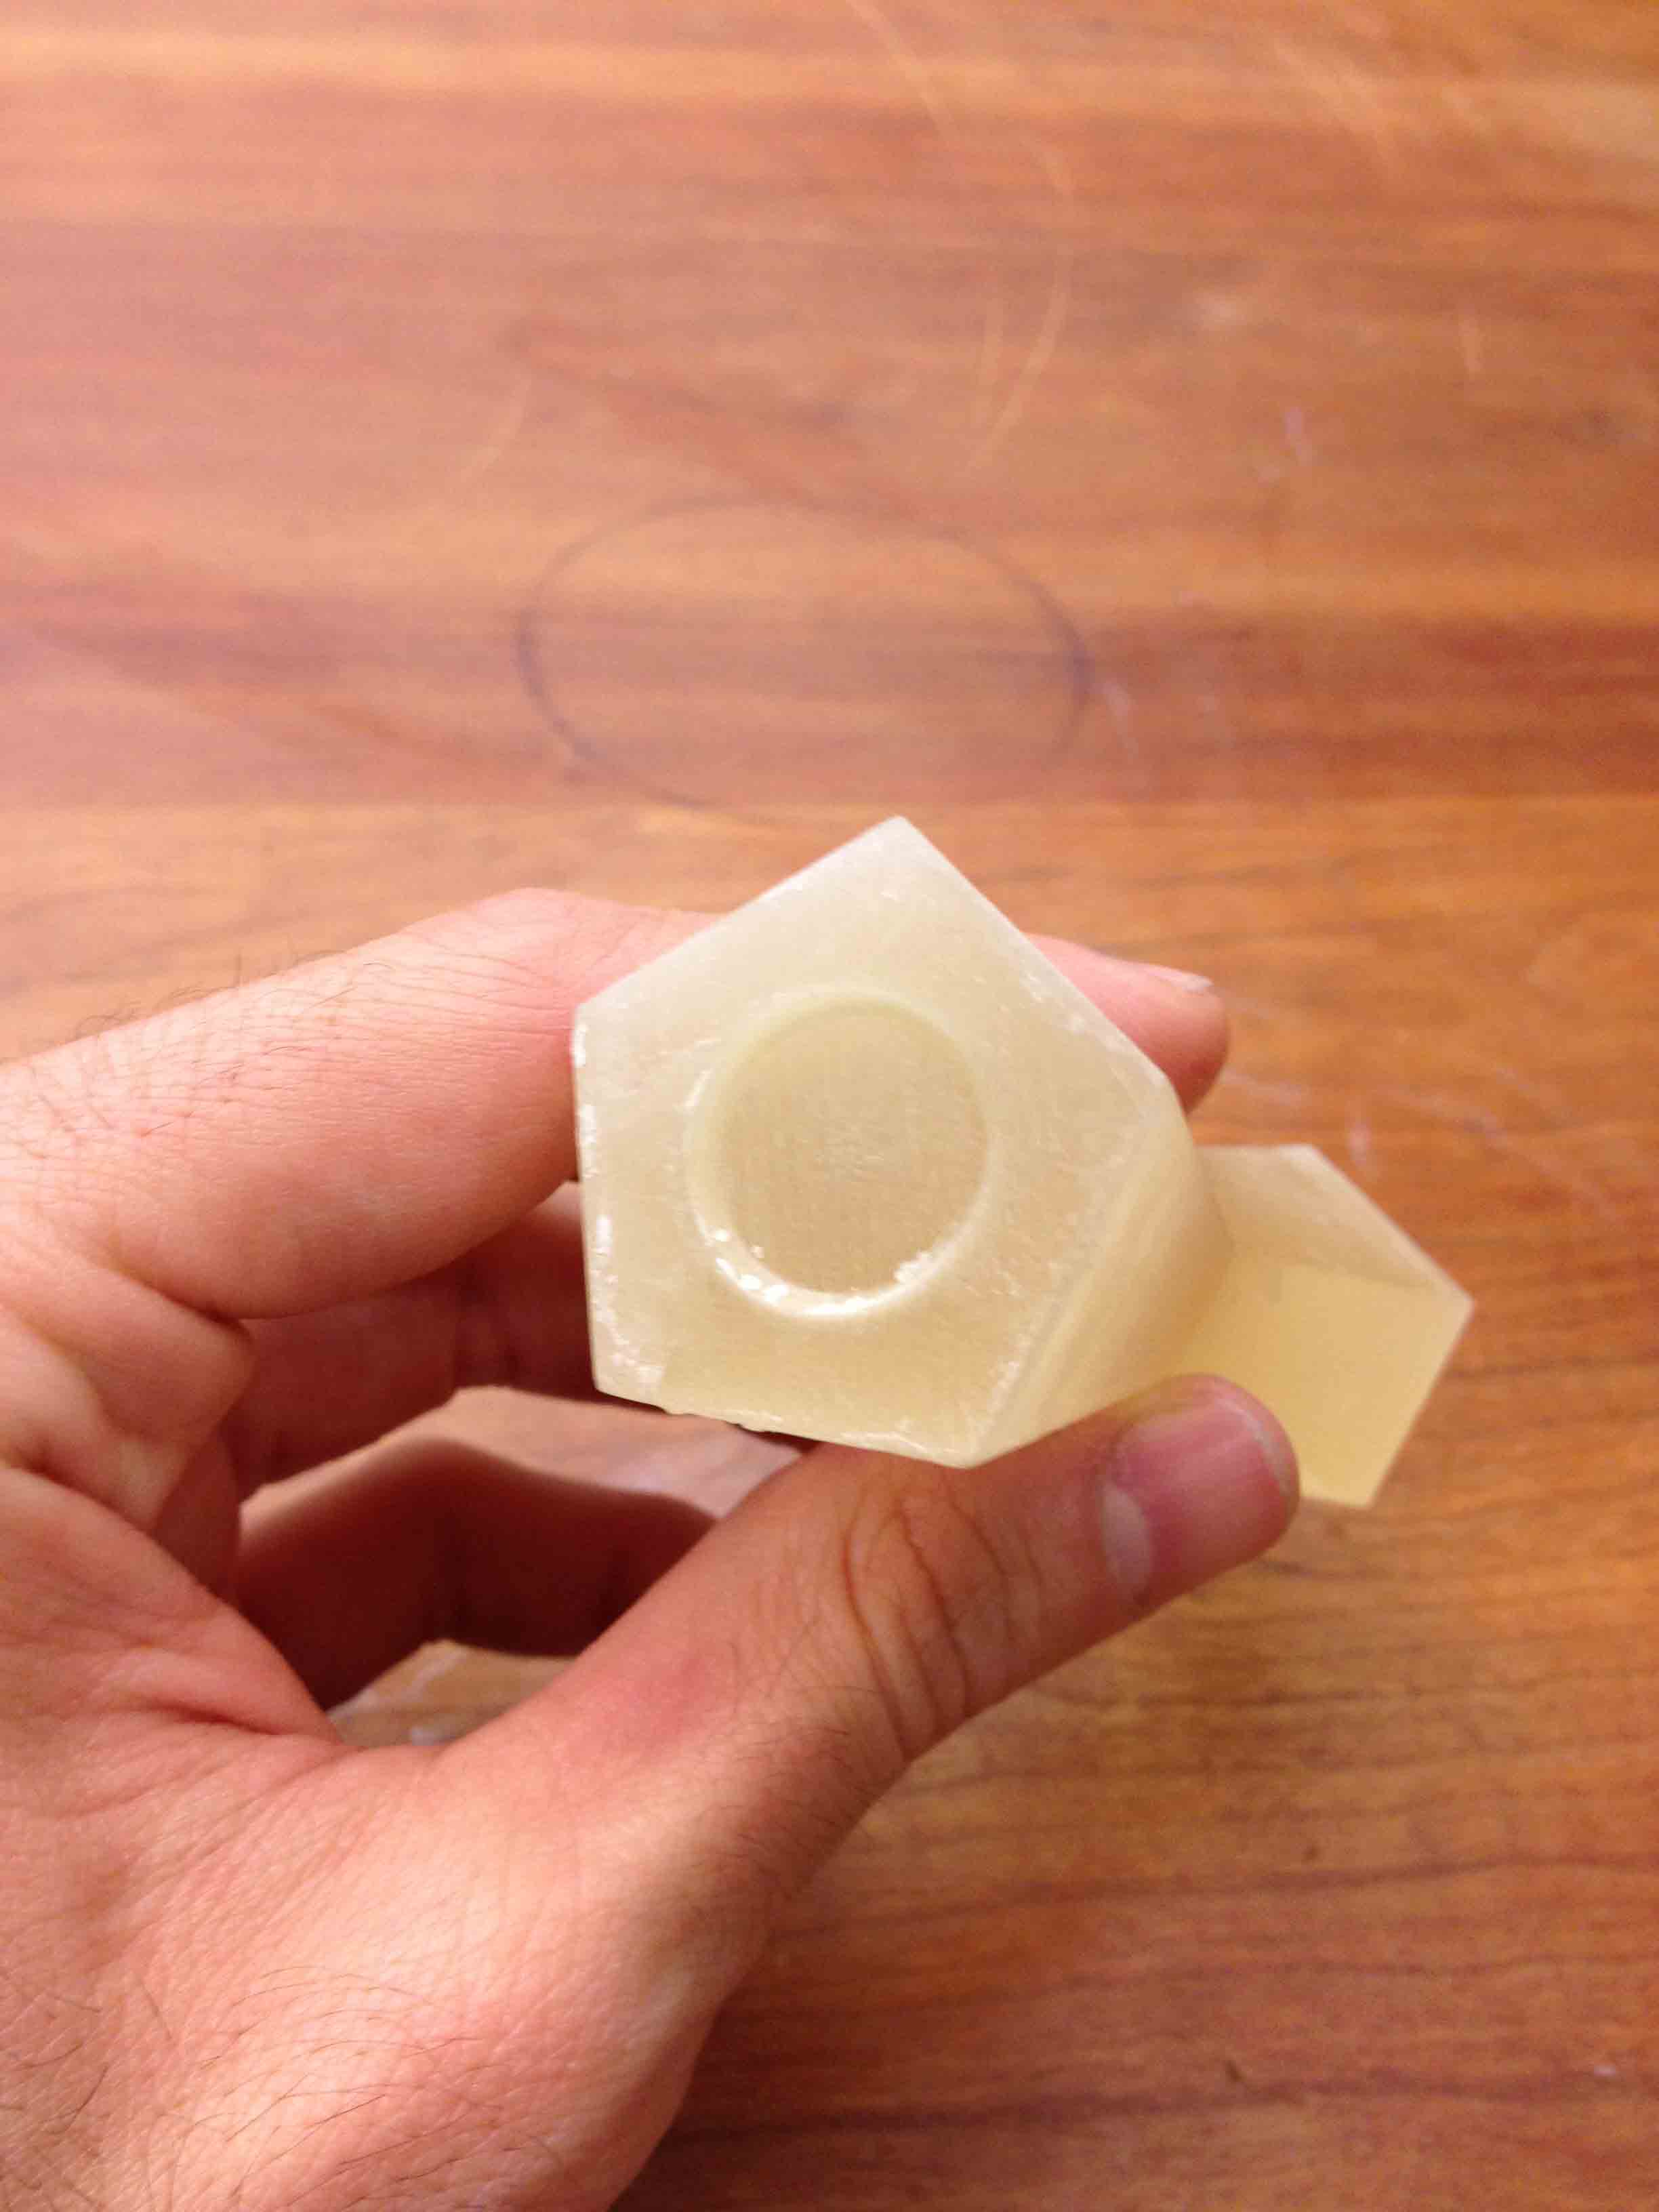
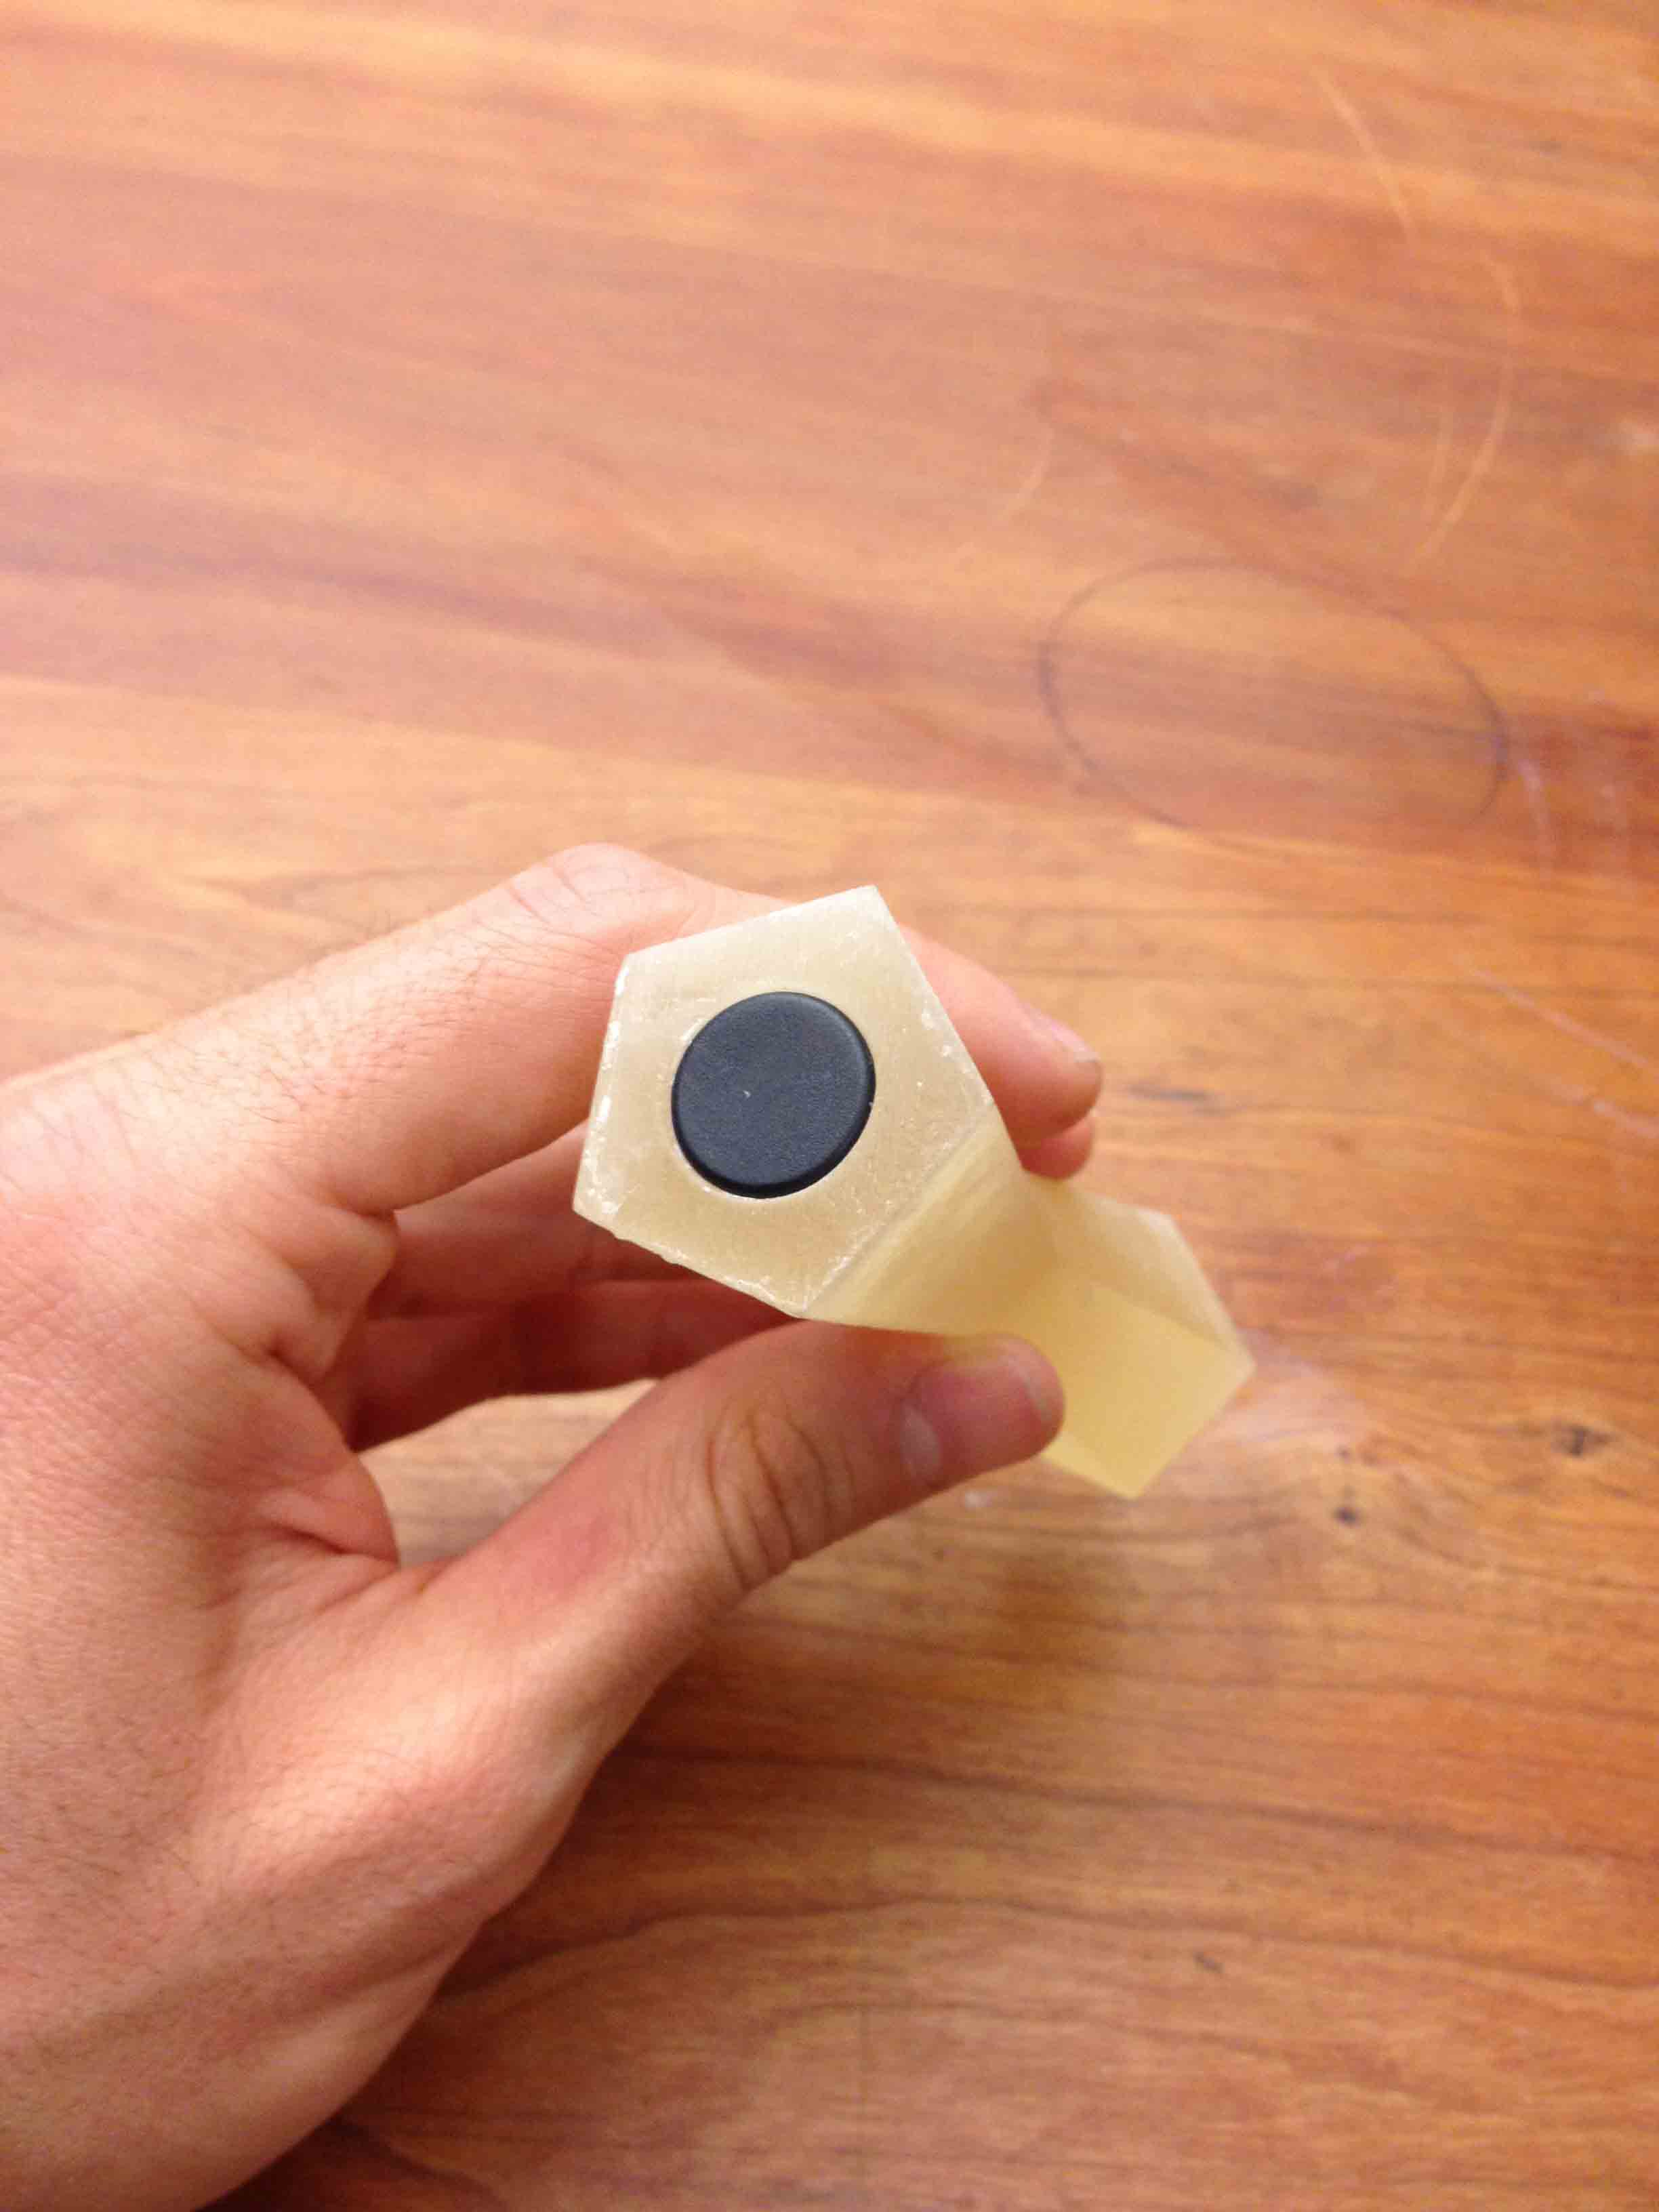
On the bottom of the piece there's a hole for the RFID tag to fit in, and then a metal plate fits on top of that.
I ran some tests to see how well magnets could move the piece around and it honestly didn't go too well. Even super strong rare-earth magnets had trouble moving the king reliably over a surface 1/16" thick. And on a paper-thin surface, the magnets were too strong and the king didn't slide along the surface at all. It worked a lot better when I put magnets on both sides of the surface (instead of just a metal plate on the chess piece), but still not reliably enough to use for the final product. I think I may need to build in some friction reducing mechanism into the pieces, like ball bearings in the base.
Design Files: