3d scanning/printing
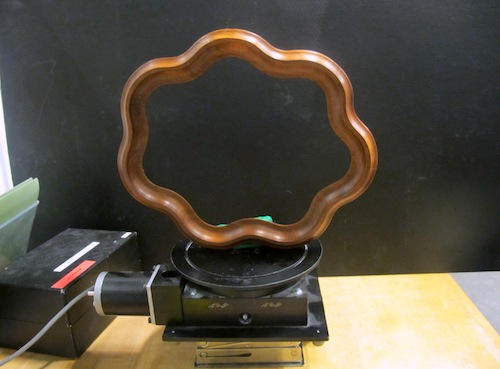
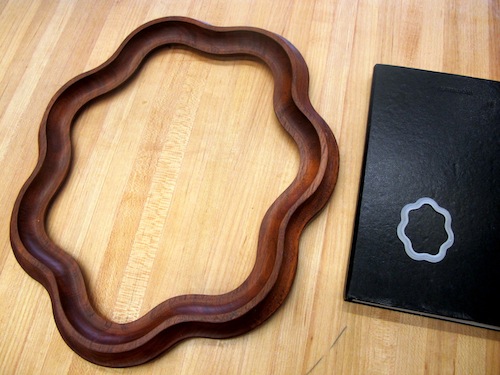
During our training, we tried scanning one of my silver rings. Though not that shiny, it didn't work well. Later someone told me not to pick anything shiny, black, or with too many tiny details. I looked around for non-shiny objects I could scan and decided on this antique wavy wooden frame. I thought it would be pretty neat to print a smaller one of these.
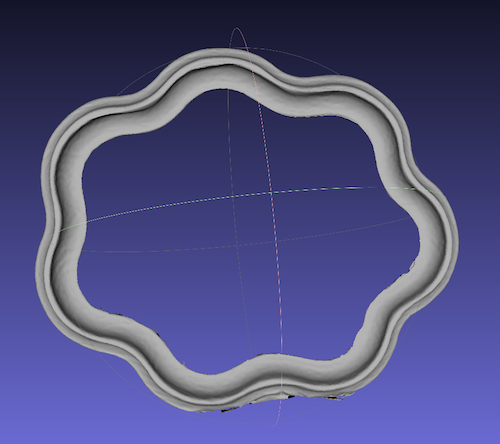
It was a much larger object than what we scanned during our training, so I had to move the scanner and the pedestal a bit to get the scanner to see it all. I noticed that if the pedestal was too far away, the machine wasn't able to calibrate the z-axis with the card. Once I got this working, I had a few bad scans because I wasn't focusing the machine properly. I got my object to show up in the green/yellow/orange range, which meant it was in focus, but the background was blue. So, when I was scanning my frame, I was getting all kinds of messy data from the background. Eventually, I found the right setting so that my object was in focus and the background was showing up as black (meaning no data). This number ended up being significantly different than what autofocus was coming up with.
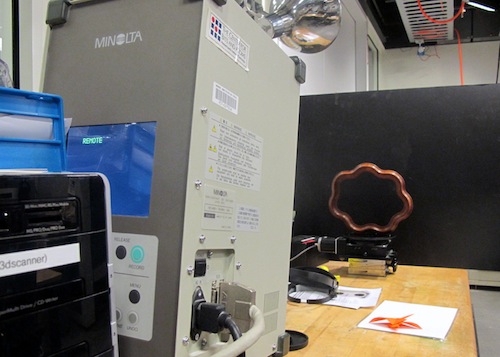
I tried using 90 degree increments as suggested in our training, but it was not working well for me. 45 degrees also didn't work well. I ended up reducing the steps to 20 degrees, and I was able to get really good results. The only part of my scan that was not looking good was the bottom where I had the frame resting on the green clay. This could be solved by maybe finding something better to rest the frame on while scanning it.
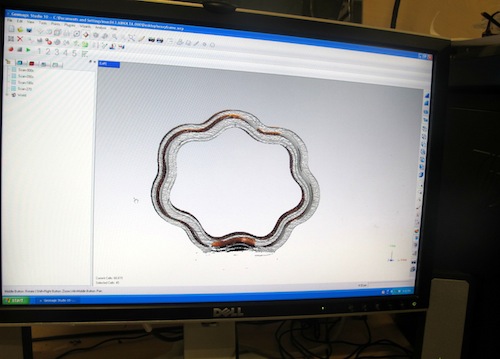
Cleaning up my scans was really hard. I'm unfamiliar with most 3d modeling tools, so I ended up trying a bunch of differnet ones to see what worked well. I found that meshlab (though it crashes like crazy and doesn't consistently save your data) worked really well for fixing holes.
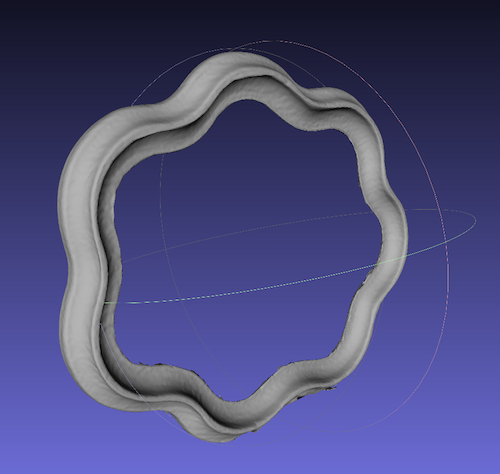

I used Rhino to delete high spots, repair and smoothing filters in meshlab, and meshlab's brush tool to soften uneven areas. I found that it was not too difficult to delete unwanted areas, but it was very hard to add volume (which is what I needed to do on the bottom where the clay was). I ended up with a fairly decent model that was a bit uneven in the area where I mounted the frame, but it was at least smooth and had no holes.
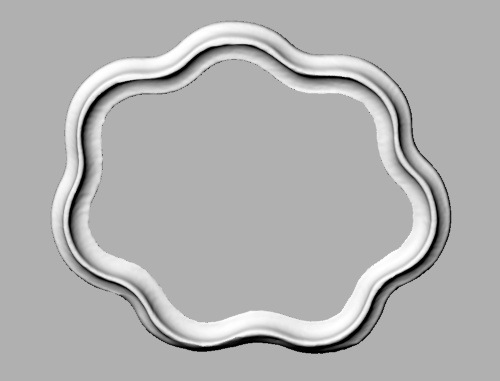
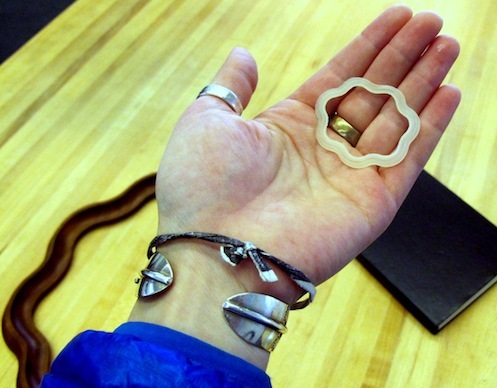
My object printed fine, and getting the excess wax off of it was no problem. The uneven area is not too noticable since it's so small. I'm thinking now what I can use this for...maybe paint a tiny painting for it or add a photo and make it into something wearable.
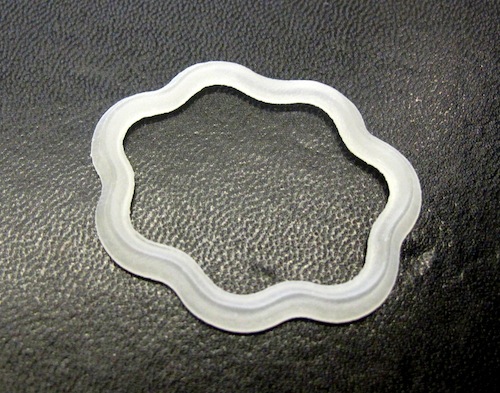
I learned that 3d scanning/printing isn't an easy solution for everything like I thought it was! Only certain objects scan well, and even then it takes a lot of work to get a decent model! I think the process will be easier once I become more comfortable with different 3d modeling software, but overall I thought this was pretty fun.