WEEK
7: MOLDING AND CASTING
Time for molding and
casting. I would like to share again Jared´s diagram, as I love how neatly he
explains what is this all about:
I really wanted to do a two
part mold, to start getting familiar with the idea of casting pipes and
registration points. I got some inspiration from the movie “Inception” (great
movie by the way) and decided to mold and cast the totem like figure that is
central to the plot of the movie.

Using SketchUp´s
library I found a totem, and then added the registration points and casting
pipe. I used cones as registration points, as I was told by
Leigh that cylinder s don´t work too well.
I created a surface to divide the two parts
of the mold and saved both parts as separate stl´s.
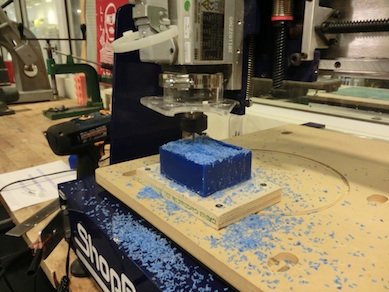
I used the desktop shopbot
to machine the wax. The software used was: Partworks
3D for the pass rough/finish configuration and Shopbot
3 for running the machine. A small detail that was not milled as expected: the
mold on the left shows a canal between walls and the piece in the bottom.

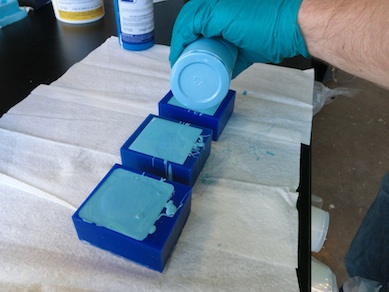
Geoff Duval helped me with the casting
process. We used oomoo to create the intermediate
mold. We also used some acrylics and weights to keep the surfaces flat (just in
case we needed to uniformly apply pressure in the last casting step):
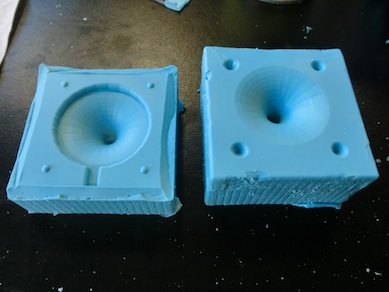
Geoff and I tried to cast urethane. Two
problems I encountered: 1) The casting pipe was not big enough to let the air
escape 2) The urethane cures super rapidly, so by the time we had filled Geoff´s
mold, the mix was not liquid enough to fill my two part mold. In a desperate
move, I opened the mold and tried to cast both parts separately. It was ok for
one, too late for the other (as seen in the right picture below).
I also tried to cast hydrostone
in order to get the complete part. The final result (wax mold, oomoo mold, urethane half part, hydrostone
complete part):