Rotem Abeles - How to make (almost) everything – Fall 2013
WEEK 7 – Molding and
Casting
This week’s task was to make a mold and cast something. Default combination was wax(shape)-oomoo(rubber mold)-drystone (cast).
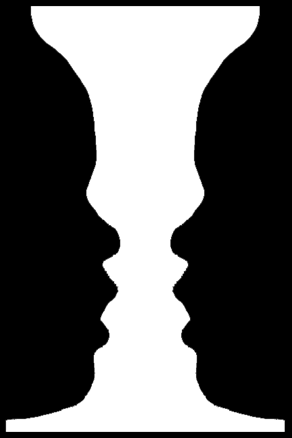
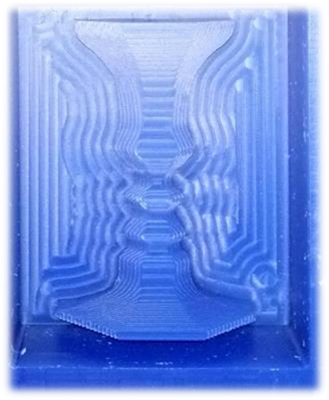
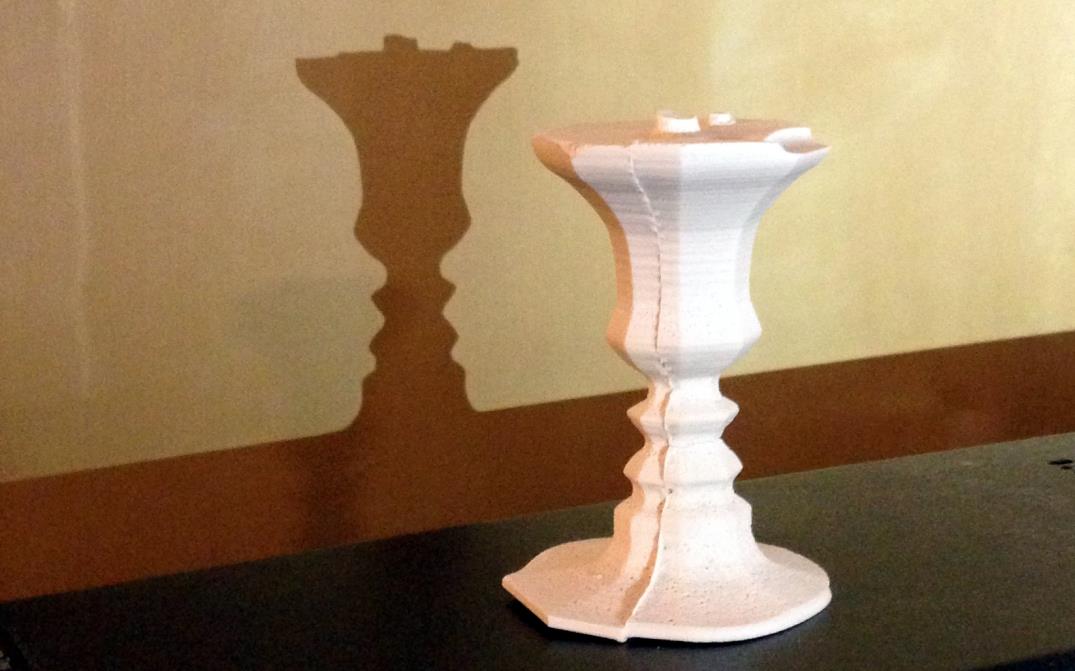
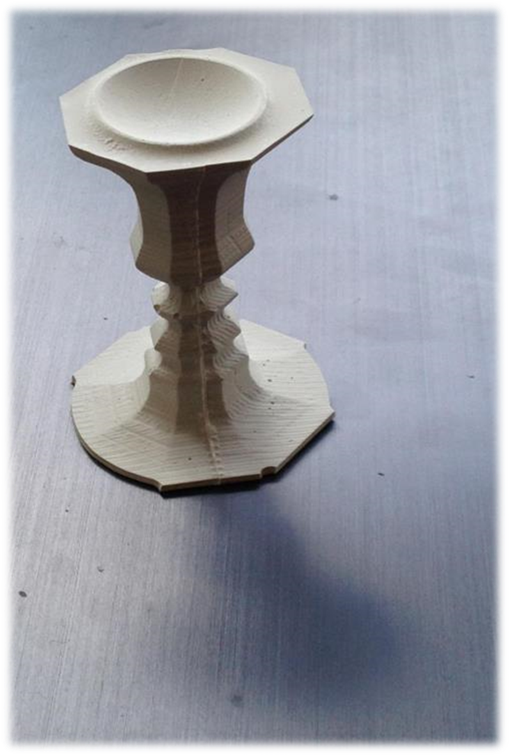
I have long wanted to make my own version of this famous face-goblet optical illusion.
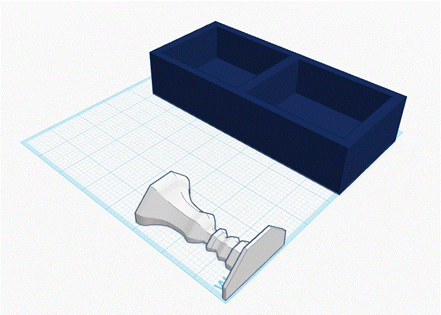
First step was to create the 2D contours of the chalice. To do that I took a picture of my daughter while she was asleep (only way to keep her from moving) and used Photoshop to follow the contour of her face. I then used Inkscape to create a path and saved it as an SVG file, which I could export into a 3D design software.

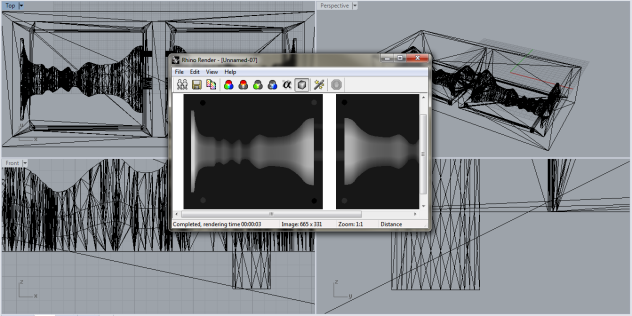
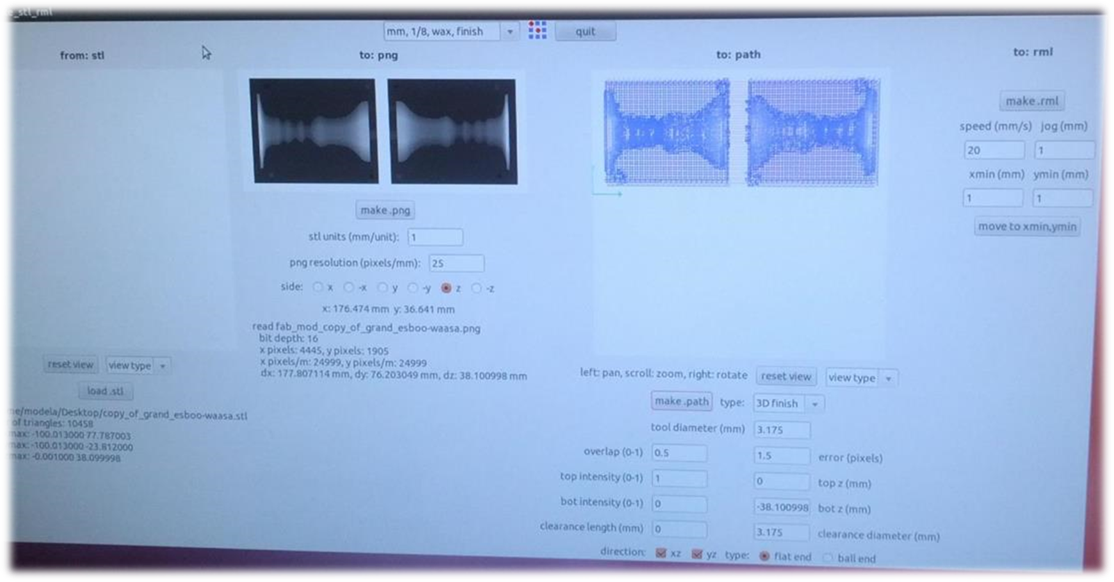
Based on my good experience in 3D printing and CNC, I used Tinkercad for the design process. It was especialy useful for creating safety margins between the margin and the “box” (the wax frame) which will later be the boundaries of the rubber mold. I used a ¼” buffer from each side (including from the top), knowing I will use the 1/8” end mill for machining in the Modella. Since Tinkercad doesn’t have a wireframe view, I used Rhino to examine my STL file for problems before machining. Ironically, I found some misalignment with the alignment features (that where meant to help align the 2 parts of the mold) and fixed it.
After some playing with the “rogue” fab_modules in IDC (which didn’t show the STL when uploaded) I started machining around 11pm. I assumed it would take an hour. I was so wrong…
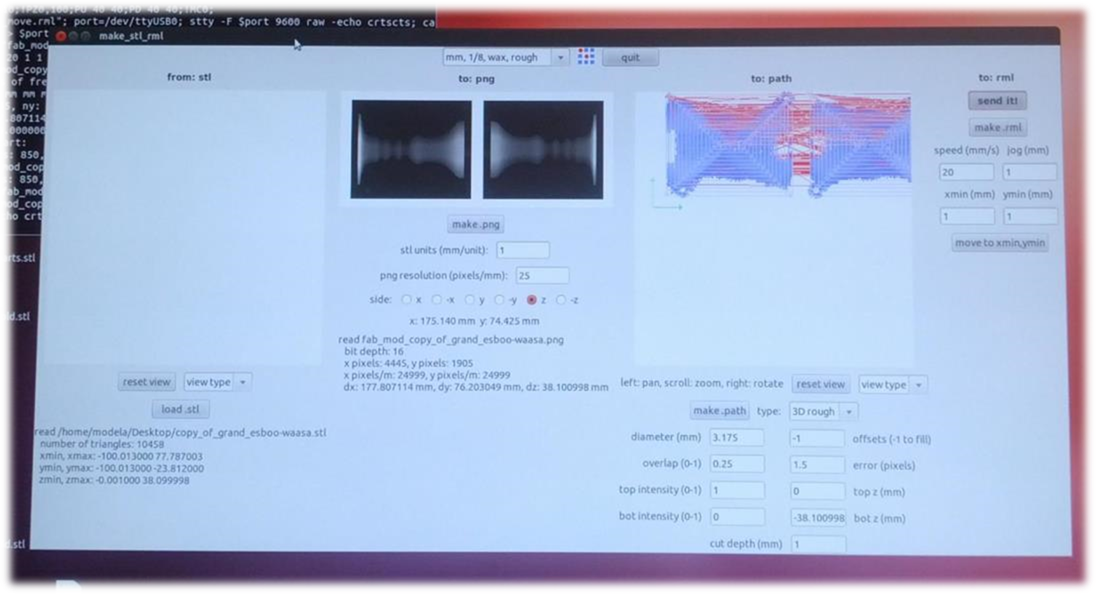
The rough cut, which is used to remove a lot of the wax, was very slow. At 20mm/sec, it took more than 4 hours. I also had to vacuum constantly but the long time it took was mostly, IMO, due to the tool-path created by the fab_modules. It had lots of unnecessary movement on the Z axis, and overall too much “airtime” in which the end mill was moving without actually milling the wax.
Video 1 video 2
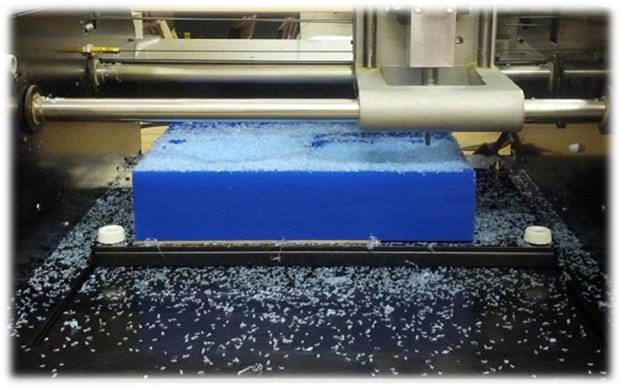
After 2.5 hours it reached this stage, and after 4 hours it was done with the rough pass.
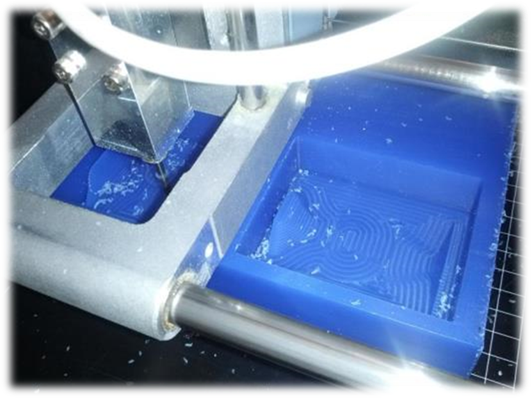
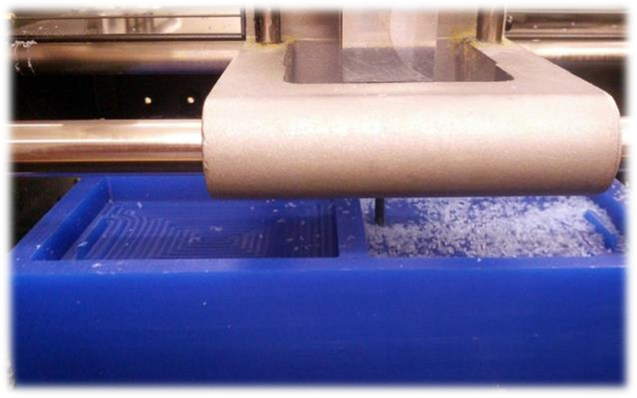
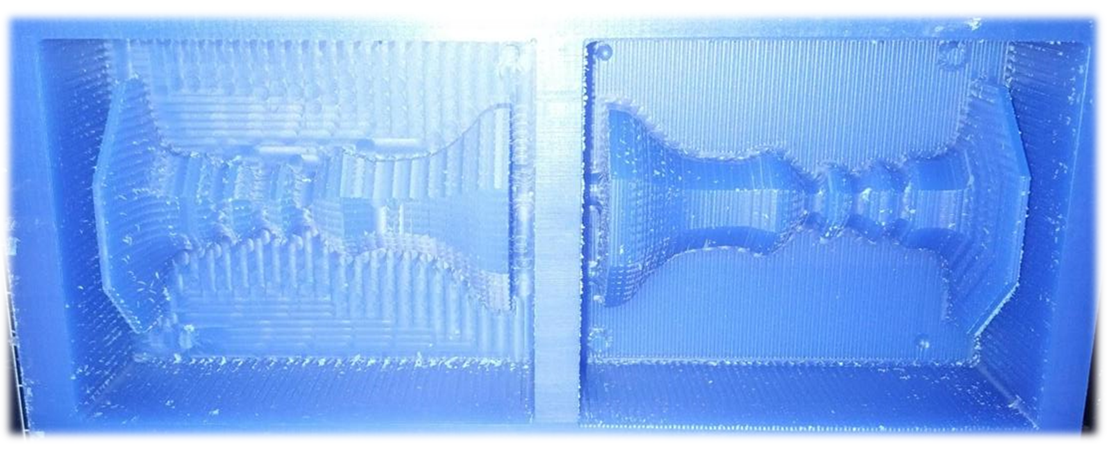
It was now time for the finish. I used the same flat 1/8 end mill, with a 50% overlap, and with the same speed (20mm/sec).
Here you can see a comparison of the rough (right) and finish (left) using the flat end mill.
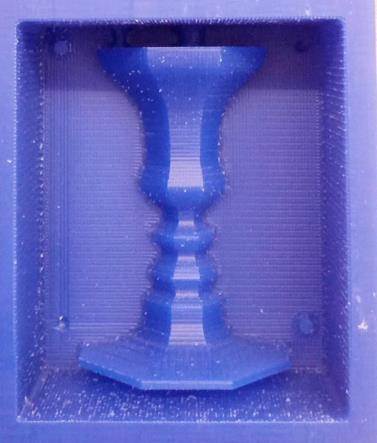
I was still unsatisfied with the finish pass, so I ran it again, this time with a ball end mill. The result was much better, and it was already 5am…
Video 3
The next step was making the mold and casting.
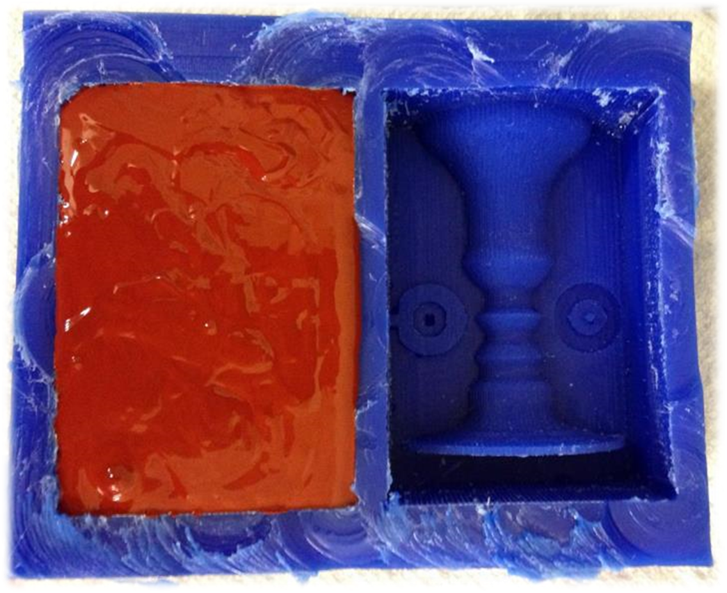
Making the mold with oomoo was rather simple. I used water to measure the volume I need, and than mixed part A and B based on volume using 2 plastic cups. I made exactly the amount I need, but didn’t take into account the material that is left in the separate cups and on the wood stirrer, so I had to scrap every drop I could from the mixture cup.
Although it was suppose to cure in 75 minutes, my mold wasn’t sticky even after 3 hours. I guess it’s because it was colder (16c) than room temperature (23c). It was getting late so I casted immediately after removing the mold from the wax. Making hydrostone was very easy, just mix the powder with some water.
After 30 minutes my cast was ready, but it broke as soon as I took it out of the mold. it also had a big misalignment problem, and bubbles. However, it was good as a proof of concept for the goblet illusion.
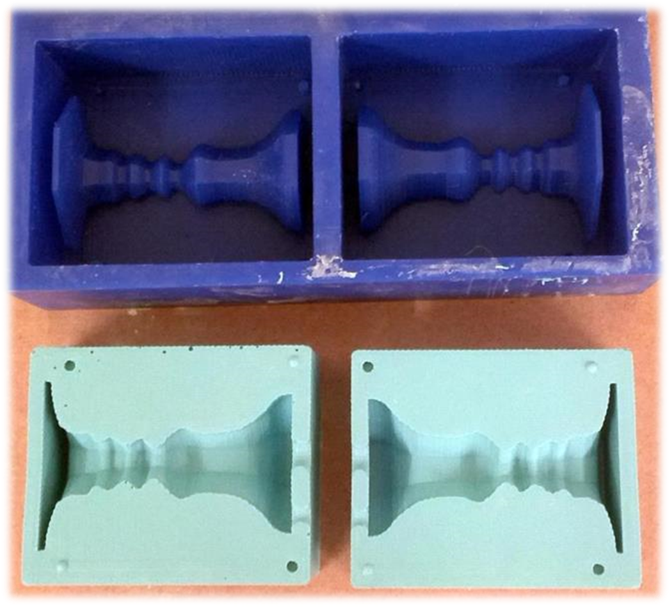
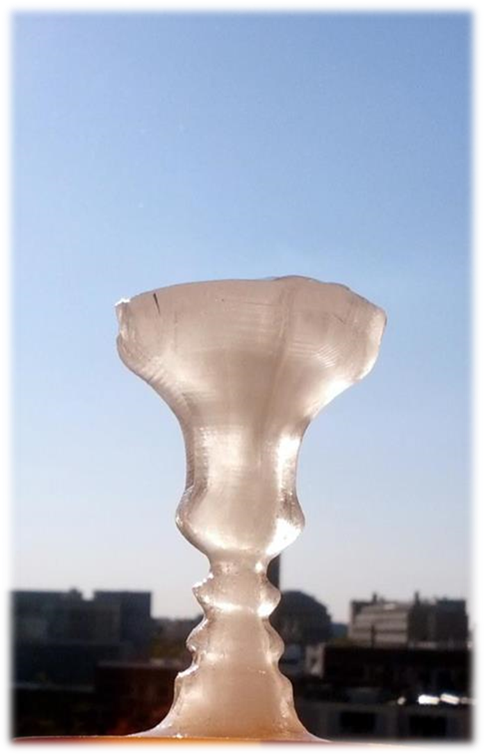
Following that experience I made some fast design changes. The first was to cut open the top of the mold, to help with alignment (allowing to see inside the closed mold) and avoid bubbles. I was wanted to see if I can use a ball as a method to create a curvature on the top. I also wanted to try drystone. I’ve also made an ice version.
Indeed, the next iteration was better. it still suffered from inconsistency in the bottom part and the alignment was still not perfect, suggesting it’s a design problem.
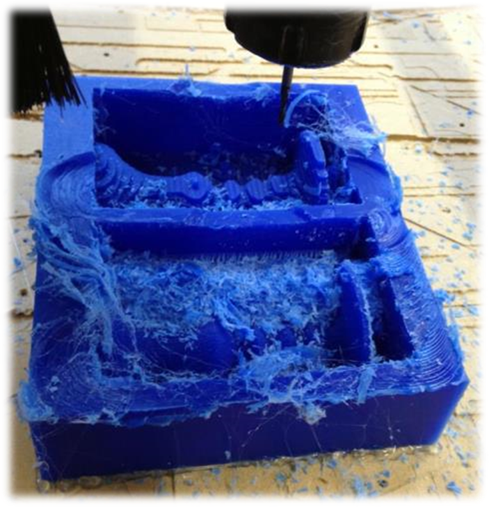
After I redesigned the wax mold (also making it bigger) I used the 3/32” end mill on the Shopbot, since I didn’t want to spend another 5 hours on the Modella. The shopbot was much faster due to better toolpath optimization and faster feed speed (76mm for 1/8” end mill which were reduced to 56mm/sec for the 3/32” [to keep the same ratio]). I have also made a tutorial for machining on the shopbot which I’ll add to the class website.
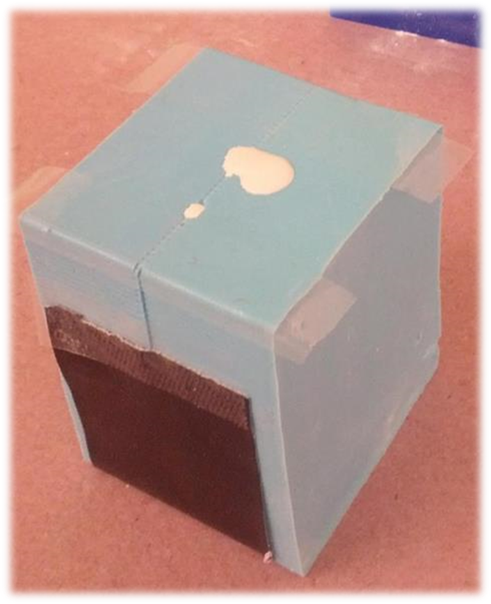
However, I found that the 3/32” end mill was too short, and luckily I put enough hot glue to prevent the shopbot from tearing it apart.
Video 4
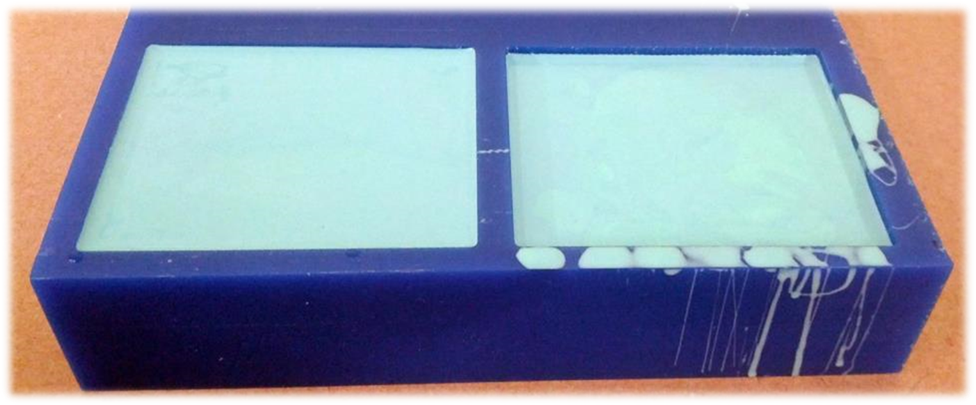
Final outcome, right side with the heat resistant rubber mold (24h curing time). You can see the different alignment features (which I moved to the middle where it really matters) and the increased gap on the bottom of the mold.