 |
||||||||||||
| HOW TO MAKE (ALMOST) ANYTHING MIT MEDIA LAB |
|
PROJECTS | ABOUT | CONTACT | ||||||||
|
|
|||||||||||
| MOLDING & CASTING - week7 | ||||||||||||
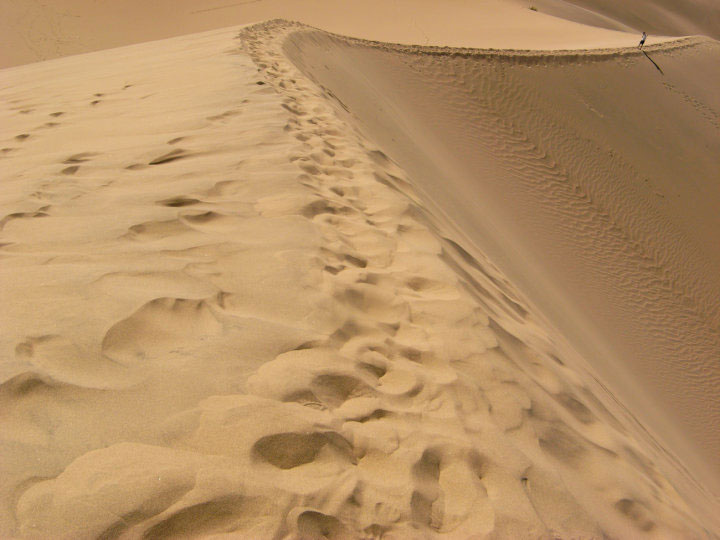
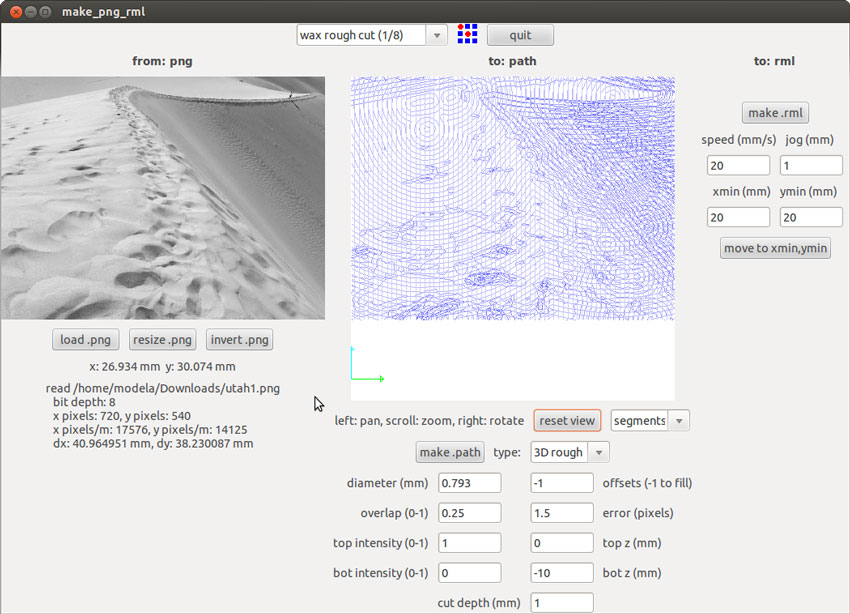
Milling wax on the Modela & Playing with Fab Modules I decided to take advantage of the fact that the fab modules can inquire depth based on grayscale and try what otherwise would take some fancy 2D -> 3D software. I took the following image, finding that it's actually better to import it into fab modules in color rather than play with grayscale prior: |
||||||||||||
 |
||||||||||||
| taken in Utah's Zion National Park by my wonderful friend Vova Kuperman. | ||||||||||||
 |
||||||||||||
| The fab module's traces and interpretation of depth | ||||||||||||
| As the image is rather detailed, Charles suggested that I use 1/32" mill on the Modela, so from the wax rough cut (1/8) presets I changed the diameter to 0.793. The values set were: | ||||||||||||
|
||||||||||||
| I then thought it would be nice to go a little deeper, to make sure that the oomoo would cover the surface, and changed the top z, bot z, cut depth, so the new settings were: | ||||||||||||
|
||||||||||||
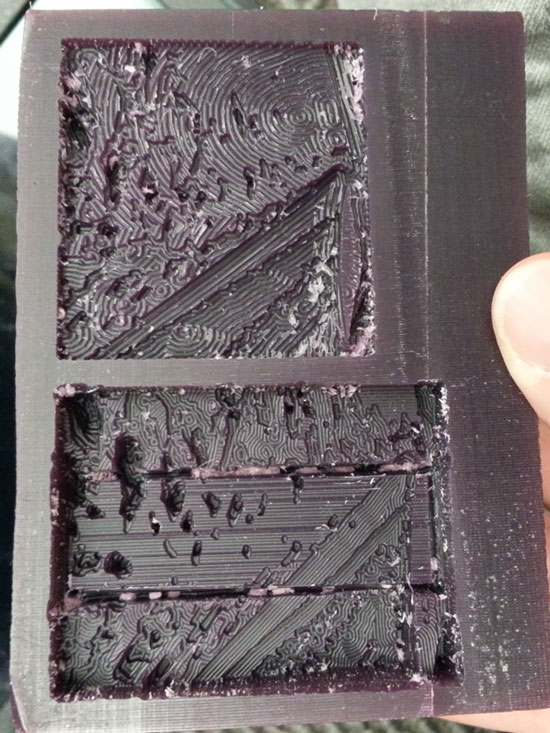
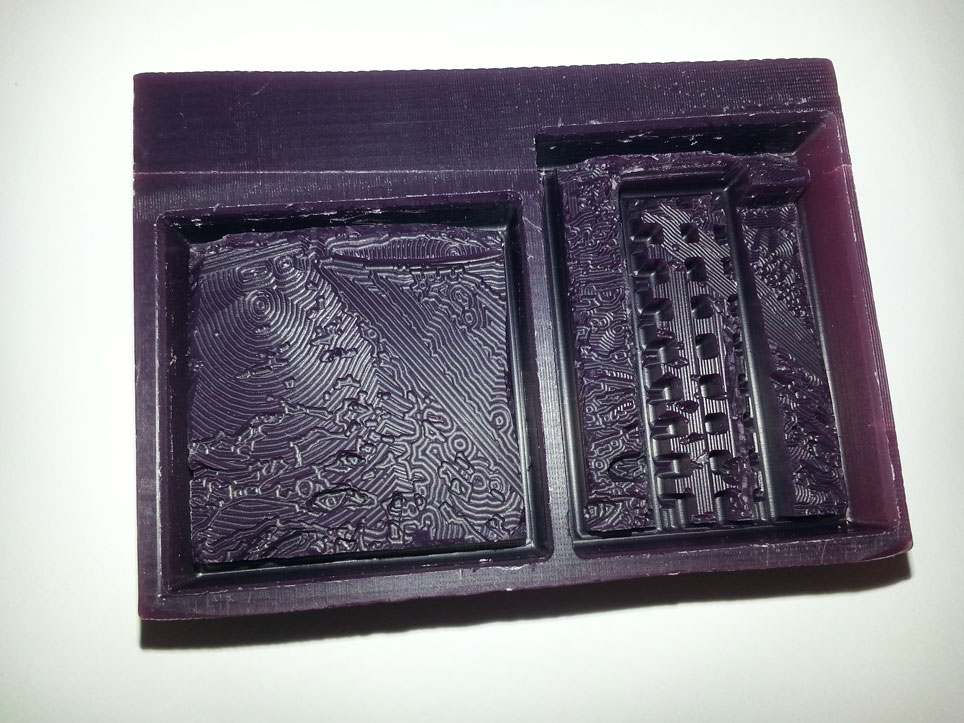
| The machine was having some trouble with this, and actually the mill came out in the first 5 min's; seemed like I didn't tighten it enough. I kept cutting on the same block thought, telling myself that the indent in the middle can now just be a mountain lake. This is what turned out: | ||||||||||||
 |
||||||||||||
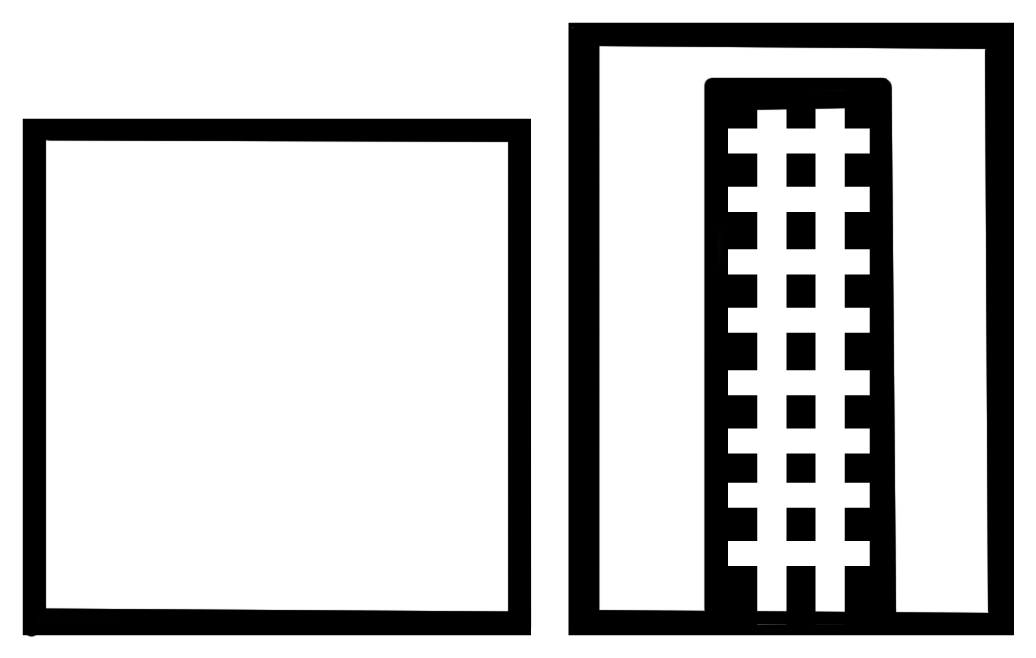
| Then, I thought, this accident can actually be symbolic of man-made intrusion in natural habitat, so I drew a railroad in Illustrator and added that along with the edges to make sure there is room for oomoo to go around the edges. | ||||||||||||
 |
||||||||||||
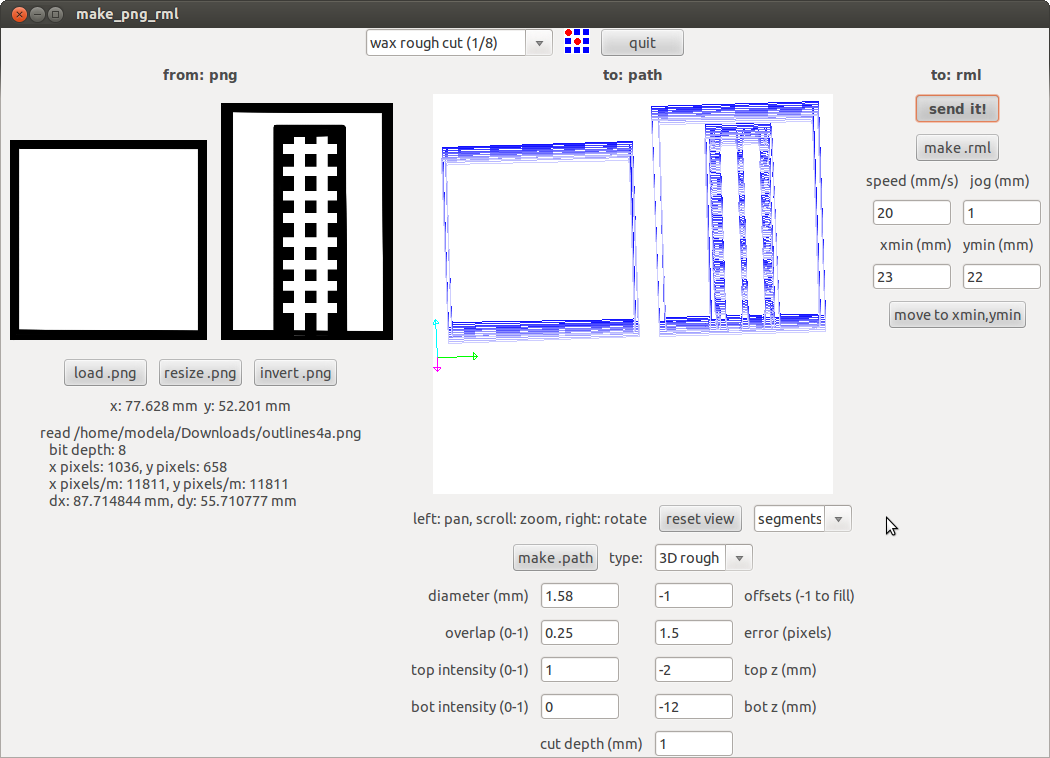
| Outlines drawn in Illustrator, milled with 1/16" piece, the settings were: | ||||||||||||
 |
||||||||||||
| And the final result: | ||||||||||||
 |
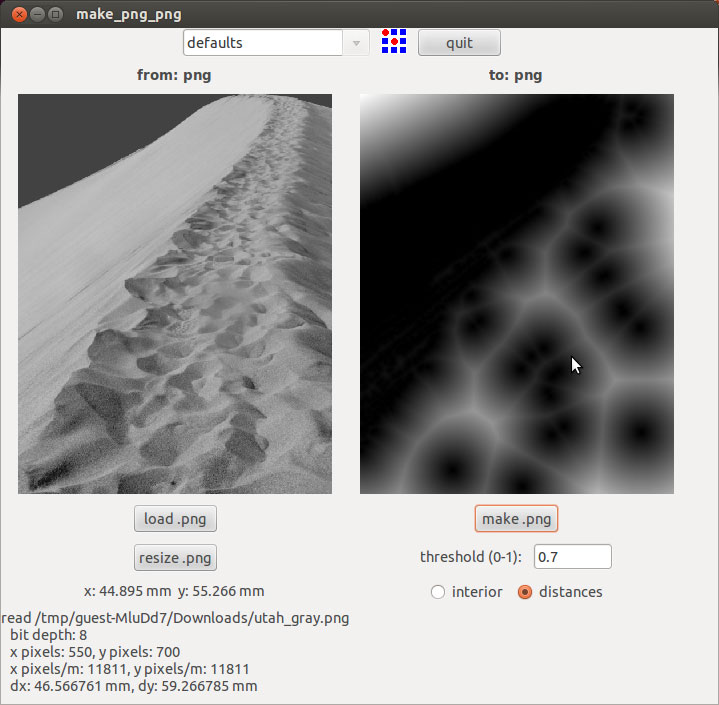
I played around with the fab modules quite a bit, the .svg to .rml didn't work so well - it didn't quite read the depth and made only one trace that, at -10mm for z axis, would be sure to break the mill bit... So I did the somewhat annoying conversion from Illustrator .ai or .pdf to Photoshop, to then save as .png and use the fab modules for .png to .rml. Also the fab modules gave me some crazy stuff that I didn't know how to save, for example this .png to .png: | |||||||||||
 |
||||||||||||
| I don't know what exactly happened there, but I inverted the colors in the .png, which is obvious and easy. From there I set the threshhold for distances instead of interior - not sure what that does, but really wish I could have saved this image! | ||||||||||||
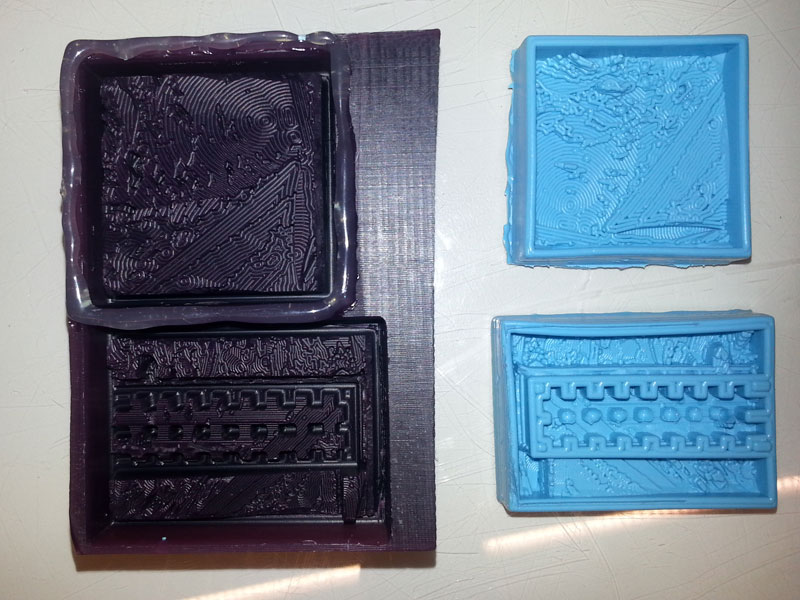
Oomoooooo and DryStone The preparation and pouring of Oomoo was pretty much straight forward and very easy to follow from the plethora of tutorials on our class site. I ended up waiting about 45min longer than the label said (120min instead of 75min) for the Oomoo to solidify, but other than that, no big problems. I added a layer of hot glue to one of the traces to elevate the wall of the wax before pouring in Oomoo. This was the result: |
||||||||||||
 |
||||||||||||
| Wax to Oomoo. "Bubbles" inside the rails are intact. | ||||||||||||
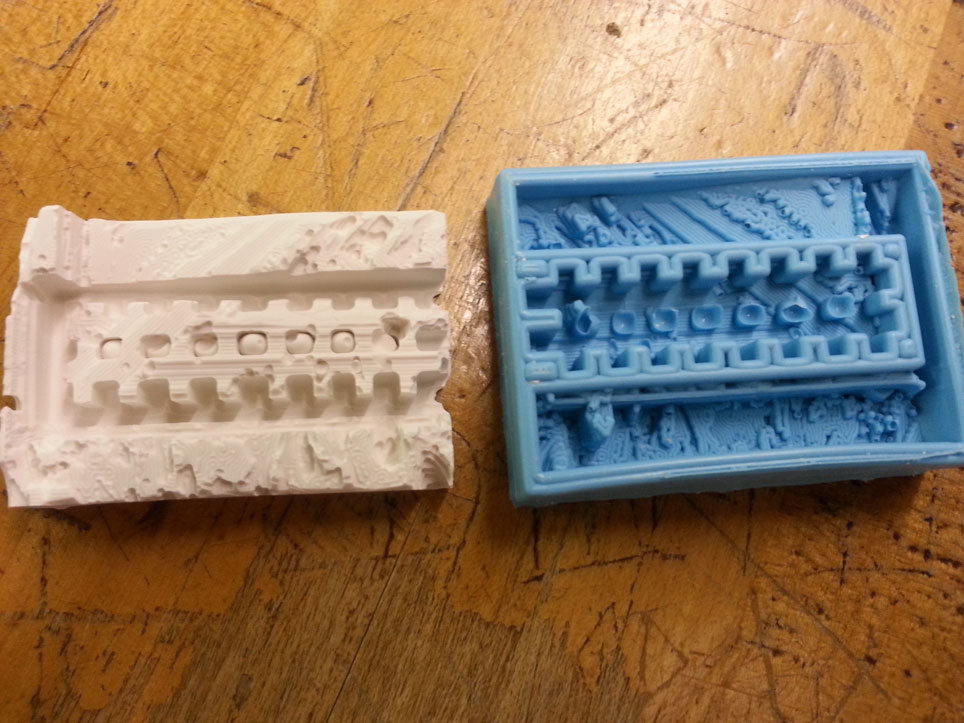
| Probably because of bubble formation in the Oomoo, or maybe because it wasn't fully solid yet, once I poured in the Hydrostone, the holes inside the rails opened and the bubbles were now stuck on the DryStone. | ||||||||||||
 |
||||||||||||
| The DryStone result from the Topography with Rails Oomoo. Stones stuck inside the rails... | ||||||||||||
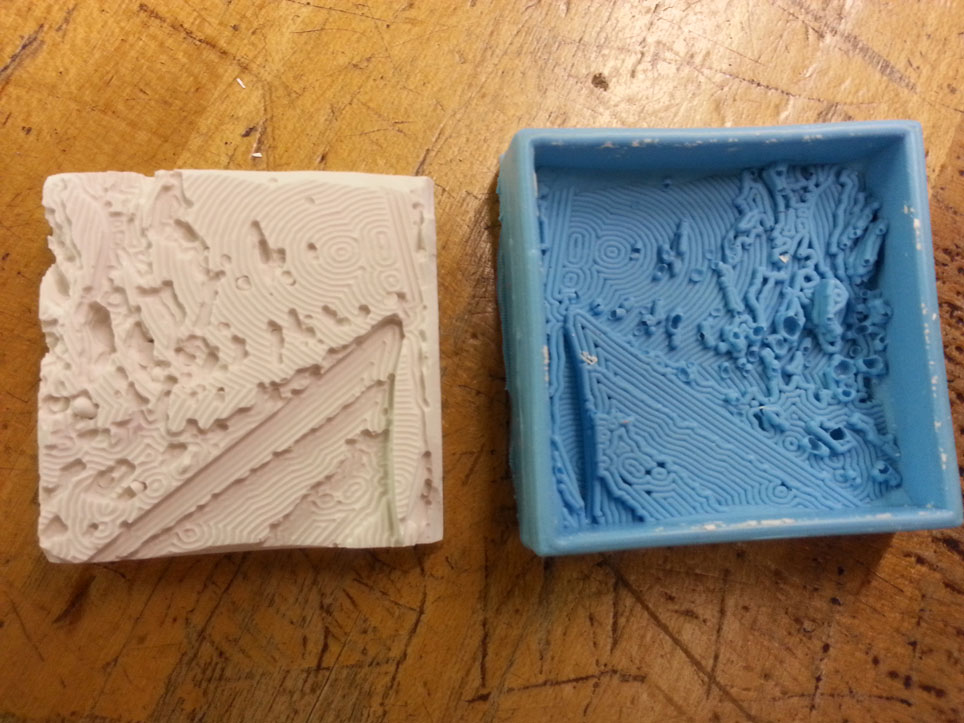
| The other DryStone topography, however, seemed to also remove some Oomoo with it, but it was less noticeable and looks rather like an actual Topography! | ||||||||||||
 |
||||||||||||
For Future Knowing now that this method works, it would be great to create your own "topographical infographics," maybe over a map (the shape of which can be a country or continent, not just a rectangle), and the z-height of which maps some kind of trend... |
||||||||||||
| Copyright 2013 by Anya Yermakova | ||||||||||||