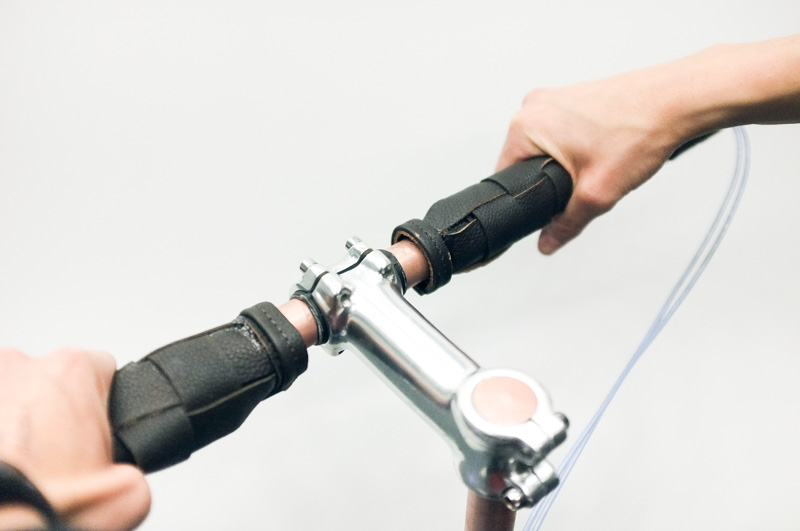
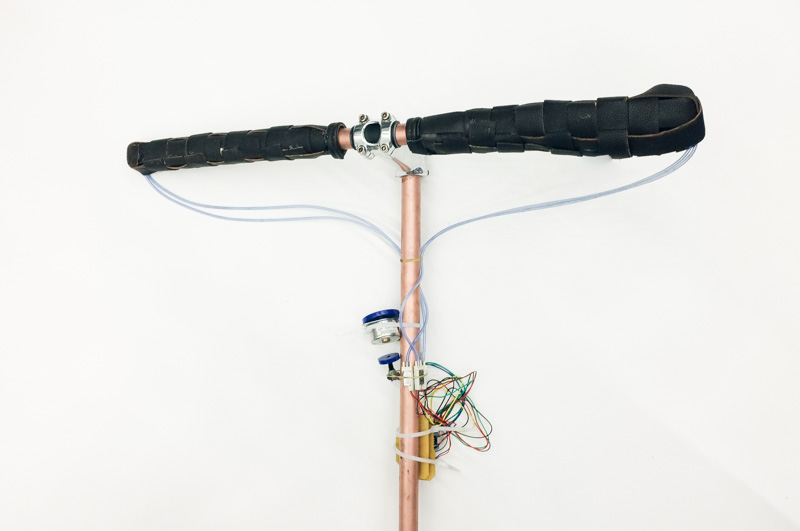
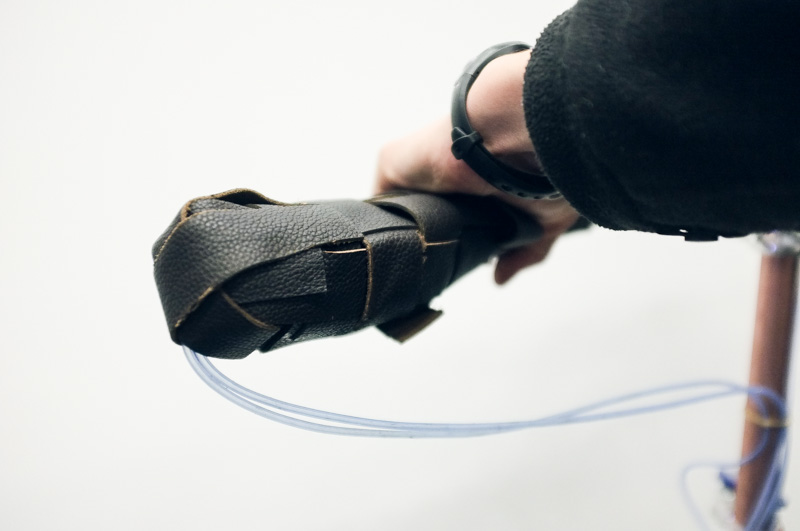
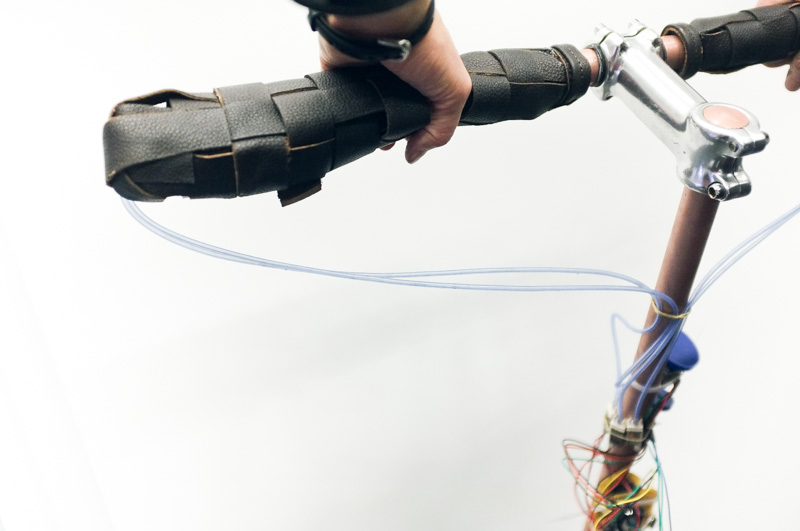
Using a gps device or app on your phone, while biking, is extremely dangerous. I explored a variety of haptic feedback methods in the handlebars themselves that will keep eyes off the screen and put them back on the road.
After much deliberation, I decided on three different methods of actuation for trying to create this "digital gut instinct" to attempt to keep things simpler: (1) weight-shifting of the handles using a steel rod pneumatically actuated from left to right; (2) inflation of the handles using pneumatically actuated silicone airbags; and (3) dynamic friction on the turning shaft using a stepper motor charged to hold position with all the torque it has.
I started off with the foundation: a fabbed arduino. I've had a decent amount of experience working with the manufactured arduinos so I felt fairly comfortable with the IDE. My first attempt at creating the fabduino was an absolute failure with my shaky hands. Felix suggested I try and put it in the oven to hopefully reflow it well enough to remove some of my optically-invisible bridged traces but... then we forgot about it for an hour... so it got crisped.
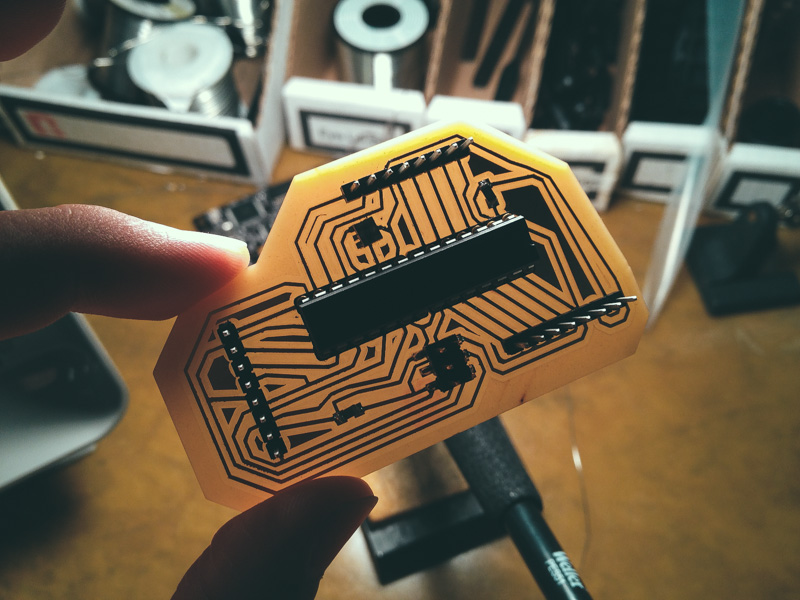
Round 2 followed with the discovery of the storage room next to the mail room, which contained some through-hole atmega 328-pu chips. These were much easier to soldier and I created a simple-enough breakout board in Eagle to make it shieldable as well as added a 16MHz resonator and a pull-up resistor on reset. After milling and stuffing the chip, I managed to get it to work with blink, pwm, analog-read and all! Woohoo!
With that foundation set, I was ready to begin designing the real interface for all my motors and sensors. I'd need pins for all four air-valves (basically just solenoids) to hook into, a row of pins for the stepper motor, pins for the potentiometer, and power inputs for the microcontroller at 5V as well as 24V for the motors.
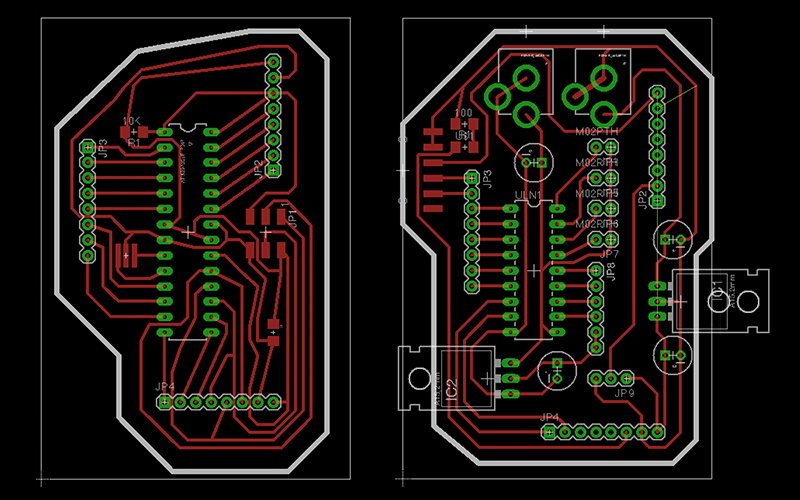
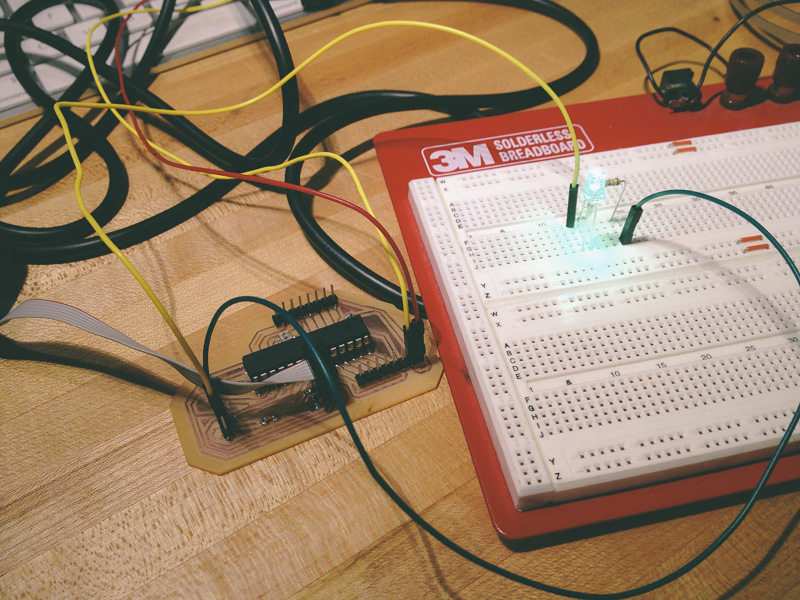
The initial board design I had was far too simple and didn't account for needing to power the chip later or debug over serial with an ftdi adapter. In the 3rd revision, I managed to make things a lot better by adding those.

By the end I was using separate voltage regulators for each power source, had an ftdi and programming jumper, and a bunch of interfacing pins for the inputs and outputs.
But, after milling and stuffing everything, the only thing I was able to get working was the potentiometer. None of the motors would even budge and after debugging for hours I couldn't make heads nor tails of what was wrong but there seemed to be numerous errors both on an execution and theoretical level. I didn't have enough time to restart from scratch so I pushed onwards into fabrication to at least have something to show.
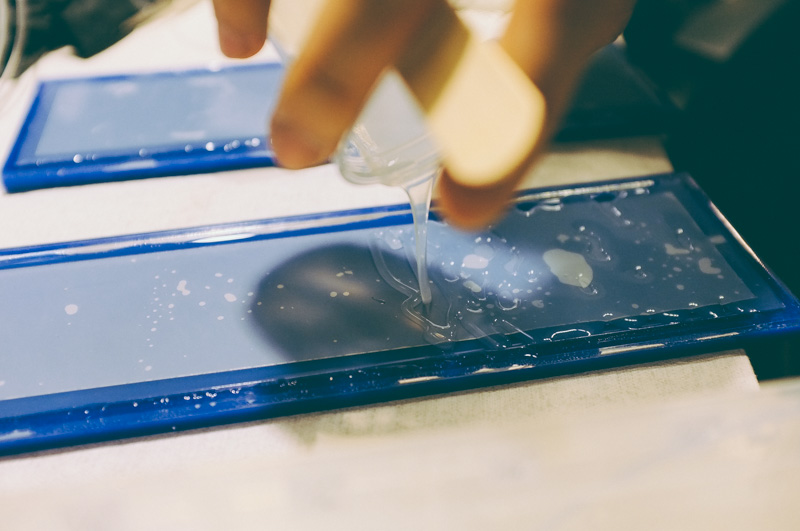
Jifei from my research group to cast the silicone molds for the airbags that I'd be inflating. The trick here is to create a simple lasercut mold that you then fill halfway with silicone and set in the oven for 10 minutes. Once cured, you then lay on top a piece of mylar in the shape of the airbag you want to create.
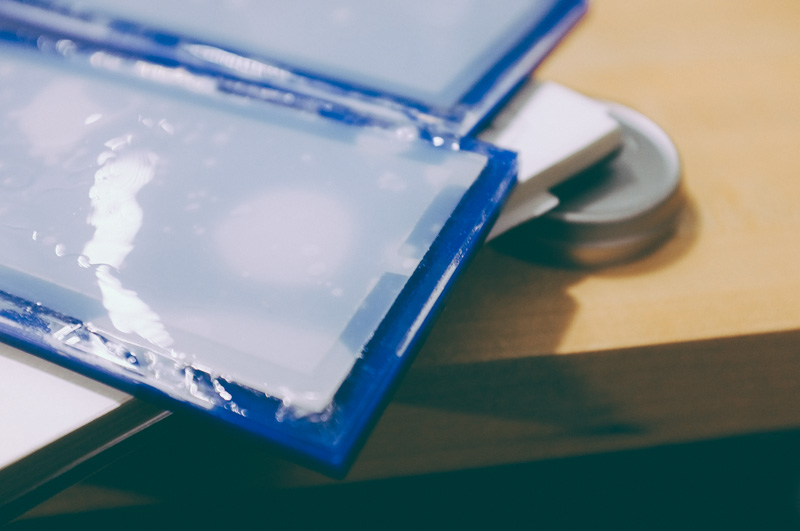
Pour the rest of the silicone on top of that and set again in the oven for 10 minutes at 400F. The mylar stays right in there and the silicone doesn't like to stick to one side of it, creating the thin slice of an opening you need for the airbag.
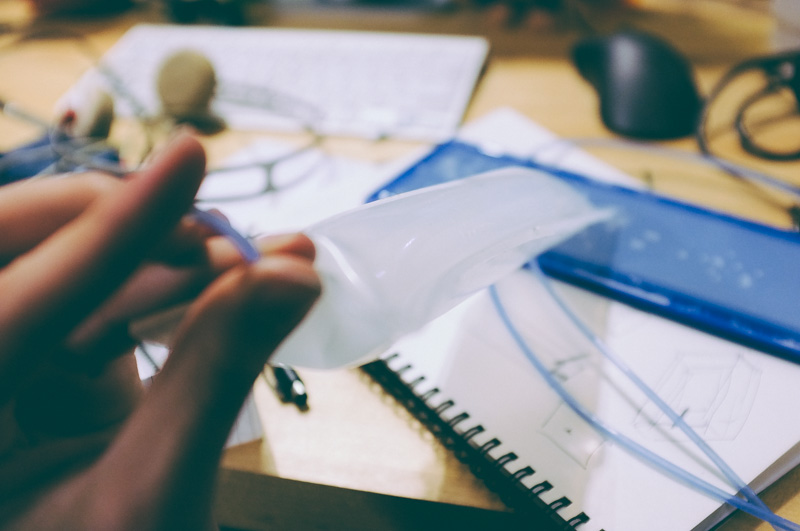
Puncture a hole in one side, slide in a tube, and you're ready to inflate. Luckily, things seemed to work exactly as planned though it would be interested to try and mold the curvature right in rather than having to wrap this rectangular piece around the tube.
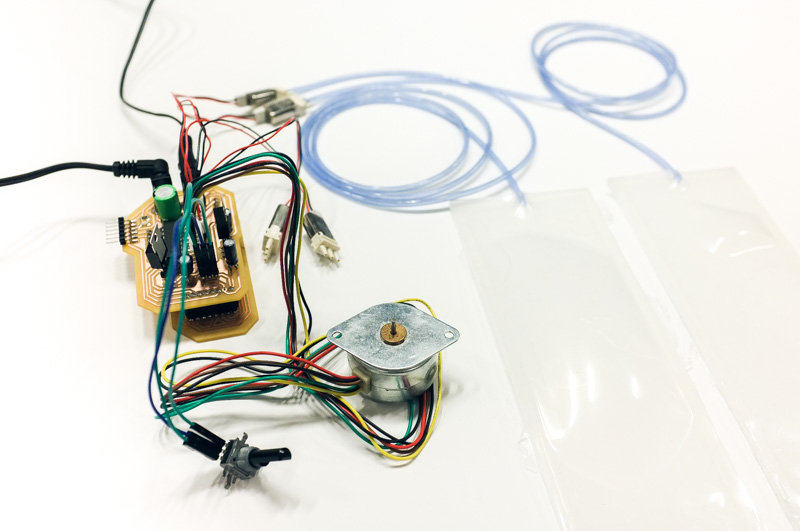
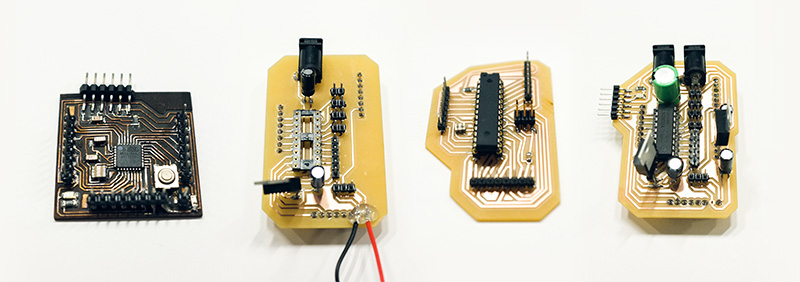
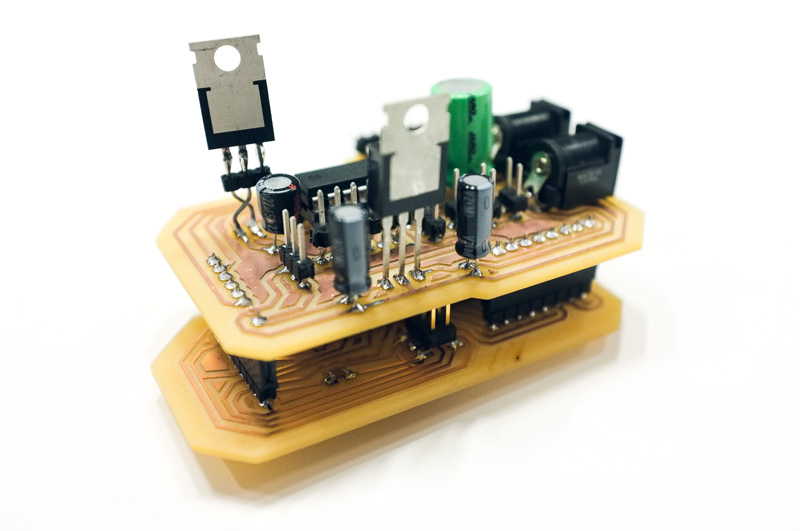
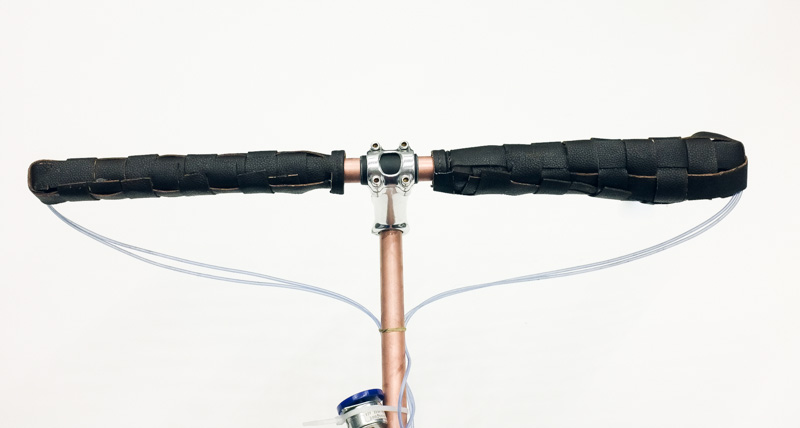
Nearing final assembly, above is a photo of all the key components of the system. Two air valves that push air on either side of the tube to move the heavy steel rod, two air valves connected to the bladders for inflation, a potentiometer to read the turning position of the main shaft, a stepper motor to create friction on the fly, and the main double-stacked board with the microcontroller and connections to power.
Overall, I should have definitely afforded much more time to this project. I would have if I could, but I should have tried harder to because most of my problems weren't necessarily showstoppers and simply needed to be debugged and iterated on to work.
However, I do feel very strongly about the concept of moving from an audio-visual-based navigation system and pushing towards one that is haptic. Our hands are yet still highly under-used in the "pilot's" position be it driving, cycling, flying, etc. Yes, most of these wheel-navigated systems do rely on our hands to turn but the latent potential of the nerve-endings in our palms is enormous.
I've learned a ton from this project, particularly on the electronics side with dealing with power and motors which I'd never had any prior experience with. Also, it was a great primer on casting silicone that I'd never had the excuse/chance to convince my lab mates to teach me how to do previously.
Pushing forward, I'm hoping to create more interesting renderings and diagrams to really illustrate and communicate the core concept as well as to give people a better idea of what's going on than through my static model. From there I'll iterate on the electronics and finally make this initial prototype work.