A Musical Fountain
Water flows like music - through time and space. For my final project I'm planning a musical fountain where the flow of water is applied to the flow of sound.
DIY Flow Sensor
I want to sense the flow of water falling through air. Cup your hands under the stream, and the flow of water/music is interrupted. I'm experimenting with a few options for sensing flow. This is a critical step, because To play the fountain like a musical instrument, the reaction time of the water interruption to be near instantaneous. Speed is more important than knowing exactly how much water is flowing.
- Sense the weight of the water reservoir
- This will be slow and noisy- water will stop flowing, and but the noise created by turbulence in the pool will prevent fast accurate readings
- I have to decouple the weight of the measurement system from the weight of the water being pushed up the tube to the top of the fountain
- Easy to interfere with by bumping or jostling the base
- Turbine flow sensor
- Good for sensing the water flowing through pipes
- I want to actually be able to manipulate water falling through the air
- Depth sensor
- Not responsive enough
- Waves caused by splashing water could easily be higher in amplitude than instantaneous stopping of water
- Conductivity
- As water falls through the air it breaks into droplets, and is no longer conductive.
- One option is having the water fall on a conductive surface - Not quite instantaneous, but might be good enough
- Beam interference Have the water flow through a beam of light
- The water has to fall through a very precise area
- Pressure sensor - have falling water hit something when it lands
- Not quite instantaneous, but might be good enough
- The harder water hits, the more resolution, but also very splashy - not as elegant as I would like
- Sound
- Record and analyze the sound of the water falling
- Try to identify when water is landing in reservoir
- Or have the water land on a hydrophone?
- I want the falling water to be acoustically as quiet as possible -- pressure based sensors sub-optimal
- Step Response
- Load Sensing - Tested, Abandoned
- Transmit Receive - Tested, Abandoned
- The plates need to be touching or almost touching the water before they read flow reliably.
- The noise from the step-response output is louder than the usable signal
- Positioning the plates for optimal reading position obstructs handling of water
More Detail A few led on one side and a few receptors on the other
DIY Flow Sensor - Aluminum Mesh - Tested and Abandoned
This was my first experiment with sensing flow. I laser cut these two plates, and filled the whole with conductive aluminum mesh. If the plates are close together, surely water flowing through the meshes will close a circuit across the meshes.
Dipping the plates in water worked perfectly. The circuit was closed instantly. However, poring water through the plates did not close the circuit -- even when the plates were only <= 2 millimeters apart. Pouring a lot of water through the plates did not work any better.
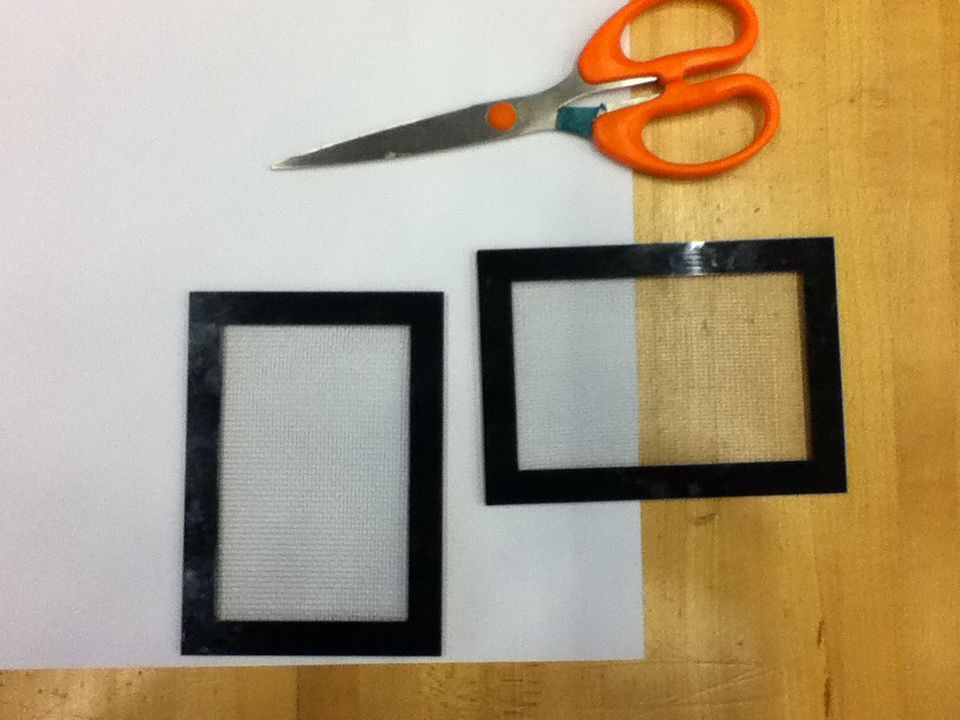
Leaving this unsolved for now, and moving on.
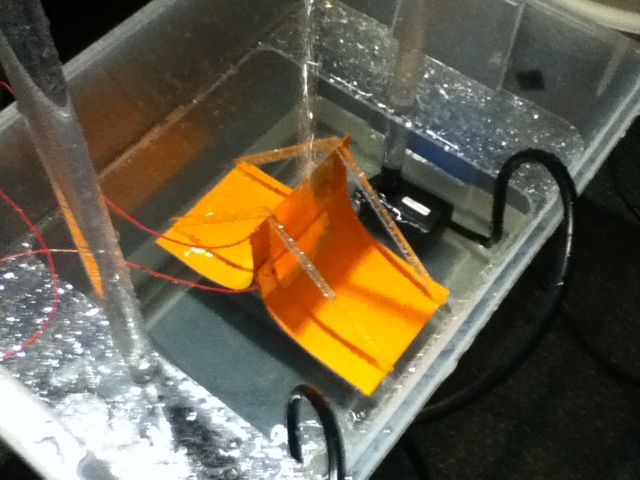
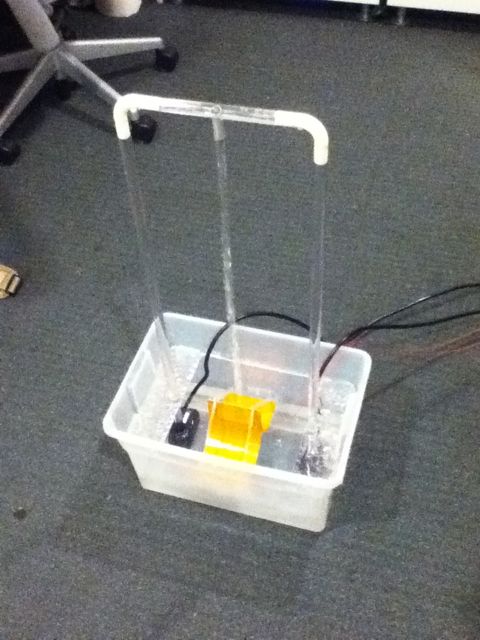
The Physical Structure
It's late November, and I still don't have a very good understanding of what the project will actually look like. I decided to push forward on building something physical. I need this before I can start listening to what it sounds like. I need to decide if I'm going to use the sound of falling water or synthesized or processed sound.
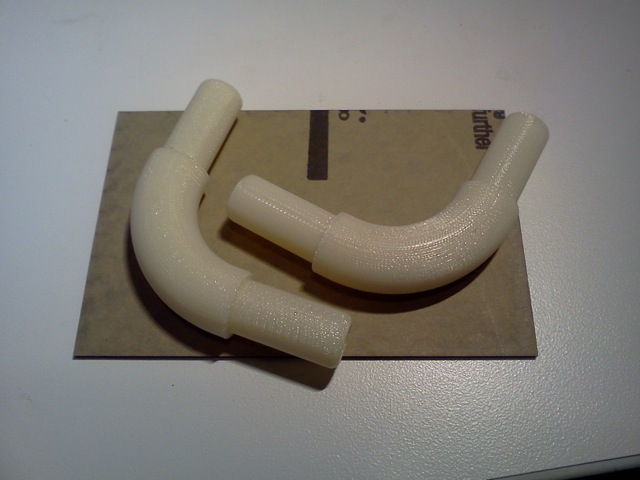
The manufacturer spec indicate +/- 10 mill variance on the inner diameter of the polycarbonate pipes. I designed the right angle in SolidWorks with a 5 mills of clearance, but it ended up being a little loose. Using super glue was a bad choice -- super glue is not space filling, and the joints leaked. I'm going to avoid using glue from now on - until the last possible moment.
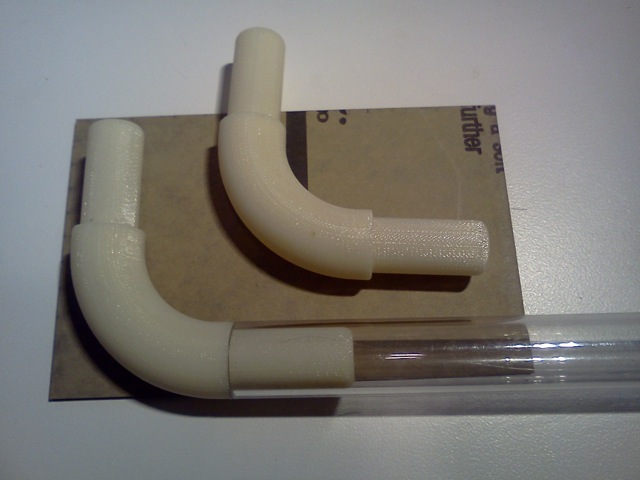
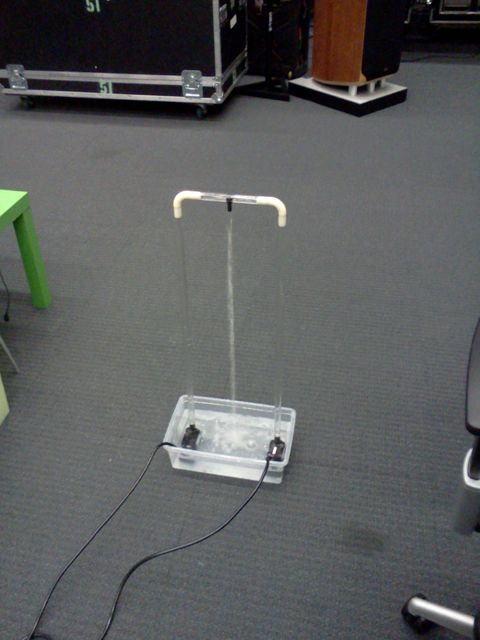
 Prototype:
Hrmm, I need a list of things to figure out:
- SOUND. Where does it come from?
- BASIN. What is it made out of? I would prefer to create it myself, but would be willing to purchase if I'm running out of time.
- SENSORS. WhatTF do they even do?
DIY Flow Sensor - Hydrophone
I am going to make some simple hydrophones by coating piezo mics with waterproof coating. First I soldered on the cable, and then used the cable to dip the piezo into "plasti-dip". It doesn't sound great - high frequencies roll-off lower than the unadulterated piezo - however, it works well enough for my purposes.
Fun Fact: Alexander Graham Bell made the first microphone capable of intelligible speech transduction. His design was a "water microphone". However, a water microphone is very different from a hydrophone - A metal cup is filled with a slightly conductive liquid, and the diaphragm is suspended in the liquid. As the diaphragm bobs up and down, the resistance of the liquid changes.
Playing with the hydrophone under water did yield interesting sonic results. Dynamic enough to use the "acoustic" sound as source material? Perhaps.
Next:
- Flow sensor 2.0: Try using contact mic
- Basin: Build it. Hide and organize cables.
- Interaction?
I've been making parallel incremental progress in all areas. Right now, nothing works great, and everything works a little bit. This is sort of like the spiral design that Neil suggests. This is essentially an art project: The objective is not clear from the start. The design choices hinge on the incremental successes and failures.
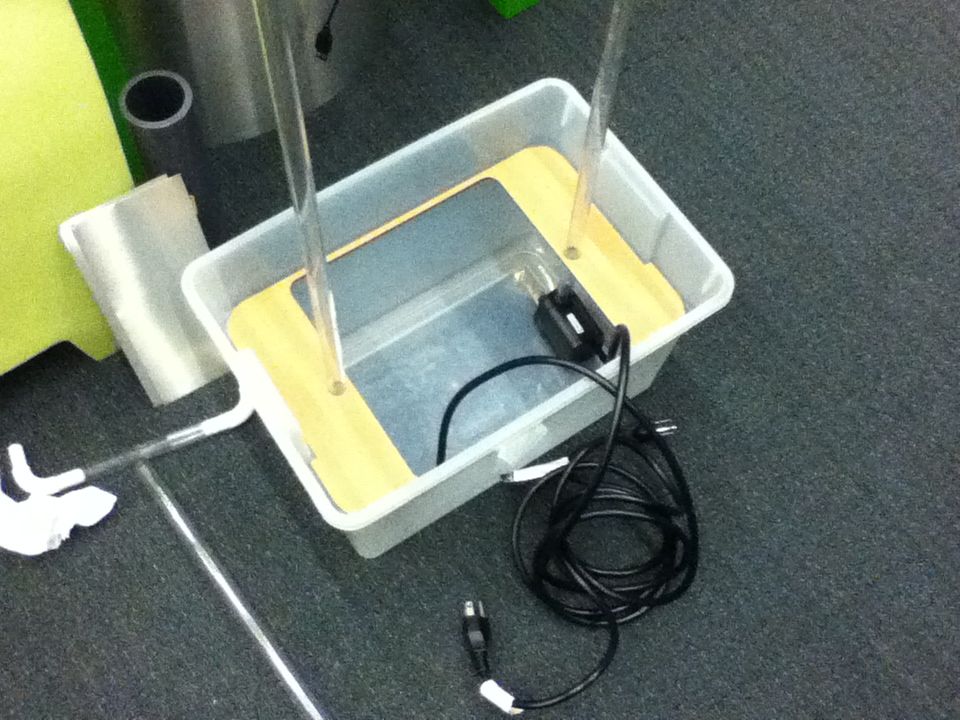
Enclosure
Next, I'm going to work on creating the enclosure surrounding the basin. For simplicity I will not try to fabricate my own waterproof basin. Instead, I will just make an enclosure for the basin I already have.
Plan to Fail Quickly
Using Akito's "MakeBox.py" python script for Rhino I made a small (6cm x 3cm x 2cm) test box to try out some different tolerances.- 0.2mm tolerance seems like a safe choice
- 0.3mm tolerance fit, but is tight. Would definitely benefit from t-bone fillets
- 0.5mm tolerance is too tight. could not even fit pieces together
- 405mm Width
- 224mm Height
- 281mm Depth
- 5.842mm Wall Thickness (230/1000ths of an inch)
- 10mm Segments
- 0.2mm Tolerance
A note on the word "Tolerance". 123dMake and the MakeBox.py script both use the word "tolerance" ambiguously -- it's not clear if the a larger tolerance means a looser fit or a tighter fit. "Interference" and "Clearance" should be used for unambiguity:
- Tolerance - The acceptable range in error. Should be specified as +/- X where X is the tolerance.
- Interference - Increasing the interference makes press fit parts tighter.
- Clearance - Increasing the clearance makes press-fit parts looser.
Inner Structure
To support the pipes, I designed this layer that fits inside the basin. After two cardboard tests, I was ready to cut an acrylic version. First attempt does not fit well: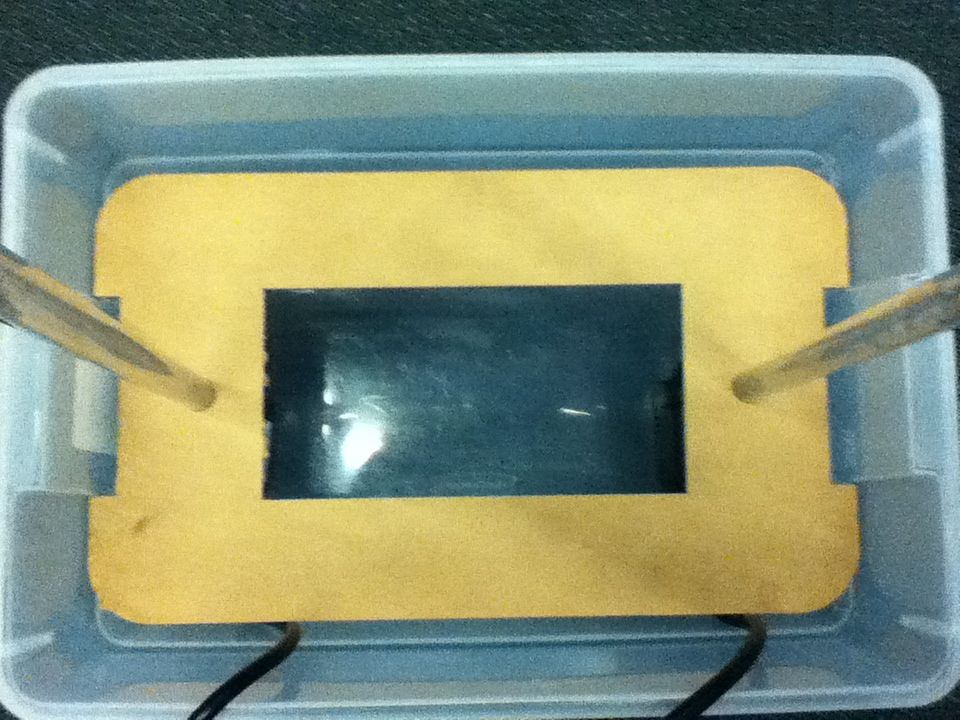
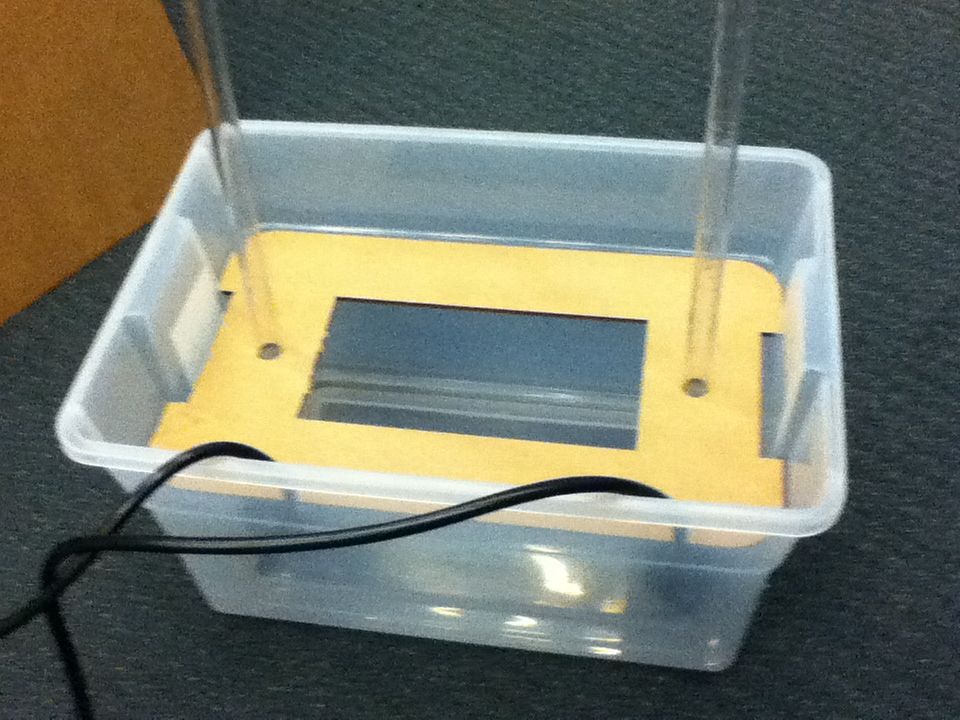 This one was better:
To do: Enclosure, Sensing, Communications, Audio
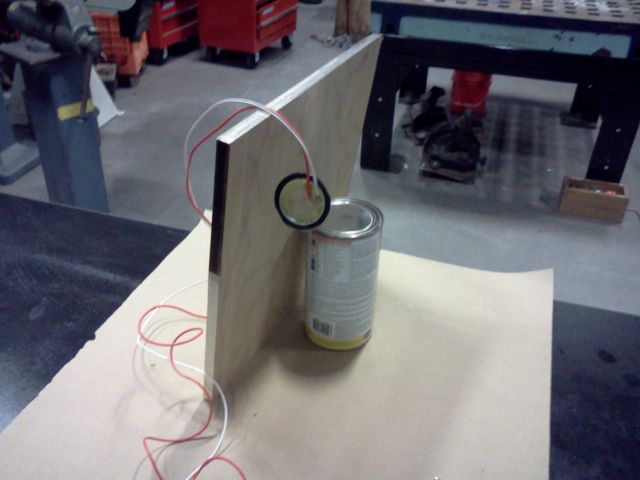
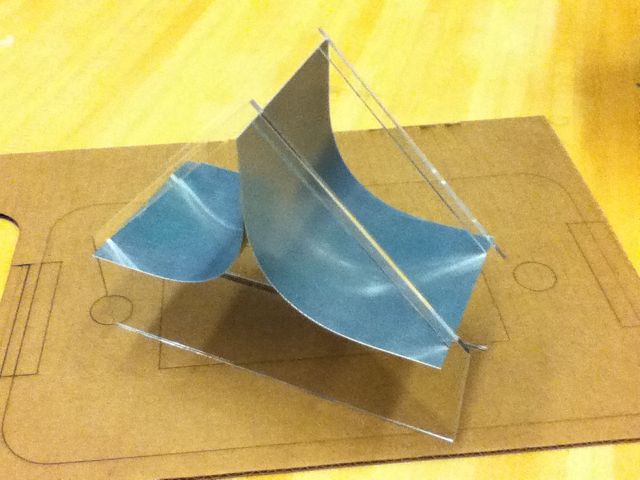
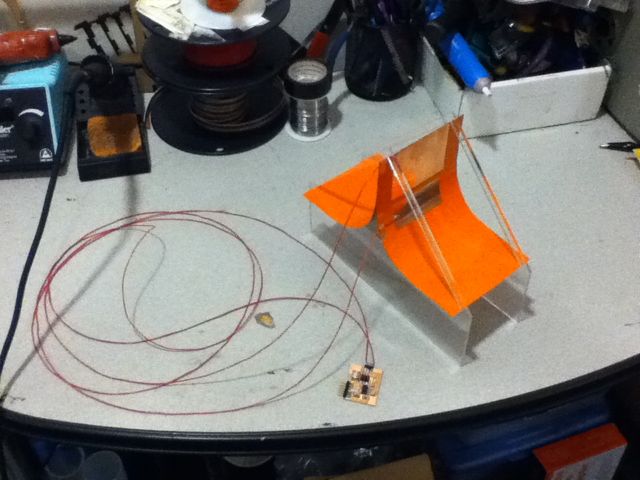
DIY Flow Sensor - Step Response
- Two aluminum flashing sheets 6 11/16 x 3 13/16 (inches)
- Laser cut acrylic supports
- Adjust the curve by changing the length of the aluminum rectangles: Longer rectangles will have a sharper corner when constrained inside the acrylic base. This can be optimized for rigidity and acoustic dampening.
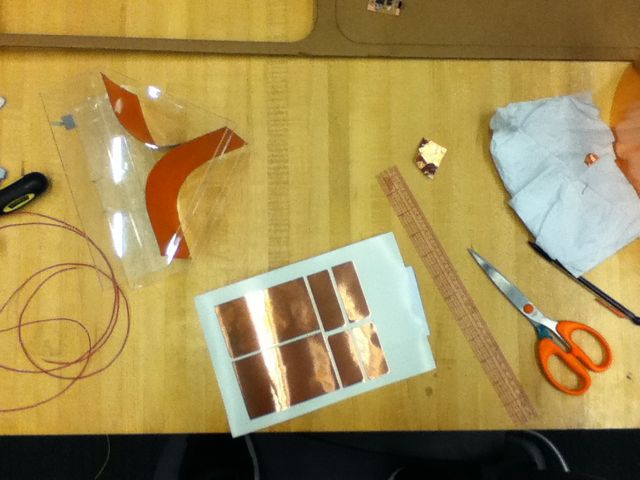
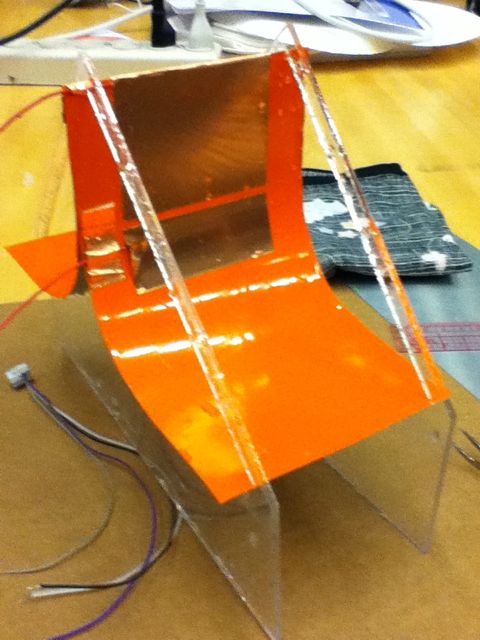
 I opted for a simpler strategy: use the conductivity of water to complete a circuit. The required the optimal alignment of two conductive plates. I coated the aluminum in vinyl to insulate the switch.
 The copper can't be so low in the arc that a pool of water can accumulate, closing the circuit. The plates have to be far apart enough so that an individual drop of water can't get stuck between them. The plates have to be close enough together so that water running over the surface does close the circuit. Required trial and error -- my first attempt was to close:
 My second attempt was not close enough:
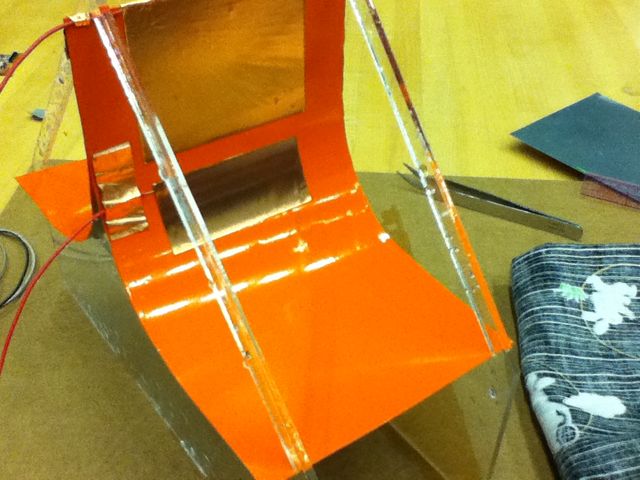 4mm is the perfect medium.
Overview
What does it do?
The musical fountain senses senses the flow of water, and communicates with a node.js server via FTDI serial. The node server then sends OSC to a synthesizer. For the demo, I completed a filtering example -- Touching the water interrupts the flow, and musically filters an audio stream.What's been done before?
There are disparate examples of hydro-musical experiences:- Michel Redolfi wrote Subaquatic Music in Swimming Pools
- An Udderbot is a musical Helmholtz resonator with a cavity of varying size. Water inside a rubber glove can be used to change the volume of the resonating cavity.
- The Hydraulophone is probably the most similar to my project. There are several different designs that fall under the Hydraulophone umbrella. Unlike my project Hydraulophones use adjusting water pressure by obstructing holes as an interface for creating sounds
What Did I Design?
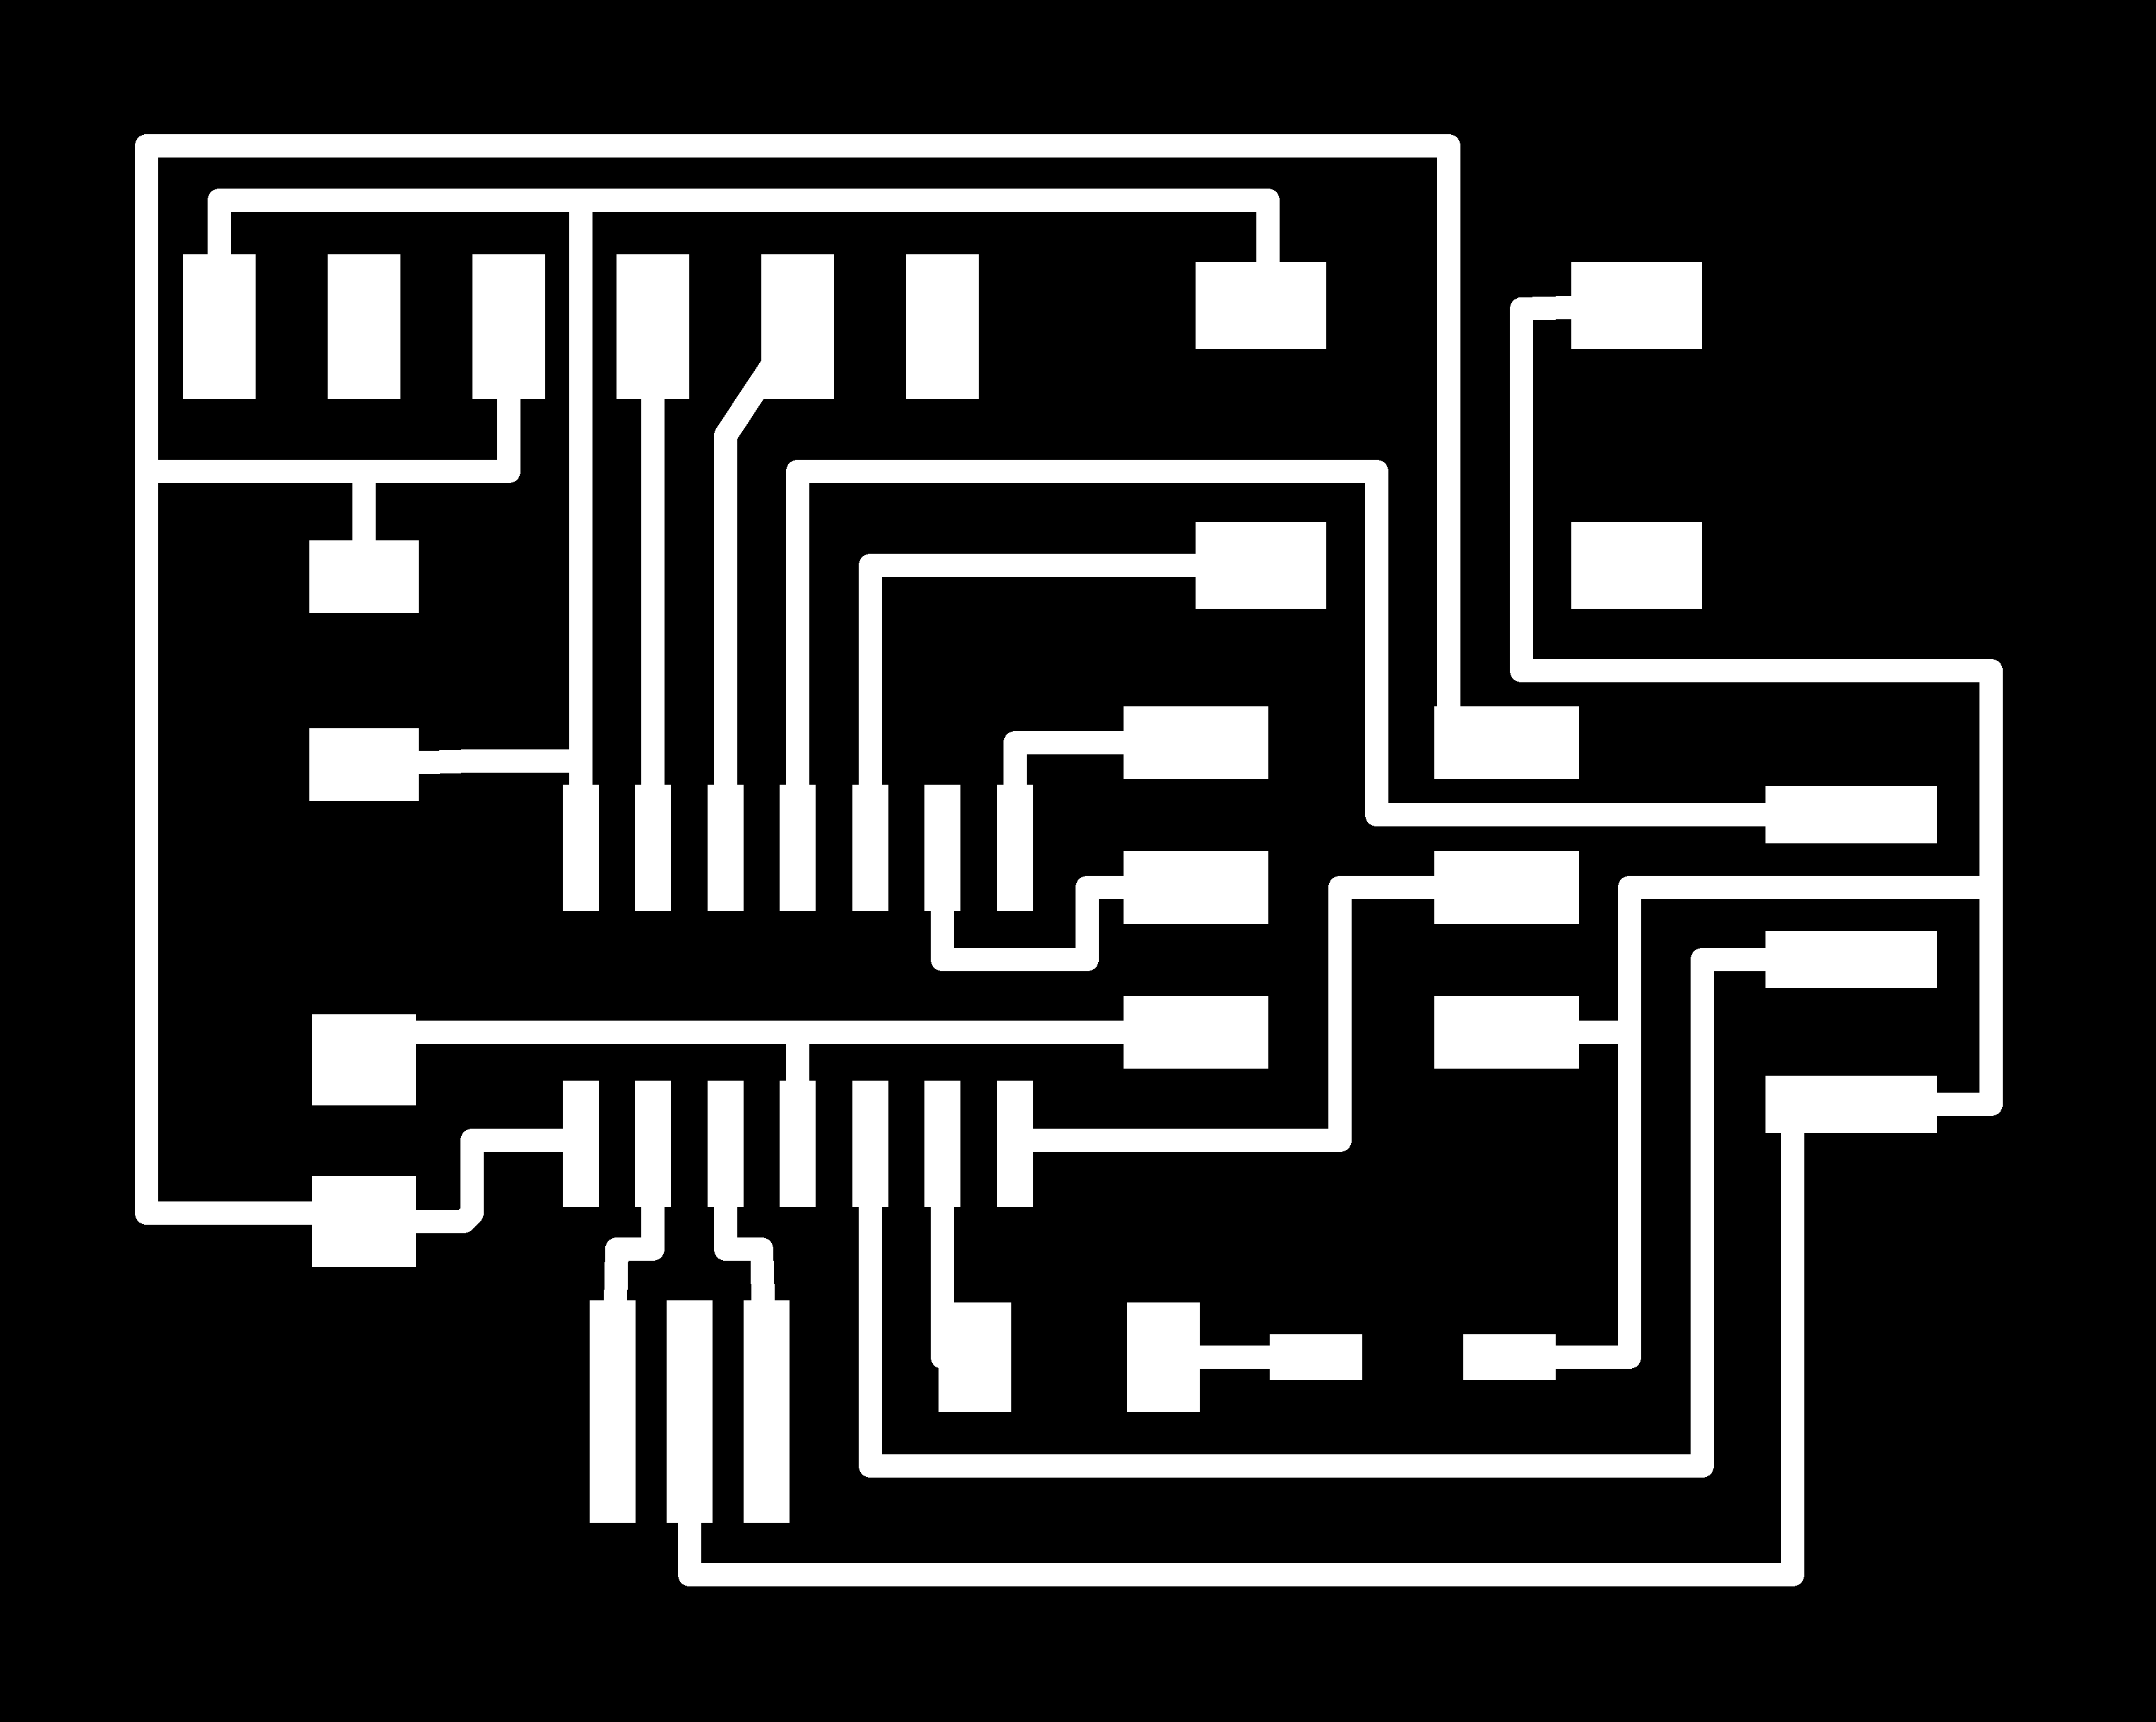
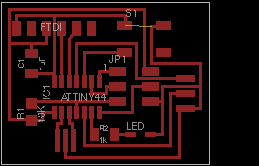
- Flow sensor electronics outline traces values Eagle Board Eagle Schematic
- Flow sensor physical structure. .svg
- Fountain physical structure (except basin) CorelDraw Project
- The Pipe fittings SolidWorks part
- C and node.js code on Github
Non Inventory Materials and Components:
| Aluminum Pipe, 0.5 inches OD | $1.00/ft @ Ace Hardware |
| Aluminum Flashing, 10 inches wide | $1.00/ft @ Ace Hardware |
| 2 Small water pumps | $30 each @ Home Depot Online |
| 2 Polycarbonate tubes, 4 feet long, 0.5 inches ID | $11 Each via Amazon |
| Plastic basin | Found object |
| Stranded wire | Found object |
Inventory Parts:
- FR1
- Resistors: 1K, 10K
- Capacitor: 1 uf
- Headers for sensor leads, FTDI
- Push button, LED
- attiny44
- Copper for soft circuit
- Vinyl for insulating the flow sensor
- Clear
Processes
- 3D Design in SolidWorks - Pipe Fittings
- 3D Print from Dimension,
- 2D Design in CorelDraw (Pipe Support)
- 2D Design in InkScape (Flow Sensor)
- Laser cut acrylic, cardboard
- Vinyl cut soft circuit
- Sheet Metal cutter for aluminum squares
- Standard circuit board workflow - Eagle, Modela, Etc
- Embedded Programming using
gnu maketoolchain - Node.js server receives serial data from board, sends OSC...
- ...to Max/MSP where is massaged into audio processing
Things that did not work
- Conductive mesh flow sensor
- Step Response (single and double plate) flow sensor
- Hydrophone flow sensing
- Using super glue to join pipes. As Neil said in the machine building lecture: super glue does not fill space. Epoxy is a better choice.
Evaluations
How is the success of the project evaluated? By listening. Is it interesting to listen to? Does the tangible input -> output feel intuitive?Learned
Coming in to the course, I had no experience with any kind of digital fabrication. In one of the first weeks, Neil said during lecture that PCB were commonly etched, but we would mill them because the etching process is toxic and a little slower for prototyping. At that time I didn't know what milling or etching was. It's been a whirlwind introduction. About my project, I realize my goal to build the perfect flow (dispersion?) sensor may have been unrealistic:- Near instant response
- Does not obstruct the hands from diverting stream
- Hands do not interfere with the reading
- Acoustically quiet (water does not land perpendicular on a plate)